How to Make a CD Bootable: Step-by-Step Guide (Also Works with DVD)
A bootable CD or DVD is a disc that can be inserted into a computer and used to boot up the operating system, making it a useful tool for installing new operating systems, troubleshooting problems, diagnosing issues, and restoring PC configurations, especially when setting up a new computer.
What Do You Need to Make a CD Bootable?
To create a bootable CD or DVD, you'll need a CD or DVD burner, a computer with a compatible operating system, and a blank CD or DVD. You can use software like ImgBurn, PowerISO, or Nero to create the bootable disc.
- A computer with an optical drive (CD or DVD)
- To create a bootable CD, you'll need an ISO file containing the operating system or data you want to install. You can either download a new ISO file from the Windows webpage or use a third-party tool to create one from your existing system.
- A blank CD or DVD
- A CD burning program
How to Make a CD Bootable with Windows ISO File?
To create a bootable CD from the new Windows ISO file, start from scratch and follow these detailed steps. If you're unfamiliar with ISO files or bootable CDs, don't worry - we'll guide you through the process. First, you'll need to create a bootable CD using the Windows ISO file, which can be done by using a CD burning software or a tool like Rufus. The process typically involves selecting the ISO file, choosing the CD burning software, and following the prompts to create the bootable CD. Once you've completed these steps, you'll have a bootable CD that can be used to install Windows.
Step 1. Download the corresponding Windows ISO file, such as Windows 10, and ensure it matches the version you're using, making sure not to download the wrong one. You can find the download link for the ISO file below.
Step 2. To burn a CD or DVD, download a free burning program such as ActiveISO, ImgBurn, or Nero, which are highly recommended for this purpose.
Step 3. Here, we take Nero as an example to show you how to burn an ISO file to a CD or DVD. Download and install Nero from its official website, then follow the on-screen guide to install it.
Step 4. Save the downloaded ISO file to your CD first. Then, run Nero Burning ROM and select "Recorder > Burn Image > image.iso".
Step 5. To determine the maximum speed, select the "Determine maximum speed" option and then click "Write" in the Burn option. Finally, click "Burn > Done".
To create a bootable CD, we can use Nero as an example. The process involves creating a bootable CD by selecting the "Bootable CD" option in Nero's interface, followed by choosing the bootable image file and burning it onto a blank CD. This allows the computer to boot from the CD, making it a useful tool for troubleshooting or reinstalling an operating system.
How to Make a Bootable CD with Your System's ISO
If you want to install Windows on a new computer using your existing system settings, you can use the bootable CD or USB drive created from your existing Windows installation. This way, you can set up the new computer quickly with the same settings and programs as your old one. However, if you want to start fresh with a clean Windows installation, downloading a new ISO file from Microsoft's webpage is a better option.
Creating a bootable CD from a third-party software allows you to replicate the system settings of one computer onto another. By creating an ISO file of your own system and burning it onto a CD, you can boot up a target computer with the exact same settings as the source computer, effectively cloning the system. This process enables you to have a duplicate system on another computer, making it a useful tool for various purposes.
To make a CD bootable with your own system, you can follow a step-by-step guide that involves formatting the CD, creating a bootable image, and burning the image onto the CD.
Step 1. Qiling Backup is a tool that can be used for both backup and cloning purposes, and also has the additional feature of creating a bootable disk with the user's own system.
Step 2. To get started with Qiling Backup, download and install the software on your computer. You can find the download button below.
Step 3. To create an emergency disk with Qiling Backup, insert your CD into your computer and launch the software. The "Create Bootable Disk" feature can also be used to create a WinPE bootable disk. For a step-by-step guide on how to do this, please refer to our detailed guide on the topic.
Step 1. Prepare a USB drive which can be written and read.
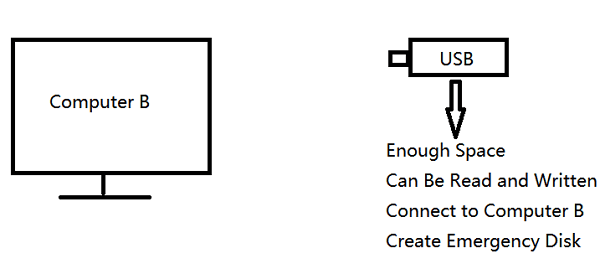
Step 2. Launch and install Qiling Backup on your computer.
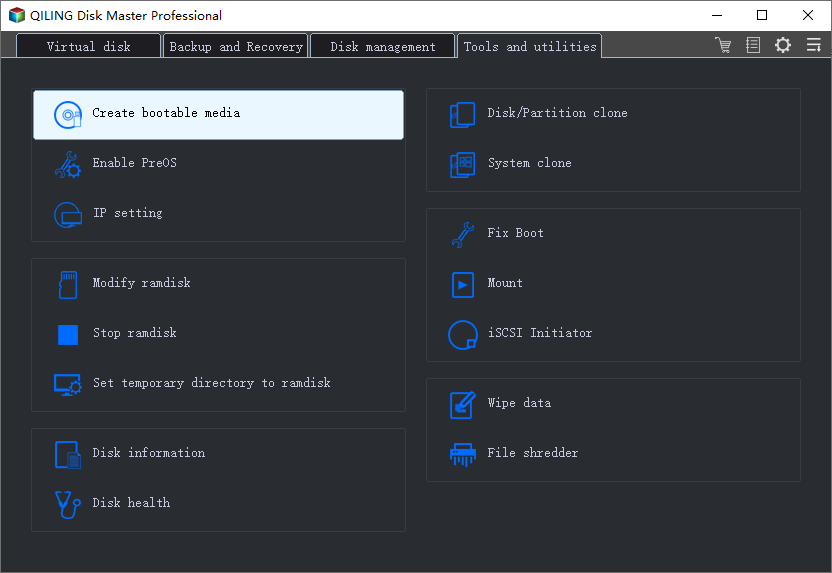
Step 3. Find and click "Tools" and choose "Create bootable Disk".
Step 4. Choose the Boot disk location, which can be an ISO file, a bootable USB, or a CD/DVD disc.
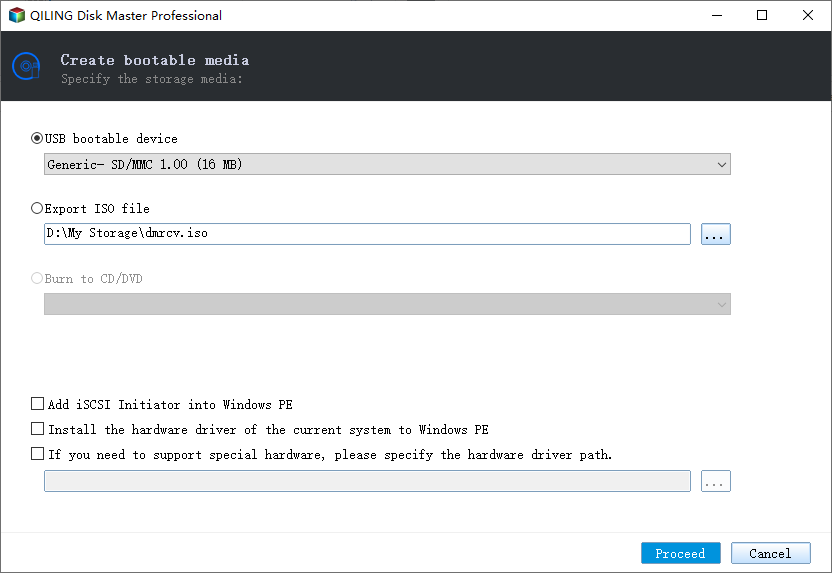
Step 5. Then click "Create" to start.
- Insert the bootable CD into your computer.
- Restart your computer and press F2/DEL to enter the BIOS.
- To boot from a removable device, select the option to boot from "Removable Devices" and press the "F10" key to save and exit.
FAQs
1. How do I make a bootable CD for Windows 10?
Step 1. To create an ISO file from your own system, you can use a tool like Rufus or ISO Recorder. These tools will allow you to create a bootable ISO file from a CD or DVD.
Step 2. Insert a blank CD into the optical drive.
Step 3. Find the downloaded ISO image file, which has a .iso file extension.
Step 4. Right-click on the ISO file and then click the "Burn disc image" option.
2. What makes a disc bootable?
When creating a bootable CD or USB drive, the storage device is formatted with a partition called MBR (Master Boot Record), which is different from the partition style MBR that is the boot sector of a hard disk. Even if the partition style is GPT, the boot disk still has an MBR partition, and BIOS loads and runs on the MBR boot sector when using the bootable CD.
You may also want to know: MBR vs. GPT
The Bottom Line
Making a CD bootable is a relatively straightforward process. You can create a bootable CD using a Windows ISO file and your existing system, or use software like ImgBurn or Nero to burn the ISO. Alternatively, you can use third-party tools like Qiling Backup to achieve the same result. This process can be completed with minimal difficulty, and the article provides guidance on how to do so.
Related Articles
- [Easy] How to Clone USB Drive to Another Windows 10
- How to Move Windows 10 Installation to Another Drive(SSD/HDD)
- Windows 10 Backup Not Working? Top Solutions to Make Windows Backup Work
- How to Install an SSD without Reinstalling Windows
- How to Backup Dropbox to External Drive [2 Tested Ways]
Do you know how to backup Dropbox to external drive? This article will describe two typical ways for you to back up Dropbox to an external drive. You can use one to create a backup of Dropbox to the external hard drive according to your needs. - How to Backup Minecraft Worlds [Full & Detailed Tutorial]
You can backup your Minecraft Worlds using three different methods, which will be explained in this article. If you're not familiar with backing up your Minecraft Worlds, this is the right place to learn. After reading this, you can choose the method that suits you best.