How to Change Time and Date on Windows 10/11
Microsoft's Windows generally handles time and date accurately, but occasional glitches can occur, which can be frustrating if you're used to them being reliable.
This issue can occur due to various reasons, such as Windows time being out of sync, software updates, or changes in time zones, causing the PC to not automatically adjust.
Having the wrong time and date on your computer can cause issues with apps that rely on them, potentially blocking access to web-based services or internet-based authorization schemes.
Thankfully, Windows operating systems allow users to adjust the time and date settings both manually and automatically. To do this, users can click on the clock in the system tray, right-click on it, and select "Adjust date/time." From there, they can choose to set the time and date manually or switch to automatic time and date settings, which can be synchronized with an internet-connected device.
How to Change Date and Times on Windows 10
When set to manual, the time and date settings are controlled by the user, while setting it to automatic allows them to synchronize with the Windows Time service.
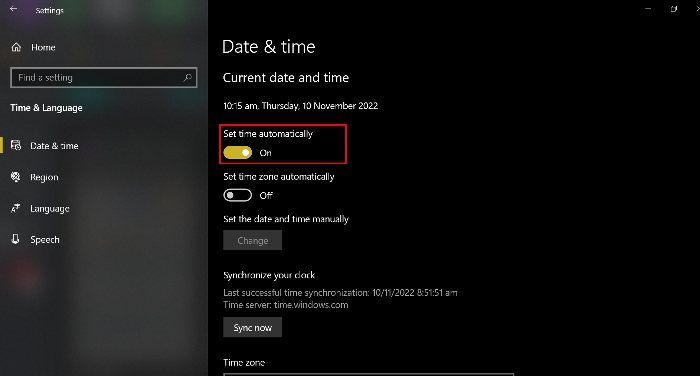
To manually configure your date and time settings, go to Settings > System > Date & time. Here, you can select your time zone, set the date and time manually, and choose whether to use a 24-hour clock. To set your date and time to change automatically, toggle the switch next to "Set time automatically" and "Set date automatically" to the "On" position.
Change Date and Time via Taskbar
The first method allows you to change the time and date from your taskbar.
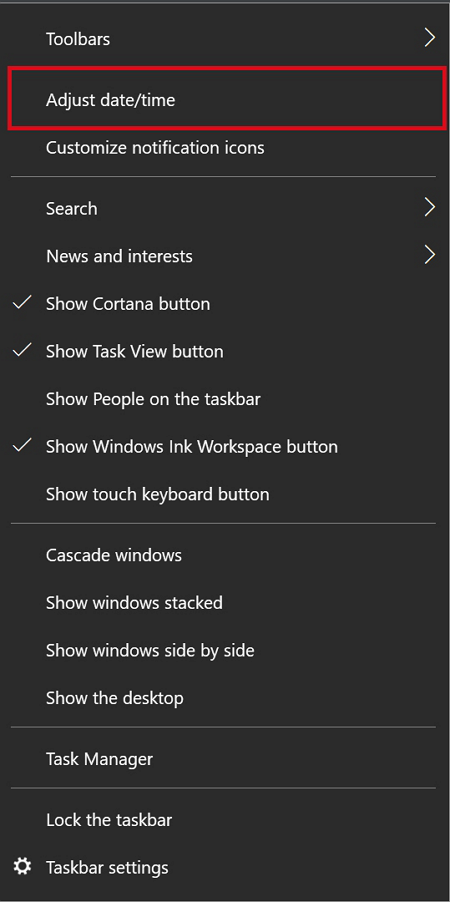
Step 1. To adjust the time display on the bottom-right corner of the taskbar, right-click on it and select "Adjust time/date" from the menu.
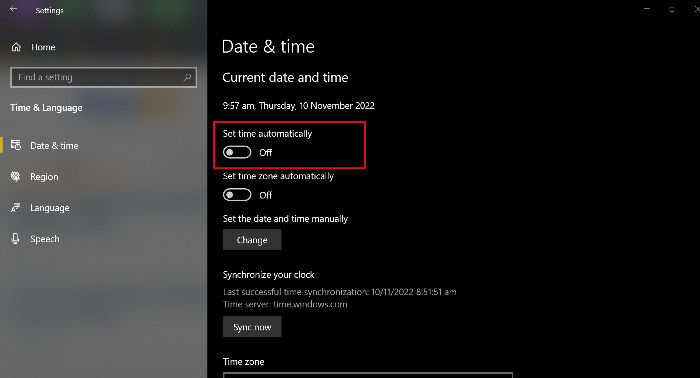
Step 2. To disable the "Set time automatically" feature, click on the toggle button to switch it off.
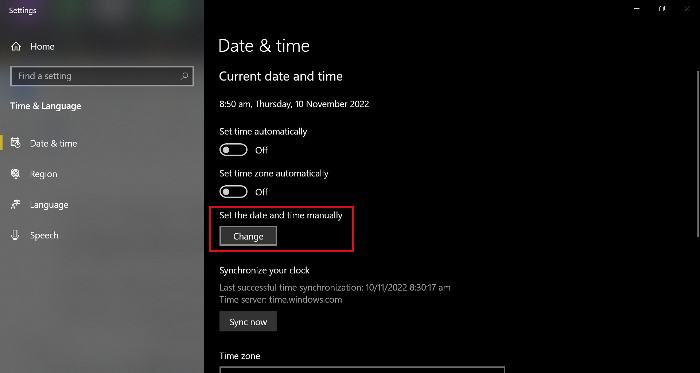
Step 3. To change the time and date on your device, click the "Change" button in the corresponding setting.
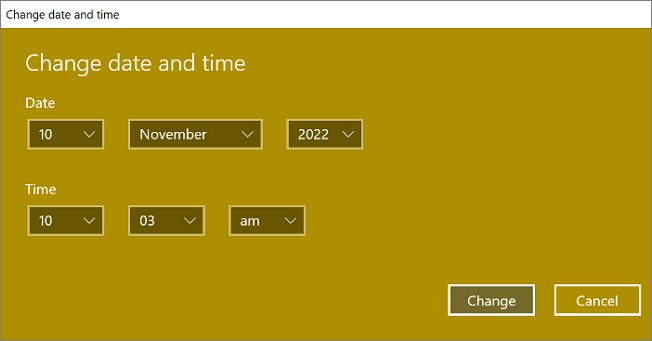
Step 4. Enter the correct time and date in the fields provided, then click "Change" to save your changes.
Change the Date and Time in Settings
To change the date and time on your device, go to your computer's settings menu, then select the option to change the date and time. From there, you can input the correct date and time. If you're unsure of the correct date and time, you can also check with a reliable source, such as a news website or a calendar app, to get the most up-to-date information.
Step 1. To access the Settings app on your Windows computer, click the Windows Start icon located at the bottom-right corner of your taskbar and select "Settings" from the menu that appears.
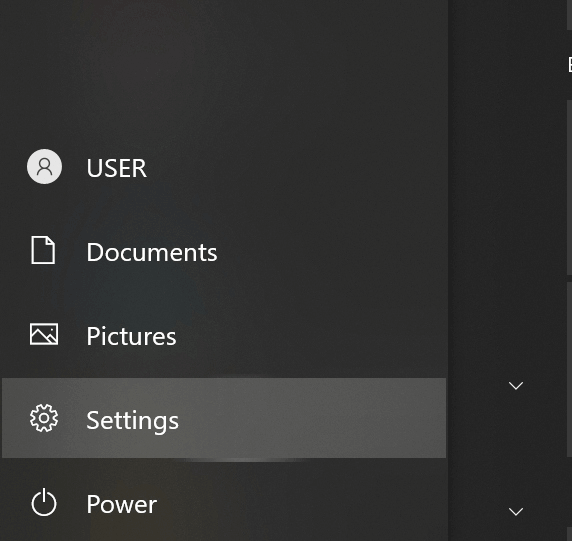
Pressing the Windows key and I key together on your keyboard will open the Settings app in Windows. This is a quick way to access system settings and preferences without having to navigate through the Start menu.
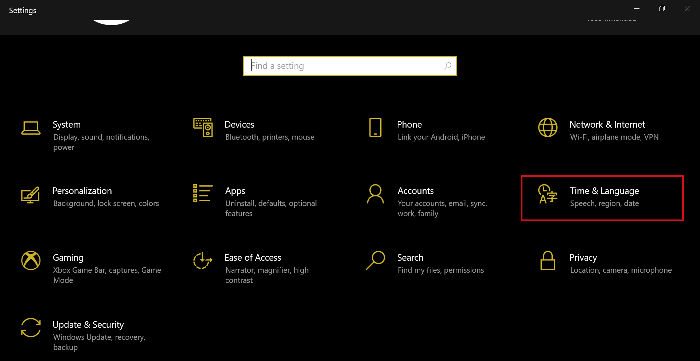
Step 2. To access the Time & Language settings in Windows, open the Settings app and click on the "Time & Language" option in the left-hand menu. This will display the settings screen for time and language settings, where you can make changes as needed.
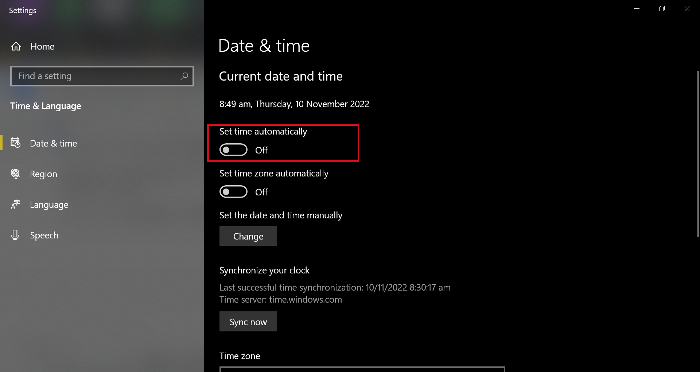
Step 3. To toggle off the automatic time setting, click on "Set time automatically" so you can manually change the time.
Step 4. Under "Set the date and time manually," click "Change."
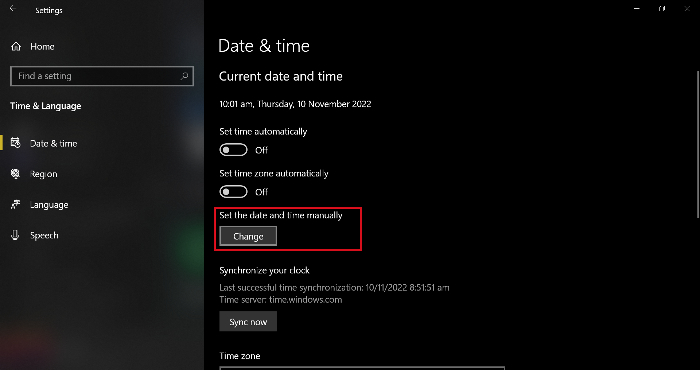
Step 5. To update the time and date on the displayed window, select the correct options from the available choices and click "Change" to apply and save the changes.

How to Change Time Zone on Windows 10
If your Windows 10 computer has an inaccurate time or date, it might be due to the time zone being set incorrectly, causing you to be an hour or more ahead or behind the actual time in your time zone, or even set to the wrong day.
To change the time zone settings manually, go to Settings > Time & Date and select the desired time zone from the list. You can also change the time zone for a specific app, such as Clock or Calendar, by going to Settings > Apps > All Apps > [App Name] > Permissions > Time Zone.
Step 1. Access the Settings page.
Step 2. Click "Time & Language."
Step 3. Select your time zone by clicking the drop-down arrow in the "Time zone" section.
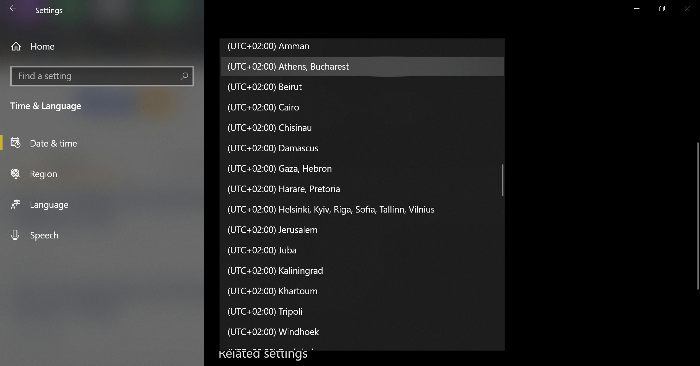
To automatically adjust your computer's clock for Daylight Saving Time (DST), toggle on the option "Adjust for daylight saving time automatically." This allows your computer's clock to automatically adjust when DST begins and ends in your region.
Extra Tips: How to Set Your Time Automatically
Windows can automatically adjust your device's clock to display the accurate time, making it a more reliable option than manually setting the time and date.
Microsoft enables the automatic setting by default on all Windows 10 and Windows 11 computers. However, you (or someone else) may have turned it off in the past. If that's the case, you can enable it again by going to Settings, then clicking on Update & Security, followed by Windows Update, and finally, clicking on Change active hours. From there, you can select the time range during which your computer won't automatically restart during updates.
Step 1. Access the Settings page.
Step 2. Click "Time & Language."
Step 3. To enable the "Set time automatically" option directly under the current date and time, click on the toggle button to turn it on.
Related Articles
- How to Sync Two External Hard Drives in Windows 10 [Two Nice Tips]
- How to Activate Windows 10 for Free Permanently in 2023
- SanDisk Extreme Pro Portable SSD Not Detected: Troubleshooting and Data Recovery
- How to Unblock Websites on School Chromebook 2023
- Solve Silicon External Hard Drive Not Showing Up [Windows & Mac]
Is your silicon external hard drive not showing up on your Mac or Windows? Discover some excellent solutions in this article to help your system recognize your hard drive and offer fixes for all of the issues. - Sims 4 Saves Location: Where and How to Find It
Finding the Sims 4 file location is crucial, allowing you to access previous saves or back up file data to prevent loss. This article will guide you to the Sims 4 saves file location and introduce a backup software to provide a strong shield for your game saves.