Downgrade from Sonoma to Ventura | No Data Loss 👍
Why Downgrade macOS Sonoma to Ventura
Some macOS users may find it beneficial to roll back to Ventura from Sonoma, despite the usual reluctance to revert to an older operating system. macOS 14, or Ventura, is a reliable and popular update that offers a streamlined interface, faster performance, and useful apps and features to boost efficiency and inspiration. If you've already downloaded Sonoma, you may want to consider downgrading to Ventura to take advantage of its advantages, such as a more refined user experience and improved functionality.
1. Stability and compatibility
If you're having issues with macOS Sonoma, you might want to consider downgrading to macOS Ventura, as Sonoma is still in beta and may have flaws and compatibility problems. Ventura, on the other hand, is a more stable and reliable OS that works well with various applications and hardware.
2. Performance optimization
The Sonoma beta may not run as smoothly or quickly on certain devices, such as older Macs or those with limited resources, and users may want to consider downgrading to Ventura to ensure a more fluid and quicker experience.
3. Familiarity and User Experience
Many people have a good experience with macOS Ventura, finding it stable and reliable. Some prefer its interface and overall experience over the more recent Sonoma, and may choose to downgrade to maintain a consistent workflow.
Downgrading from macOS Sonoma to Ventura can be a liberating experience, especially for those who've grown tired of the newer operating system's quirks and bugs. By reverting back to Ventura, users can enjoy a smoother and more stable computing experience, free from the frustrations of Sonoma's issues. The downgrade process itself is relatively straightforward, and many users have reported a significant improvement in their overall computing experience after making the switch.
Fix 1. How to Downgrade macOS Sonoma to Ventura with Mac Time Machine
To downgrade from macOS Sonoma to Ventura using a Mac Time Machine restore, start by setting up a Time Machine backup before upgrading to Sonoma. Then, follow these steps:
Step 1. Set up your Mac with your Time Machine backup disk.
Step 2. To enter Recovery Mode, restart your Mac while holding down the Command and R keys. This will allow you to access the built-in diagnostic and repair tools, including Disk Utility and Terminal.
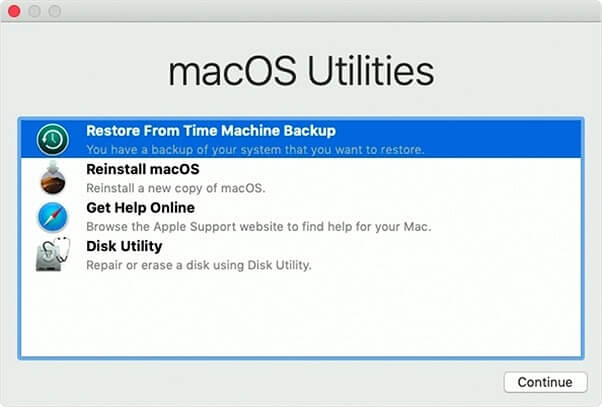
Step 3. To restore your Mac from a Time Machine backup, go to the Utilities menu in macOS and select "Restore from Time Machine Backup".
Step 4. Select the disk you will use for Time Machine backups and click Next.
Step 5. Click "Continue" when you've located the backup that contains your Ventura installation.
Step 5. Follow the on-screen prompts to bring back the backup on your Mac.
Step 6. After the restoration, your Mac will restart and you'll be back to using the Ventura OS. This process can also be used to downgrade to Monterey or earlier versions of macOS.
Fix 2. How to Downgrade macOS 14 to 13 in Recovery Mode
If you don't have a Time Machine backup or prefer an alternative way, you can downgrade macOS Sonoma to Ventura using Recovery Mode, which wipes your installation and requires a solid internet connection. To do this, follow the steps below for the macOS 14 to 13 Recovery Mode downgrade.
Step 1. Restart your Mac and press Command + R to enter Recovery Mode.
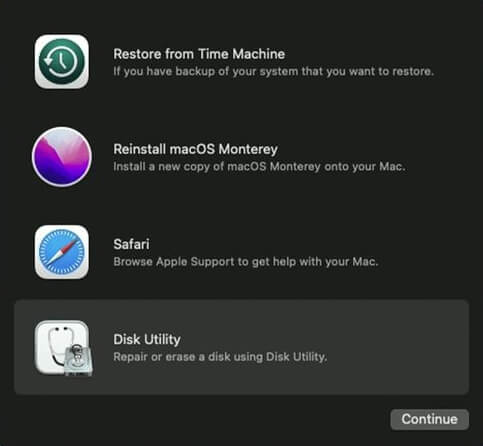
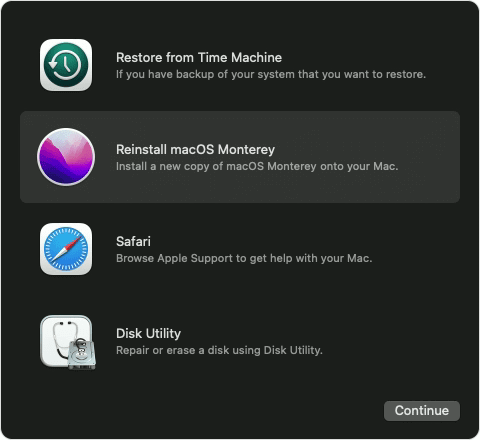
Step 2. To boot your Mac into Disk Utility, click on "Disk Utility" under macOS Utilities and then click on "Continue".
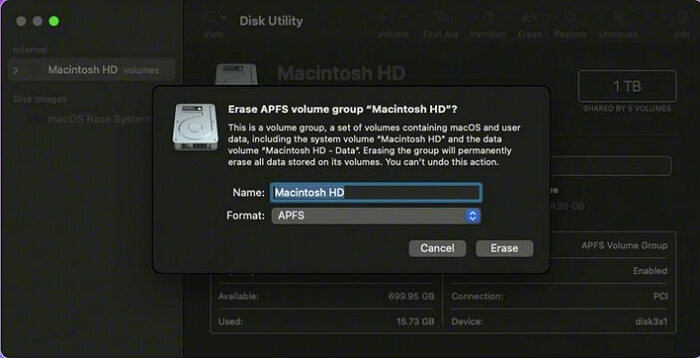
Step 3. Select the Mac startup disk, "Macintosh HD," which is your starting disk, and click Erase.
Step 4. Confirm the disk format and click Erase.
Step 5. After erasing the disk, quit Disk Utility and choose "Reinstall macOS" from the macOS Utilities menu.
Step 6. To reinstall macOS 13 Ventura on your Mac, follow the on-screen instructions. This will guide you through the process of erasing your Mac's startup disk, reinstalling the operating system, and setting up your Mac as new or restoring from a Time Machine backup.
Step 7. After reinstalling, your Mac will restart and downgrade to Ventura.
Fix 3. Downgrade Sonoma with Ventura Bootable Installer
To revert from macOS Sonoma to Ventura, you can use a Ventura Bootable Installer. This method allows you to downgrade and install Ventura cleanly, and it involves preparing a bootable installation beforehand. By following the steps, you can start the Ventura Bootable Installer-based Sonoma downgrade and successfully revert to Ventura.
Step 1. Create a Ventura Bootable USB or external storage device.
Step 2. To open the Startup Manager on your Mac, simply restart your device and press the Option key as it boots up. This will allow you to access the Startup Manager and make any necessary adjustments.
Step 3. Plug the Ventura Bootable Installer into your Mac.
Step 4. Select Ventura Bootable Installer as the starting disk in Startup Manager and click Continue.
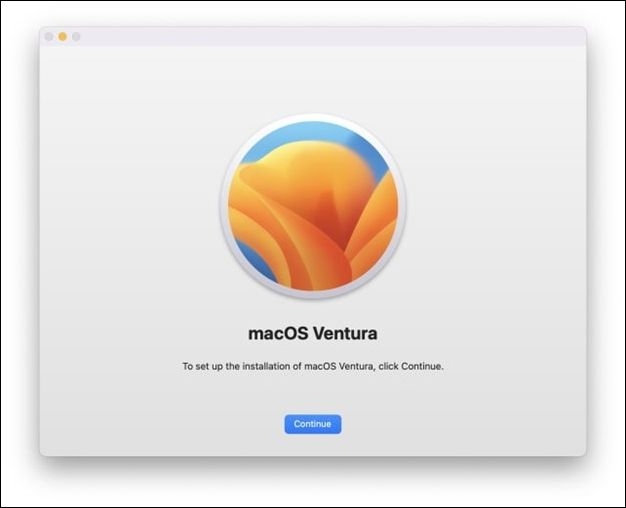
Step 5. Follow the on-screen directions to install.
Step 6. Click Install after selecting your installation location.
Step 7. After installing Ventura, your Mac will restart.
You can install macOS Ventura on an unsupported Mac using this method, and you can learn more about it by reading this guide.
Install macOS Ventura on Unsupported Mac
To install macOS Ventura on an unsupported Mac, you'll need to follow a specific process that involves creating a bootable installer, disabling System Integrity Protection (SIP), and then running the installation process. This requires some technical expertise and may void your warranty, so proceed with caution. You'll need to download the macOS Ventura installer from the App Store, create a bootable USB drive, and then boot your Mac from the USB drive. Once booted, you'll need to disable SIP and then run the installation process.
Troubleshoot macOS Sonoma Downgrade Issues
Users experiencing difficulties with downgrading from macOS Sonoma to Ventura have reported various issues. Common problems include, among others, and can be resolved by trying the following solutions.
Problem 1: Compatibility Problems with Programs and Applications
After downgrading to macOS Ventura, some programs and software may stop working or become unstable, possibly due to compatibility issues with the new operating system.
Solution:
- Check if the developer provides Ventura or macOS version-specific updates or fixes on their website or support forums.
- Consider suitable apps for Ventura or the intended macOS version.
- Try running the program or software in compatibility mode or virtualization.
Problem 2: Drivers are either Unavailable or Unsuitable
Downgrading to an older macOS version may lead to connection issues or reduced functionality due to missing or incompatible drivers for certain hardware components.
Solution:
- Find drivers that work with Ventura or the version of macOS you want to use by visiting the manufacturer's website.
- The updated drivers may be installed by following the on-screen prompts.
- If there are no updated drivers, consider contacting the manufacturer's support or using suitable hardware as a possible solution. (Note: this response is a rewritten version of the original text in a single paragraph)
Problem 3: Lost Information or Corrupted Files
Data loss or inaccessibility of certain files might occur due to improper downgrade processes or unanticipated failures.
Solution:
- Before downgrading your operating system to a lower version, make sure to back up all your important files and data to an external drive, cloud storage, or another secure location. This will ensure that you don't lose any critical information during the process.
- Use a trustworthy data recovery program like Deep Data Recovery for Mac to recover lost files from your backup or the affected disk.
- Before downgrading, it's recommended to use data recovery software to retrieve any inaccessible files from the disk.
Recover Data After Downgrading macOS Sonoma
Some customers have reported losing access to important data after downgrading from macOS Sonoma to Ventura. Deep Data Recovery can help recover lost information from various storage media, including hard disks, SSDs, and USB drives.
This program is accessible to users of varying technical skill sets due to its intuitive interface and streamlined recovery procedure, effectively recovering deleted files on macOS Sonoma or Ventura using sophisticated file-scanning algorithms.
This tool can help you recover missing photos, documents, emails, videos, and more after a macOS Sonoma update or downgrade. It can also retrieve lost files, and I can guide you through the process with a tutorial on Qiling.
Step 1. Search for lost files
To search for lost files on your Mac, select the disk location where you want to search, and click the "Search for lost files" button.
Note: To prepare for data recovery on your Mac, it's recommended to first create a disk backup using the software, which will safeguard your existing data and allow for new data to be written to the computer once the recovery process is complete. This initial backup step is crucial to prevent further data loss.

Step 2. Go through the scanning results
Deep Data Recovery for Mac will immediately scan your selected disk volume and display the scanning results.

Step 3. Select the file(s) and recover
Select the desired file(s) from the scan results and click the "Recover" button to restore them.

Conclusion
Compatibility difficulties or personal preferences are just a couple of valid reasons to revert from macOS Sonoma to Ventura. Downgrading can be beneficial, and there are ways to do it using a Time Machine backup, Recovery Mode, and the Ventura Bootable Installer. However, it's essential to be aware of the potential risks of data loss and instability when downgrading an operating system, so backing up critical data and taking necessary precautions is vital.
If data is lost during the downgrading process, Deep Data Recovery for Mac can help retrieve it. The program can recover files that were accidentally deleted.
To successfully roll back macOS Sonoma to Ventura, carefully follow the provided directions, and consider seeking professional help if needed. This will ensure a smooth and effective downgrade process.
Downgrade macOS Sonoma to Ventura FAQs
You can downgrade macOS Sonoma to Ventura if you have a compatible Mac model, a backup of your data, and a valid reason for downgrading. To prepare, ensure you have a backup of your data, including files, photos, and important documents, and remove any recently installed software or updates that may cause issues during the downgrade process.
1. How to downgrade macOS without losing data?
If you want to roll back from Sonoma to Ventura without losing data, you can use a Time Machine backup, Recovery Mode, or a Ventura Bootable Installer to downgrade macOS and keep your data intact.
2. How to recover lost data after the macOS Sonoma downgrade?
If you've lost data due to a downgrade from macOS Sonoma, we recommend using Deep Data Recovery for Mac to recover your files. Our software is designed to help you get your data back in working order, so you can trust its effectiveness.
3. What are the new features of macOS 14 Sonoma?
macOS 14 Sonoma introduces several new features, including upgraded privacy options, a more intuitive Control Center, faster page loads in Safari, a more feature-rich Maps app, and cutting-edge FaceTime capabilities.
4. Is macOS Sonoma better than Ventura?
macOS Sonoma and macOS Ventura have their own strengths and features. While Ventura may be more reliable and compatible, Sonoma offers new capabilities, making the choice between the two ultimately dependent on individual needs and preferences.
Related Articles
- How to Fix Microsoft Excel Has Stopped Working 2007/2010/2013/2016
- Call of Duty Warzone Save Files (Everything You Need to Know)
- Windows 10 Quick Access Not Working, Not Responding, Slow to Open
- How to Uninstall Sonoma Without Losing Data