4 Proven Ways to Fix Erase Process Has Failed on Mac
| Workable Solutions | Step-by-step Troubleshooting |
|---|---|
| Erase the Disk via Terminal | To open the Terminal on your computer, go to Finder, select Applications, then click on the Utility folder, and finally open the Terminal application.Full steps |
| Update to the Latest macOS | To check for software updates on a Mac, go to the Apple menu, select "About this Mac", and then choose "Software Update".Full steps |
| Erase Selected Volumes | Navigate to your Mac's Finder, click on "Apps", then click on "Utility", and start the Disk Utility from there.Full steps |
| Adjust the Security Levels | Launch Disk Utility on your computer, attach your external device, and select it in the Disk Utility window. Then, select "Erase" and choose the desired format. Finally, click "Erase" to format the drive.Full steps |
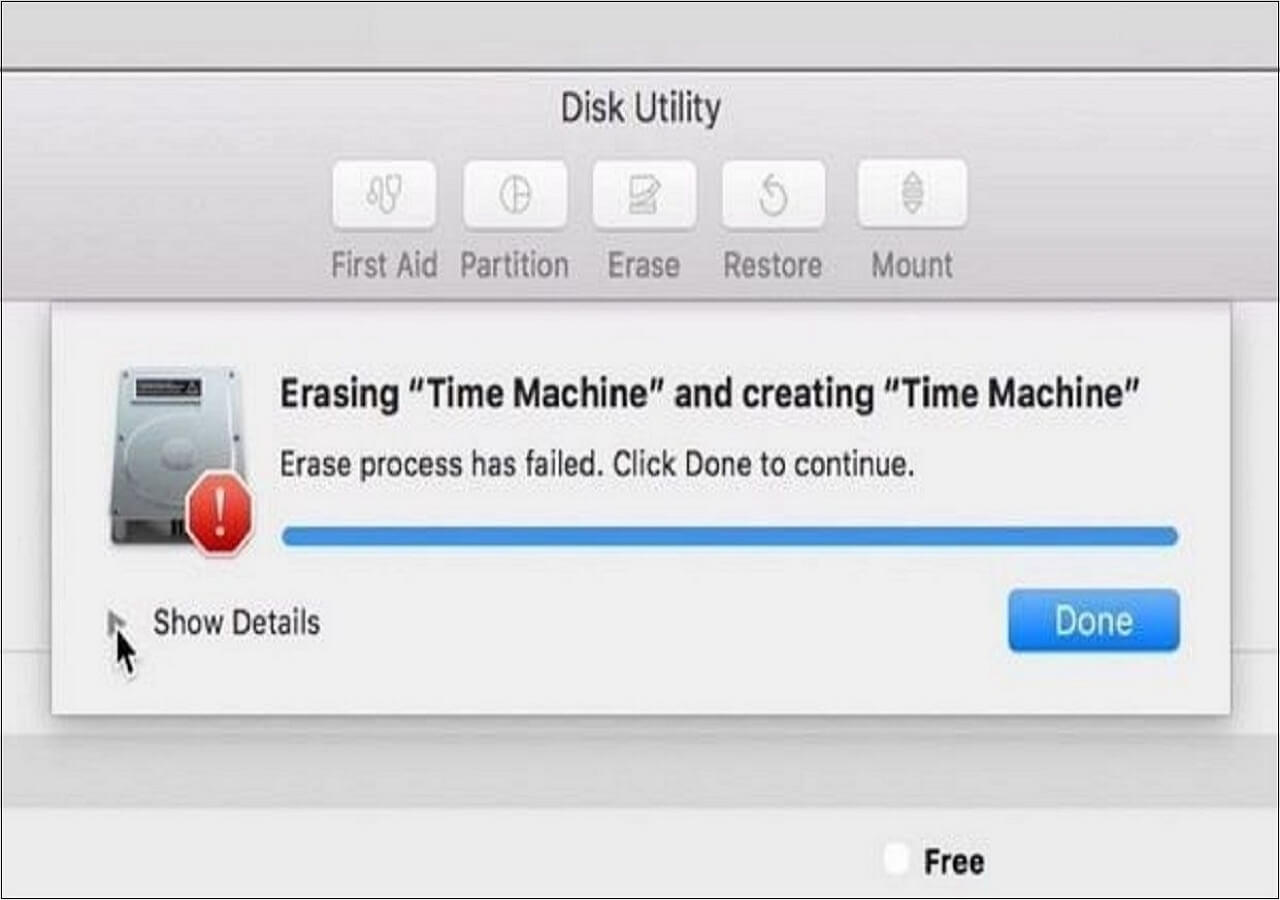
Erase Process Has Failed on Mac, Click Done to Continue
If your MacBook is displaying the "erase process has failed Mac M1" message, don't worry - this article can help. The "erase process has failed Mac" problem occurs when you try to restart macOS or OS X after erasing the information from your hard drive, preventing you from accessing your files and apps. Luckily, there are a few solutions you can try to resolve this issue.
Why does this issue happen? These are the leading reasons shown below, which caused Mac erase process has failed problem:
- Malware or viral infection on your Mac
- Damaged or corrupted hard drive on Mac
- An out-of-date variant of macOS
- Disk Utility's important Mac elements may not be correctly launched
If you're in a similar situation and looking for the best option, this article can provide valuable insights and guidance to help you make an informed decision.
4 Ways to Fix Erase Process Has Failed Mac
If you're experiencing the "error on your Mac" issue, don't worry, as there are several possible reasons behind it. Fortunately, there are also some fixes available to resolve the problem.
Now, let's start with the solutions!
Method 1. Erase the Disk via the Terminal on Your MacBook
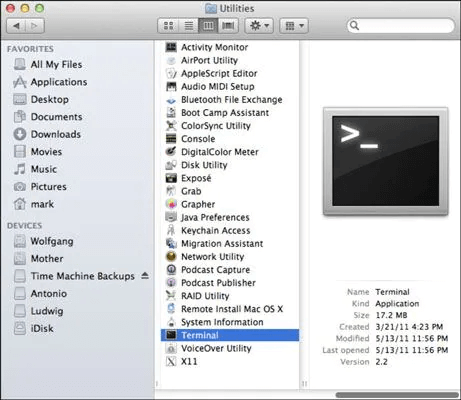
If you need help with your Mac's Disk Utility program, you can use Terminal to erase a drive, which is a clear and efficient method of achieving your requirements.
Step 1. To start, go to the Finder and select Applications > Utilities to open Terminal as an administrator.
Step 2. To identify the disk you want to convert, open Terminal and type "diskutil list" followed by a return. This will display detailed information about your Mac's drives and partitions, allowing you to note the identifier of the disk you wish to convert.
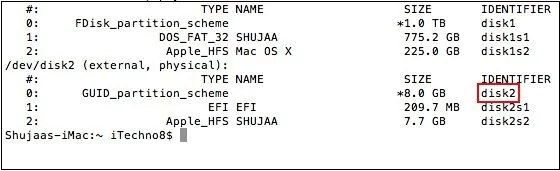
Step 3. Excellent! Once you've identified the number, use the "erase drive" instruction to delete the data.
Step 4. To prepare a disk in HFS+ format, you can use the command "diskutil eraseDisk HFS+ DISK disk2" and press the back symbol.
Step 5. Afterward, simply wait for the instructions to execute while your chosen drive is converted into compatible system files.
Method 2. Update to the Latest macOS to Fix Disk Utility Error
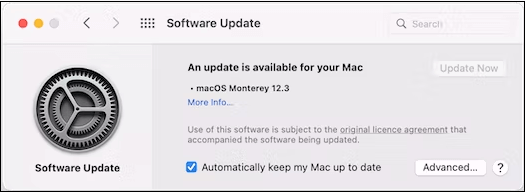
If your Mac is running an outdated version, it may encounter the "erase procedure has failed click completed to proceed" error, but updating to the latest macOS version can resolve this issue. You can find the latest macOS upgrade in the App Store or follow the steps to upgrade to macOS Ventura.
Step 1. Hit the Apple menu, and opt for "About this Mac".
Step 2. Opt for a software update.
Step 3. Wait until the checking process is complete. If there's an update available, click on the update option.
Method 3. Erase Selected Volumes Instead to Fix the Error
When formatting a disk on a Mac, users may encounter an error stating that the erase procedure has failed. Instead of formatting the entire drive, try formatting specific volumes to determine if the problem lies with a particular volume or the entire drive. This approach allows for a more targeted troubleshooting process.
Step 1. To access Disk Utility, go to the Finder on your Mac, click on "Apps," then select "Utility" from the list, and finally, start the "Disk Utility" program.
Step 2. After launching the Disk Utility implementation, navigate to the top-left edge of the interface and select all files or external media from the dropdown option.
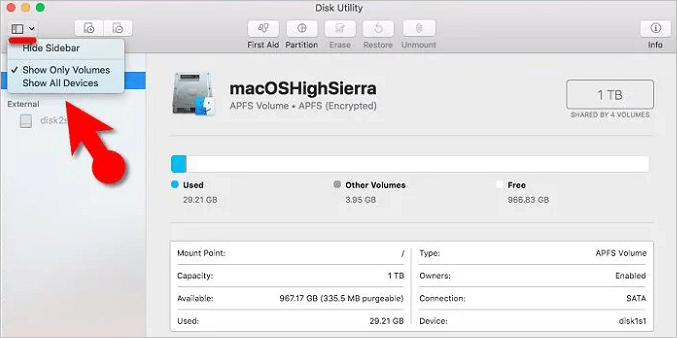
Step 3. To format a volume, select it from the sidebar instead of the entire drive, and click the "Erase" icon on the taskbar.
To troubleshoot the issue, you can try deleting the entire drive to see if the problem persists. This will help you determine if the issue is with the entire drive or specific directories.
Method 4. Adjust the Security Levels for Formatting an External Device
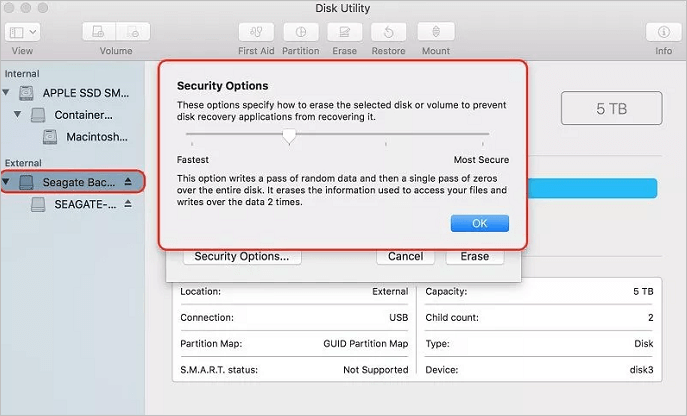
If the disk utility on your Mac is failing to format an external device due to high security levels, try resetting the disk's security level by booting from a different disk, such as a USB drive or an external hard drive, and then running the disk utility from there. This can help resolve the error and allow the formatting process to proceed. However, if the security level is extremely high, you may need to use a more advanced tool or consult a professional for further assistance.
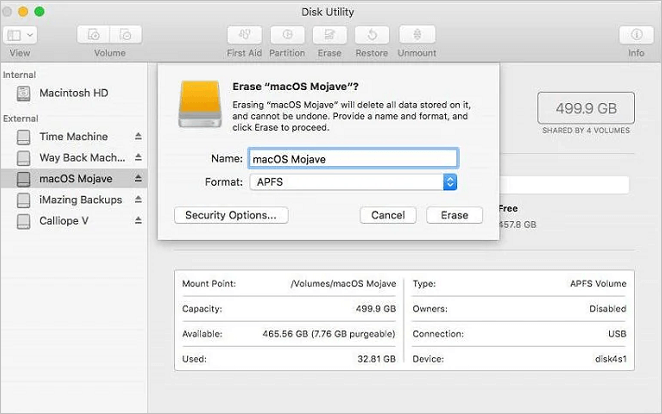
Step 1. Launch Disk Utility on your computer and attach your external device to it.
Step 2. The user should delete the device from the toolbar and navigate to the Encryption Settings tab in the new browser.
Step 3. To configure the device's protection settings, adjust the security level to a moderate setting, which should prevent the "can't delete Mac hard disk" notification from appearing.
How to Erase Hard Drive on Mac [Detailed Guide]
If you're using macOS Monterey, there are two ways to wipe your hard disk. The type of processor you have will determine the best approach for you. If you have an Intel-based Mac, you can use the built-in Disk Utility app to erase your hard disk.
- If you have a Mac with Apple hardware or an Intel-based Mac with the Apple M2 Chip, you can use the built-in dictation feature to convert your spoken words into text. To do this, click the keyboard icon in the menu bar and select "Show Dictation Window" or press the keyboard shortcut Command (⌘) + Shift + D.
- If you have an Intel-based Computer.
To find out the type of processor on your Mac, press the option key while navigating to the Apple menu > About This Mac. In the Devices area, the type of chip will be displayed in the right corner of the screen.
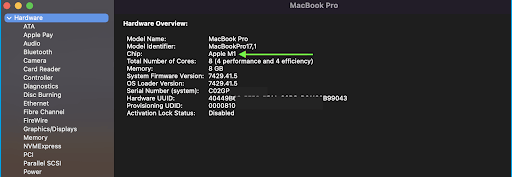
If your Mac has an Intel CPU, check the right-hand column and select "Controller" to see if it has a T2 protection chip installed. If it does, it will be displayed in the right-hand side window.
Bonus Tip: How to Erase a Disk Without Losing Data on Mac
When you format or delete your MacBook, all your information is erased. To prevent this, create a backup. If you haven't backed up your data and have reformatted your drive, consider using a data recovery program to retrieve your files.
Deep Data Recovery is an all-in-one data retrieval program that successfully recovers unintentionally erased information. With its wide range of capabilities, it's a powerful data recovery application used by millions worldwide.
The program can retrieve any type of material, including photos, files, papers, or movies, from both internal and external storage media. It ensures that files are retrieved unprocessed, in their original format, and guarantees their integrity. This tool's key features include its ability to recover files from various storage devices, making it a reliable solution for retrieving lost or deleted data.
- It can recover deleted photos, videos, music files, documents, and other files on Mac with a few clicks.
- This software supports file recovery from various storage devices including hard drives, solid-state drives (SSDs), USB flash drives, and pen drives.
- This software provides data retrieval for Mac in case of accidental deletion, virus attack, formatting, or system crash, helping users recover lost data.
Download this professional tool now and experience the best of erasing a disk without losing data on your Mac.
Step 1. Select the location to scan
Launch Deep Data Recovery for Mac, select the hard drive, SSD, SD card, USB flash drive, or TF card where data was lost, and click "Search for lost files" to initiate scanning.
Note: Before attempting data recovery, it's recommended to create a backup of your Mac using the "Disk Backup" feature in the software, which will prevent further data loss. Once a backup is made, the software can recover data from the backup, allowing your computer to be used for new data entry.

Step 2. Filter lost Mac data
The software will automatically scan for lost data on MacBook/iMac, and once the scan is complete, you can filter the wanted data through the "Type" and "Path" buttons.

Step 3. Recover lost data or files
Double-1. Click on a file to preview its contents. 2. Once you're satisfied, click the "Recover" button to restore the lost data to a desired location.

Conclusion
After reviewing this tutorial, you should be able to fix the Mac erase process failed problem. We've provided various tried-and-true remedies for this issue on Mac that you can try. Additionally, we've given a method for effectively erasing a hard drive (or an external device). If you've accidentally erased your data, you can use Qiling Mac data recovery software to easily recover all types of information from multiple sources on your Mac.
Erase Process Has Failed FAQs
The detailed FAQs provided below offer a clear understanding of the topic, covering all aspects in a concise manner.
1. How do I fix the delete process that failed on Mac?
If you're experiencing a failed delete process on your Mac, try updating your macOS, adjusting the security levels for formatting an external device, or following other fixes mentioned, to resolve the issue.
2. How do I force my Mac to erase a hard drive?
To restart your Mac and access the Recovery mode, select Restart from the Apple menu and immediately press Command + R. In the Recovery mode window, select Disk Utility and click Proceed. In the Disk Utility window, locate the disk you want to delete and click Delete in the taskbar.
3. Does a hard reset on Mac erase everything?
To perform a Mac hard reset, turn on your computer and immediately press and hold the Option, Command, P, and R buttons simultaneously. Hold them for about 20 seconds, then release. This process clears user preferences from memory and restores any security settings that may have been altered. Note that this action does not delete any files or data. It simply resets the system to its default settings.
4. What happens when Mac recovery mode doesn't work?
To restart your Mac, press and hold the 'Option+Command+R' keys on your keyboard. Release them as soon as you see the Apple logo, and your Mac will restart.
If you find this post helpful, please share it on your Twitter and Facebook to let more people know.
Related Articles
- How to Get Live Wallpapers on Windows 10 [Full Guide]
- How to Turn On/off Firmware Password on Mac [Fixed]
- [Fixed] Ubuntu Format Disk: How to Format Disk on Ubuntu
- [4 Easy Ways] How to Backup SD Card on Samsung
- [Fixed Lately] How to Perform a Netsh Winsock Reset on Windows
To perform the netsh Winsock reset command on your Windows device, open Command Prompt as an administrator, type the command "netsh winsock reset" and press Enter. This will reset the Winsock catalog and resolve network configuration errors, allowing you to access the internet and other network resources again. - Which Is the Best NTFS Allocation Unit Size, How to Set?
Learn what NTFS allocation unit size means, how it affects storage, and how to choose or set the right cluster size.