What Is Error Code 8076 on Mac | 5 Proven Methods to Fix It
Are you experiencing error code 8076 on your Mac and don't know what to do? Don't worry, as this article provides 5 fixes to help you resolve this issue.
| Workable Solutions | Step-by-step Troubleshooting |
|---|---|
| Fix 1. Checking File Permission | Choose error code 8076's file or folder. Select Get Info from the file's right-click menu...Full steps |
| Fix 2. Restart Your Mac | Save open files and close all Mac programs. Select Restart by clicking the Apple icon...Full steps |
| Fix 3. Use Terminal to Modify File | Open Mac Terminal from the Applications > Utilities folder or Spotlight search, and type the command...Full steps |
| Fix 4. Delete Finder Preference File | Open Finder on Mac. Click on Go in the menu bar, and pick Go to Folder from the drop-down menu...Full steps |
| Fix 5. Boot Mac into Safe Mode | Restart your Mac, hold down the Shift key, and stop holding it when the login window appears...Full steps |
What Is Error Code 8076 on Mac
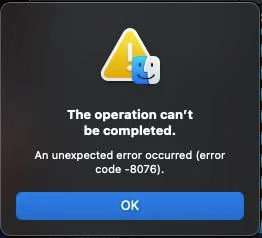
Many Mac users have reported seeing error code 8076 on Mac while doing common file operations, with a notification like "An unexpected error occurred (error code -8076)" appearing in the event log.
I have been reorganising some files and folders and created a new folder for some files. All fine but then I want to rename the folder and I just get 'error code -8076'. No information can I find anywhere as to what this means or how I resolve it.. from Apple Community
The 8076 error code is a frustrating issue that prevents users from conducting basic file management procedures, often due to permissions or attribute problems with a file. This can lead to significant lost productivity and frustration for those affected.
Possible Causes of Error Code 8076 on Mac
Mac error code 8076 can occur due to various reasons, including corrupted system files, software conflicts, and hardware issues. It may also be caused by a faulty or outdated driver, or a problem with the operating system's registry. Additionally, the error could be related to a malfunctioning or incompatible software application, or a hardware component such as a hard drive or RAM.
📂File Permission Problems: Error code 8076 can occur when trying to modify or move a file without proper file rights, such as trying to write to an external hard drive on a Mac that only allows reading. This can cause the error to appear.
🔒Locked Files: Error code 8076 occurs when a file is locked or being used by another program, preventing it from being edited or moved.
⚠️Incompatible File Names: The error may occur if the file name does not conform to Mac's specific rules and limits, such as not using special characters or protected keywords.
💾Problems with External Storage: Error code 8076 may occur when working with files saved on external devices, such as USB sticks or network shares, due to issues with the device's file system or connectivity.
Knowing what might trigger error code 8076 allows you to take the necessary steps to resolve the issue.
How to Fix Error Code 8076 on macOS
Troubleshooting macOS error code 8076 is crucial. To resolve this issue and regain control over your files, consider backing up any vital data first. Then, you can try various methods to fix the problem. These methods may include the solutions below.
Fix 1. Checking Permission of Shared File
This problem may be caused by file-sharing permissions being disabled. To correct this, simply take the necessary steps to re-enable file-sharing permissions.
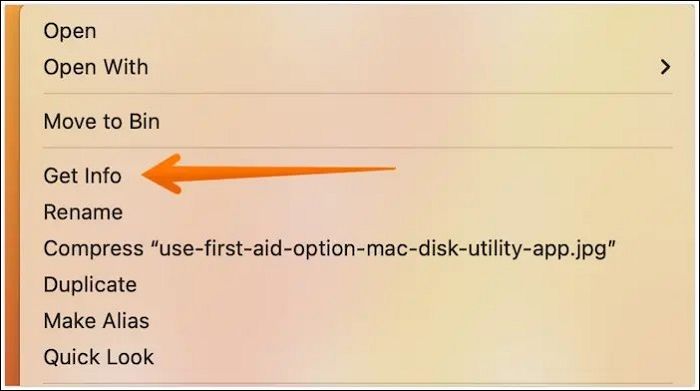
Step 1. Choose error code 8076's file or folder.
Step 2. Select "Get Info" from the file's right-click menu.
Step 3. Go to "Sharing & Permissions" in the file info box.
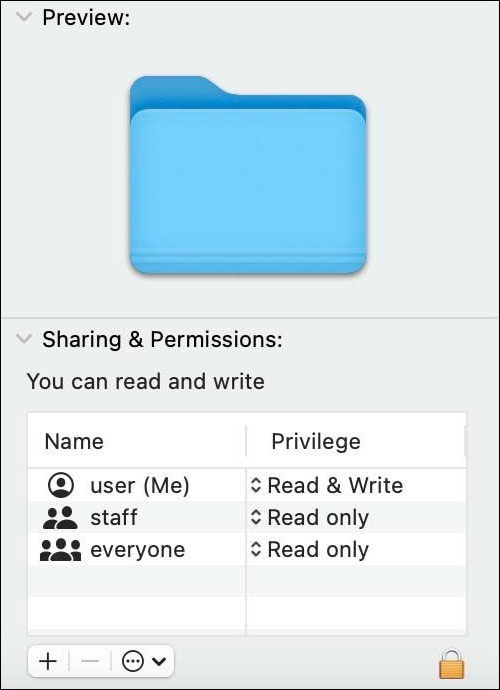
Step 4. Check your user account's file permissions.
Step 5. To create a user, click the lock symbol at the bottom right, input your administrator password, and click "+" to create a user.
Step 6. Ensure your user account has full access (Read and Write).
Step 7. To lock the changes you've made, click the lock button again.
Step 8. Rename or relocate the file again to see whether the issue remains.
5 Best Ways to Fix Permission Denied on Mac
Fixing the "Permission Denied" error on Mac can be achieved through several practical methods. One approach is to use the Terminal to run a command with elevated privileges using 'sudo' followed by the command and password. Another method is to right-click on the file or folder and select 'Get Info', then click on the lock icon and enter the administrator password to change permissions.
Fix 2. Restart Your Mac to Fix Error Code 8076
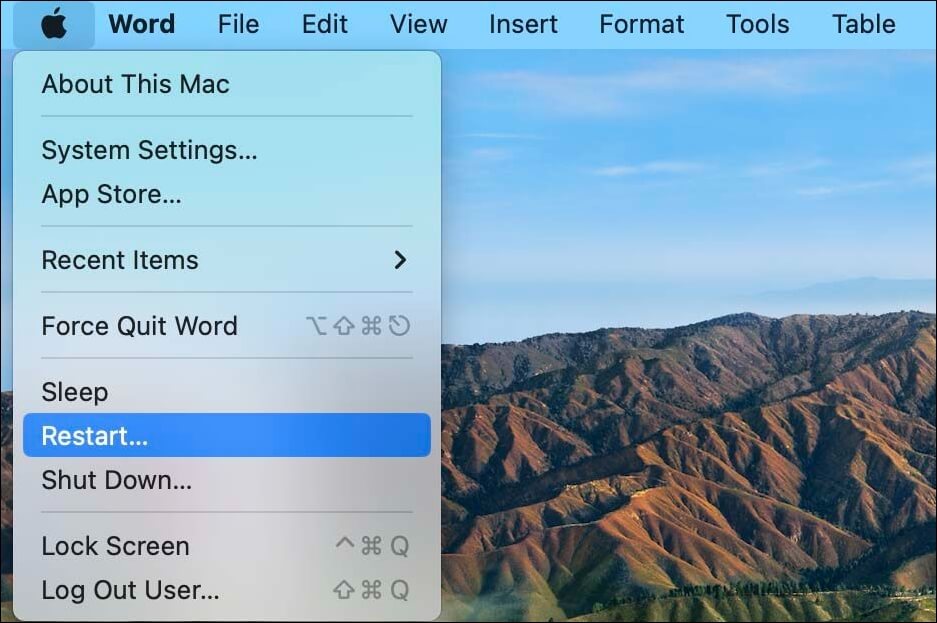
If your MacBook Pro or Air is experiencing the error code 8076, restarting the device may resolve the issue. To do this, click the Apple menu and select "Restart" or press the power button until the shutdown menu appears. Once restarted, check if the error persists.
Step 1. Save open files and close all Mac programs.
Step 2. To restart your Mac, click on the Apple menu at the top left corner of the screen, and select "Restart" from the drop-down list.
Step 3. Turn off your Mac and turn it back on.
Step 4. Rename or move the file after rebooting.
If your Mac is unresponsive, you can hard restart it and then rename or move the file to see if the error 8076 is resolved.
If you're experiencing error code 8076 on your Mac, there are a few troubleshooting steps you can take to resolve the issue. First, try restarting your Mac in safe mode to see if the problem persists.
Fix 3. Use Terminal to Modify a File
To move a file on a Mac using Terminal, navigate to the directory where the file is located using the 'cd' command, then use the 'mv' command followed by the file name and the new location. For example, 'mv file.
Step 1. To open the Mac Terminal, you can either navigate to the "Applications > Utilities" folder and double-click on the Terminal icon, or you can use Spotlight search by pressing Command (⌘) + Space and typing "Terminal" in the search bar. This will open the Terminal application on your Mac.
Step 2. In the Terminal, type `sudo mv 'source file path' 'destination file path'`.

Step 3. Please replace 'source file path' and 'destination file path' with the actual file paths you want to transfer or rename. For example, if you want to transfer a file from your desktop to your documents folder, you would insert the path to the file on your desktop in 'source file path' and the path to your documents folder in 'destination file path'.
Step 4. Log in as administrator.
Step 5. Move or rename the file immediately.
Mac Terminal is a powerful tool that requires careful use, as some commands like "rm" can delete files in a matter of minutes. If you've accidentally deleted files using Terminal, you can refer to this article for guidance on recovering them.
How to Recover Deleted Files from Mac Terminal
Don't worry if you've deleted files on your Mac, as there are ways to recover them. You can use Terminal to restore deleted files, and we'll guide you through the process. If you've permanently deleted files, we'll also show you how to recover them. To learn more about recovering deleted files on your Mac, read on.
Fix 4. Delete Preference File in Finder
If the preceding repairs didn't work, follow these procedures to erase the preference file in Finder:
Step 1. To access the Terminal app on a Mac, go to the Finder, click on "Go" in the menu bar, and select "Go to Folder" from the drop-down menu.
Step 2. To resolve the issue, go to the location /Library/Preferences/ and input the location. This holds the affected program's preference file.

Step 3. To delete a file, click on the file and select "Move to Trash" from the menu, or press the Move to Trash shortcut. After moving the file to the trash, choose "Empty Trash" to permanently delete it.
Step 4. Change or relocate the file again after restarting Mac.
If you've lost data while troubleshooting or accidentally deleted files after emptying the Trash, you can use data recovery software like Deep Data Recovery to retrieve them.
With professional Qiling data recovery software on Mac, you can easily recover permanently deleted files with just a few clicks, scanning for lost data and restoring it by following the software's instructions.
Note: To create a backup of your Mac, start by clicking on "Disk Backup" on the left. This will allow the software to recover deleted files from a backup image, preventing further damage to your disk and data, making the process safer and more reliable.
Step 1. Select the location and scan
Launch Deep Data Recovery for Mac, select the disk where data was lost, and click "Search for lost files" to initiate scanning.

Step 2. Filter and preview lost files
To find deleted files after a scan, use the file format filter to locate the desired files.

Step 3. Recover lost data or files
You can double-Click a file to preview its content, or select multiple files to recover them simultaneously. Once selected, click "Recover" to restore the lost data to a local or cloud drive.

Another common Mac error is Error Code 8072, which occurs when you are trying to delete a corrupted file, or clear a junk file. Read the following article to solve this problem.
Mac Error Code 8072 occurs when the system encounters a problem with the kernel process, which is the core of the operating system. This error can be caused by a variety of factors, including software conflicts, hardware issues, or corrupted system files. It can also be triggered by third-party software or plugins that are not compatible with the system.
This article provides solutions to resolve error code 8072 in Mac Finder, allowing you to adopt and test each one to find the fix.
Fix 5. Boot Your Mac into Safe Mode
To boot into Mac Safe Mode, turn off your Mac, then press the power button and immediately hold down the Shift key. Release the Shift key when you see the login window.
Step 1. To reset your Mac, turn it off completely, then turn it back on while holding down the "Shift" key. This will reset your Mac to its default settings.
Step 2. Press and hold the "Power" button until the Apple logo appears. Then, press "Shift" until a progress bar appears.
Step 3. You may stop holding down the "Shift" key when the login window appears.
Step 4. Use Safe Mode to log onto your Mac.
Step 6. Replace or rename the offending file.
Step 7. To escape Safe Mode, restart your Mac normally.
If your Mac can't start in Safe Mode, you can try booting in verbose mode, which can help identify the issue. To do this, restart your Mac and immediately hold down the Command (⌘) + V keys.
If your Mac won't start in safe mode, there are several ways to troubleshoot the issue. Firstly, try booting in safe mode by holding the Shift key while turning on your Mac.
If your Mac won't start in Safe Mode, don't worry - there are ways to troubleshoot and fix the issue on Ventura, Mojave, Big Sur, and Catalina. One effective approach is to reset the System Management Controller (SMC) and Power Management Unit (PMU), which can resolve issues related to the startup process. Another method is to run the built-in Diagnostic Tool, which can identify and fix hardware-related problems.
Conclusion
Error code 8076 may be resolved by restarting your Mac, checking file permissions, running Terminal commands, deleting preference files, or booting in Safe Mode.
Before making any repairs, back up any vital data and consider using Deep Data Recovery for Mac to restore mistakenly deleted files. If you continue to experience difficulties or error code 8076 persists, contact Apple Support or a qualified technician for assistance. Don't let this error slow you down - use these solutions to recover access to your macOS files.
Mac Error Code 8076 FAQs
Here are some questions people also ask when they search for error code 8076 on Mac: What is error code 8076 on Mac? How to fix error code 8076 on Mac?
1. What is Mac error 100006?
Mac error code 100006 can be frustrating as it prevents access to programs and completion of specified operations on Mac devices, including MacBook Pro, Air, and iMac. This error code can be caused by various factors such as corrupted system files, software conflicts, or outdated operating system.
2. What does "An unexpected error occurred (error code -8076)" mean on Mac?
The error occurs when there are issues with renaming or transferring Mac files, possibly due to system faults or file permission conflicts.
3. How to fix error code 8076 on my MacBook Air?
To fix MacBook Air error number 8076, verify file permissions, restart your Mac, use Terminal commands, remove preference files, or boot into Safe Mode. These steps are outlined in the provided article.
4. Why can't I rename a folder I have just created on Mac?
If you're having trouble renaming a newly created folder on your Mac, file permission difficulties may be the culprit. To troubleshoot, check if you have write access to the folder, and if not, try one of the solutions provided to resolve the issue.
5. Why does it say error 8076 occurs?
On a Mac, error 8076 occurs when there is an issue with managing or accessing files, often due to a locked or in-use file or folder by another program.
Related Articles
- Solved: Lenovo Laptop Screen Black But Still Running Issue
- SSD Not Detected in BIOS | Top 8 Ways to Fix🔥
- How to Improve SSD Read and Write Speed [100% Working Solutions]
- Learn How to Install on ReFS Partition Today | Windows 11 Installation Made Simple