SSD Not Detected in BIOS | Top 8 Ways to Fix🔥
The BIOS plays a crucial role in managing your computer's hardware, including storage devices. When your SSD doesn't appear in the BIOS, it may prevent you from accessing your important data. To ensure the performance and integrity of your SSD-based system, it's essential to address such issues promptly.
This article from Qiling lists common reasons for the "SSD not detected in BIOS" error, providing a step-by-step guide to effectively solve the issue.
Why My SSD Is Not Detected in BIOS
Experiencing the BIOS not detecting SSD can be concerning, especially when you rely only on your SSD for storage. To troubleshoot this issue, it's essential to understand the main cause, which can be due to a faulty SSD, incorrect BIOS settings, a loose connection, or a compatibility issue between the SSD and motherboard. Understanding the root cause can help you find a quick solution to ensure proper data access.
| Loose or Faulty Data Cables | If the SATA and NVMe data cable connecting the SSD to the motherboard is damaged, you should replace it with a new one to ensure proper data transfer and prevent any potential issues with the drive. This is especially important if you're using a high-performance NVMe drive, as damaged cables can significantly impact its performance and reliability.motherboard If the SSD is loose or damaged, or if the power cable to the drive is faulty, the BIOS will not be able to detect the drive. |
| Drive Issues | SSDs can fail due to manufacturing defects or physical damage, and their compatibility with older motherboards may also be an issue. |
| BIOS Settings | Incorrect BIOS settings or outdated BIOS can lead to SSD detection issues, and the drive won't appear if it's not enabled in the BIOS settings. |
| Firmware or Driver Updates | Outdated SSD firmware Outdated firmware and missing drivers can cause detection problems with an SSD. Keeping the SSD's firmware and drivers up to date is essential for proper functionality. |
| Hardware Issues | Issues with other hardware components, such as a malfunctioning motherboard, faulty ports, or a defective PSU, can indirectly affect SSD detection. |
| Secure Boot Settings | Secure Boot is a feature in some BIOS settings that can prevent an SSD from being detected if its bootloader isn't recognized as secure, and is enabled. |
| Physical Damage | Physical damage to the SSD drive, such as a bent connector or water damage, can cause it to malfunction and go undetected, potentially leading to data loss and hardware failure. |
8 Ways to Fix BIOS Not Detecting SSD
To resolve the issue of a Solid State Drive (SSD) not being detected in the BIOS, it's essential to address the common causes. This typically involves checking the SSD's power and data cables, ensuring they are securely connected to the motherboard. Additionally, verifying that the SSD is properly seated in its designated slot on the motherboard is crucial.
- Fix 1. Troubleshoot Hardware Faulty
- Fix 2. Disconnect Other Drives
- Fix 3. Run Hardware & Devices Troubleshooter
- Fix 4. Format SSD Drive
- Fix 5. Configure SSD Settings in BIOS
- Fix 6. Update BIOS
- Fix 7. Reset BIOS Settings to Default
- Fix 8. Update Device Drivers
Fix 1. Troubleshoot Hardware Faulty
Most issues with SSDs are actually caused by hardware failures, such as broken cables or incorrect connections, rather than any inherent problems with the drive itself. To troubleshoot the issue, it's essential to check the hardware for any potential problems, including damaged cables or incorrectly connected components.
Step 1. To resolve the issue, power off your computer, then ensure the SATA or NVMe data cable is securely connected to your SSD drive. Additionally, verify that the power cable is properly connected to the SSD drive.
Step 2. Insert the SSD drive into the SATA port.
Step 3. Check if SSD is now detected in the BIOS.
Step 4. Reset the BIOS settings to default.

Fix 2. Disconnect Other Drives
If two drives are incompatible, they may cause issues with other devices' performance and visibility. To resolve this, you can try to format the drives to a compatible file system, such as NTFS or FAT32, or use a third-party tool to convert the file system. You can also try to use a USB drive or external hard drive as a bridge to connect the incompatible drives to the computer, allowing you to transfer files between them.
Step 1. Remove all drives except the SSD, and then restart your computer.
Step 3. Enter BIOS.
Step 4. Check if the SSD is showing.
Step 5. If your computer is not detecting the SSD, try reconnecting the SSD to a different SATA port. If it still doesn't work, try removing any other drives connected to the same SATA port and reconnect the SSD. If that doesn't work, try removing the SSD and reconnecting it to a different SATA port.
Fix 3. Run Hardware & Devices Troubleshooter
To resolve computer issues, run the Troubleshooter, which detects and fixes problems affecting user experience. Specifically, use the Hardware and Drive Troubleshooter to address SSD-related problems.
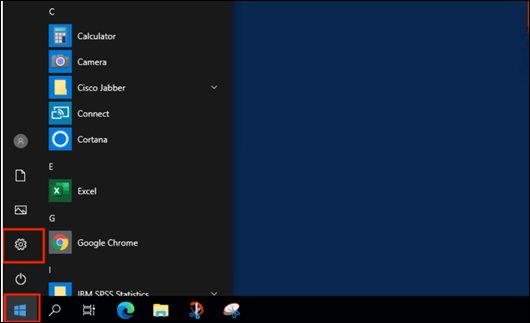
Step 1. Go to "Settings".
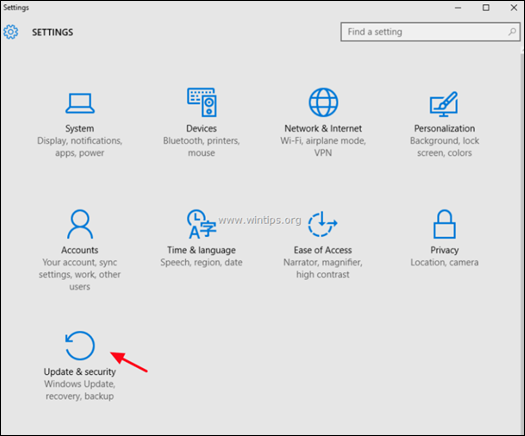
Step 2. In Settings, click on "Update & Security".
Step 3. Select the "Troubleshoot" option.
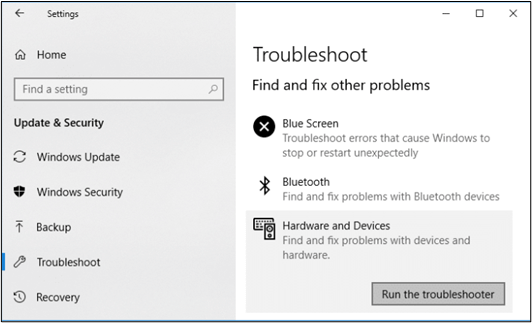
Step 4. Under Hardware and Devices, click on "Run the troubleshooter".
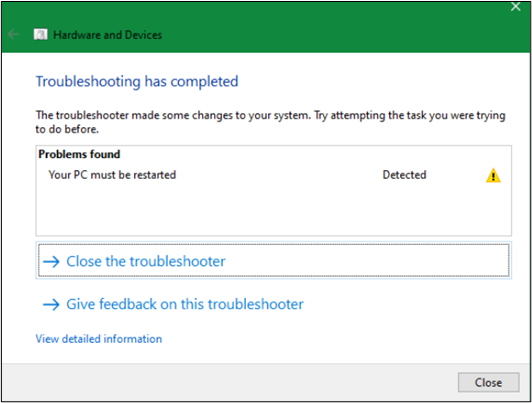
Step 5. It will scan your hardware and devices for any problems.
Step 6. The troubleshooter will try to fix the problem automatically.
Step 7. The troubleshooter will provide a report on whether the issue was resolved and offer any further steps you can take to resolve the problem if it wasn't fixed.
Fix 4. Format SSD Drive
If your SSD drive contains malware or viruses, it may not function properly on your computer. The only way to completely clean it is to format the drive, which will erase all data and restore it to its original state.
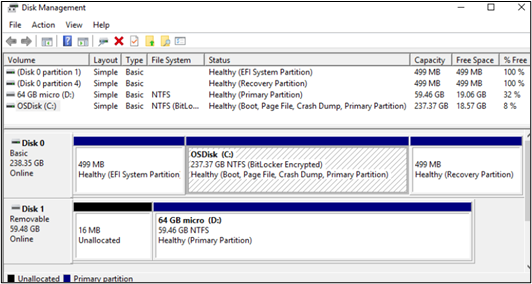
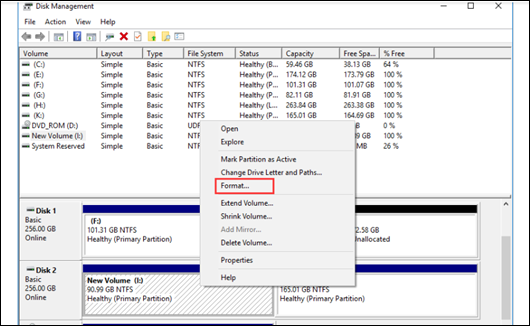
Step 1.To open the Disk Management tool, press the "Windows key + R" shortcut on your keyboard. This will open the Run dialog box, and by default, it will open the Disk Management tool. You can also type "diskmgmt.
Step 2. Open the SSD drive and select "Format".
Step 3.Select the file format and allocation unit size for your SSD, typically NTFS, and leave the allocation unit size at its default setting.
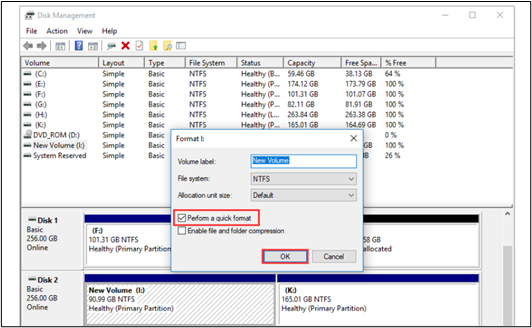
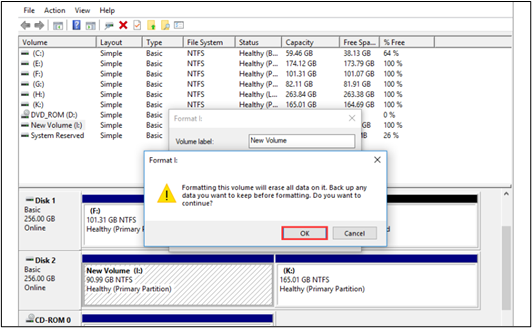
Step 4. Click "OK".
Fix 5. Configure SSD Settings in BIOS
Some BIOS systems may not allow new SSD drives that contain specific settings, which can cause issues. To resolve this, configuring SSD settings in the BIOS can be a helpful solution.
Step 1. Boot up your computer.
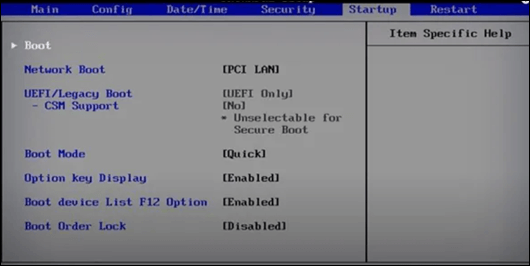
Step 2. Open the Boot menu in BIOS.
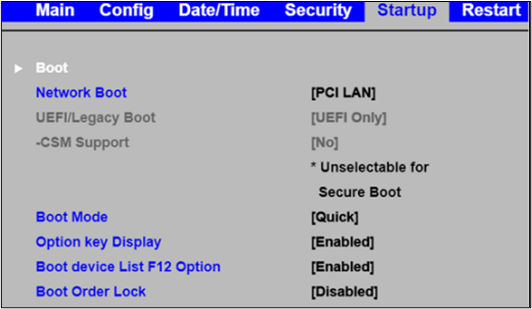
Step 3.Configure the SSD settings on your motherboard, as the exact option name may vary depending on the manufacturer.
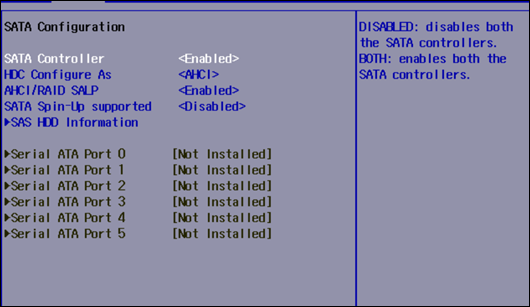
Step 4. Save your changes and exit BIOS.
Fix 6. Update BIOS
If your BIOS is outdated, it may not work well with an SSD drive. To resolve this, update your BIOS version to ensure compatibility with your SSD.
Step 1. Download the BIOS updated version.
Step 2.To create a bootable USB drive, use the Qiling Disk Master tool.

Step 3. Move the file to the bootable USB.
Step 4. Check if SSD is now detected in BIOS.
Here are some articles about how to update BIOS:
Fix 7. Reset BIOS Settings to Default
If your BIOS is not detecting the SSD, it might be due to unintentional settings changes. Try resetting the BIOS settings to their default values to see if it resolves the issue.
Step 1. Restart your computer.
Step 2. Press "F9", and a window will open asking, "Load Setup Defaults?".
Step 3. Select the "Yes" option and press "Enter".
Step 4. Save your changes and exit BIOS.
Fix 8. Update Device Drivers
SSD drivers are essential for your SSD to function properly and be recognized by the BIOS. If the drivers are outdated, you may face issues accessing your SSD drive.
Step 1. Open Device Manager.
Step 2. Select "Update driver" for updating drivers.
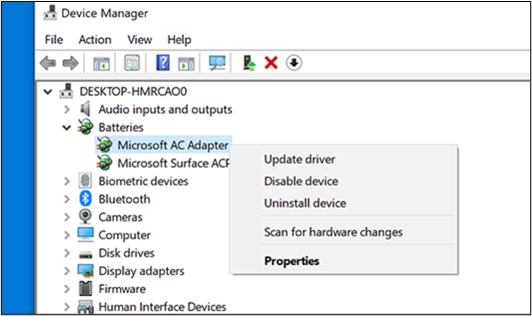
Step 3. Select the option "Search automatically for updated driver software".
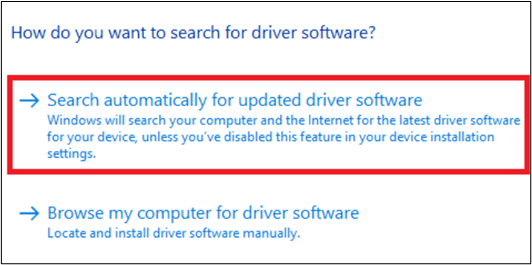
Step 4. Windows will automatically search for and install the latest driver for your SSD.
Share this post if it helps!
Bonus Tip: Backup SSD to Prevent Data Loss
Although an SSD drive provides a long-term solution, it can still lose data, making it crucial to create a backup of your SSD using a reliable backup app.
Qiling Disk Master is a powerful and user-friendly backup and recovery software that offers full, incremental, and differential backup options, storing data with high security and integrating with all cloud services, allowing users to access their data anywhere.
Here are the critical features of Qiling Disk Master.
- Disk Cloning: You can clone a hard drive to create a backup and recovery copy of the entire drive, including system files, partitions, and data.
- Data Backup: Users can create a backup of a large amount of data, including files, SSD, and operating system, and schedule it to run regularly.
- Cloud Backup: Qiling Disk Master integrates with popular cloud storage services like Google Drive, Dropbox, and OneDrive, allowing users to store backups offsite for added security.
- Universal Restore: Installing Windows on a new PC without an operating system is made easy by the universal restore feature, which allows for backing up and restoring a system to dissimilar hardware.
After downloading this powerful tool, follow the guide and back up your SSD.
Step 1. Start with selecting the backup contents.

Step 2. There are four backup categories, File, Disk, OS, and Mail, click Disk.
Step 3. It is available to back up a whole disk or a certain partition. Choose the one you need and click OK.
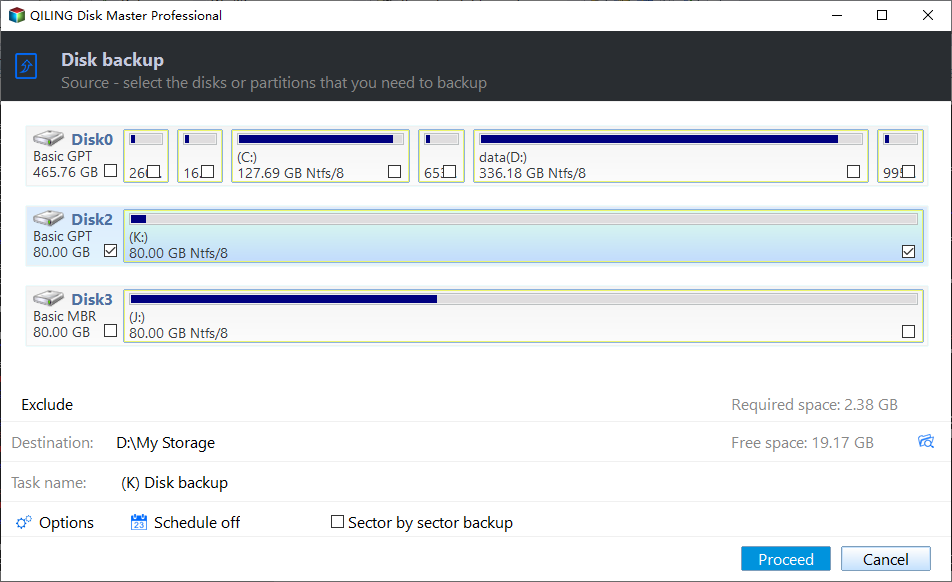
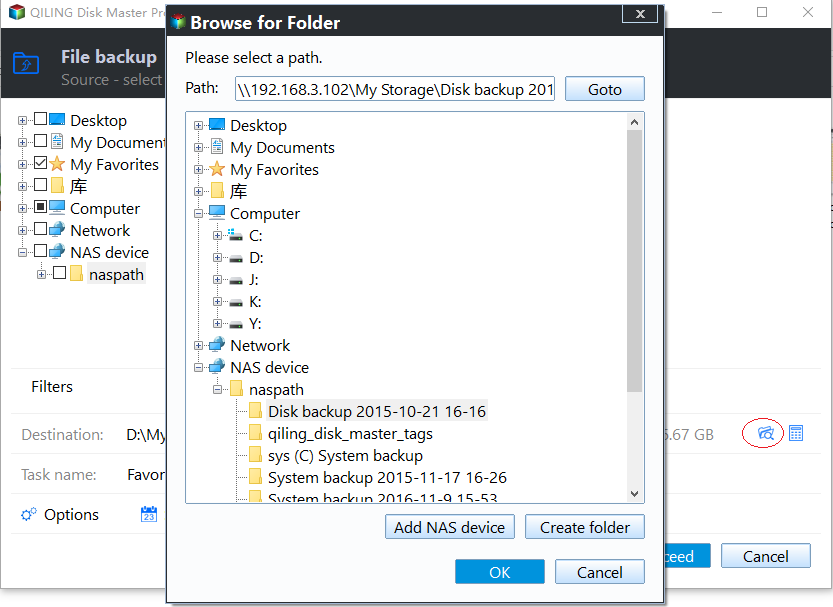
Step 4. Select the destination where you want to save the backup.
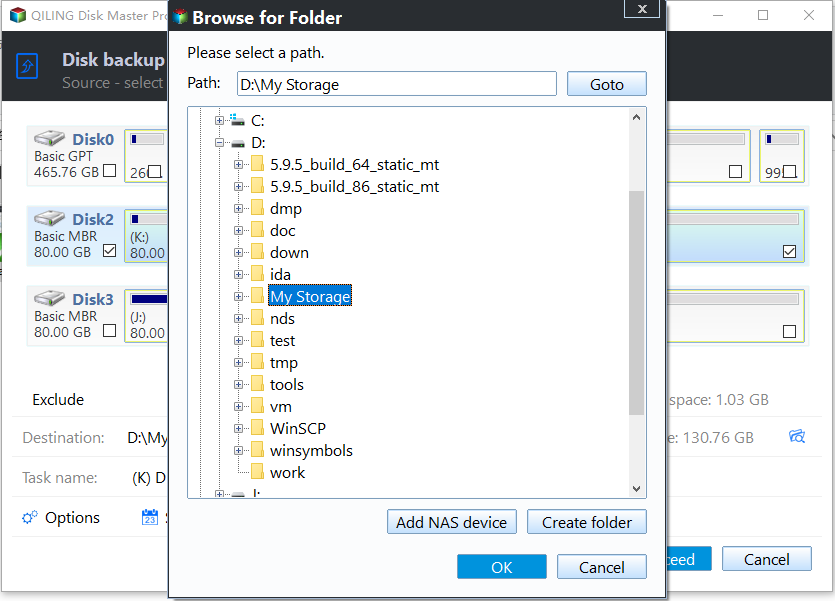
Step 5. For disk/partition backup, you can save the backup to either a local drive or a network-attached storage (NAS) device.
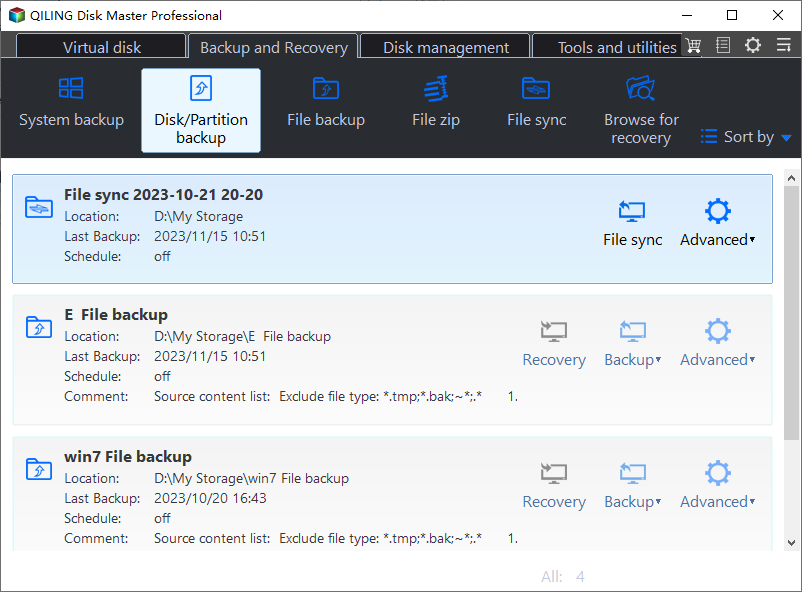
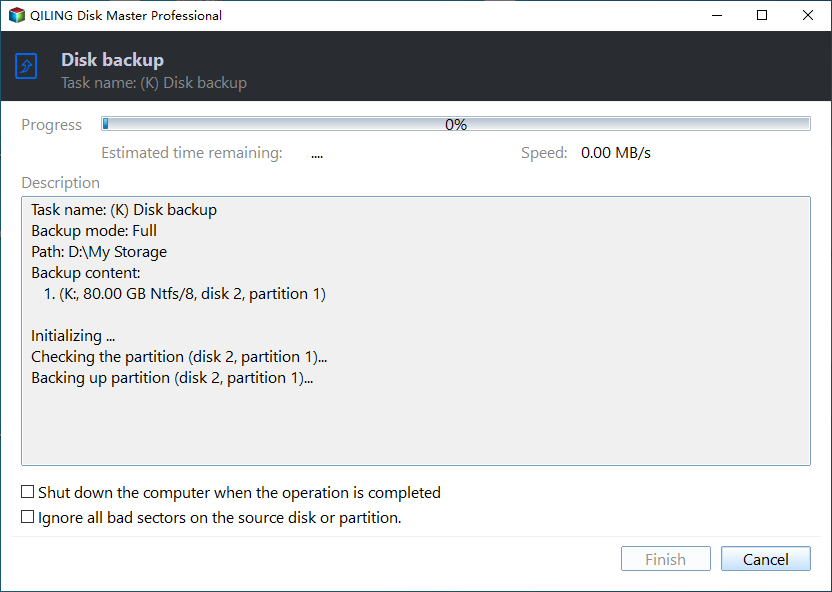
Step 6. After completing the backup process, the task will be displayed on the left side. You can right-click on any task to further manage your backup, such as recovering it, creating an incremental backup, and more.
To Wrap Things Up
UEFI BIOS not detecting SSD can cause significant problems and potential data loss. The issue can be resolved by trying the 8 solutions mentioned, but if the problem persists, it's essential to create a backup of your data using reliable backup software.
Qiling Disk Master The software stands out as a valuable solution for safeguarding your data and ensuring the integrity of your SSD, by creating efficient backups that not only store your data but also prevent future risks of data loss.
FAQs on SSD Not Detected in BIOS
When a user encounters issues with their SSD not being detected in the BIOS, it's often due to compatibility problems between the SSD and the motherboard. This can be resolved by checking the BIOS settings for the correct SSD type and compatibility. Additionally, ensuring the SSD is properly connected to the motherboard and that the SATA port is functioning correctly can also resolve the issue.
1. Why is my M.2 SSD not showing up in BIOS?
SSDs may not show up if the slot is disabled in BIOS settings or the SSD is not aligned correctly. Check BIOS settings and ensure the SSD is securely installed.
2. How do I enable SSD boot in BIOS?
To enable SSD boot:
- Access BIOS settings,
- Navigate to the Boot menu.
- Set the SSD as the first boot device in the boot order or priority.
3. How do I know if my BIOS is detecting my hard drive?
In the BIOS settings, navigate to the "Storage/Drives" section, where your hard drive or SSD should be detected and displayed with its capacity and model name.
Related Articles
- Solve System Reserved Partition on Wrong Drive: Everything You Should Know
- macOS Cannot Verify That This App Is Free from Malware [Error Solved]
- What Should I Do After Accidentally Marked Drive C Active [2023 New]
- Do I Need to Backup OneDrive? [Why & How-to Guide]
- What Is the Best LG TV USB Format & How to Set It? [Step-by-Step Guide]
this guide will hely you to choose the suitable format for LG TV USB. And you will also be familiar with the three simplest ways to set the best LG TV USB format. - Fix Mark Partition as Active Greyed Out in Disk Management in Windows 10/11
Fix Mark Partition as Active greyed out in Windows. Learn why the option is unavailable and how to repair boot partition settings.