In-depth Guide | How to Update BIOS Without CPU🔥
Upgrading your BIOS is a potentially tricky process, but it's possible to update your motherboard's firmware even without a CPU installed. In this article, we'll demonstrate how to update BIOS without a CPU, a process that's often considered challenging. We'll show you the way to upgrade your motherboard's firmware, even if you don't have a CPU, using a method that's often referred to as "flashback". This process allows you to update your BIOS without the need for a CPU, making it a useful option for those who want to upgrade their motherboard's firmware without the hassle of installing a CPU first.
Preparations for Updating Your Motherboard BIOS
To safely update your motherboard BIOS, start by downloading the correct BIOS version for your specific motherboard model from the manufacturer's website. Then, create a bootable USB drive with a BIOS update tool, such as Rufus, and copy the downloaded BIOS file onto the drive. Next, backup all important data and shut down your computer. Now, plug in the USB drive and enter the BIOS settings by pressing the designated key (usually F2, F12, or Del) as your computer boots up.
Backup Your Computer for Data Security
Updating the BIOS of your computer is generally safer than installing a new one, as it can potentially destroy your motherboard. To be on the safe side, it's always a good idea to create a system image before making any changes to your computer's BIOS, so that you can restore it to a working condition if something goes wrong.
To avoid potential issues, it's recommended to create a backup of your computer before proceeding, especially in case of BIOS corruption. This is where software like Qiling Disk Master comes in handy, allowing you to create a backup of your system.
Qiling Disk Master Pro is an incredible backup and recovery tool that helps users back up all their important data, including their computer's system, apps, files, and multiple drives at once. It allows users to create various backup modes, such as full, incremental, and differential backups, and store the backups in different storage paths.
Here are some key features that make Qiling Disk Master a reliable backup tool:
- 250GB of free cloud storage is available to back up a computer to the cloud. This allows users to store their files, photos, and other data in a secure and accessible location, providing a safeguard against data loss in case of a computer failure or other disaster.
- Create a security zone to prevent malicious attacks on data
- To clone a hard drive and migrate your OS from a traditional HDD to an SSD, you can use a cloning software such as Qiling Disk Master. These tools allow you to create a sector-by-sector copy of your existing HDD to the new SSD, preserving the operating system, installed applications, and all data.
- To create a WinPE bootable disk, you can follow these steps: Download the Windows Assessment and Deployment Kit (ADK) from Microsoft's website. This kit includes tools for creating and managing WinPE images.
- Transfer an operating system from one computer to another
There are many more reasons to use this exceptional backup software. But here is how you will use it to back up your computer before performing a BIOS update without CPU.
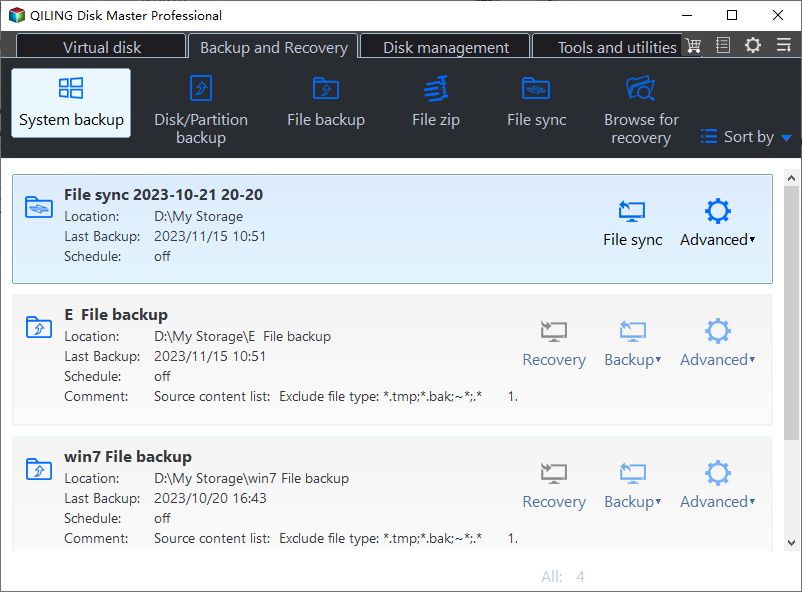
Step 1. Launch Qiling Disk Master on your computer, click Create Backup on the home screen, and then select backup contents by clicking the big question mark.

Step 2. To back up your Windows operating system, click on "System backup" to initiate the backup process.
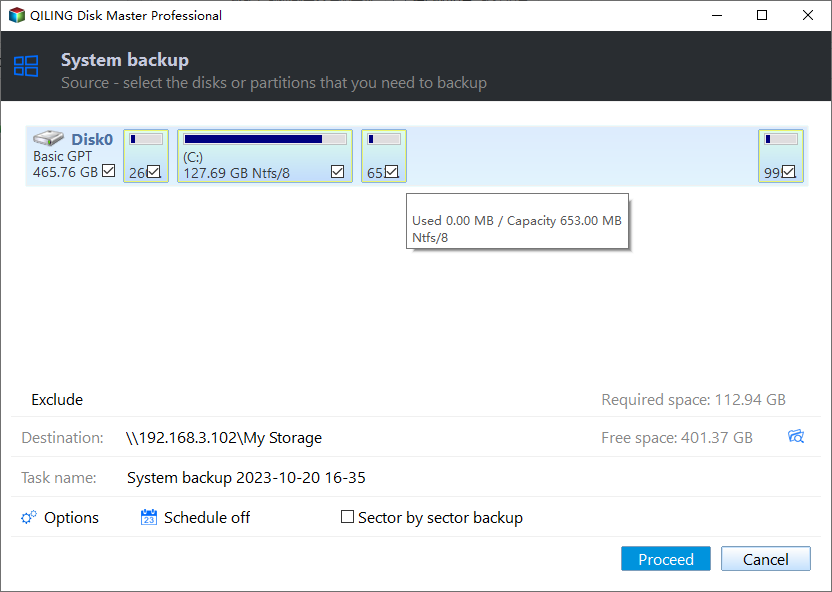
Step 3. Your Windows operating system information and all system related files and partitions will be automatically selected, so you don't need to do any manual selection at this step. Next, you'll need to choose a location to save the system image backup by clicking the illustrated area.

Step 4. The backup location can be another local drive on your computer, an external hard drive, network, cloud, or NAS. It's generally recommended to use an external physical drive or cloud to preserve system backup files.
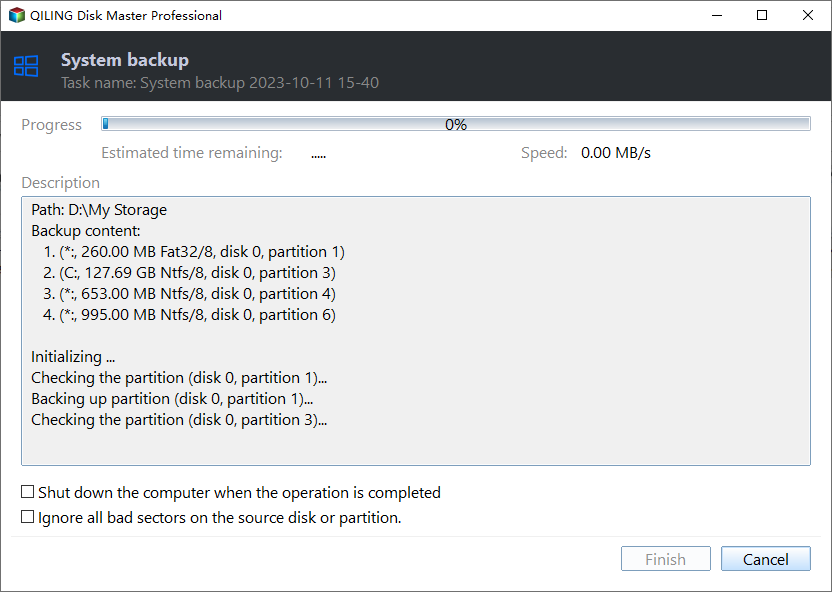
Step 5. The customization settings for automatic backup schedules, including daily, weekly, monthly, or event-based backups, can be accessed through the Options button. Upon selecting a schedule, users can proceed to initiate the Windows system backup process, which will display the completed backup task on the left side in a card style.
The Do's and Don'ts for Updating Your BIOS
When flashing the BIOS, it's essential to follow a set of guidelines to ensure a smooth and stress-free process. To prepare, make sure to create a list of things to do and avoid before updating your BIOS. This list should include actions such as backing up important data, creating a BIOS backup, and disconnecting unnecessary peripherals. On the other hand, it's equally important to know what not to do, such as not touching any settings, not interrupting the update process, and not relying solely on the manufacturer's instructions.
| ⭕Should Do | ❌Shouldn't Do |
|---|---|
|
|
To avoid issues during the BIOS update, it is essential to ensure that your power supply is stable and that the USB flash drive you are using is properly formatted and contains the correct BIOS file.
How to Flash BIOS Without CPU
Key takeaways:
To update the BIOS, simply drop the BIOS file onto a FAT32 formatted USB flash drive, insert it into the USB BIOS Flashback port, and press the Flashback button near it. This process requires no CPU, only an ATX power connector.
Flashing the BIOS without a CPU is a relatively simple process. Before starting, you'll need a USB drive and a stable internet connection. Once you have these, you can proceed with the update process.
- Go to your motherboard manufacturer's website;
- Enter the motherboard BIOS model, then find and download the latest BIOS version available for it.
- Copy the BIOS file to a USB drive that has been formatted as FAT32.
- If the motherboard manufacturer provides instructions to rename the BIOS file, follow those instructions. This ensures compatibility and proper functioning of the BIOS with the motherboard.
- To update your motherboard's BIOS, disconnect the USB drive containing the update file from your computer. This ensures that the BIOS update process is not interrupted by any external connections.
To upgrade BIOS without a CPU, you will need to remove the CPU and other components from the motherboard, then use a specialized tool to access the BIOS chip. Next, you will need to connect a jumper wire or use a specific adapter to access the BIOS chip's pins.
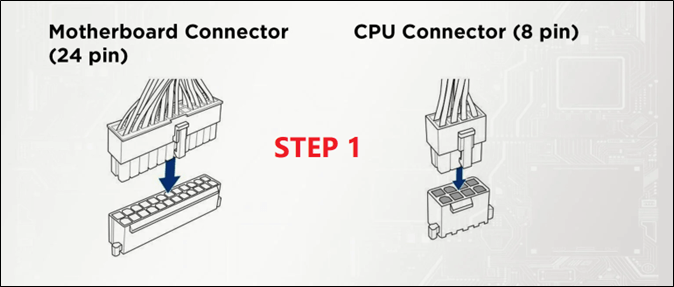
Step 1: To prepare your computer for a new power supply, you need to disconnect all cables from the old power supply and connect only the 24PIN ATX and CPU 8PIN to your motherboard. This will ensure that your system remains powered on while you work on replacing the power supply.
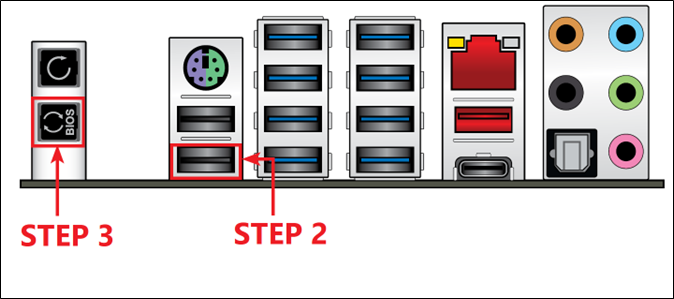
Step 2: The USB with the BIOS update file should be connected to the dedicated BIOS flashback port.
Step 3: Press the BIOS flashback button and wait for the BIOS light to turn on.
Step 4: Wait for the LED flash BIOS button to stop flashing.
After completing the BIOS update process, ensure the power supply remains connected until the light stops flashing, which should take around 2-3 minutes. If the light stops flashing, it indicates the BIOS update is complete. Follow each step carefully to successfully update your BIOS without using the CPU.
More articles related to BIOS:
Why Should You Update Motherboard BIOS
Updating the BIOS without a CPU is now possible with the latest generation of motherboards, which allows for a BIOS flashback, enabling users to update the BIOS even without a CPU installed.
Updating your motherboard BIOS is crucial, but you might not need to do it. To check if you need to, understand that BIOS updates are typically required to fix bugs, improve performance, or add new features to your motherboard. If your motherboard is relatively new or you've never experienced any issues, you might not need to update it.
Motherboard creators often provide BIOS updates to fix bugs, including issues such as incorrect fan control, faulty USB ports, and other system-related problems. These updates can improve the overall performance and stability of the motherboard, making it a crucial step in ensuring the longevity and reliability of the system. By applying these updates, users can resolve various problems and enjoy a smoother computing experience.
- Providing new RAM support;
- Providing more support for the latest Gen of CPUs;
- And fixing any additional issues with the motherboard version.
The only reason to flash your BIOS is if it's going to fix a problem or improve your PC's performance, as updated BIOS versions are usually listed on the motherboard manufacturer's website, typically below the BIOS upgrade page.
To Wrap Things Up
Updating BIOS without a CPU installed has become a more stress-free process, thanks to the ability of motherboards to update BIOS through the flash BIOS button. This feature allows users to flash their BIOS without the need for a CPU, making the process much simpler and less intimidating. By understanding how to use the flash BIOS button, users can successfully update their BIOS and enjoy a smoother computing experience.
To update the BIOS on a motherboard with a BIOS flashback button, it's essential to back up your data first using a tool like Qiling Disk Master Pro. This is a crucial step before downloading the BIOS from the official website. The steps to update the BIOS, including the use of the BIOS flashback button, should be followed carefully, and any do's and don'ts should be adhered to, as they are compulsory to avoid any potential issues.
FAQs on How to Update BIOS Without CPU
Performing a motherboard BIOS update without a CPU can be a bit tricky, but there are some frequently asked questions that can help users navigate the process and troubleshoot any issues that may arise. By consulting these FAQs, users can gain a better understanding of the steps involved and be better equipped to handle any challenges that come up during the update process.
1: Can I do BIOS update without USB?
You can update your BIOS without a USB by downloading the BIOS update utility or using UEFI firmware settings, which can help you flash your BIOS without the need for a USB.
2: Can we update BIOS without OS?
You can update a PC's BIOS without an operating system, but you'll need another PC or laptop to prepare a USB drive with the FAT32 file system. This means you'll have to use another computer to download and format the USB drive, which can then be used to upgrade the BIOS on the PC without an OS.
3: What happens if BIOS does not support the CPU?
12th Gen Intel Motherboards require a BIOS update to support 13th Gen CPUs, but not 12th Gen CPUs. Users must update the BIOS to a firmware that supports the specific CPU they want to use.
4: How do I update my BIOS if my computer won't boot?
You can either try the UEFI BIOS update method or simply try the USB BIOS flash without CPU option, which requires another PC or laptop to download the BIOS to a FAT32 USB and then use the UEFI or BIOS flashback button/USB header at the back.
Related Articles
- [Download] Windows 10 Recovery Tool for 32 Bit and 64 Bit
- Windows 7 Backup and Restore Blank Screen? Here Are Fixes!
- Azure File Backup: How to Backup Files in Azure & Find Best Alternative
- How to Upgrade Windows 7 to Windows 11 with 2 Options
- Windows 10 Game Save File Location🔥All You Want to Know
- Add Folder to OneDrive Backup Without Moving: 3 Working Ways
- How to Backup Windows 11 to Synology NAS (3 Working Ways)👍
Backing up Windows 11 to a Synology NAS can be easily done in three convenient ways, making recovery and collaboration a breeze.