How to Backup Windows 11 to Synology NAS (3 Working Ways)👍
Backing up Windows is a good practice that helps protect your data in case of unexpected events. If you have a NAS backup device like Synology or QNAP at home or in the office, you can easily back up your Windows 11 system to it, keeping your files safe and secure.
A Network Attached Storage (NAS) device connects to your computer network, providing shared access to data for multiple user devices and making data continuously available for employees to collaborate over a network.
This guide explains three convenient ways to back up Windows 11 to Synology NAS. Each method has different requirements and setup time, so you can choose the one that best matches your backup needs.
The Benefits of Backing Up Windows to NAS
Malware and ransomware attacks can encrypt data and make it inaccessible. Saving Windows 11 backups on a NAS backup device gives you a centralized recovery location and can be more convenient than searching local drives for the latest backup file.
- 🪄Easy to set up and use
- 🔑Comparatively secured than local drives
- 💻Easily used with different and multiple computers
- 💾RAID support protects against data loss
How to Backup Windows 11/10/8/7 to Synology NAS - 3 Ways
Windows 11 backup to a Synology NAS is becoming increasingly popular for convenient recovery in case of a ransomware attack or hard disk failure. Windows 11 offers a free backup solution through Backup and Restore and System Image creation, while also allowing users to rely on third-party tools like Qiling Disk Master for added security.
| Methods | Effectiveness | Required Time | Difficulty |
| Qiling Disk Master👍 | Very High | Time-saving | Super Easy |
| Create a System Image | High | 30 - 40 minutes | Difficult |
| Selectively Backup Files via Backup and Restore | High | 30 - 40 minutes | Moderate |
Method 1. Backup Windows PC to NAS via Professional Backup Software
Qiling Disk Master is a professional backup tool that allows Windows users to easily back up their data to NAS, including file folders, disks, partitions, and the operating system, with a simple user interface and quick backup times.
| ⛈️Enhanced backup efficiency | Carry out a differential or incremental backup To optimize backup time and disk storage, one approach is to rely on a previously completed full backup. By doing so, you can shorten the time required for subsequent backups and conserve disk space. |
| ⏳Schedules backup | Daily, weekly, monthly frequency, auto-backups |
| 🔐Simple backup management | Manages old backups to delete, split, merge, compress, and save disk space by keeping only useful backups. |
| 🔑Secured password-protect backups | Encrypts the backup files for double data protection to value privacy and keep the data confidential. |
| 🖥️Bootable backup and recovery | Creates a WinPE bootable disk to repair/reinstall the PC during breakdown |
| 💾Disk and Partition cloning | A process called cloning or imaging can be used to create an exact replica of the old hard drive on the new one, preserving all data and settings, eliminating the need for reinstalling Windows. This method involves creating an image of the old drive, which is then transferred to the new drive, allowing for a seamless transition. |
| 🦠Restores system to dissimilar hardware | Seamlessly restore a system backup image from one PC to another with different hardware, or migrate from a physical machine to a virtual machine (P2V). |
🪜Steps to back up your system to NAS with Qiling Disk Master:
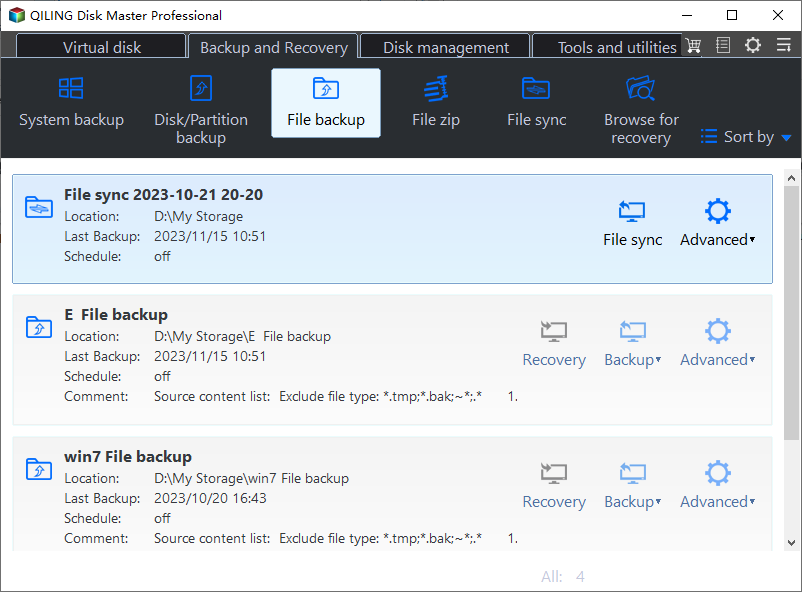
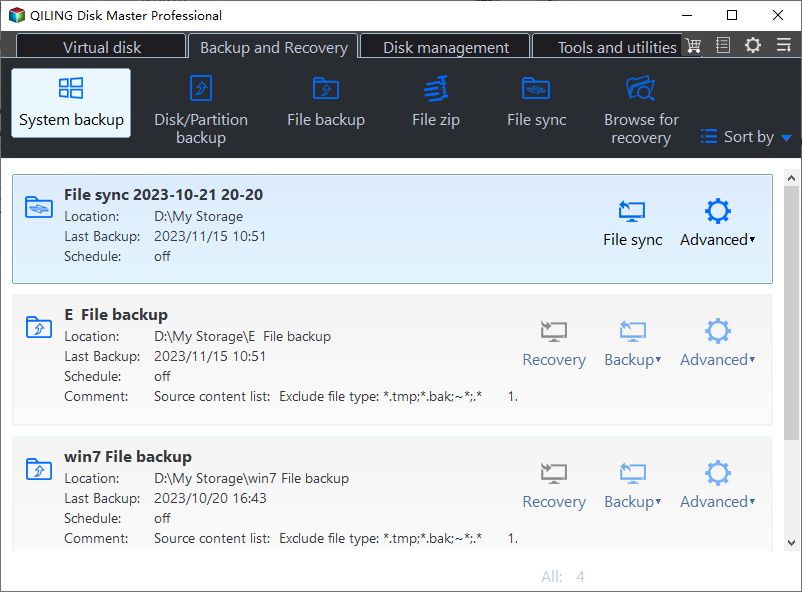
Step 1. On the main page, click "Backup and recovery".

Step 2. Among the four available categories, click System backup.
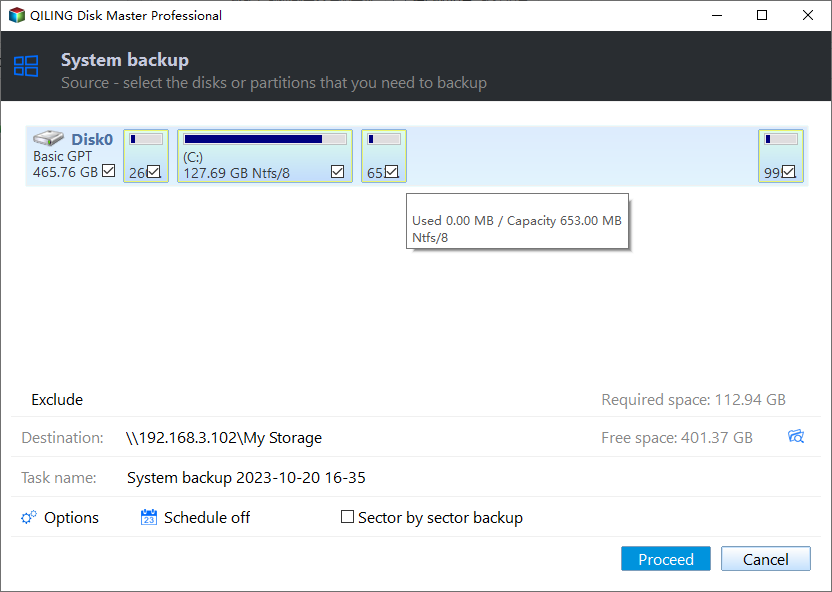
Step 3. Qiling Disk Master will automatically select your system partition, requiring only the selection of a backup destination.

Step 4. Both local drive and NAS are available for you to save the backup file.
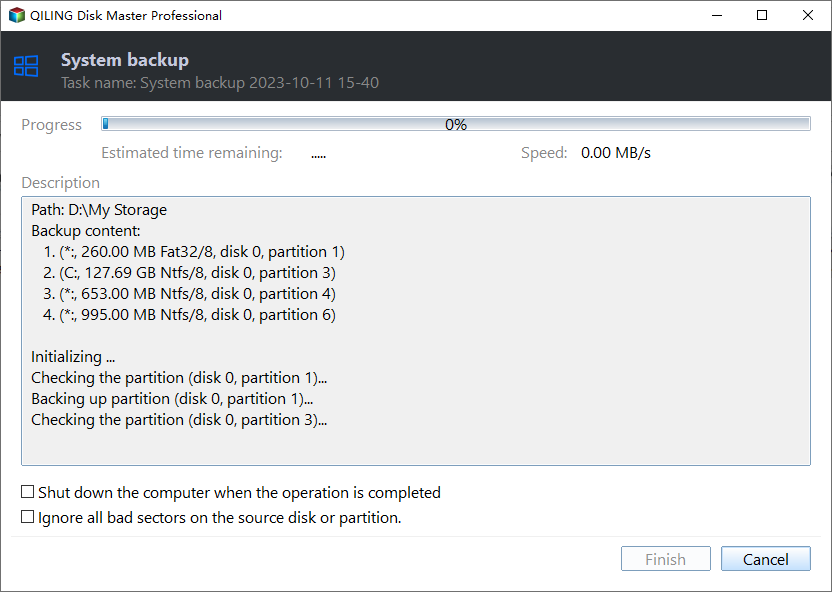
Step 5. After completing the backup process, you can check the backup status by right-clicking the backup task on the left, which will also allow you to recover, open, or delete the backup.
Method 2. Backup Windows 11 by Creating a System Image
A system image backup captures the entire disk, including files, apps, settings, and the operating system, allowing you to restore your system to a previous state in case of a disaster, such as a ransomware attack or hard drive failure.
👍Pros:
- Comprehensive backup method
- Enables recovery of individual files and the entire system
- No need to install and launch
- Produces larger files, consuming more storage space
- Backup the OS, user data, and apps
- Easily migrates a system to a new hard disk
👎Cons:
- Not suitable for use with cloud storage
- Slower than file-level backups
See also:

[All-in-One] Create Windows 11 Backup to NAS (Network drive)
Choosing a safe and secure backup location is key to success in the world of data protection. A Network-Attached Storage (NAS) device, also known as a network hard drive, is an emerging network-based storage solution that can serve as a reliable backup location. This article will explore the possibility of backing up Windows 11, including files and systems, to a NAS.

🪜To create a system image of your Windows 11 PC using Backup and Restore, follow these steps: Connect your PC to a power source, external hard drive, or network drive. Open the Control Panel and click on System and Security.
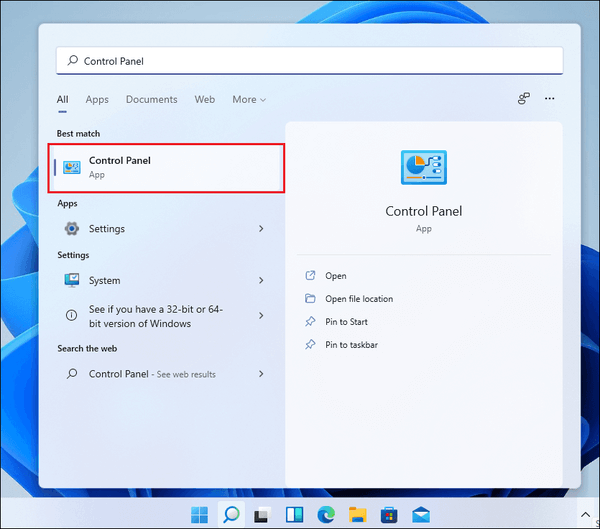
Step 1. Type `Control Panel` in the Windows Search Bar and press Enter to open it.
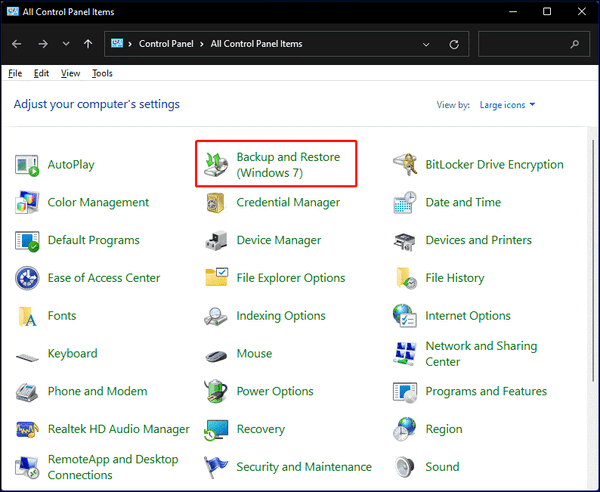
Step 2. System and Security > Click Backup and Restore Windows (7)
Step 3. Click Create a system image.
Step 4. Select a drive to save the system image and choose Next.
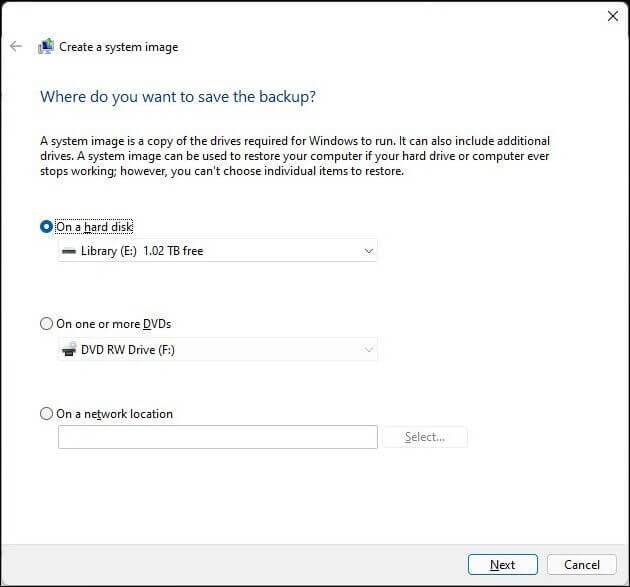
- 📓Note:
- If you want to keep the old system image, you can copy the entire WindowsImageBackup folder to a new location and then create a new system image. This way, you can keep the old image for reference or to revert to it later.
Step 5. To start the backup process, tap the "Start Backup" option. It is essential to have your AC adapter connected during this process and avoid shutting down your device forcefully to prevent any potential errors.
Step 6. Click "No" when you receive a notification prompt asking to create a system repair disc.
Step 7. Once your system image creation is completed successfully, select Close.
If the backup steps feel complicated, start with the method that matches your setup: Qiling Disk Master for a guided backup, Backup and Restore for a Windows system image, or File History for file-level protection.
Method 3. Selectively Backup Windows 11 via Backup and Restore
Backup and Restore (Windows 7) is a Windows built-in solution that allows you to customize and backup specific folders, which can be accessed through the Control Panel, even though the entrance in Windows Settings has been replaced with OneDrive backup.
🪜To create a custom backup on Windows 11 using the Backup and Restore feature, follow these steps:
Step 1. To access the Control Panel, click the Search icon in the center of the taskbar, which will open it.
Step 2. Find and select Backup and Restore (Windows 7).
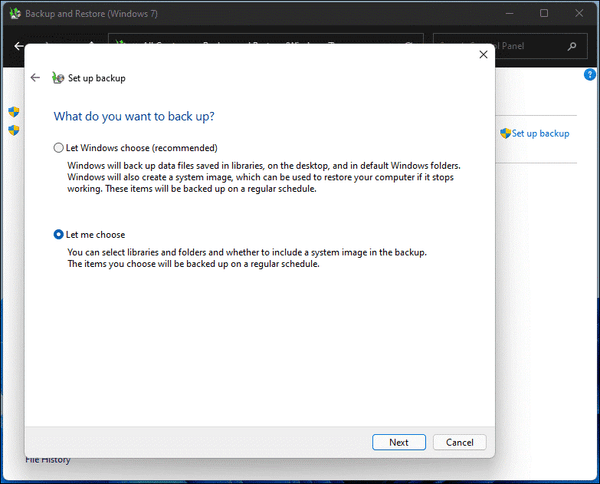
Step 3. To set up a backup, click the "Set up backup" option and enter the backup settings. Choose a destination for the backup and tap "Next" to proceed.
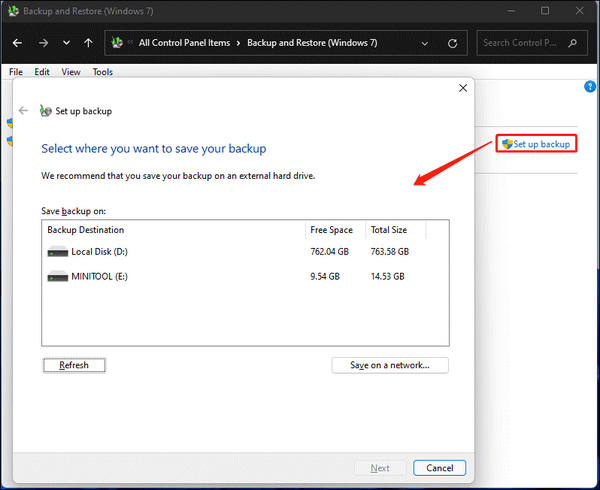
- 📔Note:
- If you have mapped your NAS storage, you can choose the drive letter you mapped your NAS to and tap Next. If not, tap Save on a network to proceed. Otherwise, you can map your NAS storage by tapping on the "Save on a network" option, which will allow you to select the drive letter and proceed.
Step 4. To add your shared network drive, tap 'Browse' in the 'Select a Network window', enter your network credentials, and then tap 'Next'.
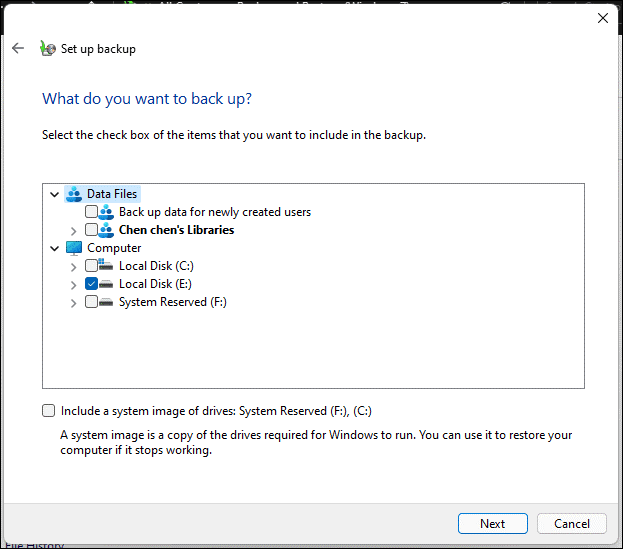
Step 5. To back up everything, start by selecting all the data files you want to save, and then tick the checkbox of your computer to include it in the backup. Make sure to check all the items you want to back up, so you don't miss anything important. This will ensure that you have a complete backup of all your data and computer files.
Step 6. Check your backup settings once. You can customize and schedule backup frequency by tapping Change Schedule, which allows you to set daily, weekly, monthly backups or a specific day and time.
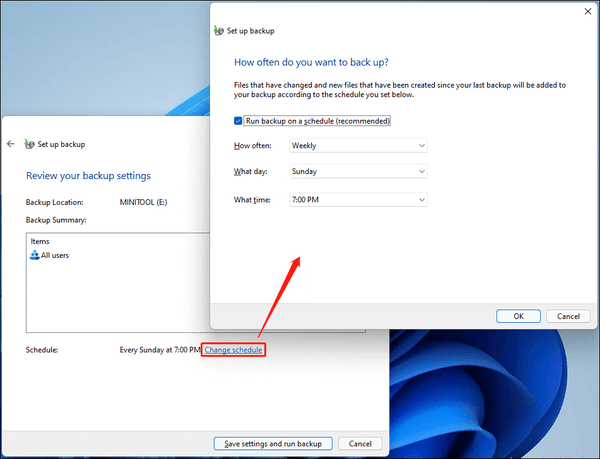
Files changed since the last backup will be automatically included in the backup, following the set schedule.
Step 7. After configuring the settings, click the "Save settings" button and then run the "backup" button to complete the process.
The article discusses the importance of setting realistic goals and expectations when it comes to personal growth and development. It highlights the dangers of setting overly ambitious goals that may lead to disappointment and frustration, and instead suggests focusing on achievable milestones that can be built upon over time.
Quick Wrap Up
To backup Windows 11 to Synology NAS, one can use the built-in Windows Backup tool, Synology Drive, or the DS Backup feature, which allows for scheduled backups and file sharing. Additionally, users can add the NAS as a virtual drive within File Explorer, making it easily accessible and allowing for quick backups. Prior to setting up backups, ensure the NAS is properly connected. This process is relatively quick and straightforward.
We have shared several ways to back up Windows 11 to a Synology NAS. Qiling Disk Master is recommended for users who want a guided backup workflow, while Windows built-in tools are useful for basic system image or file backup needs.
FAQs on How to Backup Windows 11 to Synology NAS
1. What is NAS vs. SAN for backup?
NAS (Network-Attached Storage) is a single, relatively inexpensive storage device that uses Ethernet, prioritizing ease of use, scalability, and lower total cost of ownership. In contrast, SAN (Storage Area Network) is a complex, multi-device network that uses Fibre Channel and Ethernet, focusing on high performance and low latency, but requiring more setup and management expertise.
2. What is better NAS or external hard drive?
The choice between a Network-Attached Storage (NAS) and an external hard drive for backing up data depends on the volume of data you need to store. NAS is a centralized and reliable solution for large data files, but for smaller data sets, an external hard drive is a simple and affordable option.
3. Does Synology NAS come with backup software?
Synology NAS offers a license-free backup solution for servers, PCs, and virtual machines.
Related Articles
- 2 Tips | How to Backup Hard Drive Before Formatting on Windows 11/10/8/7
- How to Backup Photos to pCloud on Various Devices [Solved]🔥
- How to Backup Hard Drive to Google Drive in 2 Ways - Full Guide
- How to Choose the Right SSD for Your Needs
- How to Backup PST File with 3 Outlook PST Backup Tools
- How to Backup Windows 11 to USB [2 Safe Ways] 👍
- Moving Server to Cloud, What To Consider and How to Do It [2022 Complete Guide]
Are you looking for a complete and safe guide that can insist you moving Server to Cloud without losing any data? This page will give you a full guide on what you need to consider and how to move Server to Cloud with detailed instructional steps.