How to Factory Reset Microsoft Surface with Every Possible Way
If you're experiencing issues with your Microsoft Surface laptop, the first steps are to troubleshoot and address the root cause of the error. If that doesn't work, a factory reset can be a last resort to restore your device to its original settings. If you're unsure how to factory reset your Surface laptop, you can refer to the device's user manual or contact Microsoft support for assistance.
If your Microsoft Surface Pro has malfunctioned, you can try one of three strategies to factory reset it, all of which are outlined in an article from Qiling. Before taking any action, it's a good idea to back up your files using a third-party tool, which will help ensure their safety. By doing so, you'll be able to recover your data if needed. The article provides detailed information on how to factory reset your Surface Pro, so you can choose the method that works best for you.
📚Related reading: Microsoft Surface Factory Reset Without Password or Recovery Key
Backup Your Data Before Factory Reset Surface Pro/Go/Book
Before performing a factory reset on your Microsoft Surface, it's essential to have a backup strategy in place to ensure your data is safe and accessible. A good backup tool, such as Qiling Disk Master, can help you back up your computer efficiently, making it easy to restore your files and data after the reset process. This will prevent any data loss and give you peace of mind knowing your important files are protected.
This tool enables you to factory reset your computer without losing data and back up your files to various locations, including the cloud, local drive, external hard drive, NAS, or network. It also allows you to create a system image on a USB drive, which can be used for recovery in case of system failure. The tool provides flexibility in restoring the backup data to the original device or a different location, making it particularly useful in scenarios such as system crashes, malware attacks, or hardware corruption.
The key features of Qiling Disk Master include the following:
- Enhanced backup efficiency
- Multi-path backup storage
- Back up multiple hard drives
- Basic backup scheduling, i.e., daily, weekly, or monthly
- Backup files in Windows to an external hard drive
- Bootable backup and recovery
To back up your Microsoft Surface data easily, download and install Qiling Disk Master on your device, following the straightforward steps provided by the software.
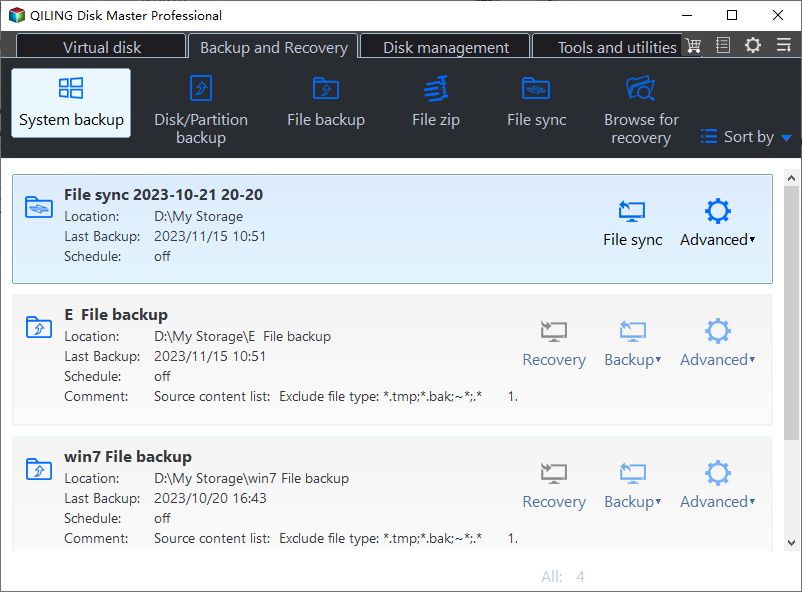
Step 1. Launch Qiling Disk Master on your computer, and click the Backup and recovery tab page.

Step 2. To back up your Windows operating system, click on "System backup" to initiate the backup process.
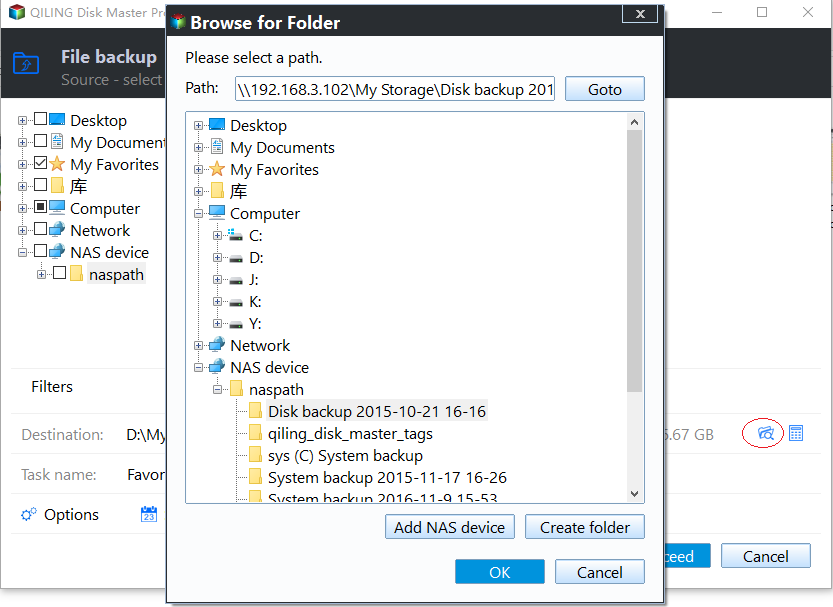
Step 3. You don't need to manually select any system files or partitions, as Windows will automatically choose them. Instead, you'll select a location to save the system image backup by clicking on the illustrated area.

Step 4. The backup location can be a local drive, external hard drive, network, cloud, or NAS, with external drives or cloud storage being recommended for preserving system backup files.
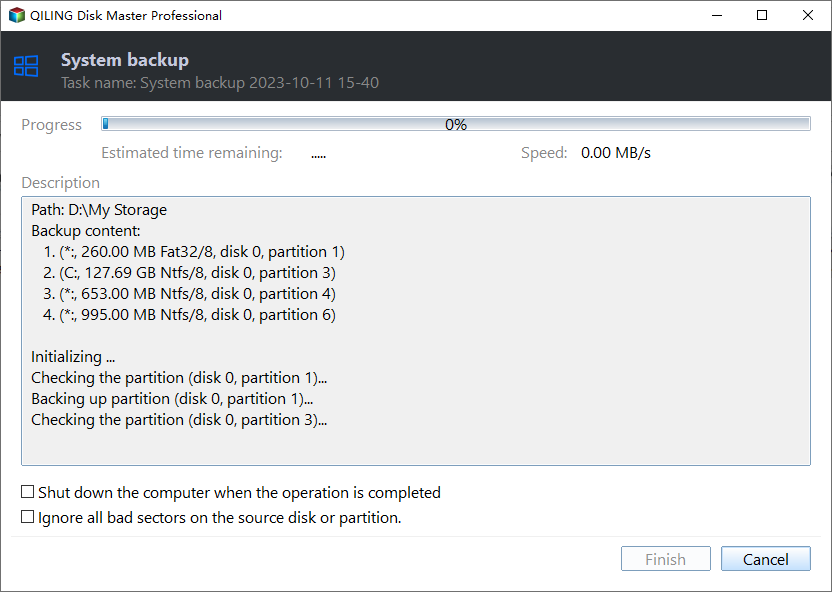
Step 5. The Windows system backup process allows customization settings such as enabling an automatic backup schedule in daily, weekly, monthly, or upon an event, and making a differential and incremental backup, which can be accessed through the Options button. Upon proceeding, the backup process begins, and the completed task will be displayed on the left side in a card style.
The article discusses the importance of sharing articles on social media to help more people. It encourages readers to take a few seconds to share the article with their friends and family, which can have a significant impact on its reach and engagement.
3 Ways to Perform a Microsoft Surface Factory Reset
If all troubleshooting steps have been taken and your Microsoft Surface laptop still isn't working properly, a factory reset may be the last resort. This process will erase all data and settings, returning the device to its factory default. Prior to performing a factory reset, it's essential to have backed up your data using a tool like Qiling Disk Master to prevent losing essential information.
A factory reset can be performed in three ways. The first method involves using the device's built-in reset feature, which can usually be accessed through the settings menu.
- Way 1. Reset Microsoft Surface to Factory Settings in Windows Settings
- Way 2. Reset Surface to Factory Settings in Windows Recovery Environment
- Way 3. Reset Surface Using a USB Drive
Please come along as we outline how each method works.
Way 1. Reset Microsoft Surface to Factory Settings in Windows Settings
To factory reset your Surface, go to the main settings on your device and reset it from there. The steps differ slightly between Windows 11 and Windows 10, but the process is generally straightforward.
On Windows 11:
Step 1. Hit the Windows logo key + I to access Settings.
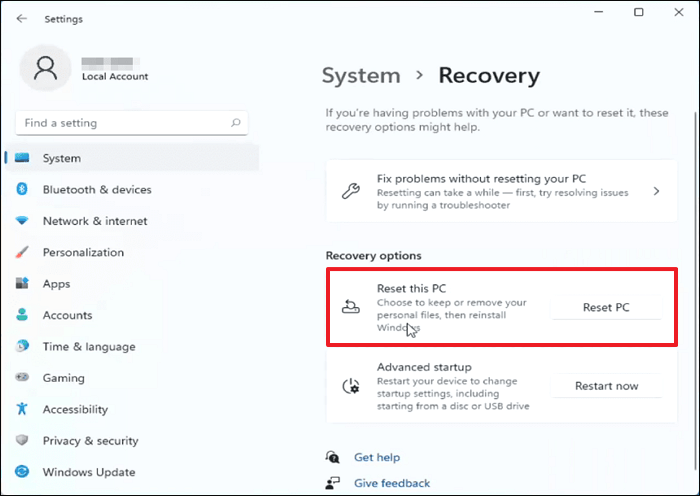
Step 2. Next, go to "System">"Recovery" and click "Recovery options."
Step 3. To reset your Microsoft Surface Pro laptop, navigate to the "Reset this PC" section and click "Reset PC" to initiate the process.
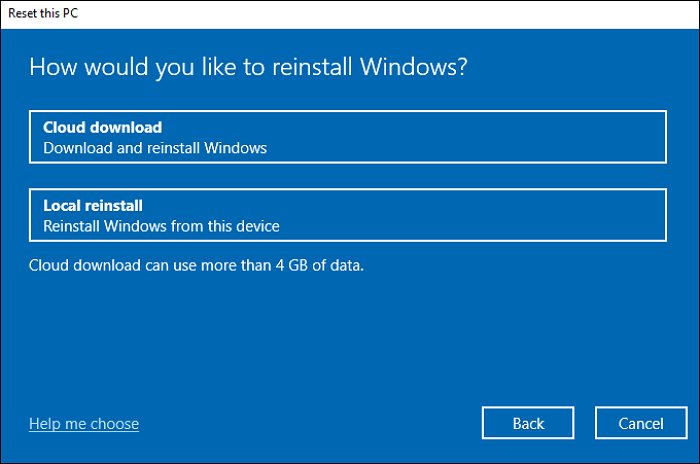
Step 4. After selecting the correct option, follow the on-screen instructions to choose between a Cloud download or Local reinstall for your operating system.
On Windows 10:
Step 1. To access the settings, navigate to the bottom left corner of your screen, click the Start button, and then go to "Settings."
Step 2. To reset your PC, go to Settings, click on Update & Security, then Recovery, and finally Reset this PC, where you can initiate the process by clicking Get started.
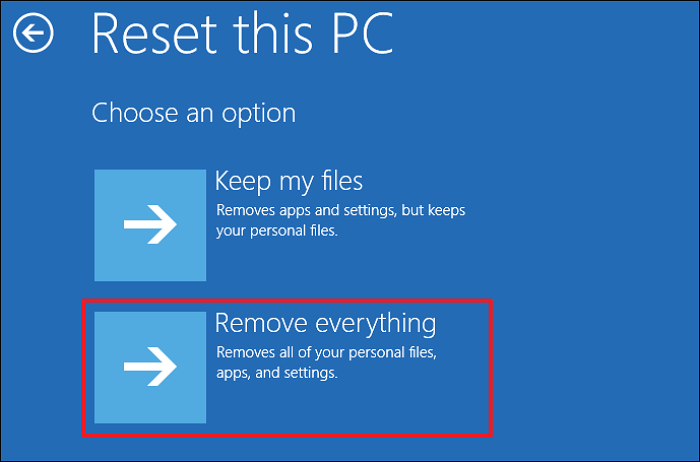
Step 3. In the next window, select "Keep my files" or "Remove everything" and follow the on-screen instructions.
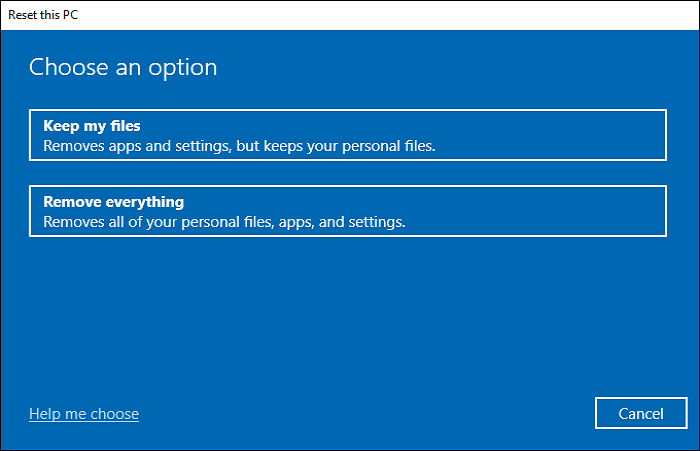
Step 4. To reinstall your Microsoft Surface OS, you can choose between a Cloud download or Local reinstall, depending on your preference. This process will result in a factory reset of your laptop, returning it to its default settings, and allowing you to start fresh.
Way 2. Reset Surface to Factory Settings in Windows Recovery Environment
If Microsoft Surface won't boot normally, you can try entering the Windows Recovery Environment and factory resetting your device. To do this, you'll need to follow these steps:
Step 1. To enter "Automatic Repair" on your Microsoft Surface laptop, power it on and restart it three times, allowing the Surface logo to appear each time. This process will initiate the automatic repair process.
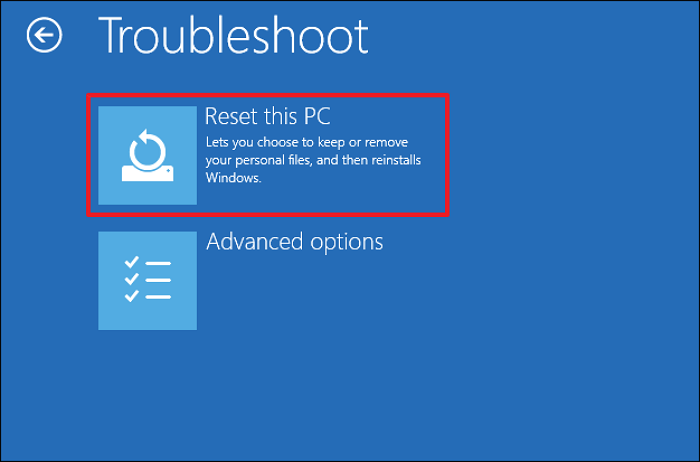
Step 2. Once your device enters automatic repair, go to Advanced options, then Troubleshoot, and finally Reset this PC to initiate the factory reset process.
Step 3. After the system has finished the installation process, it will prompt you to choose whether you want to keep your files or remove everything. Simply select one of the options and follow the on-screen instructions to proceed.
Step 4. To reinstall Windows, select how to reinstall Windows in the next window, choosing either a "Cloud download" or "Local install". Follow the instructions to complete the factory reset process.
Way 3. Reset Surface Using a USB Drive
To reset your Surface using a USB drive, you can use Microsoft's Surface recovery image, which can be downloaded from the Microsoft website and must be stored on a 16 GB or larger, FAT32-formatted USB drive. Alternatively, you can use a recovery drive, but the recovery image is a more straightforward option.
Follow the steps below:
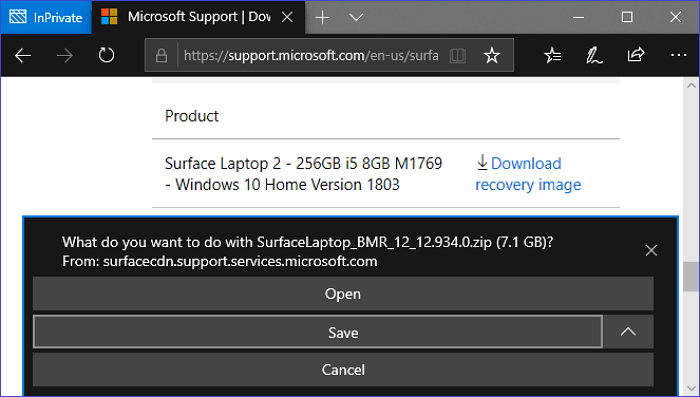
Step 1. To download a recovery image for your Surface Pro/Go/Book, visit the Microsoft website.
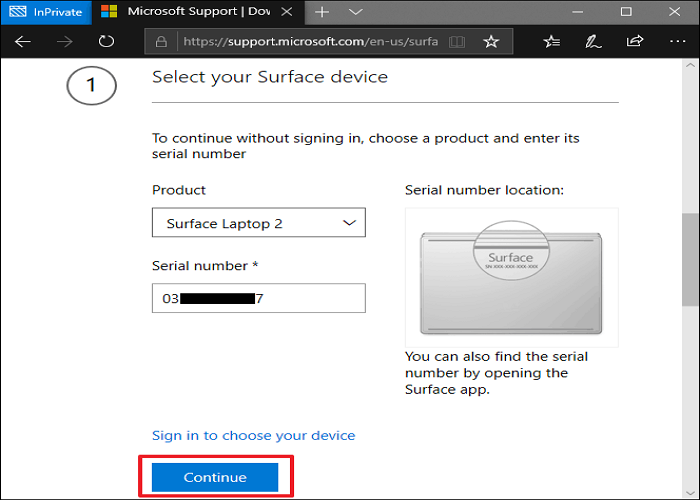
Step 2. Enter the product's name and serial number in the "Select your Surface" window. Click Continue.
Step 3. To download the recovery image, proceed to the website where the file is hosted, and click on the download link. Once the download is complete, navigate to the folder where the file was saved, right-click on the ZIP file, and select the option to extract its contents to your USB hard drive. This will transfer the recovery image to your external storage device, making it ready for use.
Step 4. To enter the Windows Recovery Environment on your Microsoft Surface, shut down the device and connect a USB drive. Press and hold the Volume down button, then press the Power button and release the Volume down button when the Surface logo appears, allowing your device to boot into the Windows Recovery Environment.
Step 5. Select the language and preferred keyboard layout.
Step 6. To factory reset your device, navigate to the "Choose an option" screen, click "Troubleshoot", and then "Reset this PC". This will initiate the process of resetting your device to its default settings, and you can follow the on-screen instructions to complete it.
Pro Tip: How to Factory Reset Microsoft Surface Without Password
If you've forgotten your device password or someone changed it accidentally, you can still factory reset your device without inputting the password. To do this, follow the steps below.
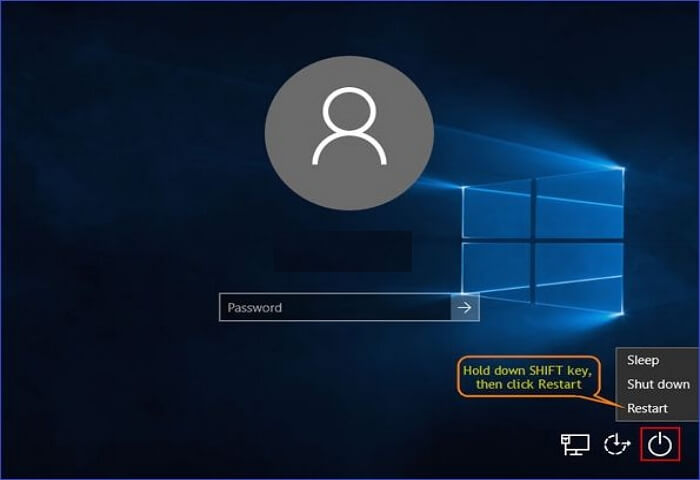
Step 1. To access the login screen, power on your device normally. Then, immediately hit the Shift key, click the Power button, and select the Restart option. This will allow you to access the login screen.
Step 2. After your system restarts, you will enter the Windows Recovery Environment (WinRE). From here, you can factory reset your device by clicking on "Troubleshoot," then go to "Reset This PC" and select "Remove everything."
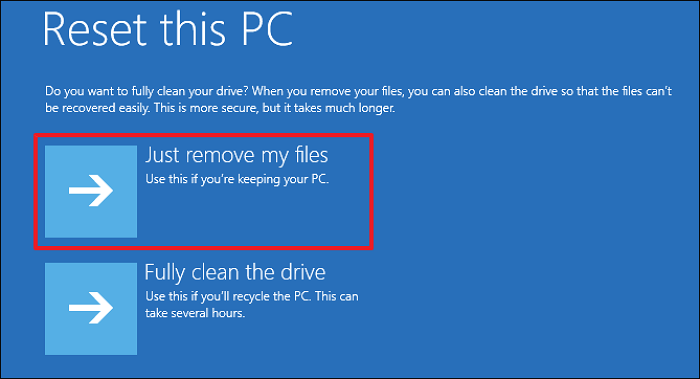
Step 3. To perform a Microsoft Surface factory reset, select the drive where Windows is installed, choose "Just remove my files," and click the "Reset" button, then set a new account password.
To Wrap Things Up
The article has provided a step-by-step guide on how to factory reset a Microsoft Surface laptop, covering three methods: resetting via Windows settings, entering the Windows recovery environment, and performing a surface reset via USB. Each method offers a different approach to returning the device to its original factory settings, allowing users to choose the one that best suits their needs.
Before carrying out a Microsoft Surface factory reset, it's essential to back up your data. A reliable tool for this task is Qiling Disk Master, which offers advanced backup features such as multi-backup storage, password-protected backups, and basic scheduling options. Downloading and installing Qiling Disk Master is recommended to ensure your data is safely backed up.
FAQs on How to Factory Reset Microsoft Surface
Frequently asked questions about factory resetting a Microsoft Surface include: how to perform a factory reset, what to expect during the process, and how to prepare for it. To factory reset your Surface, you can go to Settings > Update & Security > Recovery, and then select "Reset this PC" from the options.
1. How Do I Reset My Surface to Factory Settings Without Windows?
To reset a Microsoft Surface to factory settings without Windows, you can download the recovery image from the Microsoft website, select your device and its serial number, and choose the recovery image to download. After downloading, you can make the recovery image bootable and reinstall Windows from a USB drive.
2. How to Factory Reset Microsoft Surface Without Recovery Key?
To factory reset your Microsoft Surface laptop without a recovery key, you can perform a clean Windows install by using a Surface recovery image downloaded from the Microsoft website and extracted onto a USB drive, which allows you to reimage your entire system and reload its firmware and drivers.
3. How Do I Factory Reset My Microsoft Laptop Without Logging In?
If you've forgotten your Microsoft Surface account password, you can reset your device to its factory settings. To do this, go to Settings > Update & Security > Recovery, and then select "Reset this PC" from the options.
- Step 1. To restart your device in safe mode, power it on normally. When the login screen appears, press the Shift key, click the Power button, and select Restart. This will initiate the safe mode restart.
- Step 2. After your system restarts, you will enter the Windows Recovery Environment (WinRE). From here, you can now factory reset your device by clicking on Troubleshoot, then go to Reset This PC and select Remove everything.
- Step 3. Follow the onscreen instructions to initiate and complete the reset process.
Related Articles
- Which Is the Best NTFS Allocation Unit Size, How to Set?
- Solved: PS3 System Storage Not Enough, Not Found or Corrupted
- How to Backup Google Account on Android and PC
- [Detailed Info] The Elder Scrolls V: Skyrim Saves Location
This post will guide you on where to find The Elder Scrolls V: Skyrim saves location and provide tutorials to help you back up these important game saves with Qiling Disk Master software. Also, ways of deleting and transferring Skyrim saves are offered too. - How to Find WiFi Code/Password on Windows & Mac [5 Methods]
If you've lost or forgotten your WiFi password, don't worry - you can easily find it on your Windows or Mac computer using one of the 5 reliable methods listed on this page. Simply choose a method and follow the tutorial guide to check, view, or retrieve your WiFi password. - Where Can I Find My Windows Product Key Remotely?
The question 'Where Can I Find My Windows Product Key Remotely?' is a common one, and the answer lies in some quick and easy solutions.