PC Stuck on BIOS Screen - How to Fix?🔥
The BIOS (Basic Input/Output System) is the most crucial part of your computer, as you can't perform any tasks without it. It can be considered the soul of your computer, without which it's like a lifeless body. However, users often encounter issues like their PC getting stuck on the BIOS screen.
If your computer is stuck, it means that it's not moving ahead to work properly. This issue can be resolved using methods outlined in a guide from Qiling, which can be applied to both HP and ASUS devices, helping to smooth system operations.
Why My PC Is Stuck on BIOS Screen
The PC getting stuck on the BIOS screen is a common issue, and before we dive into the solutions, it's essential to understand the underlying reasons. The BIOS screen is a pre-boot interface that loads before the operating system, and if it gets stuck, it's likely due to a hardware or software issue. Some common reasons include a faulty BIOS chip, a malfunctioning motherboard, a loose or damaged connection between components, or a corrupted operating system. Once the root cause is identified, you can proceed with the necessary steps to resolve the issue.
The most common cause of this issue is the poor health of your system's RAM, often resulting from overclocking or overvoltage, which can cause RAM slots to become faulty. Regularly checking RAM with Windows Memory Diagnostic is essential to prevent this problem.
Users may experience a stuck screen due to a variety of reasons, including hardware issues, software problems, or incorrect boot configurations. These issues can prevent the computer from booting up properly, resulting in a stuck screen. To resolve this problem, users can try booting their computer, following a step-by-step guide, to identify and address the underlying cause. This approach can help users troubleshoot and potentially fix the issue.
How to Fix Computer Stuck on BIOS Splash Screen
When your computer is stuck at BIOS screen, you must be looking for a solution. It is because you can't perform any operation unless it moves ahead from the BIOS screen. So, we have wrapped a list of a few solutions for you.
- Way 1. Unplug all External Peripherals
- Way 2. Check Boot Order
- Way 3. Check RAM
- Way 4. Check the CMOS
- Way 5. Restore BIOS to Default Settings
- Way 6. Update BIOS
- Way 7. Perform Startup Repair
Way 1. Unplug all External Peripherals
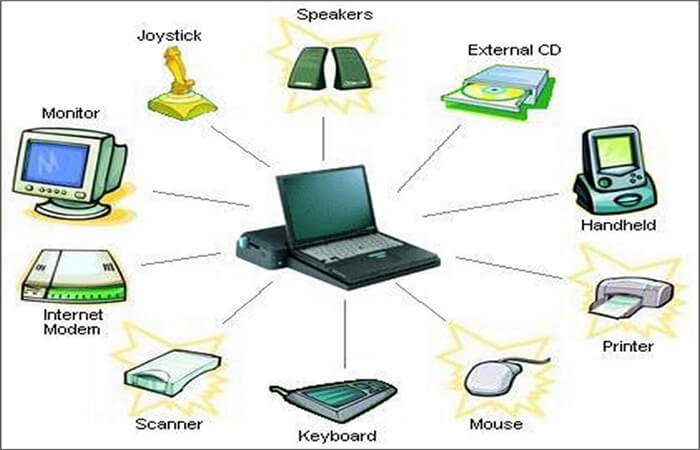
External peripherals such as printers, mice, and keyboards can sometimes cause your computer to get stuck on the BIOS screen. These peripherals can conflict with your system, leading to issues like the BIOS screen getting stuck. To resolve this problem, you'll need to follow a series of steps.
Step 1. Turn off your computer using the "Power Button".
Step 2. Unplug all external peripherals.
Step 3. Turn your computer "ON" using the same power button.
If your computer is still experiencing issues, it's likely due to a faulty device. To troubleshoot, try uninstalling each device one by one to identify the problematic one. Once identified, replace it to resolve the issue.
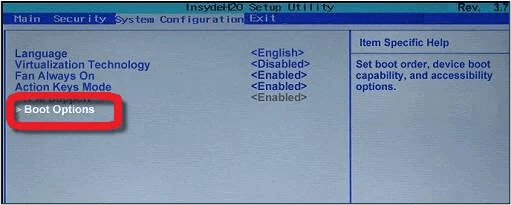
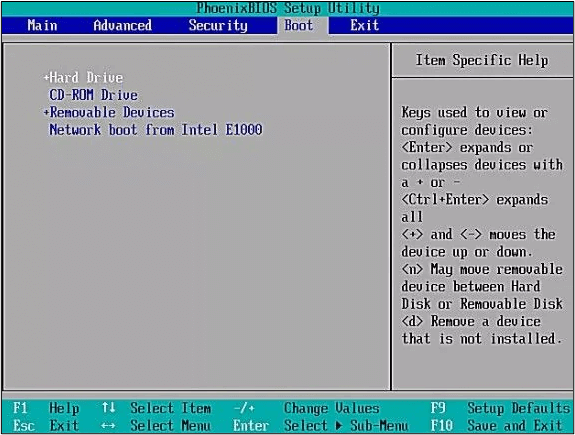
Way 2. Check Boot Order
To resolve a PC being stuck on the BIOS screen, check the boot configuration by entering the BIOS settings and verifying that the boot order is set to the correct device, such as the hard drive or SSD. Ensure that the boot device is properly connected and functioning. If the boot device is not recognized, try resetting the BIOS to its default settings or updating the BIOS to the latest version.
Step 1. Start your PC.
Step 2. To access the BIOS settings, press the top keyboard keys such as F2, F9, F12, or ESC, depending on the device's specifications. This will open the BIOS settings menu, allowing you to make changes to the device's boot order, time and date, and other settings.
Step 3. Find the "Boot Order" area and open it.
Step 4. Set your SSD or hard drive to boot first.
Step 5. Restart your system to check if the issue has been resolved.
If the issue is due to the boot order, you can resolve it by following a few simple steps. You'll need to be familiar with the BIOS settings, but don't worry, it's easy. By following these steps, you'll be able to reach the destination and resolve the issue.
Way 3. Check RAM
If the above methods haven't worked, it's likely that the issue is due to inappropriate RAM fixing or a faulty case. Check for any loose connections or damaged components in the RAM or case.
Step 1. Turn your computer off.
Step 2. Open the "Computer Case".
Step 3. Remove all RAMs from their slots (check the device manually if you don't know about slots).
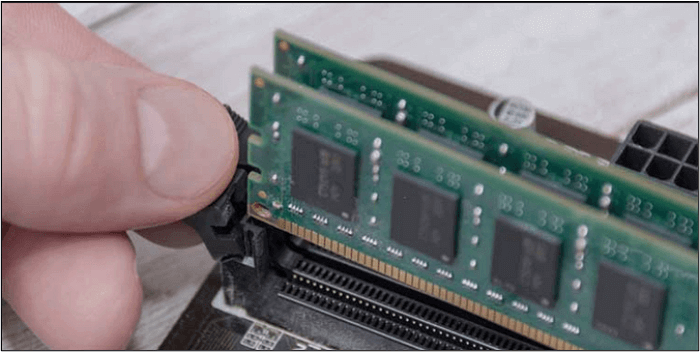
Step 4. To ensure that all RAMs are functioning properly, follow these steps: Insert one RAM at a time, and after each insertion, restart your system to check if it's working correctly. This process helps identify any issues with individual RAMs, making it easier to isolate and replace faulty components.
There are great chances that you will be able to resolve this problem while inserting RAMs. Be careful while removing the computer case and RAM, as it can damage the slots if you do so forcefully.
Way 4. Check the CMOS
To resolve the issue of a PC stuck on the BIOS screen, you can clear the CMOS battery by following these steps: locate the CMOS battery, which is usually a small coin-sized battery on the motherboard, and remove it. Then, press the power button to discharge any remaining power in the system. Next, wait for a few minutes to allow the system to fully discharge.
Step 1. Disconnect all external devices.
Step 2. Unplug the computer's power cord from the wall outlet to turn off the AC power.
Step 3. Remove the "Computer Case".
Step 4. "Find" and "Remove" the battery carefully.
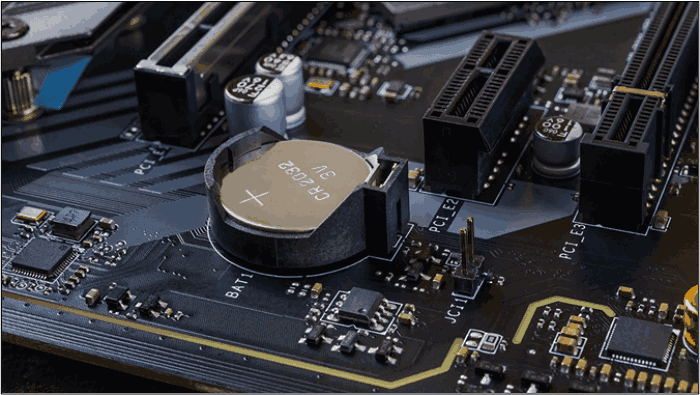
Step 5. Wait for a few minutes and "reinsert" the battery again in the same way.
Step 6. Connect all devices again and "Turn ON" the computer.
Your problem may have been solved. Remember that it is a general process that may vary from device to device or company to company, so you may need to check the manual if you're using a specific manufacturer's device, such as Dell.
Way 5. Restore BIOS to Default Settings
If you've tried various troubleshooting methods but still can't get your computer to boot, it's time to restore the BIOS to its default settings. This can resolve issues caused by changes made to the BIOS that are preventing your device from booting normally. To do this, restart your computer and enter the BIOS settings by pressing the designated key (usually F2, F12, or Del). Navigate to the 'Save & Exit' or 'Exit' menu, and select the option to 'Load Optimized Defaults' or 'Reset to Default Settings'.
Step 1. To access the BIOS settings, you need to boot your computer and repeatedly press the key that triggers the BIOS setup screen. This key is usually F2, F12, Del, or Esc, and it may vary depending on your computer's manufacturer.
Step 2. To restore the default settings on your device, press the key indicated by the manufacturer's website, which is usually a combination of keys. This will launch the "Load Default Settings" prompt, allowing you to reset your device to its factory settings.
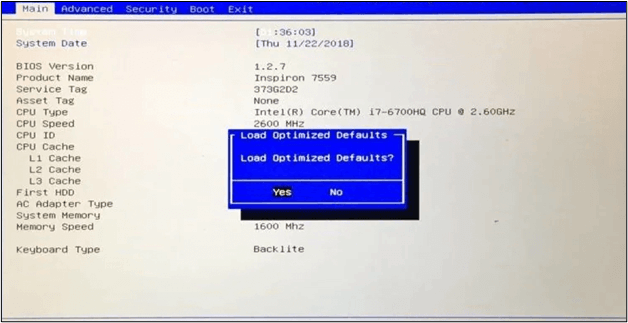
Step 3. Tap on "Yes" for confirmation.
Step 4. "Save" the settings & "Exit" the tab.

If you're experiencing issues with your computer, you can try resetting the BIOS to its default settings. This can be done by accessing the BIOS settings and selecting the "Reset to Default" or "Load Optimized Defaults" option. This will restore the settings to their original factory settings, which may resolve any issues you're experiencing.
Way 6. Update BIOS
If your device is showing an error, it might be due to outdated BIOS, which can be updated to provide new RAM support, support for the latest CPUs, and fix issues with the motherboard version. Check if a BIOS update is available and perform it according to the company's instructions.
To update your BIOS using a USB drive, follow these steps: first, download the latest BIOS version from the manufacturer's website and extract the contents to a folder on your computer; next, create a bootable USB drive using a tool like Rufus or a similar software; then, copy the extracted BIOS files to the USB drive; after that, boot your computer from the USB drive and follow the on-screen instructions to update your BIOS; finally, restart your computer and verify that the update was successful. If you encounter any issues during the process, you can refer to this article for troubleshooting help.
How to Update BIOS With USB
If you're trying to update your BIOS with a USB drive, this article will guide you through the process of updating your BIOS from a USB drive, and by the end of it, you'll be able to do it yourself with ease.
Way 7. Perform Startup Repair
You can also resolve PC stuck at BIOS screen problems by using Windows startup repair. To do this, start your computer in Safe Mode first, and then follow these steps.
Step 1. Go to "Settings" on your computer.
Step 2. Look for the "Update & Security" option.
Step 3. Find the option named "Troubleshoot".
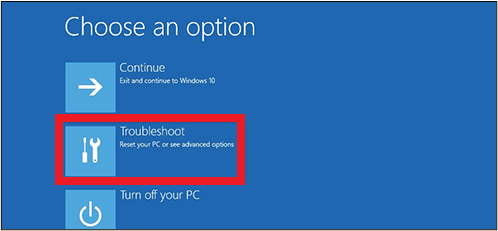
Step 4. Under this, choose the "Advanced" option.

Step 5. Tap on "Startup Repair" once shown on the screen.

In that case, you may want to consider using a Linux live CD or a Windows installation media to boot your system and run a disk check, which can help identify and potentially fix the issue.
Share it with your friends and family to help them out:
Bonus Tip: Always Backup Your Computer for Data Security
When a computer screen freezes on BIOS, it's essential to take precautions to protect your data. This issue can lead to data loss, especially if you attempt to resolve it without proper knowledge. To safeguard your data, it's recommended to back it up using a reliable backup software, such as Qiling Disk Master.
Qiling Disk Master Pro allows you to safely store your data in cloud storage, keeping it secure even if your device experiences issues. It enables easy backup of files to the cloud, and you can restore your data using its user-friendly interface.
Your data will be safe even if you change your device or restore settings to default. To access your files on the local disk, simply use the same software on your new device.
To back up your computer, start by determining what data you want to back up, such as files, documents, photos, and videos. Next, choose a backup method, such as an external hard drive, cloud storage, or a backup service.
Step 1. Launch Qiling Disk Master on your computer, and click the Backup tab page.

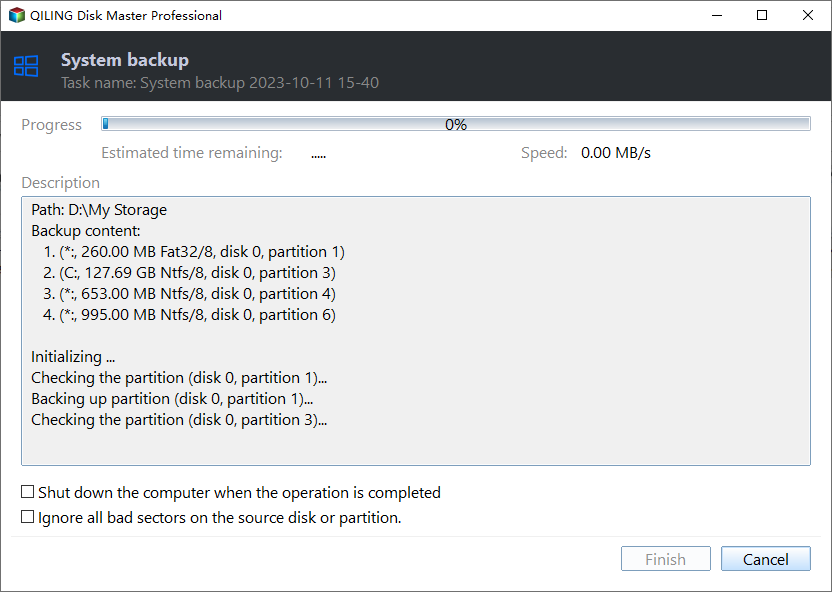
Step 2. To back up your Windows operating system, click "System backup" to initiate the backup process.
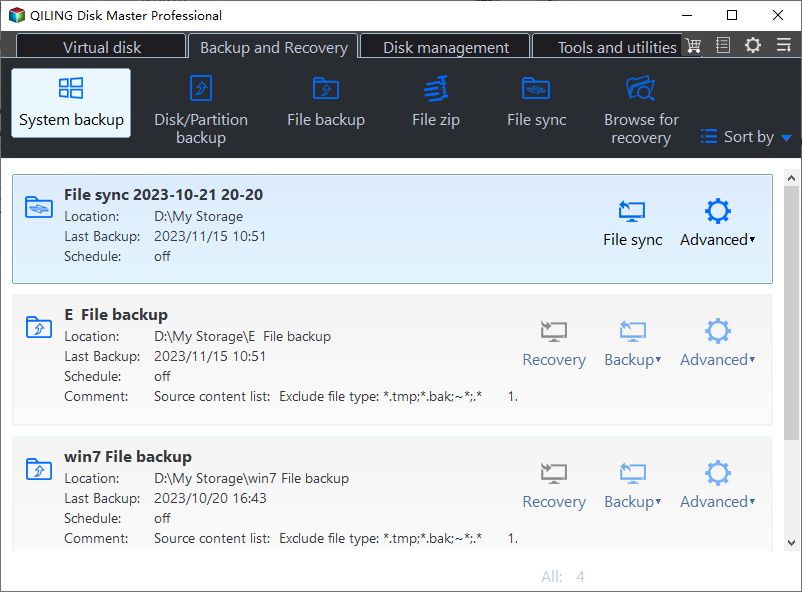
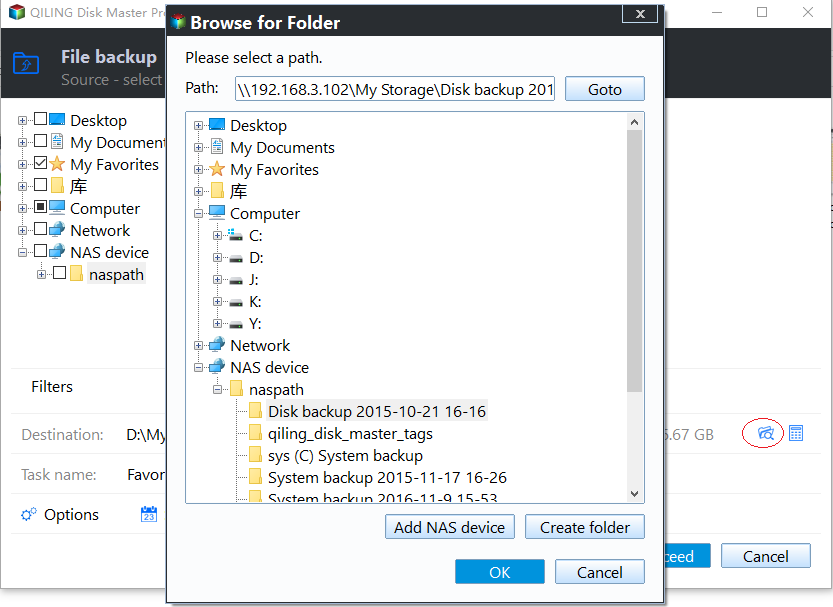
Step 3. In Windows, the operating system information and all system-related files and partitions will be automatically selected, so no manual selection is needed. To proceed, click on the illustrated area to choose a location to save the system image backup.

Step 4. The backup location can be another local drive, external hard drive, network, cloud, or NAS, with external physical drives or cloud storage being recommended for preserving system backup files.
Step 5. The Windows system backup process can be customized with settings such as enabling an automatic backup schedule daily, weekly, monthly, or upon an event, and making a differential and incremental backup, which can be accessed through the Options button. Once selected, clicking "Proceed" initiates the backup process, and the completed task is displayed on the left side in a card style.
After solving this issue, you may be interested in:
To Wrap Things Up
We've covered various effective methods to resolve the issue of a PC stuck on the BIOS screen. By following these steps, you should be able to successfully resolve the problem. For your safety, it's also recommended to back up your data regularly.
Keep your data safe in Qiling Disk Master cloud storage by creating a scheduled backup to avoid hectic tasks.
FAQs on PC Stuck on BIOS Screen
1. What to do if the PC turns on but won't boot BIOS?
To resolve the issue, you can explore various methods to find the one that suits your needs. This might include clearing the CMOS, addressing defective connections, or other solutions depending on the specific situation.
2. Why does my computer freeze at the BIOS splash screen?
The problem may be caused by a wrong Boot configuration or faulty RAM slots.
3. Why is my computer stuck on the loading page?
The issue may be caused by various factors such as driver updates or Windows updates. To determine the cause, you can try applying the relevant methods one by one.
4. Why am I stuck in Gigabyte BIOS?
To resolve the issue of a computer not booting up, you can try setting the hard drive or SSD as the first boot device while turning on the computer. This can be done by entering the BIOS settings and adjusting the boot order accordingly. This should allow the computer to properly boot up and access the operating system.
Related Articles
- Fix Invalid Partition Table Error in Windows 10/8/7
- Solved: Can't Start Windows 10, No Access to Boot Menu or Can't Repair Windows 10
- What Is SD Card Reader? [You Must Know This]
You need an SD card reader when you want to use your computer to access files on an SD card. This article will detail what is SD card reader and recommend some of the best ones for you. Please continue reading this article and learn more useful information. - How to Fix Drive Is Not Accessible Access Is Denied on Windows 11
Feeling distressed when Windows 11 prevents you from using an external hard drive? You can fix the 'disk is not accessible access denied' error and use Deep Data Recovery to retrieve deleted files from inoperable disks, making it possible to recover lost data. - BitLocker Recovery Screen: How to Fix It After Windows Booting
If you're stuck on the BitLocker recovery screen, you can try to bypass it or enter the recovery key to regain access to your system. This is crucial as without the key or bypass, you won't be able to recover data from the system. - Black Screen After BIOS Update [Causes & Fixes]
Fix black screen after a BIOS update. Learn possible causes and safe troubleshooting steps for BIOS, display, and boot issues.