How to Move Files from OneDrive to Teams
| Workable Solutions | Step-by-step Troubleshooting |
|---|---|
| 1. What are OneDrive and Teams? | OneDrive by Microsoft can save everything from family photos to lecture notes Teams is another top-tier service...Full steps |
| 2. How to Move Files from OneDrive to Teams? |
Firstly, use your Microsoft 365 account to log into the Microsoft Teams app. Now go to the "Files" section...Full steps |
| 3. How to Upload Files to Microsoft Teams? | A simple method to upload files on Teams is directly from a channel. By uploading a file this way, you can also...Full steps |
| 4. Transfer OneDrive between PCs | This top-tier PC transfer tool is a smart choice when it comes to moving your data, accounts...Full steps |
What are OneDrive and Teams?
OneDrive by Microsoft is a top cloud storage service that allows users to save various files, including personal documents, photos, and business proposals, and access them on the go.
Teams is another top-Microsoft Teams offers a range of features that make it easy to create a centralized hub for workflow management, including instant messaging, video calls, meeting organization, and content sharing.
Sharing files from OneDrive to Teams can be a convenient way to collaborate with others. Whether it's an assignment, lecture material, business proposal, or any other type of file, being able to move files from OneDrive to Teams can be a time-saving and efficient way to share information. To do this, follow these simple steps: follow the steps below.
How to Move Files from OneDrive to Teams
To directly move and share files stored on your OneDrive with participants in a Teams meeting, follow these simple steps: you can move a file from OneDrive to Teams using just a few clicks.
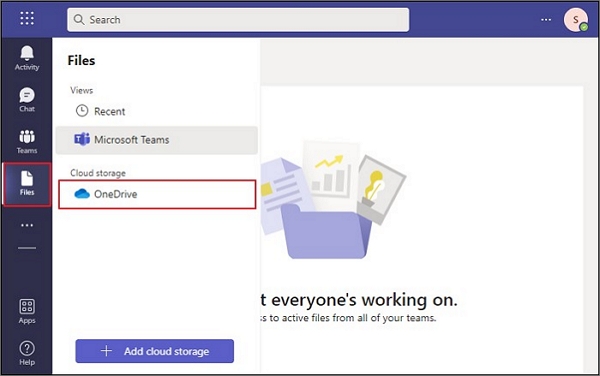
Step 1: To access OneDrive through Microsoft Teams, log into the Microsoft Teams app using your Microsoft 365 account. Then, navigate to the "Files" section and select the "OneDrive" option, which can be found under the "cloud storage" section.
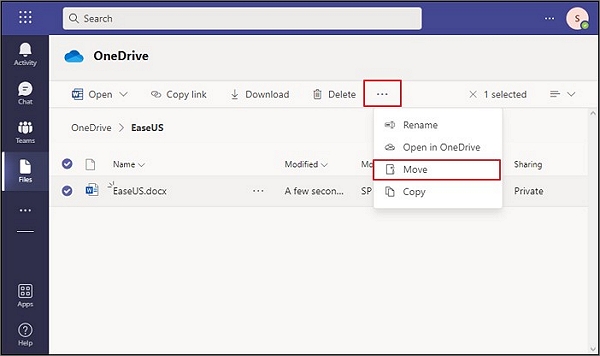
Step 2: To move a file, select the file(s) you want to move from the pop-up window, then click the "Three Dots" icon in the top header and choose the "Move" option.
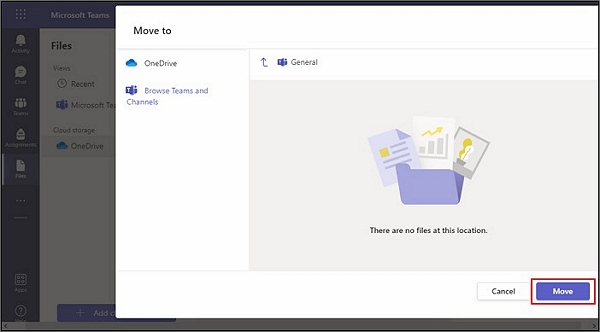
Step 3: To move files in Microsoft Teams, click on the three dots next to the file you want to move, select "Move" and choose the new location from the list of available teams and channels. Tap "Move" to finalize the move, and you can check your moved files by going to "Files" in Teams.
Get More Info: How to Upload Files to Microsoft Teams
Uploading files to Microsoft Teams is a straightforward process that can be done using various methods. If you want to simply upload files to Teams instead of moving them, you can do so easily. This can be achieved through direct file upload, which allows you to add files to a channel or team without moving them from their original location.
1. Upload Files to Teams via Channel
To upload files on Microsoft Teams directly from a channel, follow these steps:
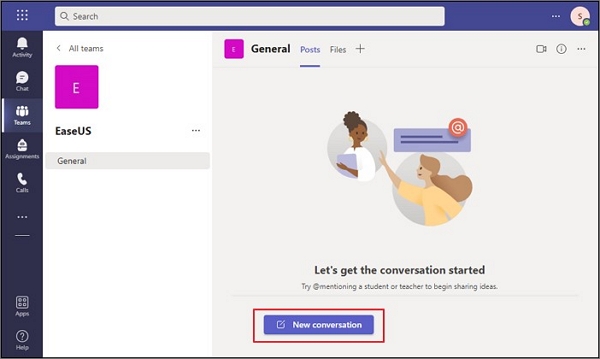
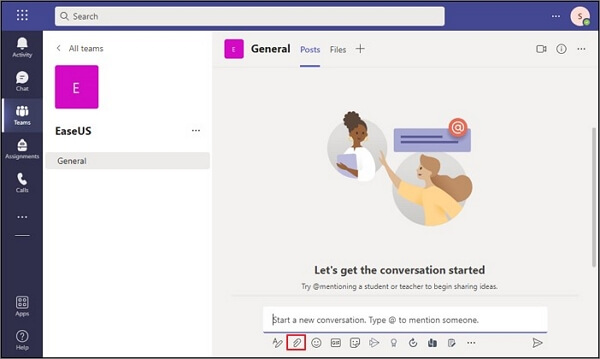
Step 1: Launch Microsoft Teams, go to the "Teams" tab, select the channel, and tap on "New Conversation" to upload a file.
Step 2: To attach a file on Teams, click on the paperclip icon in the toolbar below the text input field.
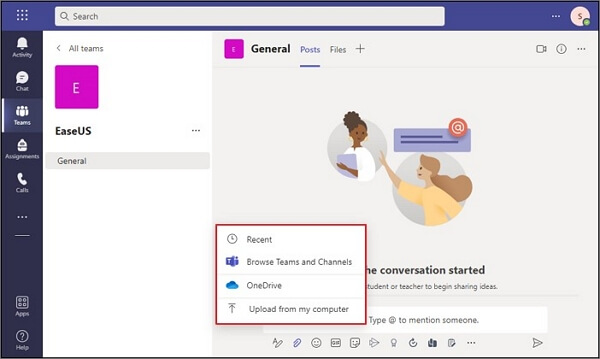
Step 3: Attach a file to a message by selecting the paperclip icon, choosing where to attach the file, selecting the file, and sending the message.
2. Upload Files to Teams via Files Tab
To upload files on Microsoft Teams using the "Files" tab, simply click on the "Files" tab in the navigation menu, click on the "Upload" button, select the file you want to upload from your device, and click "Open". This will upload the file to your Microsoft Teams channel, making it easily accessible to team members.
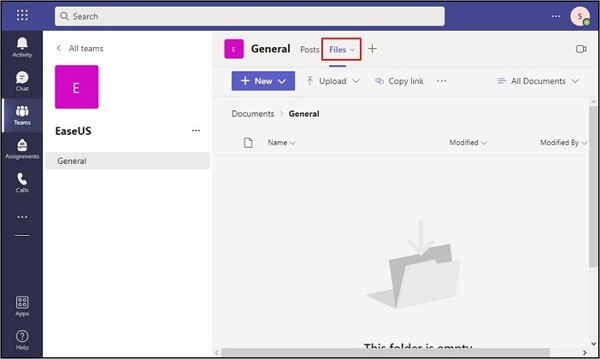
Step 1: Launch Microsoft Teams on your device, go to the "Teams" tab, and select the channel where you want to upload your file.

Step 2: Head over to the "Files" tab of your chosen channel.
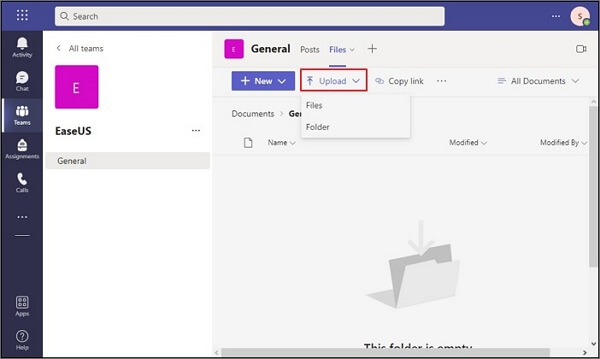
Step 3: Now, use the "Upload" button from the top toolbar and select the files or folders you wish to upload, which will be automatically uploaded to your chosen channel.
3. Upload Files to Teams via SharePoint
SharePoint is a quick and efficient method to upload large and multiple files on Microsoft Teams. To use SharePoint to upload files on Teams, you can follow these steps.
Step 1: Select the desired channel in the Microsoft Teams "Teams" tab.

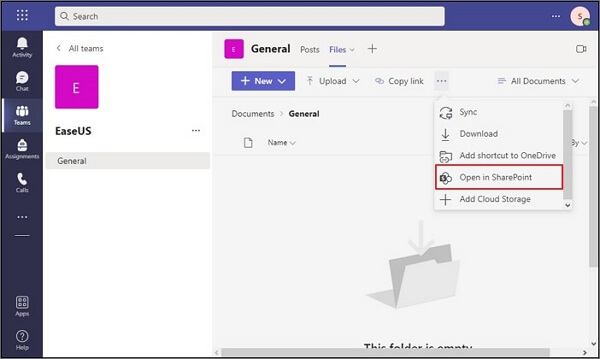
Step 2: To open a channel's files in SharePoint, navigate to the "Files" tab within the channel, then select the "Open in SharePoint" option from the top toolbar's three-dots menu.
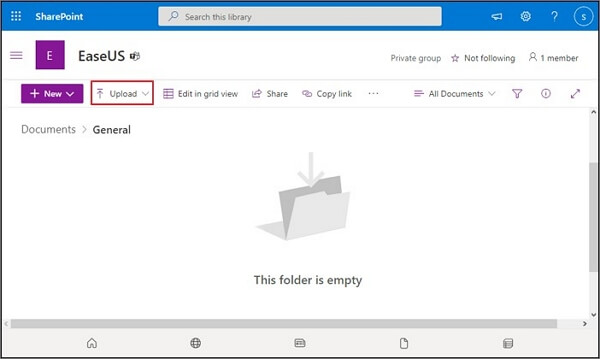
Step 3: In the next window, you can add the files you wish to upload to your Teams channel by either selecting them from your computer or dragging and dropping them. Once the upload process is complete, your files and folders will be visible in Teams.
Bonus Tip: Transfer OneDrive between PCs
If you're looking for a reliable tool to transfer all your OneDrive data from one computer to another, Qiling Disk Master is an excellent choice. It can help you easily migrate all your files, settings, and applications from one PC to another, making the process of switching computers a breeze.
This top-A tier PC transfer tool is a smart choice for quickly moving data, accounts, and applications between computers, offering an intuitive interface, easy features, and automatic functions to ensure a seamless and loss-free transfer process.
Advantages of Qiling Disk Master
- With this tool, you can transfer all types of data files and most commonly used applications like Microsoft Office and Adobe Photoshop.
- The tool ensures no data loss along the way, so you can move your files securely.
- You can choose from various options to transfer data and files, depending on your specific needs.
- It features a simple and easy-to-use interface so everyday users can operate it with ease.
Transfer OneDrive between PCs Using Qiling Disk Master
To transfer your OneDrive account and data between PCs, you can use the Qiling Disk Master app. This app allows you to easily move your OneDrive account and associated data from one PC to another, making it a convenient solution for upgrading or replacing your computer.
Step 1. Run Qiling Disk Master on both PCs
On the source PC, select "File sync" on the main screen of Qiling Disk Master and proceed.

Step 2. Connect two computers
1. Connect to your target PC by selecting it from the list of available devices and clicking "Connect".
2. Enter the login password of your target PC and click "OK" to confirm.
If you didn't see the target PC in the listed devices, you can also manually connect the target PC by clicking "Add PC" and inputting its IP address or device name.

Step 3. Select apps, programs, and software and transfer to the target computer
1. You can select and choose what you want to transfer from the current computer to the target PC.
2. To begin the transfer process, select the desired applications and programs, then click "Proceed".

Conclusion
Uploading files to Microsoft Teams is a straightforward process that doesn't require much technical expertise. Users can upload files using various methods, and moving files from OneDrive to Teams is also easily achievable with the help of a guide.
Related Articles
- How Do I Transfer SketchBook to Another Device? [PC&iPad&Mobiles]
- Transfer QuickBooks to New PC with 100% Working Methods
- How to Move Microsoft Teams to Another Drive
- How to Migrate Dropbox to OneDrive: Step-by-Step Guide
- How to Back Up Quick Access in Windows 10 [ 2022 Update]
The Quick Access location is a feature in Windows 10's File Explorer, and sometimes users want to back up quick access for data security. To resolve this issue, Qiling Backup software can be used, among other solutions. - Top 7 Best Backup Software for Windows 7 64 Bit/32 Bit Recommends [Free & Paid]
Are you looking for the Best Backup Software for Windows 7? How do you back up everything on Windows 7? Let's uncover the top 7 best backup software for Windows 7 64-bit and 32-bit users that are free to download.