2022 Fixed: Time Machine Won't Complete First Backup
Quick Navigation:
- 1. Fix Time Machine Stuck at Waiting to Complete First Backup (6 methods - easy and quick!)
- 2. Helpful Tips to Avoid Time Machine Backup Failure
- 3. Recover Data Without Time Machine Backup (Once for all!)
The Time Machine utility on Mac allows you to create a backup of your Mac's data, which can be stored on an external disk to safeguard against data loss.
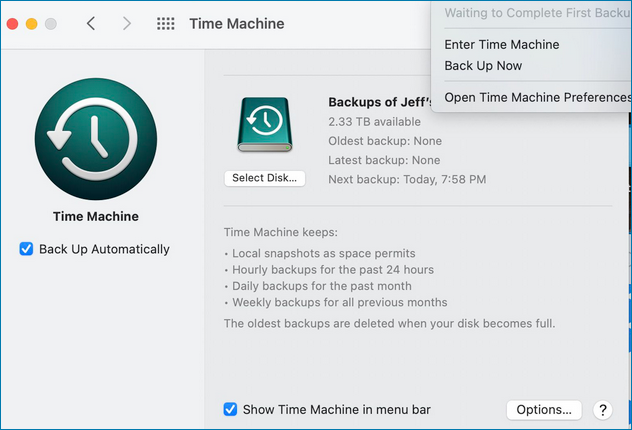
Mac users may encounter issues with Time Machine, with the error message stating it's waiting to complete the first backup, preventing new backups from being created. However, assistance is available to resolve this issue.
The time machine is stuck at waiting to complete the first Backup due to several reasons. These include the details below.
- Problem with your backup drive: The issue is likely due to the backup drive used by Time Machine, which may be causing problems. Check if the drive is functioning normally.
- Pending software updates: To run Time Machine smoothly, your Mac should be using the latest macOS version. If it's not, you need to update your macOS.
- Internet connectivity: Inconsistent WiFi network or slow internet can cause this error, so it's recommended to use reliable and good speed internet for Time Machine backups.
- Incomplete backup process: When using Time Machine to back up your Mac, it's essential to complete the backup process before shutting down your computer. Users often lose patience and turn off their Macs while the backup is running, which can lead to problems in the future. By waiting until the backup is finished, you can avoid potential issues and ensure that your data is safely backed up.
To run Time Machine backups without issues, it's essential to avoid and keep in mind certain things. This includes ensuring the backup destination is not full, not using the same backup disk for multiple Macs, and keeping the backup disk connected to the Mac being backed up. Additionally, it's crucial to be aware of potential issues like the backup disk being too slow, the Mac's CPU being too busy, or the backup process being interrupted.
Time Machine Restore Button Greyed Out, How to Fix?
Time Machine, the built-The Time Machine backup feature on a Mac automatically backs up all files, including apps, music, photos, email, documents, and system files.
How to Fix Time Machine Stuck at Waiting to Complete First Backup
The good news is that you can fix the time machine stuck waiting to complete the first backup issue. To resolve this, you can try six compiled solutions listed below, which can be done on your own to get rid of this error.
- 1. Cancel Backup Progress and Restart to Backup Again
- 2. Run First Aid on the Time Machine Backup Drive
- 3. Exclude Affected Directories for Backup
- 4. Start Your Mac in Safe Mode for First Backup
- 5. Format Time Machine Backup Drive to APFS
- 6. Install Available New macOS Update
1. Cancel Backup Progress and Restart to Backup Again
To cancel your ongoing Backup and back up again, follow these steps:
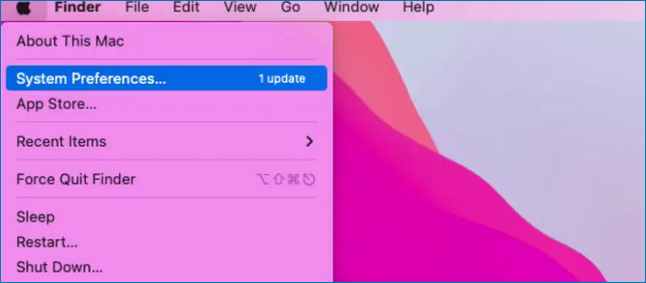
Step 1. From Apple Menu, select System Preferences.
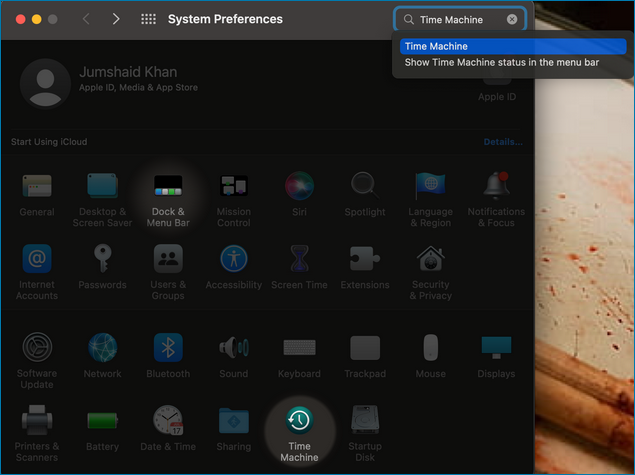
Step 2. Open Time Machine.
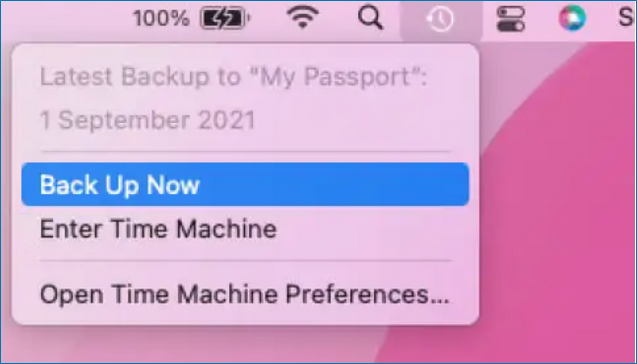
Step 3. Click the x icon to stop the ongoing backup progress.
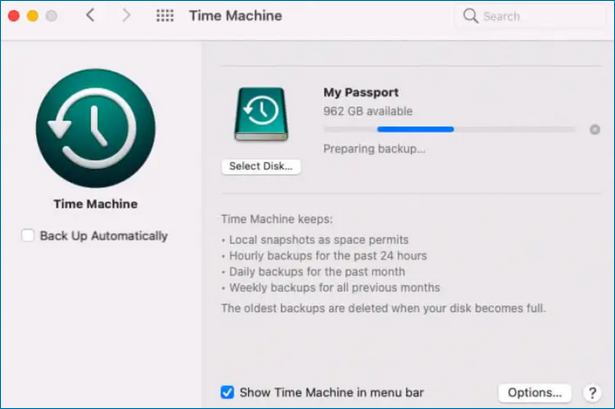
Step 4. To restart your Time Machine backup, click on the Time Machine icon in the Menu bar and select Back Up Now. This will initiate the backup process again.
2. Run First Aid on the Time Machine Backup Drive
If you're experiencing issues with your Time Machine backup drive, it's possible that file system errors on the drive itself could be the culprit. To resolve this, you can utilize Mac's built-in Disk Utility tool to scan and repair any file system errors on the Backup drive. This can help restore functionality and ensure your backups are successfully created and stored.
To run first aid on the Time Machine backup drive, insert the drive into your Mac, open Disk Utility, select the drive from the sidebar, click the "First Aid" button, and follow the on-screen instructions. If the drive is not recognized, try restarting your Mac and then running First Aid.
Step 1. To launch Disk Utility, press the CMD + Space key on your keyboard, which will open the Spotlight search bar, and then type "Disk Utility" to initiate the application.
Step 2. Select your Time Machine backup drive from the left sidebar.
Step 3. Click on the First Aid button.
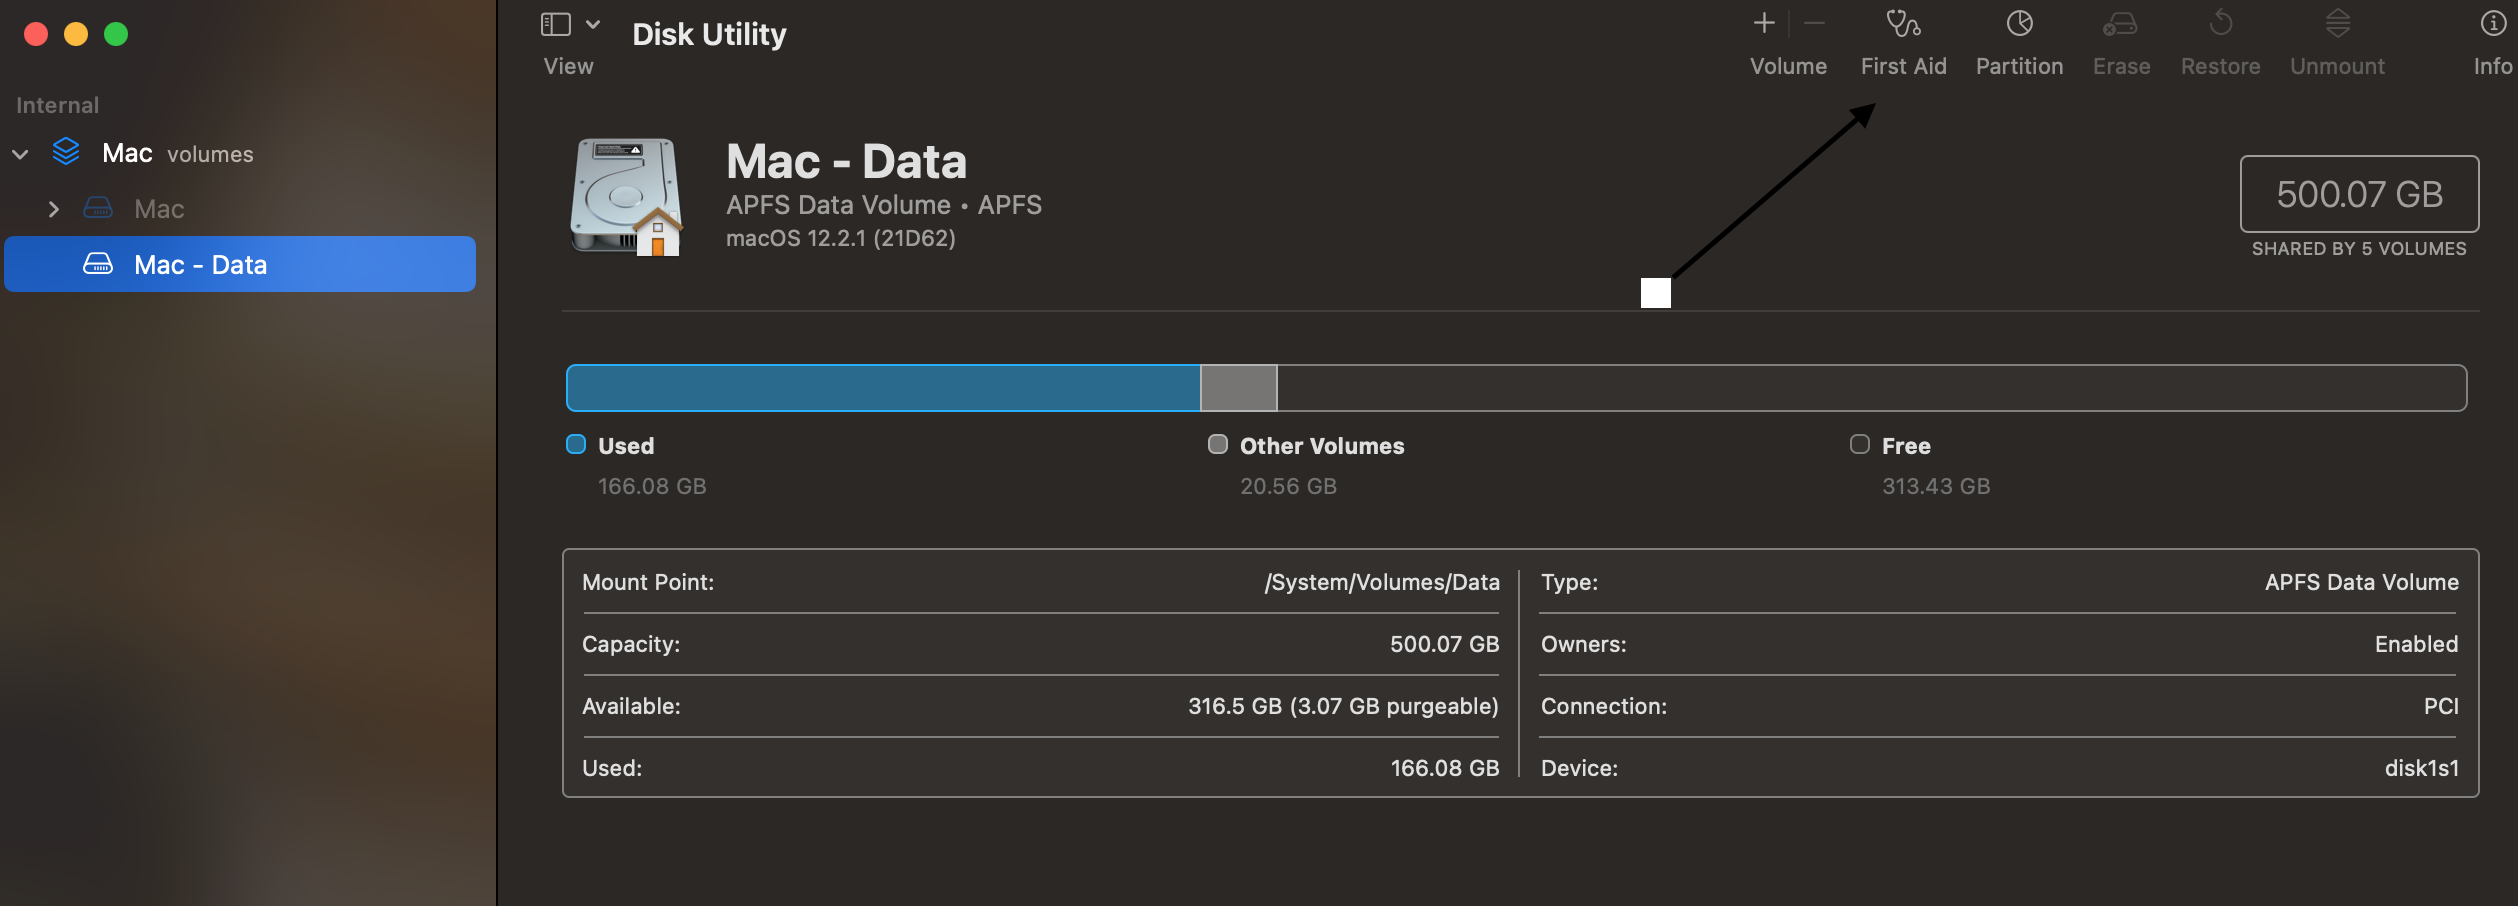
It will scan and check for file system errors on your backup drive, fix them, and then allow you to run Time Machine backups without any issues.
3. Exclude Affected Directories for Backup
Time Machine backups are failing due to affected directories that are preventing the backup process from pausing or stopping, resulting in a "Failed to proactively acquire device lock assertion" error.
To exclude directories from Time Machine backup, identify the affected directories and follow these steps:
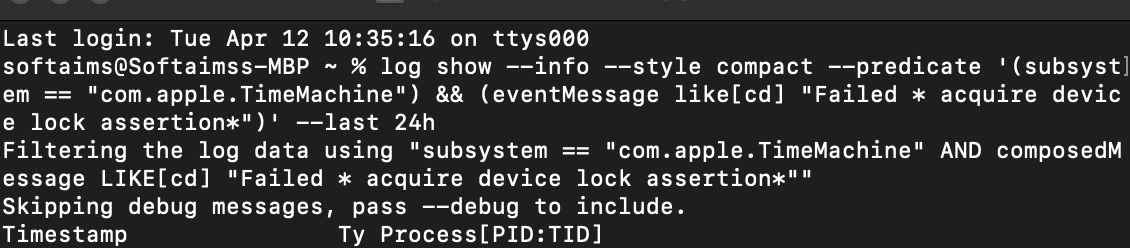
Step 1. Open Mac Terminal and enter the below command.
log show --info --style compact --predicate '(subsystem == "com.apple.TimeMachine") && (eventMessage like[cd] "Failed * acquire device lock assertion*")' --last 24h
Running the command will list the directories for you as output.
Step 2. From Apple Menu, select System Preferences and open Time Machine.
Step 3. To exclude certain directories from Time Machine backups, click on the Options tab and then click on the Plus icon. Select the directories you want to exclude from backups.
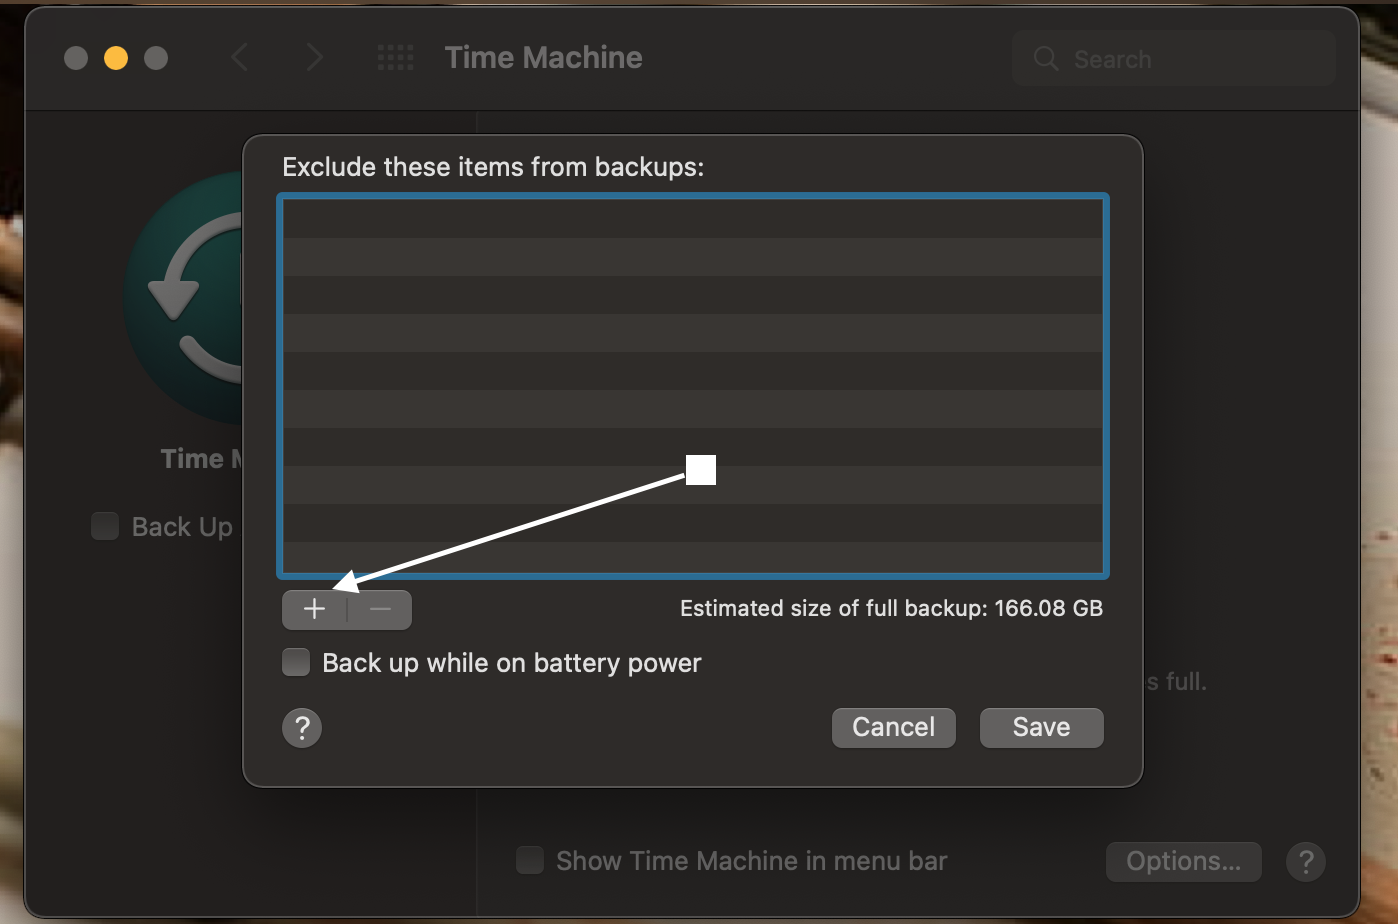
Once you've selected the files you want to exclude from backup, click the Save button to confirm your selection and prevent the files from being backed up in the future.
4. Start Your Mac in Safe Mode for First Backup
When running Time Machine for the first time, it can be a slow process. To avoid any software conflicts that might slow down the backup, you can boot your Mac in Safe Mode. This allows Time Machine to complete the initial backup without any potential roadblocks.
To start your Mac in Safe mode for the first backup, follow these steps:
Step 1. Turn off your Mac.
Step 2. The power off screen will appear. Release the power button.
Step 3. To troubleshoot issues with your Mac, you can load it in Safe Mode, which disables all third-party login items and startup programs. This can help you identify if a specific app or process is causing problems.
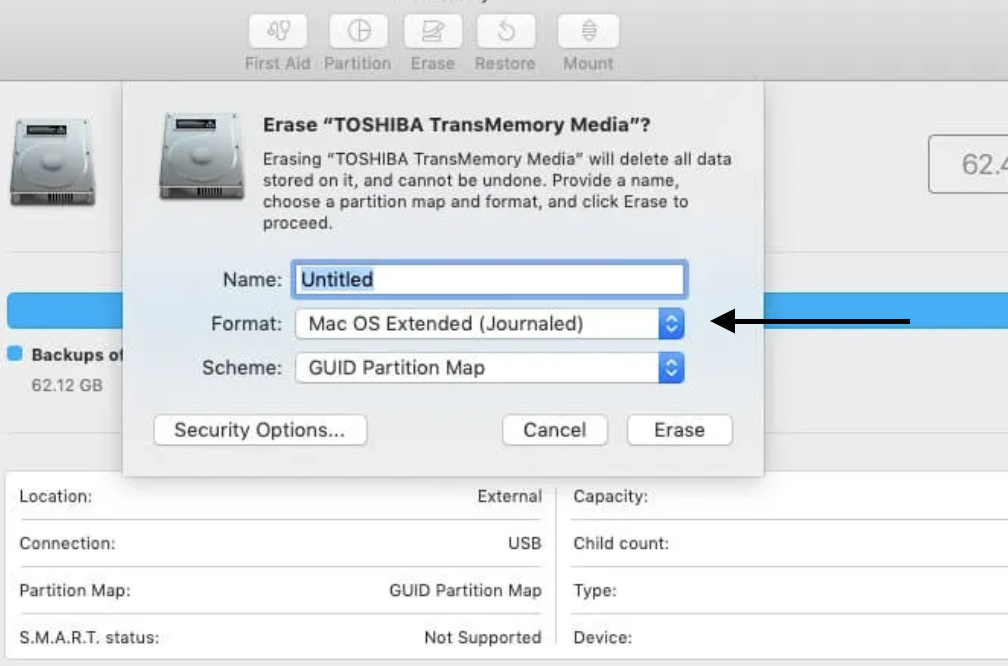
5. Format Time Machine Backup Drive to APFS
It is recommended to use APFS for your Time Machine backup drive, and you can format the drive to APFS by going to Disk Utility, selecting the drive, clicking on the "Erase" button, and then selecting "APFS" from the format options. This will ensure your Time Machine backups are compatible with APFS.
Step 1. To launch Disk Utility, press the CMD + Space key to open Spotlight, type "Disk Utility" and press Enter.
Step 2. Select your Time Machine backup drive from the left sidebar.
Step 3. To erase the Mac, click on the Erase button at the top, select APFS as the format, and then hit the Erase button.
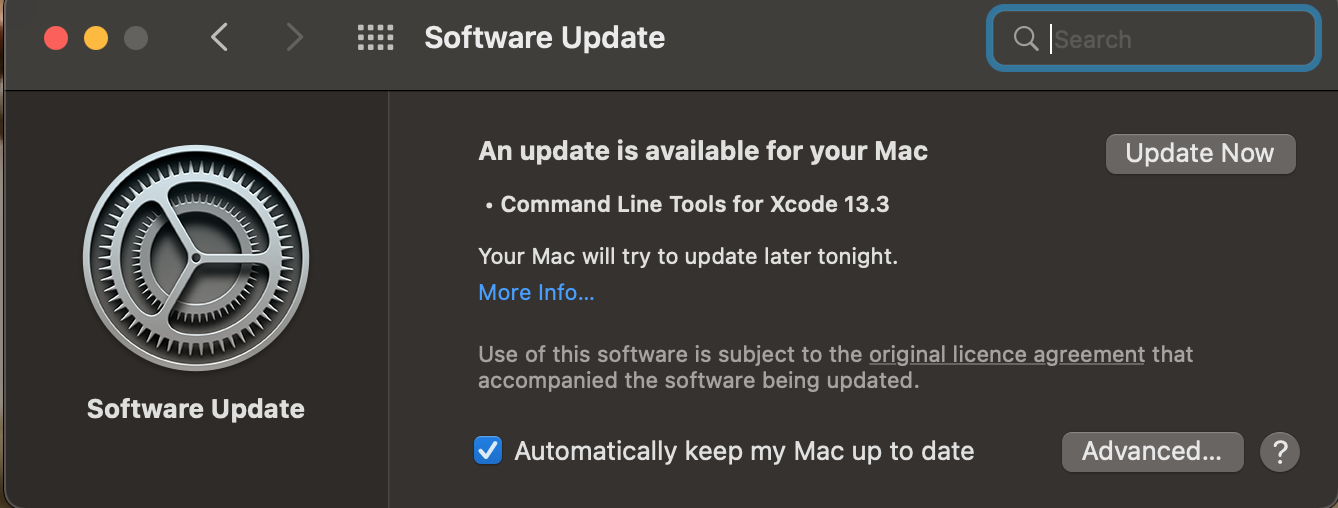
6. Install Available New macOS Update
To ensure smooth Time Machine backups, make sure to install any new macOS updates as soon as they become available, as pending updates can also cause backup issues.
Follow the steps below to install new macOS updates:
Step 1. Press CMD + Spacebar and type Software Update.
Step 2. If there is any update available, click on the "Upgrade Now" button.
Helpful Tips to Avoid Time Machine Backup Failure
While discussing the "Can't complete first backup" issue with Time Machine, it's worth noting that other users have also encountered problems with their backups, such as issues beyond the initial backup process.
- 1. Time Machine couldn't complete the Backup to "TimeCapsule."
- 2. The backup process failed due to an issue while copying files to the backup disk. This resulted in the backup not being completed successfully.
- 3. The backup volume is read-only.
And, there are more errors that you can encounter with your Time Machine. You can avoid falling to back up essential data by using the following tips:
Time Machine backup failed, not enough space: This error occurs when there's insufficient space on the backup drive. To resolve it, consider expanding the backup drive's storage capacity, removing unnecessary files, or excluding large files from the backup process.
Time Machine backup not backing up automatically: To enable automatic backups with Time Machine, go to System Preferences, then click on "Time Machine", and ensure the "Select Backup Disk" option is selected and the disk is chosen. Next, click on the "Options" button and select "Automatically protect all files on this disk" and "Encrypt backups". Finally, click on "Select Backup Disk" again to confirm your choices and start the backup process.
If Time Machine fails to recover your data, you may need to use data recovery software to help you recover data from your Mac.
How to Recover Data Without Time Machine Backup
Deep Data Recovery is a reliable and free Mac data recovery tool for macOS and old Mac OS X that allows users to recover files on their Mac without needing a Time Machine Backup, even when their Time Machine fails.
Deep Data Recovery for Mac is highly recommended due to its ability to recover data from any scenario. Whether a file was deleted, lost, or corrupt, this software can help you recover your data in simple steps.
Step 1. Launch Deep Data Recovery, select the file types you want to recover, and click "Next" to initiate the recovery process.

Step 2. Select the disk location where you lost data and files, then click the "Scan" button.

Step 3. Deep Data Recovery for Mac will immediately scan your selected disk volume and display the scanning results on the left pane, showing you a list of recoverable files.

Step 4. In the scan results, select the file(s) and click the "Recover" button to restore them.
Related Articles
- Mac Video Repair | How to Repair Corrupt MOV, MP4 Files
- Fix Corrupted Hard Drive on Mac with Two Methods
- External Hard Drive Data Recovery Mac: How to Recover Deleted Files from External Hard Drive
- How to Show Hidden Files on Mac
- How to Extract and Restore Specific/Individual Files from Windows 11/10/8/7 Backups
If you're trying to extract and restore specific or individual files from a Windows backup, there are two methods you can use. Whether you're working with a Windows 10, 8, or 7 image backup, these methods can help you find and restore single files or folders. - Fallout 4 Accidentally Deleted Saves, How to Recover?
Have you accidentally deleted saves from Fallout 4? This article will teach you how to recover your Fallout 4 accidentally deleted save with Qiling data recovery software. Download this free data recovery software to restore lost data as soon as possible.