How to Clone a Hard Drive with Clonezilla
Clonezilla is free, runs from a USB stick, and has copied drives in data centers for two decades. Its weakness is the interface: a text menu lists disks by cryptic device names, and one wrong choice overwrites the target without a recycle bin.
This walkthrough keeps the sequence short, explains what each confirmation means, and covers the firmware and boot record work that has to happen before the cloned disk will start Windows on its own.
PAGE CONTENT
- Boot Clonezilla Live from USB
- Read the Device Names Before You Choose
- Run a Device-to-Device Clone
- Clone with a Guided Alternative
- Set the Target as the Boot Disk
- FAQs About Clonezilla
- Back Up Before Clonezilla Writes
Boot Clonezilla Live from USB
- Get the live image. Download the Clonezilla Live ZIP or ISO for amd64 from the official site and check the published checksum.
- Write a spare stick. Rufus, Ventoy or dd can write the image, but the stick is erased, so use a spare 2GB or larger drive.
- Expect the firmware rules. Clonezilla Live starts in UEFI or Legacy mode, and Secure Boot may block it; disable Secure Boot for the session if it does.
- Choose the boot entry. Pick Clonezilla live with default settings, then answer the language and keyboard questions.
- Start the right menu. Select Start Clonezilla for the guided menus; the shell option is only for manual ocs-sr commands.
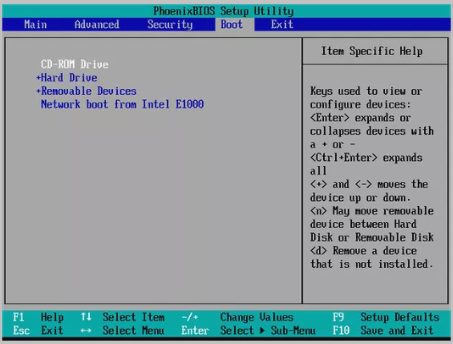
The stick must reach the firmware boot list before the hard drive does. Use the one-time boot menu, usually F12, F11 or Esc depending on the board, so you do not have to change the permanent order.
Read the Device Names Before You Choose
- Names follow the bus. SATA disks appear as /dev/sda, /dev/sdb, while NVMe drives appear as /dev/nvme0n1 and /dev/nvme1n1.
- Size is the safest clue. Compare the reported capacity and model string with the labels printed on the two physical drives.
- The target must fit. Clonezilla refuses a destination smaller than the source unless you pass -icds, and that flag skips a warning rather than creating space.
- The target is erased. There is no undo, so unplug external backup drives before booting the live media.
- -j2 keeps hidden sectors. On an MBR disk this copies the data between the partition table and the first partition, which some bootloaders rely on.
If the menu labels still look ambiguous, drop to the shell and run lsblk or sudo parted -l. Guessing between two identical 1TB drives is exactly how a clone lands on the wrong disk.
Run a Device-to-Device Clone
- Pick device-device. After Start Clonezilla, choose device-device, then stay in beginner mode for a straight disk copy.
- Choose disk to local disk. The beginner list calls it disk to local disk; the expert branch adds flags you do not need yet.
- Answer the two disk prompts. Clonezilla shows each disk with its capacity, so read the source screen and the target screen separately.
- Watch the size warning. If the target reports fewer sectors, continue only when you know the gap is rounding, not a smaller drive.
- Confirm twice. You press y to proceed and y again to accept that the target partition table will be destroyed.
Clonezilla runs from the live media, so it cannot clone the disk that is currently running Windows. Booting the stick is the whole point; there is no supported in-place mode from inside the installed system.
Clone with a Guided Alternative
If the text screens feel risky, the same job takes about five dialogs in Qiling Disk Master, and the destination is described by model and capacity instead of a Linux device name.
Watch the video tutorial below to clone the drive step by step with Qiling Disk Master.
Step 1. Open Qiling Disk Master, choose Clone, and then select Disk Clone.

Step 2. Connect the new disk with a SATA cable or USB adapter, then select the drive that currently holds Windows as the source.

Step 3. Select the new disk as the destination and read its model and capacity before you accept the warning.

Step 4. Keep the intelligent mode and leave all partitions selected so the EFI and recovery areas move along with Windows.

Step 5. Click Proceed, wait for the completion message, then power off and remove the old disk before the first start.

Set the Target as the Boot Disk
- Remove the live media. Clonezilla leaves the machine set to boot from the stick, so unplug it before restarting.
- Reorder the firmware list. Put Windows Boot Manager or the new disk first in the UEFI boot order.
- Disconnect the source disk. Two identical GPT disks can confuse firmware, which may keep reading the EFI entry of the old disk.
- Repair the boot if it stalls. Boot a Windows USB and run bootrec /rebuildbcd, or use bcdboot C:\Windows /s S: /f UEFI.
- Check capacity in Windows. Disk Management should show the full size; if the clone was scaled, extend the last partition into unallocated space.
A clone that starts only while the old disk is attached has a boot-order problem, not a failed copy. The firmware is still picking the first EFI entry in its list, which belongs to the original drive.
FAQs About Clonezilla
Does Clonezilla erase the destination drive?
Yes. Every partition and file on the target is replaced. Back up the target before you boot Clonezilla, because the tool offers no recovery step.
Can Clonezilla clone to a larger SSD?
Yes, the target only has to be equal or larger. Expert mode offers a proportional option so the partitions can use the extra space.
Why will the cloned disk not boot?
Firmware is usually still booting the old disk, or the EFI entry points at the old partition. Disconnect the source and repair the BCD.
Can Clonezilla clone a BitLocker drive?
It copies the encrypted blocks, but Windows may demand the recovery key on first boot. Suspend BitLocker before cloning to avoid that prompt.
Does Clonezilla create incremental copies?
No. Every job is a full image or a full device-to-device copy, so plan the storage space and the downtime before you start.
Back Up Before Clonezilla Writes
One wrong device name in Clonezilla wipes the only copy of your data. Create a separate system image first, so a failed clone becomes a restore job rather than a rebuild.
Watch the video tutorial below to back up Windows and restore it if the clone fails.
Step 1. Before booting Clonezilla, open Windows and create a System Backup with Qiling Disk Master.

Step 2. Save the image to a disk that will not be connected during the clone, ideally an external drive you unplug afterwards.

Step 3. Run the backup and let it finish completely; the optional shutdown tick prevents the PC from sleeping mid-backup.

Step 4. If the Clonezilla copy will not boot, restore the image to the original disk and repeat the clone with a different target drive.

Conclusion
Clonezilla works well when the device names are read carefully. Boot the live media, choose device-device and disk to local disk, confirm the target twice, then disconnect the source and put the new disk first in firmware. If the text menus still make the job feel unsafe, use a guided tool that names the destination for you.
For more on rescuing drives and imaging them, see How to Clone a Hard Drive with Bad Sectors, How to Clone an HDD to SSD Without Software, How to Clone a Disk with WinPE When Windows Won't Boot, and How to Clone a USB Drive to an ISO or Image File.
Related Articles
- Download Clonezilla Alternative for Windows 11/10/8/7
Use a graphical clone tool instead of text menus. - Clonezilla vs Qiling Disk Master for Windows Disk Cloning
Compare the two approaches side by side. - How to Fix Clonezilla Failed to Clone Bad Sectors
Handle read errors without losing the clone. - Which One to Choose: Macrium Reflect Free vs Clonezilla
Pick the right free imaging tool. - How to Clone a Hard Drive Without Booting Windows
Clone from live media when the system is down.
Products
Articles & Tutorials
- Data Recovery
- Data Backup
- File Recovery
- File Backup
- System Backup and Restore
- Disk and Partition Clone
- Technical articles
- Mobile articles
- Disk Master Help
- Windows Data Recovery Tutorials
- Windows Secure Delete Tutorials
- Windows Partition Management Tutorials
- Windows File Backup and Restore Tutorials
- Windows System Backup and Restore Tutorials
- Windows Disk Backup and Restore Tutorials
- Windows Clone Tutorials