How to Clone a PNY SSD to a New Drive
PNY builds some of the most affordable SSDs on the market, from the 2.5-inch CS900 to the NVMe CS1030 and CS3140, and none of them includes a migration program. Buyers often discover this after the drive is installed, when Windows still lives on the old disk.
This guide sorts out the PNY product lines, explains how to check capacity before a copy, and walks through a disk-level clone that keeps the boot partitions so the new drive starts on its own.
PAGE CONTENT
- Know Which PNY Drive You Bought
- Check Capacity and Interface First
- Cloning, TRIM, and 4K Alignment
- Clone with Qiling Disk Master
- Test the PNY SSD Before You Wipe
- FAQs About PNY SSD Clones
- Back Up Before the Clone
Know Which PNY Drive You Bought
- CS900 is a SATA drive. The 2.5-inch CS900 uses a SATA III connector and fits a laptop bay or a desktop SATA port.
- CS1030 and CS3030 are NVMe. These M.2 drives run over PCIe and cannot connect to a SATA cable at all.
- CS2130 and CS3140 sit higher in the range. The CS3140 adds PCIe 4.0 speed, while the CS2130 stays on PCIe 3.0 with a different controller.
- Entry models are DRAM-less. CS900-class drives use host memory buffer instead of onboard DRAM, so sustained writes slow down once the SLC cache fills.
- There is no PNY migration tool. The company publishes firmware notes but no cloning or transfer utility, so a third-party program is required.
Read the box or the drive label before buying an adapter. A SATA-to-USB cable will not accept an NVMe board, and a plain M.2 enclosure will not read a 2.5-inch SATA drive.
Check Capacity and Interface First
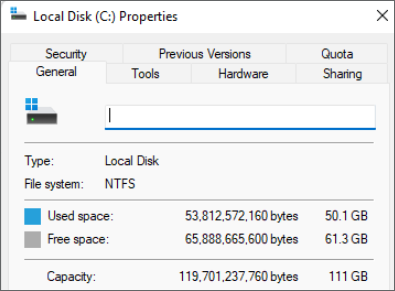
- Compare real capacity. A 1 TB PNY drive appears as about 931 GB in Windows, so the target must exceed used data rather than the marketing figure.
- Plan for the cache drop. Once the SLC cache is exhausted, a DRAM-less drive may fall to a few hundred MB/s for the rest of the copy.
- Match connector to connector. Clone SATA to SATA or NVMe to NVMe; a one-slot laptop needs a USB NVMe enclosure to hold the new drive.
- Clear the destination. Remove its old partitions and initialize it as GPT for UEFI firmware or MBR for a Legacy system.
- Pause antivirus scanning. Real-time scanning adds overhead during a block-level transfer and serves no purpose there.
These checks take a few minutes and prevent the most common failure: a copy that stops halfway because the target is slightly too small or the connector does not fit.
Cloning, TRIM, and 4K Alignment
- Clone the entire disk. Copy the EFI system partition, MSR, Windows, and recovery partition in a single job.
- Keep 4K alignment. A sector-by-sector copy of an old MBR disk can shift partition offsets, while intelligent clone keeps the original alignment.
- Confirm TRIM is enabled. Run fsutil behavior query DisableDeleteNotify; a returned 0 means the SSD receives TRIM commands.
- Skip defragmentation. Defragmenting an SSD adds write wear without improving speed, and Windows already handles SSDs differently.
- Verify the boot entry. After the swap, UEFI setup must list Windows Boot Manager on the PNY drive.
If the cloned PNY drive writes far below its rating, check the SATA link speed. A worn cable can negotiate 1.5 Gb/s instead of 6 Gb/s and quietly bottleneck the whole system.
Clone with Qiling Disk Master
Because PNY offers no transfer utility, a disk-level clone is the only way to move Windows and the boot partitions to a CS900, CS1030, or CS3030 drive in one pass.
Watch the video tutorial below to clone the drive step by step with Qiling Disk Master.
Step 1. Open Qiling Disk Master, choose Clone, and then select Disk Clone.

Step 2. Select the source disk that holds Windows and click Next.

Step 3. Select the PNY SSD as the destination and confirm that its data will be replaced.

Step 4. Choose the clone mode; intelligent clone copies only used sectors and keeps the partitions aligned.

Step 5. Click Proceed, wait for the copy to finish, then shut the machine down before you remove any cable.

Test the PNY SSD Before You Wipe
- Boot from the new drive alone. Disconnect the source disk for the first start so the firmware cannot fall back to it.
- Read the model in Settings. Storage should report the PNY model instead of a generic NVMe controller description.
- Run a quick benchmark. Sequential reads close to the rated speed show the link is healthy after the swap.
- Check the full capacity. The volume should match the drive size, not a fraction left over from a partial copy.
- Keep the source disk for a week. A hidden partition or a missed driver may appear later, and the old disk is the fastest fix.
Clone the drive a second time if the first attempt booted but lost the recovery partition. Repeat the copy rather than rebuilding partitions by hand.
FAQs About PNY SSD Clones
Does PNY provide software to clone a drive?
No. PNY ships no cloning or migration utility, so you need a third-party program that works at disk level.
Can I clone from an NVMe drive to a CS900 SATA SSD?
Yes, but the target must be large enough and the machine must boot from the SATA port afterwards. Adjust the boot order in firmware.
Why is the clone slower than the PNY drive's rating?
The drive is DRAM-less and loses speed once the SLC cache fills. A slow USB adapter or a 3 Gb/s SATA link also caps the transfer.
Will cloning to a PNY SSD keep my Windows activation?
Usually yes, because the license follows the motherboard. A digital license re-arms without a new key.
Why does the PNY SSD show less space after cloning?
Either the tool left unallocated space at the end of the disk or it copied only one partition. Extend the volume or repeat a disk-level clone.
Back Up Before the Clone
A clone replaces everything on the target and can leave Windows unbootable when the boot mode does not match. Save a system image first so a failed attempt costs nothing but time.
Watch the video tutorial below to back up Windows and restore it if the clone fails.
Step 1. Open Qiling Disk Master and select System Backup to include the EFI and recovery partitions.

Step 2. Save the image to an external disk and keep it away from the PNY drive you are about to fill.

Step 3. Click Proceed to start the system backup and wait patiently until it finishes. You can also tick Shut down the computer when the operation is completed to power off automatically.

Step 4. If the PNY clone fails or the SSD is not detected, restore the image and test the drive in another port first.

Conclusion
PNY covers SATA and NVMe models from the budget CS900 to the PCIe 4.0 CS3140, and none of them ships with a cloning utility. Mark the connector and the real capacity, clear the destination, and run a disk-level clone that keeps the EFI, MSR, and recovery partitions. Then boot with the old disk disconnected, confirm the model and the full capacity, and hold on to the source drive until the upgrade has proven reliable.
For more on capacity and partition outcomes, see Clone a Hard Drive to a Larger Hard Drive, Clone a GPT Disk to an MBR Disk, Clone Only the OS Partition to a New SSD, and Cloned SSD Not Showing Full Capacity.
Related Articles
- How to Clone a Crucial SSD to a New Drive
Crucial HQ and MX drives clone with the same disk-level method. - Clone a Hard Drive to a SanDisk SSD
Replace a failing hard drive with a SanDisk SSD and keep it bootable. - How to Clone a Western Digital SSD
Copy a WD drive and reset the firmware boot order afterwards. - Best Free Disk Cloning Software in 2026
Compare free tools by clone limits, boot media, and SSD support. - Clone a Hard Drive to a Smaller SSD
Shrink the data first when the new SSD holds less than the old disk.
Products
Articles & Tutorials
- Data Recovery
- Data Backup
- File Recovery
- File Backup
- System Backup and Restore
- Disk and Partition Clone
- Technical articles
- Mobile articles
- Disk Master Help
- Windows Data Recovery Tutorials
- Windows Secure Delete Tutorials
- Windows Partition Management Tutorials
- Windows File Backup and Restore Tutorials
- Windows System Backup and Restore Tutorials
- Windows Disk Backup and Restore Tutorials
- Windows Clone Tutorials