SSD Clone Write Speed Drops Halfway: Causes and Fixes
Quick Navigation:
- Burst Speed and Sustained Speed
- Is It the Drive or the Link?
- Heat, Hubs, and What to Change
- Clone Again with Qiling Disk Master
- Frequently Asked Questions
A clone that writes 1,500 MB/s for the first minute and then settles at 200 MB/s looks like a failure but is often normal behavior. Solid state drives are rated for short bursts, while a disk clone writes for an hour without stopping. The middle of the job is where the cache, the controller, and the port reveal their real limits.
Burst Speed and Sustained Speed
A published sequential write figure is measured over a few seconds on an empty drive. A clone writes every used byte in one pass, so the number that matters is the sustained rate after the cache is full, which is far lower on most consumer drives.
TLC and QLC drives use part of the flash in single-level mode as a write cache. While that cache has room, data lands at full bus speed; when it fills, the drive folds the cached blocks into denser cells and the incoming writes must wait, so the rate falls to the raw speed of the flash.
A destination that is already full has little room to absorb that folding, and a DRAM-less drive keeps a smaller cache. Both make the curve flatten earlier, which is why the drop often appears at 40 or 60 percent instead of near the end.
Is It the Drive or the Link?
Watch where the speed settles rather than how far it fell. A value that reaches a plateau and stays flat for many minutes is the sustained rate of that drive, and no setting will raise it.
An abrupt drop followed by recovery points at thermal throttling. Most NVMe drives reduce their write rate between 70 and 80 degrees Celsius, and an enclosure without airflow reaches that temperature within minutes of continuous writing.
A ceiling near 35 MB/s is a USB 2.0 connection, and one near 400 MB/s is a USB 3.x link shared with other devices. Compare that number with the same SSD connected directly to the board before blaming the drive.
The cable, the bridge chip, and the port each set a maximum, and the clone can only run at the lowest of them. A drive that reaches 900 MB/s inside the case and 350 MB/s in an enclosure has not slowed down; the enclosure has always been the limit.
Heat, Hubs, and What to Change
Give an NVMe drive a heatsink or open air, and keep it out of a closed bay during a long copy. A SATA SSD in a metal enclosure should feel warm after ten minutes, not hot enough to pull your hand away.
Connect the destination to a rear port on the motherboard, not to a hub and not to a front-panel header. Rear ports sit on chipset or processor lanes and hold a stable link for the whole job, while a hub divides one upstream connection among everything plugged into it.
Reduce the amount that has to be written. A copy of used space instead of a sector-by-sector copy can halve the job on a drive with plenty of free room, and a shorter job stays inside the cache window and below the throttle point.
None of this raises the physical limit of the drive; it changes how long the job stays near the top of the curve. For typical durations at each interface, see how long a disk clone takes.
Clone Again with Qiling Disk Master
Qiling Disk Master reports the transfer rate while it copies, so a drop is visible as it happens rather than an hour later. Run the job with the destination directly attached and the drive cool, and the rate should stay on one plateau for the whole run.
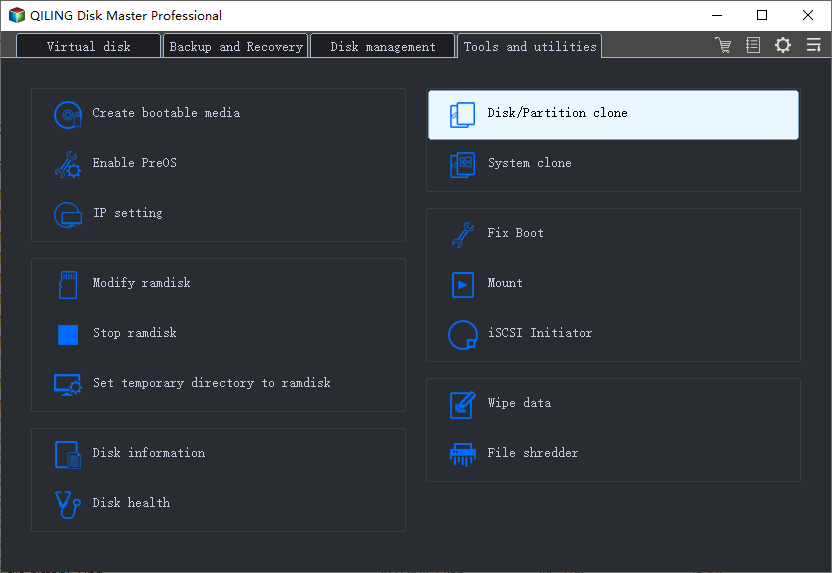
Step 1. Open Disk/Partition Clone
On the Tools and utilities tab, click Disk/Partition clone. Leave System clone alone here, because copying only the Windows partition produces a shorter job and hides the sustained behavior you are testing.
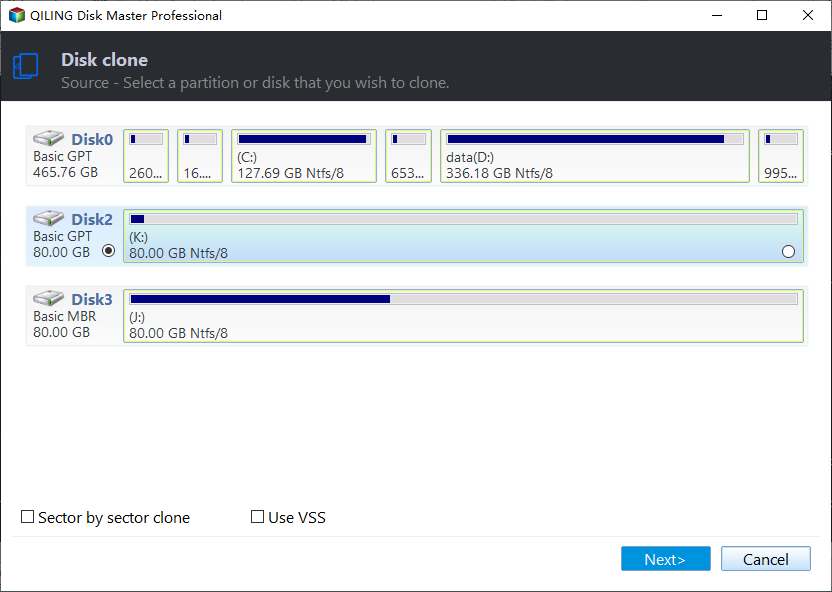
Step 2. Select the Source Disk
Pick the source and click Next. Use the default copy for a healthy drive, since the sector-by-sector option writes the free space too and doubles the amount that has to pass through the cache.
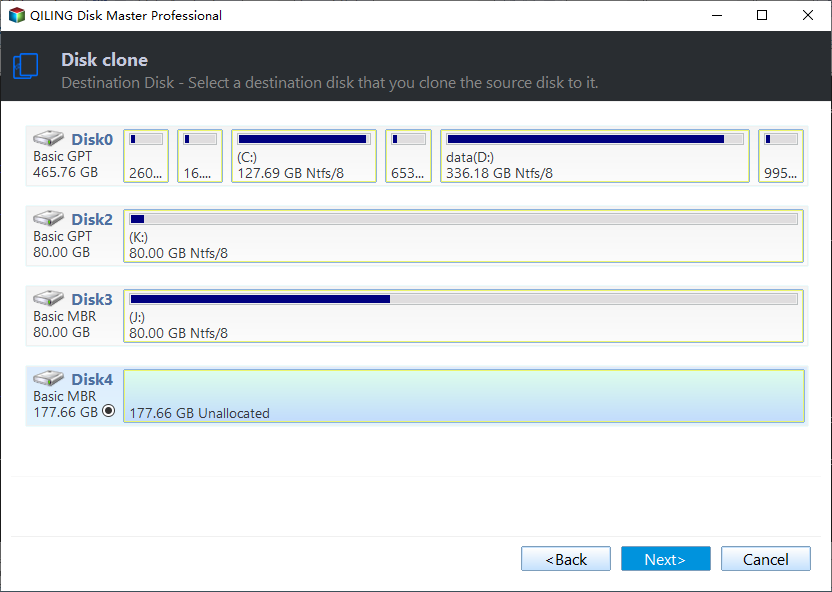
Step 3. Select the Destination SSD
Choose the SSD and check that its capacity and model match what you expect. An enclosure that reports the wrong size will also report a wrong limit, and the copy will stall long before the drive is actually full.
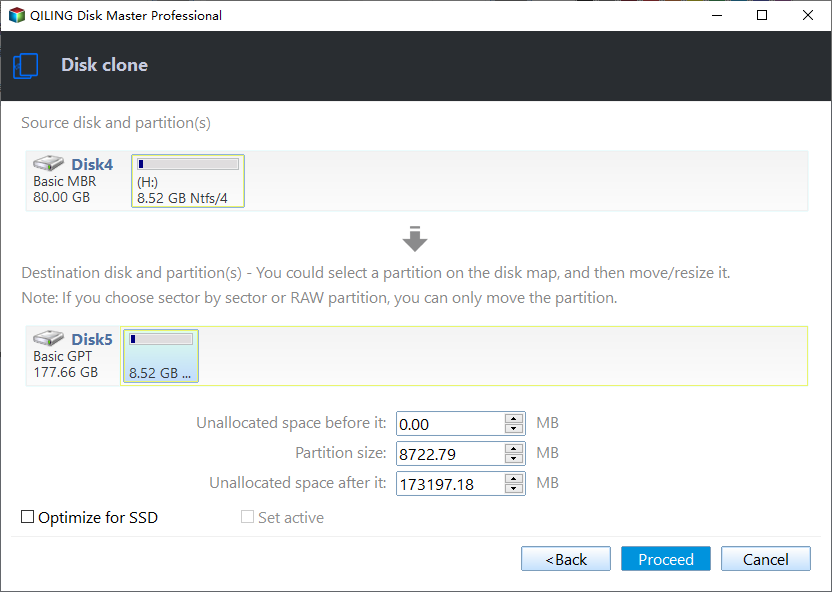
Step 4. Check the Preview and Click Proceed
Confirm the layout, tick the SSD option, and choose Autofit the disk when the destination is larger. Click Proceed, accept the overwrite warning, and watch the rate for the first five minutes to see which plateau the job settles on.
Step 5. Read the Finish Window
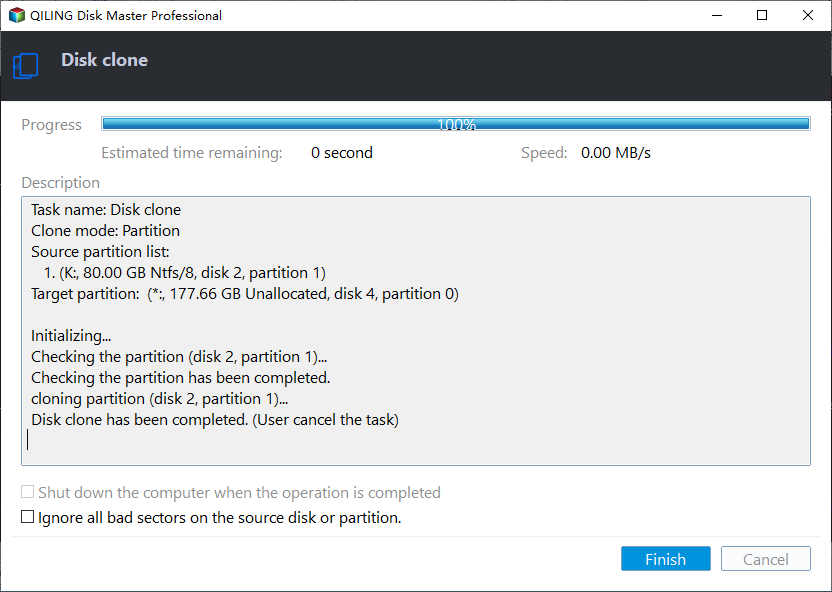
A finished job reports 100 percent, the line Disk clone has been completed, and an enabled Finish button. A job that stops with a write error instead names the phase that failed, which separates a slow drive from a link that dropped.
A destination that ends the job much slower than expected is worth testing on its own; an SSD that is slow after cloning covers the checks on the finished system.
Frequently Asked Questions
Why does the speed fall at the same point every time?
Because the cache size is fixed. The first block of gigabytes is absorbed at full speed, and once that space is used the drive must fold data as it writes. On the same drive and the same amount of data, the drop lands at the same place.
Does a slow second half mean the SSD is faulty?
Usually not. A sustained rate far below the advertised burst figure is normal for consumer TLC and QLC drives. Only a rate that collapses to single digits, or a job that fails, points at a hardware problem.
Can I pause the clone and let the drive cool?
Most clone jobs run straight through, and cancelling leaves the destination half written and in need of preparation again. Cooling the drive before the start, or improving airflow around it, is more effective than interrupting the copy.
Related Articles
- SSD Slow After Cloning: How to Fix It
- How Long Does a Disk Clone Take?
- Disk Clone Stuck at 0% or 99%: Causes and Fixes
- How to Clone a Drive with a Docking Station
- Clone an HDD to an SSD with a USB Cable Only
Products
Articles & Tutorials
- Data Recovery
- Data Backup
- File Recovery
- File Backup
- System Backup and Restore
- Disk and Partition Clone
- Technical articles
- Mobile articles
- Disk Master Help
- Windows Data Recovery Tutorials
- Windows Secure Delete Tutorials
- Windows Partition Management Tutorials
- Windows File Backup and Restore Tutorials
- Windows System Backup and Restore Tutorials
- Windows Disk Backup and Restore Tutorials
- Windows Clone Tutorials