How to Find Motherboard on Windows 11, 10, 8 and 7
To find the motherboard model information on a Windows 11, 10, 8, or 7 computer, you can use various methods such as the System Information tool, Command Prompt, or third-party tools. Alternatively, you can access the boot menu or physically disassemble your computer to find the information.
To find your motherboard model on a Windows 10 computer, you can use various methods. Whether you are troubleshooting a hardware issue or simply want to know more about your computer's setup, these methods will help you find the information you need.
By following these steps, you will be able to identify your motherboard model and potentially resolve any hardware-related problems. Additionally, this knowledge can provide you with valuable insights into your computer's capabilities and how to optimize its performance.
Find Motherboard on Windows 11, 10, 8, and 7
Using Microsoft's System Information Tool
To find the motherboard information using Microsoft's System Information tool in Windows 11, 10, 8, or 7, follow these steps: Open System Information, click on "System Summary" on the left, and look for "Baseboard" or "Motherboard" in the right panel.
This will display the motherboard model, manufacturer, and other details. Alternatively, you can also use the Device Manager to find the motherboard information by expanding the "System devices" section and looking for the motherboard model listed there.
Step 1. To open the Run dialog box, press the Windows key + R on your keyboard.
Step 2. To open the System Information window, type "msinfo32" and press Enter.

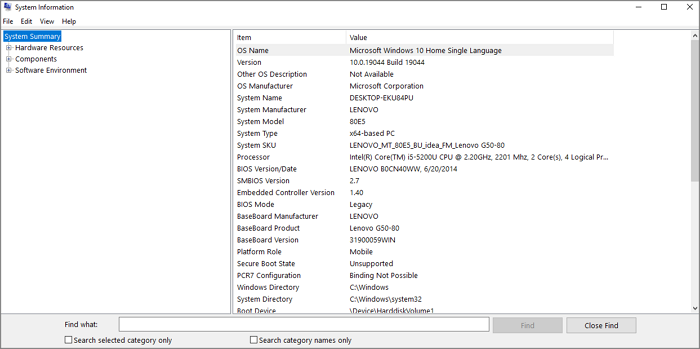
Step 3. The System Information window will display various system details, and clicking on the "System Summary" option on the left side will provide an overview of the system's hardware and software configuration. This includes details about the processor, memory, storage, and operating system.
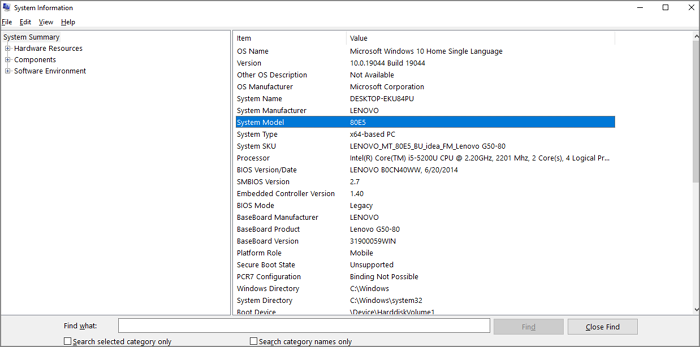
Step 4. To find the model number of your motherboard, scroll down to the "System Model" field in the middle of the window. The information listed next to "System Model" will be the model number of your motherboard.
Using Command Prompt
To find the motherboard information in Windows 11, 10, 8, and 7 using the Command Prompt, you can type the command "wmic" followed by "path baseboard get product" and press Enter. This will display the motherboard model, manufacturer, and other relevant details.
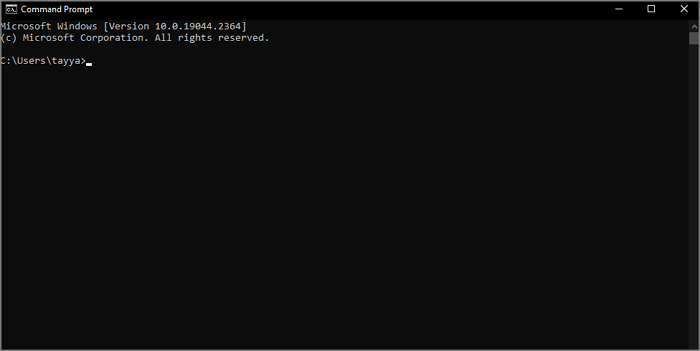
Step 1. To open the Command Prompt as an administrator, press the Windows key + X on your keyboard and select "Command Prompt (Admin)" from the menu that appears.
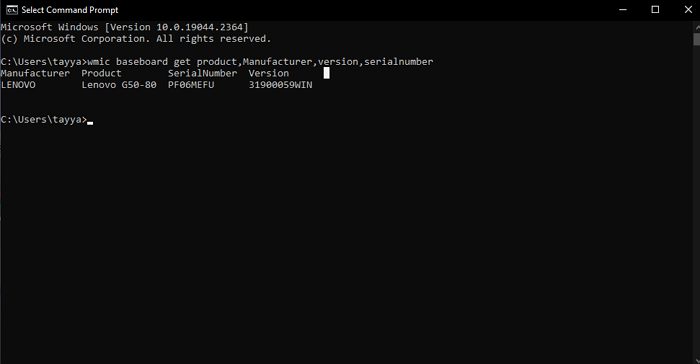
Step 2. In the Command Prompt window, type the following command and press Enter: wmic baseboard get product,Manufacturer,version,serialnumber.
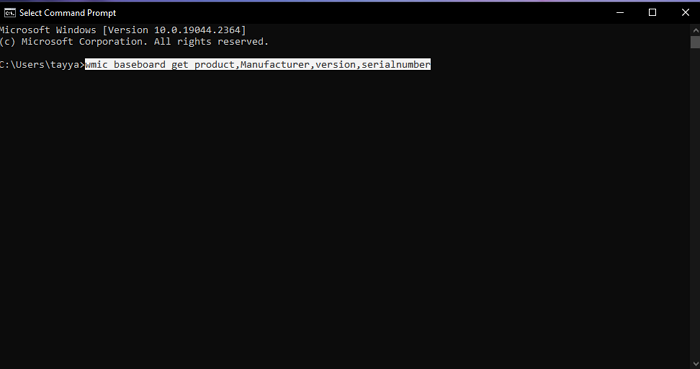
Step 3. This command will display the following information about your motherboard:
- Product: The model number of your motherboard
- Manufacturer: The manufacturer of your motherboard
- The version of the BIOS or UEFI firmware installed on your motherboard is referred to as the "version".
- Serial Number: The serial number of your motherboard
Using Boot Menu
To find your motherboard information in Windows 11, 10, 8, or 7, simply access the boot menu. From there, you can view detailed information about your motherboard, including its specifications and features.
Step 1. Restart your computer and wait for the BIOS or UEFI boot screen to appear.
Step 2. Press the key listed on the screen, usually DEL, F2, or F12, to enter the BIOS or UEFI setup, as the required key may vary depending on your motherboard.
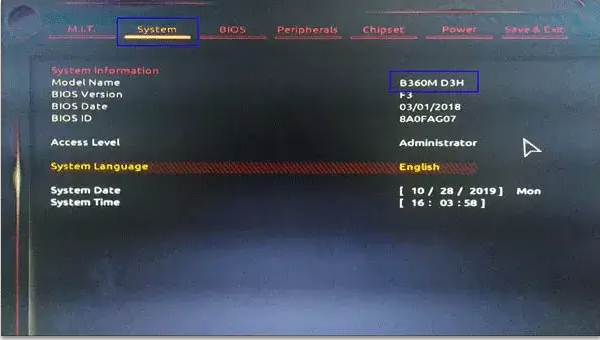
Step 3. In the BIOS or UEFI setup, look for a section called "Main" or "System Information" where you can find details about your system, including the CPU, RAM, and storage devices. This section is usually located on the main menu or under a tab labeled "System" or "Hardware."
Your motherboard model number is a series of letters and numbers that can be found on the motherboard itself, usually printed on a sticker or etched into the surface. It may look something like this: "MS-7A92" or "ASUS PRIME Z390-A."
The model number is unique to your specific motherboard and can be used to identify it among other similar models.
Using Third-Party Tools
There are several third-party tools you can use to find motherboard information in Windows 11, 10, 8, or 7, such as CPU-Z, Speccy, and HWiNFO. These tools are easy to download and use.
To find the motherboard information using CPU-Z, follow these steps:
Step 1. Download and install CPU-Z from the official website.
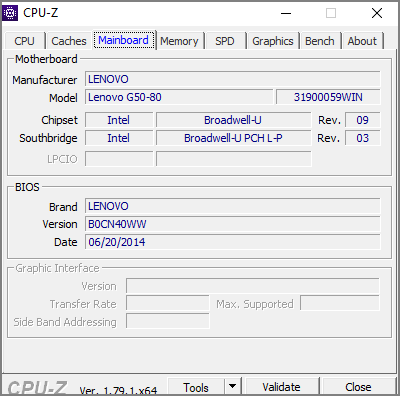
Step 2. Launch CPU-Z and click on the "Mainboard" tab.
Step 3. The model number of your motherboard is listed under the "Model" field, providing a unique identifier for your specific motherboard.
This number can be used to look up information about your motherboard, such as its specifications, features, and compatibility with other components.
To find the motherboard information using HWiNFO, follow these steps:
Step 1. Download and install HWiNFO from the official website.
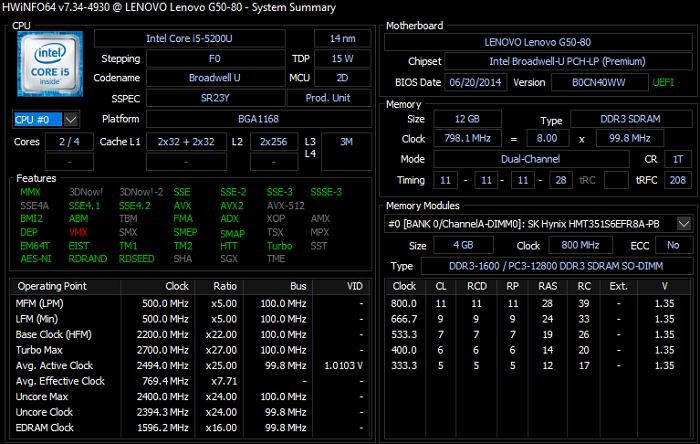
Step 2. Launch HWiNFO and click on the "System Summary" option on the left side of the window.
Step 3. In the System Summary view, locate the "Motherboard" section which displays the manufacturer, model, and chipset information of your motherboard.
Step 4. The model number of your motherboard is listed next to "Model" in the provided information.
To find the motherboard information using Speccy, follow these steps:
Step 1. Download and install Speccy from the official website.
Step 2. Launch Speccy and click on the "Motherboard" tab on the left side of the window.
Step 3. The model number of your motherboard is the information listed under the "Model" field.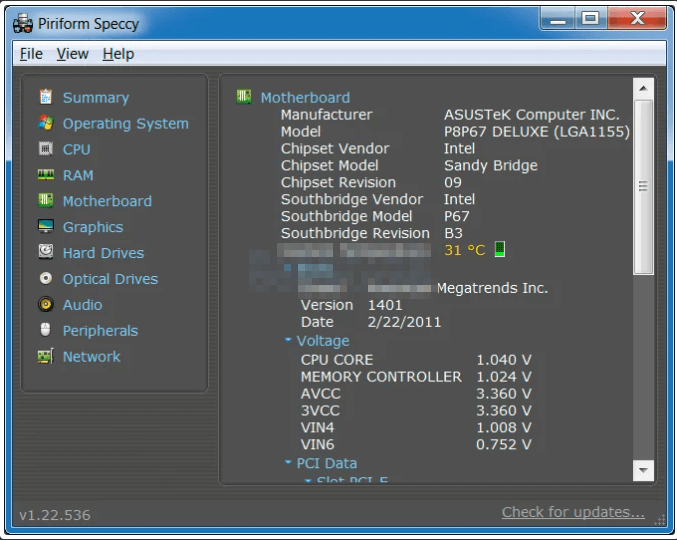
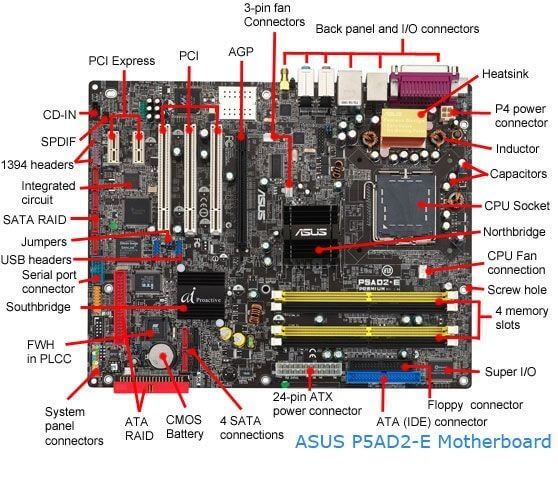
Physically Disassembling The Computer
To find the motherboard model on Windows 10, you can physically disassemble the computer. Start by opening the computer case, which will give you access to the motherboard.
Locate the motherboard, usually found in the center of the case, and look for a label or sticker with the model number printed on it. Alternatively, you can also check the manufacturer's website or documentation for the computer to find the motherboard model.
Step 1. Unplug your computer from the power outlet and turn it off.
Step 2. Remove the side panel of your computer case. The side panel is usually secured with screws or thumbscrews.
Step 3. Once the side panel is removed, you will be able to see the inside of the computer.
Step 4. The motherboard, a large circuit board, is typically found in the center of the computer case and is connected to the power supply, CPU, memory, and other hardware components.
Step 5. Look for a label or sticker on the motherboard that indicates the model number, usually located near the center or a corner.
Conclusion
Now that you have read this post, finding your motherboard model on Windows 11, 10, 8, and 7 should be a breeze. With five easy methods to choose from, you can pick the one that suits you best.
Whether you are a tech-savvy individual or not, these methods are straightforward and simple to use, making it easy to get the information you need. If you have any further questions, feel free to drop a comment below.
FAQs
Is The Motherboard Listed In Device Manager?
Your motherboard is usually listed in the Device Manager under System Devices, making it easily accessible for viewing.
Where Is The Motherboard Driver In Device Manager?
Your Motherboard drivers can be found in the Management Engine Interface in the Device Manager. To access this, go to the Device Manager, scroll down to System Devices, click on the Management Engine Interface, and it will show details about the motherboard driver, including the install and update dates, which will be either Intel or AMD depending on your system.
Are Motherboard Drivers Automatically Installed?
When you install Windows on your computer, it automatically installs all necessary drivers, saving you the hassle of manually installing them. Additionally, Windows allows you to receive automatic updates of these drivers when you update your operating system.
Related Articles
- Great Discover Virus | Here Is Everything You Should Know
- What Is A DMG File on Mac/Windows and How Do You Use It?
- How to Open Windows Device Manager [Full Guide in 2023]
- Intel-Based Mac | What Is Intel Mac and Why Differs from Apple Silicon
- How to Reset BIOS to Default Settings in 3 Different Ways
You can easily reset your BIOS to its default settings using the methods outlined in this article, which explains what BIOS is, why you might need to reset it, and how to do so. - [All You Should Know] How to Save Sims 4 While Frozen
Learn what to do when Sims 4 freezes and how to protect your saves. Try recovery steps, backup tips, and fixes to reduce future freezes.