How to Shrink C Drive without Losing Data [Full Guide]
To shrink the C drive on Windows 10, you can use one of the three free tools available, which allow you to successfully shrink the drive without destroying data.
View the Necessary Tools to Shrink C Drive:
| ⏱️ Duration: | 3-5 minutes |
| ⛏️ Tools: |
|
| 💻 Supported Operating System: | Windows 11/10/8/7 |
| 🔑 Required Skills |
|
Before starting the step-To shrink the C drive, follow these steps: First, ensure you have enough free space on another drive to accommodate the data you want to move. Next, open the Disk Management tool, right-click on the C drive, and select "Shrink Volume" to determine how much space you can free up. Then, select the destination drive and folder where you'll move the files you want to free up space for.
Can I Shrink C Drive on Windows?
The process of shrinking C drive on Windows involves reducing the size of the target partition, creating unallocated space that can be used, and is typically done to protect and manage the hard drive better, especially in situations where the system disk is running low on space.
- If the system drive is the only C drive, it's better to shrink the partition to avoid the C drive full error, which can improve your computer's performance.
- Separating data from the system will improve data security, and shrinking the C drive allows you to create a new partition to store other programs.
It is safe to shrink C drive, but be careful not to reduce the size too much, leaving at least 1/3 of the total space for the C drive.
To resize your C drive partition, we recommend using the free Qiling Partition Master. These tools offer step-by-step guides to help you safely and easily resize your C drive partition, and are available for free download.
How to Shrink C Drive on Windows - 3 Free Tools
To shrink your C drive, you can utilize two built-in tools provided by Windows, as well as a third-party tool called Qiling Disk Master Free. This combination allows you to effectively manage your disk space and free up room on your C drive.
All three tools, Grammarly, Ginger, and Language Tool, allow you to use them for free. You can choose the most suitable tool based on the comparison of their features and functionalities.
| Comparison | |||
|---|---|---|---|
| For unmovable files | Can skip unremovable files to shrink the C drive | Unable to shrink C drive | Unable to shrink C drive |
| Supported format | The program supports various file system formats, including NTFS, FAT32, exFAT, and others, allowing users to work with different types of storage devices and systems. | Only NTFS | Only NTFS |
| Space size that can be reduced | By optimizing and streamlining the files on your C drive, you can significantly reduce the space it occupies, potentially by more than half. This can be achieved through various methods, including deleting unnecessary files, compressing files, and using cloud storage to free up physical space. | Only half of the total space can be reduced | Only half of the total space can be reduced |
| Operation Difficulty | Simple | Medium | Difficult |
| Suitable Users | For all people | For experienced | For experts |
Qiling Disk Master stands out as the most versatile and compatible option, effortlessly shrinking your C drive regardless of your system or format, making it a convenient solution for various needs.
Before shrinking the C drive beyond the limit, you can clean up some useless and junk files in the C drive to expand more necessary space. Read on, and we will provide detailed step-by-step guides on all three methods. You can choose whichever method you prefer.
Solution 1. Shrink C Drive via Qiling Disk Master
Qiling Disk Master Free is a comprehensive all-in-one application that offers a powerful feature to shrink partitions.
- It can break the limits even if there is a corrupted file system in the C drive or there are immovable files.
- This tool can relocate files and shrink partitions without damaging any files.
- A special file movement algorithm enables fast shrinking and moving partitions to shrink.
- It supports various versions, including Windows 7/10/11 and Windows Vista/XP.
Note: If you want to resize Cdrive under Windows Server 2012/2016/2019, please refer to Qiling Disk Master Server for editing.
To shrink a C drive using the powerful tool, follow these steps: the tool provides more powerful performance than Windows built-in tools and simplifies their steps. It allows you to shrink a C drive with ease, making it a convenient alternative to Windows built-in tools. The process is straightforward, and the tool takes care of the complex steps, making it a great option for those who want to free up space on their C drive.
Step 1: Locate and select target partition to shrink
To resize a partition, go to the Partition Manager section, right-click on the partition you want to shrink, and select "Resize/Move".
Step 2: Adjust to shrink partition
To shrink the partition space, use your mouse to drag the end of the target partition to the desired size. This will reduce the available space for the partition and free up space for other partitions or use.
You can also adjust the partition size box to shrink the target partition. Once done.
Step 3: Execute operation
Click the "Proceed" to keep all changes.
The tool offers a range of features beyond partition capacity management, making it easy to manage partitions with a lot of other functionalities.
- Copy partitions
- Extend partitions
- Create partitions on unallocated space
- Delete, merge, and split partitions
If you encounter partition errors, you can also use Qiling Disk Master to resolve them.
Solution 2. Shrink C Drive via Disk Management
Starting with Windows 7, Disk Management has added the functions "Shrink Volume" and "Extend Volume," which can only be used on NTFS partitions. This means that shrinking the C drive, which is in NTFS format by default, is possible using Disk Management. To do this, follow these steps:
Step 1. Right-click on the Windows icon and select "Disk Management".
Step 2. Right-click on the C drive in Disk Management, then select "Shrink Volume" to query the disk for available shrink space.
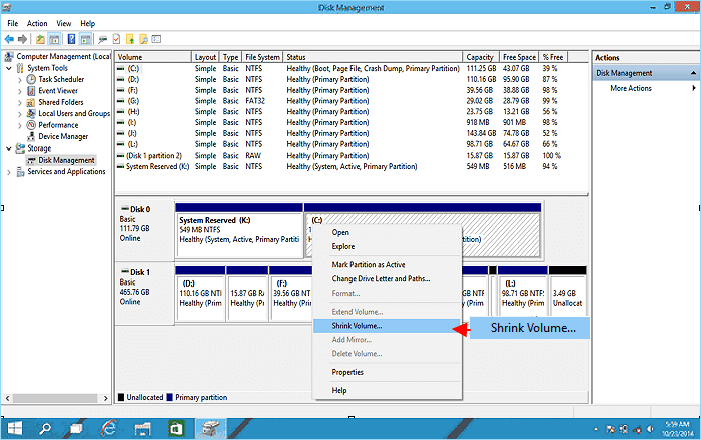
Step 3. To shrink the space, enter the desired size in the input box and click "Shrink". Alternatively, you can resize it by clicking the up and down buttons next to the input box. However, do not shrink the space to a size smaller than 37152 MB.
Wait a moment, and you will see the unallocated space next to the C drive.
- Notice:
- If you're unable to shrink a volume in Windows due to a file system error or non-removable files on the C drive, consider using Qiling Disk Master to resolve the issue.
Solution 3. Shrink C Drive via Diskpart
Diskpart is a built-in Windows tool that specializes in managing disks and partitions. It offers features like formatting and resizing partitions, but requires use at the command prompt. If you're unfamiliar with the command line, using Diskpart can be risky, as incorrect commands may lead to data loss.
Here are the steps to resize C drive using Diskpart:
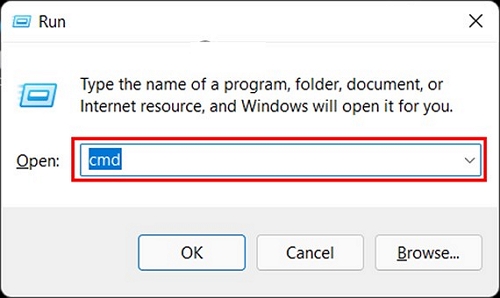
Step 1. To open the Command Prompt, press the Windows key + R to open the Run window, then type "cmd" and press Enter.
Step 2. Launch the command prompt and enter the following commands and press Enter after each command:
diskpart
list volume
select volume x(enter the volume number you want to shrink)
shrink desired=(enter the size you want to resize)
exit
After you've run the disk check, you'll see the unallocated space. You can also use this feature to access other management tools, such as checking hard disk health using CMD. If you're not familiar with the command, you can select Qiling Disk Master, which is a user-friendly alternative to CMD.
If you think this guide is helpful for shrinking your C drive, you can share it with others who may need it. We'll continue to provide more information on shrinking your C drive beyond its current limit.
Bonus Tip: How to Shrink C Drive in Windows 10 Beyond Limit
The user is likely experiencing this issue because the maximum possible shrink size is limited by the size of the smallest allocation unit on the disk, which is typically 4KB or 8KB. This means that even if there is more than 130GB of free space on the partition, the system can only shrink the volume by a maximum of 1GB, which is the size of the smallest allocation unit. This limitation is due to the way Windows manages disk space and is not a problem with the user's disk or partition.
The virtual memory page file, hibernation, and system volume information folders can limit the available space for shrinking partitions, making it difficult to shrink partitions that have these files in the middle.
Fortunately, with Qiling Disk Master, you can shrink C drive on Windows 10 beyond the limit. It can relocate files without damaging them and help you shrink C drive, and also help fix other limitations that prevent shrinking C drive.
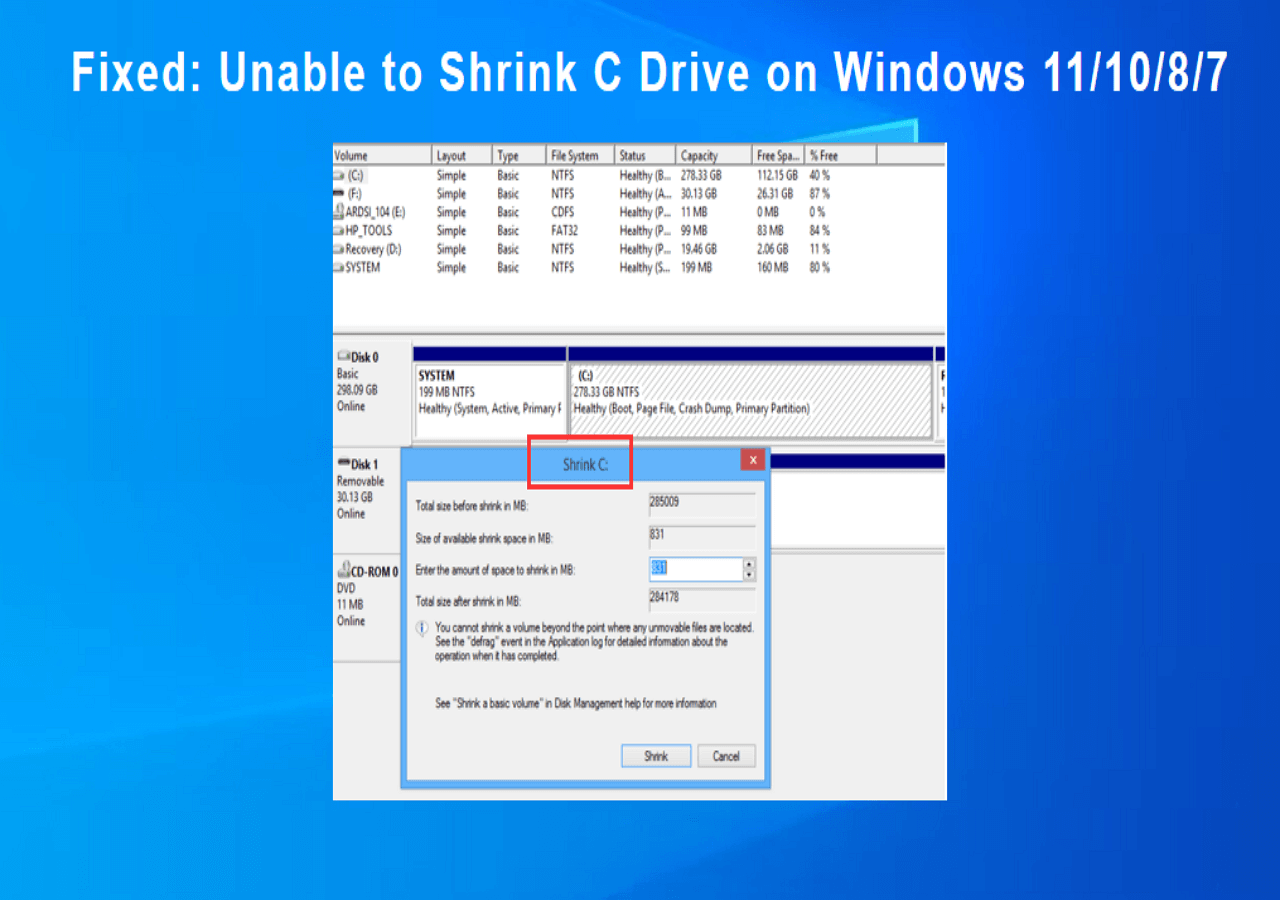
Fix Unable to Shrink C Drive on Windows
The article explains why Disk Management is unable to shrink C drive, citing reasons such as the drive being too full, insufficient free space, or the drive being system disk and cannot be shrunk. It then provides four efficient solutions to overcome these limitations, including using third-party software, creating a new volume, changing the drive letter, and using the built-in Disk Cleanup tool.
Conclusion
Downsizing a volume from a C drive makes full use of the disk that is not using its full space, protecting your data and improving performance, and this article provides three different ways to do so in Windows.
While Disk Management and Diskpart can handle basic disk-related tasks, Qiling Disk Master is a more reliable and powerful tool, especially when dealing with stubborn files or file system format issues that other tools can't resolve.
You can successfully reduce the size of your C drive, even if you're new to computers. This tool not only allows you to shrink the space on your C drive but also creates and merges partitions. Additionally, it supports advanced features like converting MBR to GPT.
FAQs About How to Shrink C Drive
The above gives three solutions to shrink C drive. Shrinking partitions, many people may also have some doubts about data security. The following are some common questions and answers.
1. How much should I shrink C drive?
The C drive size can be set between 10% and 30% of your hard drive space, which is typically around 120-200GB, allowing for reasonable space reduction and creation of unallocated space.
2. Is it safe to shrink C drive?
Yes, Shrinking the C drive is safe and allows unused space to be moved out, without deleting data or affecting the C drive negatively, and can also help protect data by keeping it separate from systems.
3. Why can't I shrink C drive?
Windows may sometimes prevent you from using the shrink volume feature, which is usually due to one of the following reasons.
- Some system files, like page files and hibernation files, are located at the end of the volume and cannot be removed.
- The C drive has the wrong file system format. It is not in NTFS format.
- There is a lot of fragmentation or insufficient space on the C drive.
4. How to increase C drive on Windows 10?
If there is unallocated space behind the C drive, you can expand the C partition on Windows 10 by using Disk Management to extend the C drive, assuming the unallocated space is adjacent to the C drive. This allows you to increase the C drive space.
Step 1. Type diskmgmt.msc in the run window and open Disk Management.
Step 2.Right-click on the C partition and select Expand Volume.
Related Articles
- How to Clone PS4 Hard Drive to SSD Without Losing Data
- C Drive Full, D Drive Empty – How to Fix
- Free Download SD Memory Card Formatter for All Memory Cards
- Your Best Guide to Clone Windows to M.2 SSD [2024 Tutorial]
- How to Split Partitions with Qiling Partition Master?
Qiling Partition Master can split a partition in Windows to free up hard disk space, making the most of the available space with its partition splitting manager software, supporting Windows XP/2003/Vista/2008/Windows 7/8/2012. - SSD Maintenance: Tips to Maintain Performance and Extend the Life of Your SSD
To keep your SSD running at peak performance for years to come, you can follow these steps: regularly clean up temporary files and system logs, disable unnecessary startup programs, and update your operating system and drivers.