How to Boot Raspberry Pi From USB [Step-by-Step]
Booting the Raspberry Pi from a USB drive offers more storage space than an SD card, enabling users to perform various operations such as freshly installing the operating system or running a test system. Qiling's article provides a step-by-step guide on how to boot the Raspberry Pi from USB using simple commands and a firmware update.
- Notice:
- This guide applies to all Raspberry Pi models, including Raspberry Pi 2, 3, 4, and 5, and shows you how to boot Raspberry Pi without an SD card, although note that older models cannot boot from USB.
Preparations to Boot Raspberry Pi from USB
Before setting up your Raspberry Pi to boot from USB, ensure you have all necessary components and prepare them in detail. This includes having a compatible USB drive, a Raspberry Pi with a compatible USB port, a power source, and a microSD card with the Raspberry Pi OS installed.
To prepare the USB, format it to EXT4/FAT32, as the Raspberry Pi supports these formats. On Windows, use Qiling Disk Master Free, a comprehensive formatting solution that provides a faster, safer, and more reliable way to format the USB compared to doing it on the Raspberry Pi.
To prepare your Raspberry Pi for booting from USB, download the tool for free and follow the instructions to set it up. This will enable your Raspberry Pi to boot from a USB drive, allowing you to run the operating system and other software from a USB device.
Step 1. Launch Qiling Disk Master, right-click the partition you intend to format and select "Format".
Step 2. Enter the Partition label, choose the FAT32/EXT2/EXT3/EXT4 file system, and set the cluster size as needed, then click "OK" in the new window.
Step 3. Then you will see a warning window, click "Yes" in it to continue.
Step 4. To proceed, click the "Proceed" button in the top-left corner to review the changes, then click "Apply" to start formatting the partition to the desired file system.
Qiling Disk Master is a powerful tool that offers advanced features, including the ability to install Windows 10 on a Raspberry Pi, allowing for better management of the device's hard drive.
If you have a newer version of Raspberry Pi, such as Raspberry 4, please update the system and firmware to ensure compatibility with the USB or SSD boot process. To do this, enter the following command in the terminal:
- sudo apt update - update the package list
- sudo apt full-upgrade- Install the latest update and press Y to confirm
- sudo rpi eeprom-update - update firmware
- sudo rpi-eeprom-update -a - apply available updates
After updating the system and firmware, reboot the Raspberry Pi using sudo restart.
To start a Raspberry Pi, you need to create an imager, which can be done using Etcher to write to a USB device or by downloading and installing the Raspberry Pi Imager from the Raspberry Pi website.
After preparing your USB device with the necessary files, you can proceed with booting from it. Follow the steps to ensure your USB device is properly configured and ready for use. If you found this guide helpful, don't forget to share it with others who may need it.
How to Boot Raspberry Pi from USB
To boot the Raspberry Pi using a USB drive, first ensure the drive is properly formatted and contains the necessary operating system files. Then, insert the USB drive into the Raspberry Pi and follow the simple steps to boot up the device.
Stage 1. Set up USB for Raspberry Pi
Step 1. To get started, open the Raspberry Pi Imager on your computer and plug the USB drive into the computer. This will allow you to write the Raspberry Pi OS to the USB drive, which will then be used to boot the Raspberry Pi.
Step 2. To install an operating system on your Raspberry Pi, click on "Operating System" and select the desired OS. Alternatively, click on "Raspberry Pi OS (other)" to explore additional options.
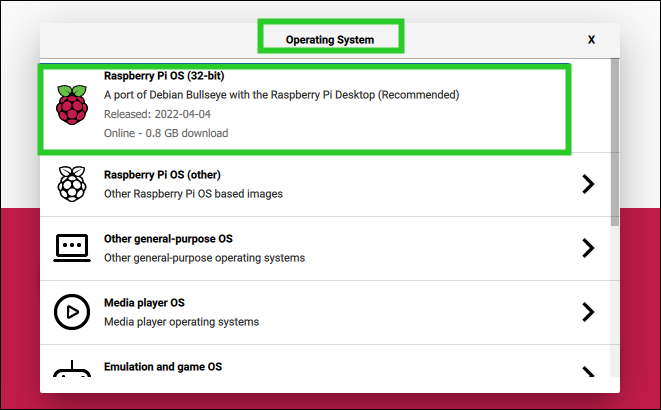
If you have already downloaded the operating system image file to your computer, you can load it into the Imager by clicking Use Custom.
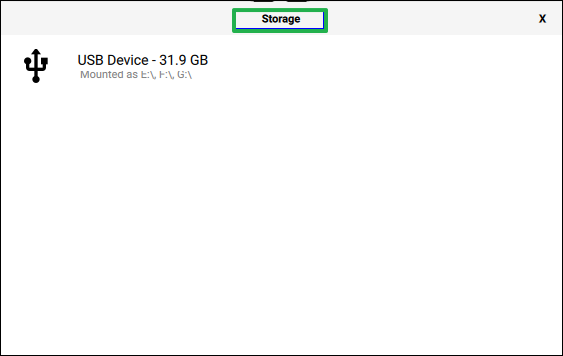
Step 3. To select the target USB for your Raspberry Pi, go to the Storage tab, choose the connected USB, and then set it as the bootable USB.
Step 4. When you return to the main screen, click the "Write" button to write the selected Raspberry Pi operating system to the USB drive.
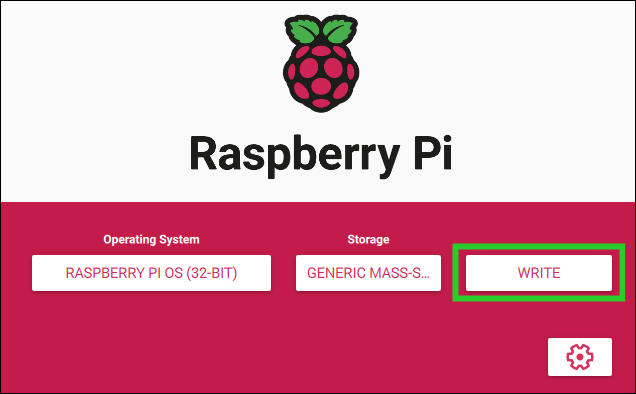
Step 5. Click "Yes" on the pop-up message, and the Imager will start writing the Raspberry Pi system to the USB drive.
Step 6. Once the Imager has finished writing to the USB, it will begin verifying the USB, which may also take some time. This process ensures that the data written to the USB is accurate and complete, and it may take a few minutes to complete.
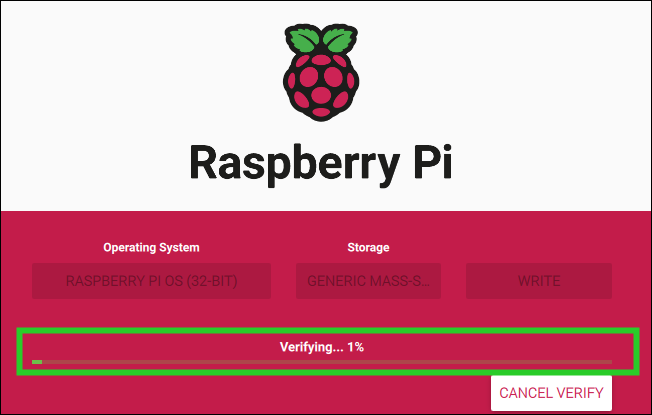
When the process is complete, click Continue and safely remove the USB drive from the computer.
Stage 2. Boot Raspberry Pi from USB
After completing the above steps, you have successfully created a bootable USB for the Raspberry Pi. However, the process isn't over yet - you'll need to manually complete the boot sequence configuration and make the final adjustments.
Step 1. Turn off the Raspberry Pi, and take out the additional SD card.
Step 2. Connect a bootable USB to the Raspberry Pi's 3.0 port, or if incompatible, use the 2.0 port.
Step 3. Connect the power supply to the Raspberry Pi 4 to switch it on.
- Tip
-
To enable the Raspberry Pi 3 to boot from USB/SSD or any other supported external media, modify the /boot/config.txt file by adding the line "program_usb_boot_mode=1".
The Raspberry Pi 3B+ can boot from a USB SSD by simply connecting it to the operating system, which will automatically recognize and utilize it as the boot device. This eliminates the need for a separate SD card or other storage medium, providing a more efficient and streamlined boot process.
Once the Raspberry Pi is set up to boot from a USB, you can remove the SD card and boot the device without it. The Raspberry Pi will automatically use the USB as the boot device, but it may take around 10-20 seconds to detect the USB and start booting from it.
If your Raspberry Pi 4 won't boot, check if the power supply is sufficient and the microSD card is properly inserted and recognized by the Pi. Also, ensure the microSD card is formatted for the Raspberry Pi OS and that the boot mode is set to legacy or UEFI, depending on the Pi's version.

How to Fix Raspberry Pi Not Booting [Causes & Solutions]
If your Raspberry Pi is unbootable and the green light is not flashing, try checking the power supply, ensuring the microSD card is properly inserted, and verifying that the device is properly connected to the monitor and keyboard. If the issue persists, try resetting the device by pressing the reset button, and if that doesn't work, try reflashing the operating system or seeking professional help.
Conclusion
This tutorial shows you how to set up your Raspberry Pi, including booting from a USB drive if you don't have an SD card. You can choose a suitable external hard drive or boot from a SuperSpeed SSD or faster HDD.
Regardless of what you want to do on your Raspberry Pi using a USB or SSD, make sure to format the Raspberry Pi SD card first. Qiling Disk Master Free can provide the necessary foundation for subsequent operations.
FAQs About Boot Raspberry Pi from USB
If you're having trouble booting from a USB device, some possible solutions include checking the USB drive's file system and formatting it if necessary, verifying that the device is properly connected to the computer, and ensuring that the BIOS or UEFI settings are set to boot from the USB device. Additionally, you can try using a different USB drive or a different computer to rule out any issues with the device itself.
1. How to boot from a USB Raspberry Pi 4 with no SD card?
To boot the Raspberry Pi from a USB drive, you'll need to perform a firmware update first, which allows the PI 3/4 to boot from the USB. Then, you can use a USB drive as a boot device, eliminating the need for an SD card. This process is straightforward and allows for flexibility in booting options.
Then, select the hard drive instead of the SD card in the imager application when writing the boot image.
2. Can Raspberry Pi 5 boot from USB?
The Raspberry Pi 5 can boot from a USB device, but ensure that it's the only connected device. If using a USB 3 device, place it in one of the two blue USB 3 ports, or it will automatically boot from a microSD card if one is inserted.
3. How do you boot a Raspberry Pi?
Power is connected to the USB-The Raspberry Pi has a C connector adjacent to the HDMI ports labeled POWER IN. It lacks an on button, so it will automatically turn on and start booting once plugged in.
Related Articles
- Logical vs Primary | What's the Difference and Which Is Better
- How Do I Format Hard Drive on Windows 11? 2024 Complete Guide
- How to Fix Remove PIN (Greyed Out) on Windows 11
- How to Disable PIN on Windows 11? 2024 Guide
If you're looking to disable the PIN on Windows 11, this guide provides the best methods to help you achieve that. - Can I Run Windows Disk Speed Test with Command Line? Sure, Your Guide Is Here
The speed of your drive is crucial for a faster and smoother experience, as it gets data to the processor quickly. To assess this, two reliable approaches for a Windows disk speed test command line are available. - Solved: 6 Fixes for Samsung 990 Pro Slow Write Speed - 2024 New
The Samsung 990 Pro may be experiencing slow write speeds, but there are fixes available. Qiling provides 6 solutions to resolve this issue, including using Samsung Magician and reliable SSD benchmark test tools.