How to Install Windows 10 on Raspberry Pi 4 [Step-by-Step]
If you're a Raspberry Pi 4 user, you might be wondering if it's possible to install and run Windows 10 on it. With Windows 10 now supported on ARM platforms like Samsung Exynos and Qualcomm Snapdragon, you may be curious if this applies to the Raspberry Pi 4 as well. In this article, we'll explore whether installing Windows 10 on the Raspberry Pi 4 is a feasible option.
You'll learn about the hardware and software requirements needed to install Windows 10 on your Raspberry Pi 4 computer, as well as how to use a third-party tool called Qiling to burn/flash a Windows 10 ISO file onto an SD card, which can then be used to boot Windows 10 on your Raspberry Pi 4.
| ⏱️Duration | Several hours |
| ✍️Difficulty | Hard but you can find a simple step-by-step guide |
| ⛏️Required Software |
✔️Format tool - Qiling Disk Master ✔️Raspberry Pi ISO burner - WoR |
| 👣Steps | |
| 🧑💻Suitable for | Install Windows 10 on Raspberry Pi 4 |
Can I Install Windows 10 on Raspberry Pi 4?
Microsoft initially only allowed users to run the old version of Windows 10 IoT Core on their Raspberry Pi devices, limiting them to running Visual Studio but not a standalone OS with a GUI. This meant no official Windows OS support.
With recent developments, it's now possible to fully run Windows 10 on Raspberry Pi 4, and the next part will discuss how to run a full desktop version of this OS on your Raspberry Pi 4 device.
What Do You Need to Install Windows 10 on Raspberry Pi 4?
Before installing Windows 10 on Raspberry Pi 4, make sure the required hardware and software are ready. Meeting these requirements helps reduce installation errors and keeps the setup process smoother.
| Hardware Requirements |
|
| Software Requirements |
|
How to Prepare the Raspberry Pi 4 SD Card to Install Windows 10
To install Windows 10 on a Raspberry Pi, you'll need to format your SD card into a Raspberry Pi 4-supported file format, specifically FAT32, which requires doing so on a Windows system.
If you're unsure how to format your Raspberry Pi 4 SD card, we recommend using Qiling Disk Master, which allows you to quickly format your SD card from any file format to FAT32, even if you're new to computers.
Step 1. Right-click the partition on your SD card that you want to format, then select "Format" from the context menu.
Step 2. Set a new partition label, file system (NTFS/FAT32/EXT2/EXT3/EXT4/exFAT), and cluster size to the selected partition.
Step 3. Click "Yes" on the pop-up window to continue.
Step 4. Click the "Proceed" button to start formatting your SD card.
Further Reading:
To install Windows on your Steam Deck in 2024, you'll need to follow these steps: first, download and install the latest version of Rufus, a free utility that can create a bootable USB drive. Next, download the Windows 11 ISO file from Microsoft's official website. Use Rufus to create a bootable USB drive from the ISO file, then insert the USB drive into your Steam Deck.
Learn how to install Windows OS on your Steam Deck in detail, with a step-by-step tutorial and troubleshooting alternatives, in this post.
How to Install Windows 10 on Raspberry Pi 4
Installing Windows 10 on Raspberry Pi 4 requires several stages and may take some time, so be patient as you navigate through the process. With the necessary hardware and software in place, you can proceed with installing the OS on your Raspberry Pi, following the steps to completion.
- Notice:
- This article's tutorials have been verified from the official Raspberry Pi tips and summarized with additional guidance programs, making it a trustworthy guide.
Stage 1. Update Your Raspberry Pi Firmware
Here are the steps to update your Raspberry Pi 4 firmware in one paragraph:
Step 1. To access the command line on Raspberry Pi, open the Terminal icon or press Ctrl + Alt + F1.
Step 2. Next, paste the following commands on Command Line:
sudo apt update
sudo apt full-upgrade
To update your Raspberry Pi 4 firmware to the latest version, run the following commands in the terminal: `sudo rpi-update`, `sudo rpi-update -y`, or `sudo apt-get update && sudo apt-get dist-upgrade && sudo rpi-update`. After running these commands, you can safely switch off your device and proceed to the next stage. This will ensure your firmware is up-to-date and ready for the next steps.
Stage 2. Download the Necessary Tools
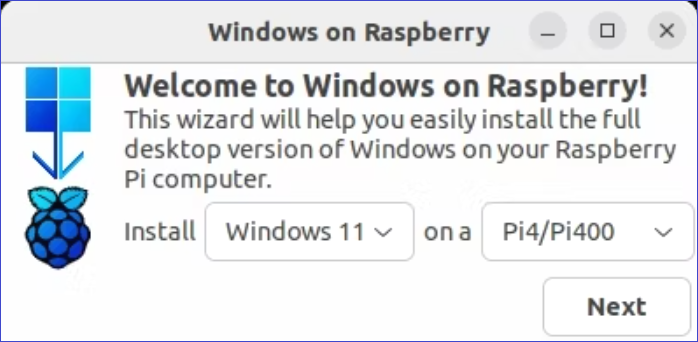
To install Windows 10 on Raspberry Pi, you'll need a UUP file and the WoR tool, which allows you to flash the ISO file to your SD card and build the Windows 10 Raspberry ISO file on your computer, respectively.
Step 1. Download and install WoR on your computer.
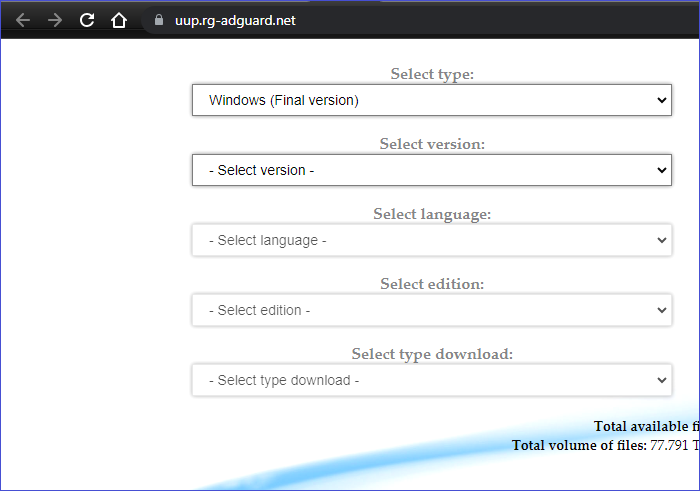
Step 2. Visit this website to download the UUP file, selecting the correct "Type", "Version", "Language", "Edition", and "Type Download" options from the dropdown menu, then click "Download ISO compiler in One Click!" and select the first link to download the cmd file.
To proceed, you should now configure the environment variables for the tools you've downloaded. This typically involves setting up the paths to the tools in your system's environment variables. You can usually do this by adding the tool's installation directory to your system's PATH variable.
Stage 3. Create Windows 10 Raspberry Pi ISO File
To install Windows 10 on a Raspberry Pi, you'll need to create a custom ISO file tailored for the Raspberry Pi, not a standard Windows 10 file. This custom ISO file will be necessary for the installation process.
Step 1. Double-click the cmd file on your computer and click Yes in the User Account Control window.
Step 2. The terminal window will download many essential files, ensuring your computer is connected to a stable internet connection.
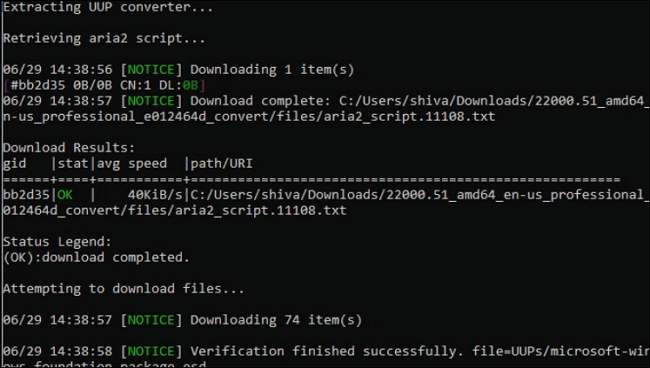
Step 3. The tool will automatically create the Windows 10 Raspberry Pi ISO file.
Stage 4. Flash the ISO File to the SD Card
Once you have downloaded the Windows 10 ISO file, you can proceed to burn the ISO file to the SD card using Qiling Disk Master for general Windows ISO files, or WoR for Windows 10 ISO image for Raspberry Pi.
- For Windows 10 ISO burning: Burn ISO to USB on Windows 10
- For Windows 10 Raspberry Pi ISO burning, follow the steps:
Step 1. Connect the SD card to your computer.
Step 2. Run the WoR.exe file.
Step 3. To proceed, select the SD card and choose Raspberry Pi 4 from the Device Type dropdown menu. Click "Next" to continue.
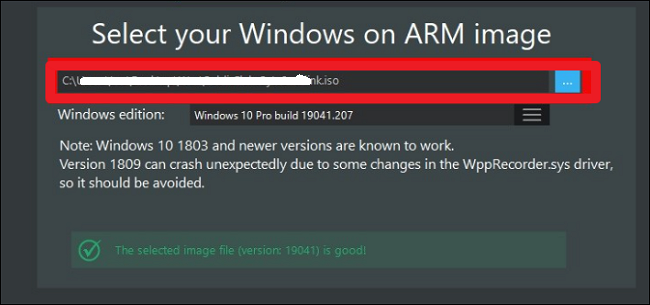
Step 4. Select the ISO file you just created and choose the version of Windows you want to install.
Step 5. On the next page, select Use Latest Package.
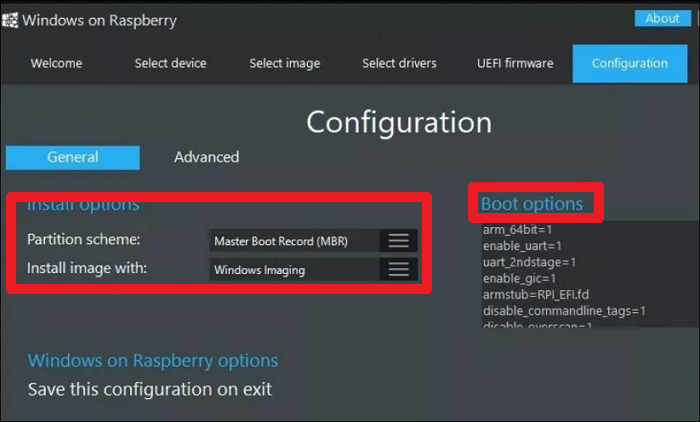
Step 6. Set the partitioning scheme, boot options, install options and other configurations, and click Next. Then, start installing the Windows ISO file to the SD card.
Once you've burned the ISO file to your SD card, you can eject it from your computer and proceed to Stage 5.
Note: If you need to burn Windows 10/11 ISO files to USB, Qiling Disk Master is a wise choice, being one of the best free ISO burners on Windows, allowing you to create bootable media and boot different laptops from USB.
Here are some topics related to using the burning feature of Qiling Disk Master:
Stage 5. Install Windows 10 on Raspberry Pi 4
To install Windows 10 ISO files on your Raspberry Pi 4 device, you can follow these steps: First, ensure your SD card is bootable and has the necessary files to run Windows 10. Then, insert the SD card into your Raspberry Pi 4 device and boot it up. Next, follow the on-screen instructions to complete the Windows 10 installation process.
Step 1. To set up your Raspberry Pi 4 computer, first, connect the flashed SD card to the device. Then, plug in other necessary peripherals, such as the power cable, keyboard, mouse, and HDMI cable. This will allow you to access the device and start using it.
Step 2. To restart your Raspberry Pi 4 computer and set your SD card as the boot drive, simply power it down, unplug it, wait for 10 seconds, and plug it back in. Then, ensure that your SD card is set as the boot device in the Raspberry Pi's configuration.
Step 3. Once the system detects your bootable SD card, follow the onscreen instructions to complete the Windows installation process.
Step 4. After the system finishes installing, open Command Prompt and paste the command to enable 3GB of RAM.
bcdedit /deletevalue {default} truncatememory
Step 5. Restart your device to implement the changes above.
Step 6. Connect your Raspberry Pi 4 computer to a network and install the programs you want to run on it, starting with the Microsoft Edge browser.
Read Also: Install Windows 10 on Second Hard Drive
You've successfully installed Windows 10 on your Raspberry Pi 4, and can now enjoy its features. If you found this guide helpful, consider sharing it with others to assist them in installing Windows 10 on their Raspberry Pi 4.
Conclusion
Installing Windows 10 on a Raspberry Pi 4 is possible, and the process involves preparing the necessary hardware and software. This includes using Qiling Disk Master to format the SD card, obtaining a Windows 10 ISO file, and using a flashing tool to burn the setup onto the SD card.
FAQs About Install Windows 10 on Raspberry Pi 4
Follow through the questions below about how to install Windows 10 on Raspberry Pi 4.
1. Can Raspberry Pi Run Windows Apps?
After installing a Windows operating system on your Raspberry Pi, you can run supported Windows apps on your device. Simply download and install the apps on your Raspberry Pi computer, and you're ready to go!
2. Can I Set Up Windows on Raspberry Pi 4?
You can run Windows 10 on a Raspberry Pi 4 by downloading a Windows 10 ISO file, burning it to an SD card, and then installing the operating system on the computer by connecting the bootable SD card.
3. Is It Good to Install Windows on Raspberry 4?
Installing Windows on your Raspberry Pi 4 allows you to access Windows features and run Windows programs, making it a good idea for your project.
Related Articles
- How Do I Format Disk to exFAT in Command Prompt
- Top 3 Easy Disk Drive Repair Software for Windows 10/8.1/8/7
- Yellow Screen of Death In Windows 10 [Detailed Info & Fixes]
- Why My SD Card Shows Empty But is Full
It is a common issue that an SD card is full, but no files show up. If you are wondering 'Why my SD card shows empty but is full', this page provides you the answer and guide you to resolve the problem. - How to Use Driver Easy | Is It Safe to Use Driver Easy
Driver Easy is a free driver update tool that serves millions of users. This software provides information on outdated drivers, allowing users to update them to the latest versions. To use Driver Easy, users can download and install the software, then scan their system for outdated drivers. - How to Use Rufus to Install Windows 11 (with Pictures)
Bootable drives can be created in various ways depending on the scenario, with popular utility software options including Rufus and Qiling OS2Go.