Recover Files After a Canceled Clone: Safe Steps
Quick Navigation:
- What a Canceled Clone Leaves Behind
- What Not to Do With Either Disk
- Check the Source, Then Image It
- Recover the Files with Qiling
- Frequently Asked Questions
A canceled clone usually looks worse than it is. The target disk stops at some random point, Windows may call it unreadable, and the source that was being copied sits right next to it with all of its files intact. The trick is to resist repairing either disk before you know which one holds the data you need. This guide explains what a half-finished clone leaves behind and how to recover files without making the situation permanent.
What a Canceled Clone Leaves Behind
A clone copies a disk block by block, and the copy is only meaningful once it finishes. Cancel it halfway and the target holds a partial file system: some partitions complete, some half written, and the table may point at sizes that were never reached. The source, by contrast, was only read, so in most cases it is exactly as it was before the job started.
That is why a canceled clone is rarely a data-loss event. The source still has its original file system and files, and the target is an unfinished copy of them. The dangerous part is what people do next: they see an unbootable target, assume the clone destroyed something, and start repairing or formatting both disks. The order below avoids that trap.
Two situations change the picture. If the clone was started because the source was failing, the long read may have pushed a weak drive further, and the source can now be unreadable in places. If the tool was set to resize partitions during the clone, the target table may describe a layout that never existed, which is harder to interpret than a plain partial copy.
What Not to Do With Either Disk
Do not initialize the target disk when Windows offers to. Initializing writes a fresh partition table, and on a partially cloned disk that table is the only remaining record of how far the copy got. It is also the structure a scan uses to decide which partitions are genuine and which are leftovers, so every step below depends on it.
Do not format the target either, and do not let the clone tool resume while you are still deciding. If the tool offers verification or a checksum comparison, run that instead of a repair; it reads both disks without changing them. A repair, by contrast, writes first and asks questions later, so it tends to reduce the options you have left.
Do not boot from the target. A half-written Windows volume will start a repair cycle that writes to the disk on every attempt, and the same applies to the source if it is still installed in the machine. Work from a third system or bootable media while you test both drives, and label them before unplugging anything, because two identical SSDs look the same once the cables are off.
Check the Source, Then Image It
Start by confirming that the source is readable. Connect it to a working computer and open folders from different areas of the disk, then copy a small sample out and open the files. If that works, the source is intact and there is nothing to recover from the target at all, so finish the clone again or keep using the source.
If the source stalls, clicks, or drops off the bus, stop reading it casually and image it. A sector-level image that skips bad areas is the right first move for a weak drive, and every later scan should run on the image rather than the original. Keep the target untouched during this work, and check its health only if the source turns out to be missing files.
Recover the Files with Qiling
Qiling Disk Master recovers from a canceled clone in three actions that belong to one tool: choose the source or its image, scan it deeply, then save the finds to a third drive. Nothing is written to the half-finished target at any point, so the canceled copy cannot get worse while you work. If you have not imaged the source yet, do that first as described in Part 3, then return here with the image.
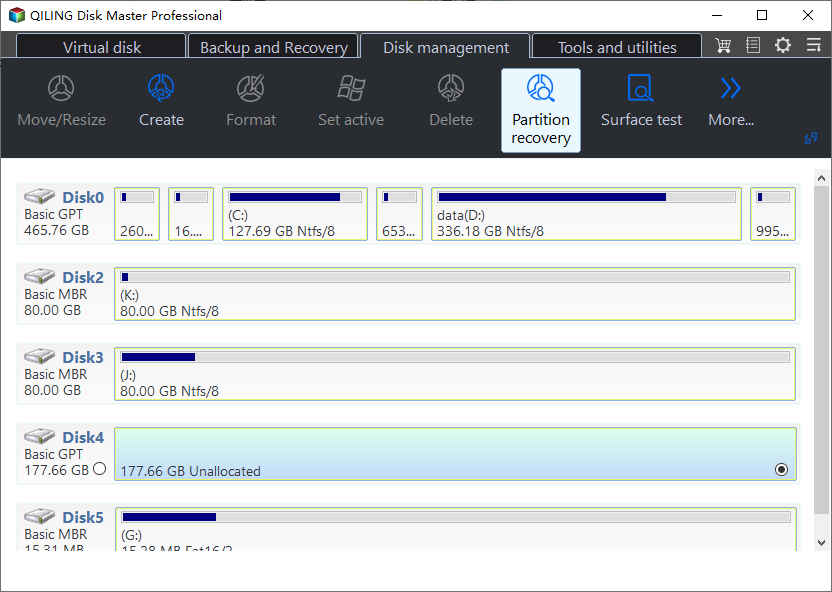
Step 1. Select the Source Disk or Its Image
Open the recovery wizard and choose the disk that still holds your data, which is the source of the canceled clone. If you already imaged it, pick the image file instead, because the wizard reads both sources the same way. Match the disk by number and capacity before you continue, since the target has a similar size and holds nothing you want.
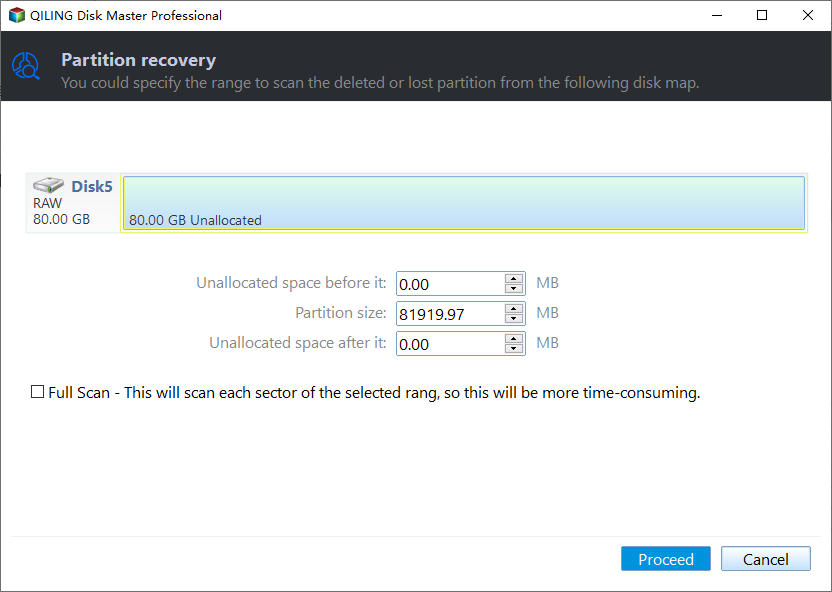
Step 2. Choose the Deep Scan and Wait for the List
Run a deep scan across the whole disk or image so the scan can rebuild the folders that the interrupted copy left behind. A quick scan reads only the current file table and finds little after a cancel, so keep the deep option selected. Do not open the results until the scan reports completion, because the tree grows as partitions are indexed.
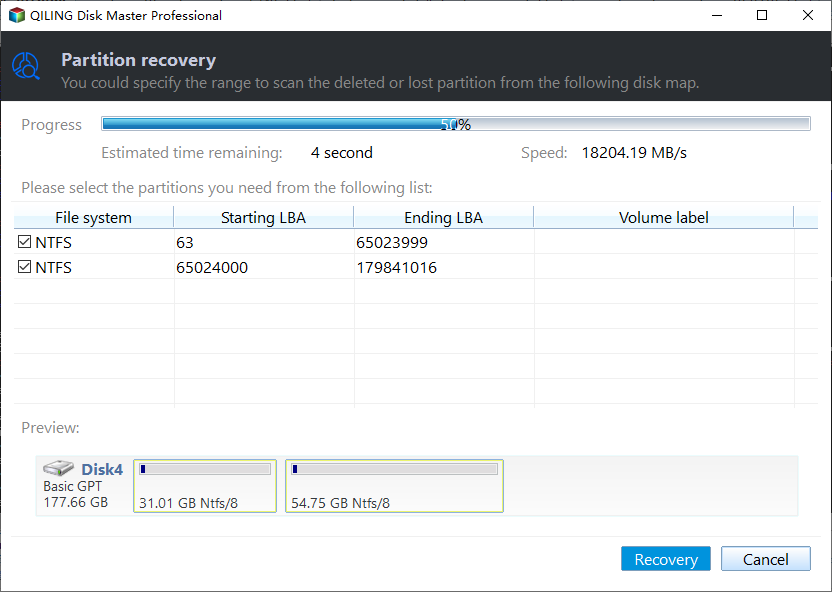
Step 3. Preview the Finds and Recover to a Third Drive
Open the folders in the results and preview documents, photos, and archives before you select anything. Mark only the files you need, set the destination to a third drive, and click Recover; never restore to the source or to the canceled target. When the job ends, open one file from each folder to confirm the copy, and keep your image until that check is done.
Frequently Asked Questions
Is the target disk usable after a canceled clone?
Only as scrap. Its file system was never completed, so Windows may mount a volume that is missing files or reports the wrong size. Re-clone from the source, or rebuild the target from scratch, once your data is safe. Until then, do not treat the target as a backup, because it is not one, and a fresh clone takes less time than a repair.
Can I resume the clone where it stopped?
Some tools offer it, and it is safe only when the target has not been mounted, formatted, or written to since the cancel. Otherwise, always start a new clone from the source, because a resume writes over blocks a scan might still need and it keeps the two halves of different jobs apart. A full copy also verifies what it wrote.
What if the clone canceled because the source died?
Then the source is the recovery case, not the target. Image whatever the source will still return, scan the image, and expect the files at the bad areas to be the ones missing. Stop retrying the clone until the data is out, and replace the drive before you try again, because a drive that failed during a clone rarely improves with another attempt.
Related Articles
- Recover Files After a Failed Disk Clone
- Recover Files After Accidentally Initializing a Disk
- Recover Files After a Partition Table Rebuild
- Recover Files When Storage Spaces Loses Communication
- Recover a RAID 5 Array With Two Failed Disks
Products
Articles & Tutorials
- Data Recovery
- Data Backup
- File Recovery
- File Backup
- System Backup and Restore
- Disk and Partition Clone
- Technical articles
- Mobile articles
- Disk Master Help
- Windows Data Recovery Tutorials
- Windows Secure Delete Tutorials
- Windows Partition Management Tutorials
- Windows File Backup and Restore Tutorials
- Windows System Backup and Restore Tutorials
- Windows Disk Backup and Restore Tutorials
- Windows Clone Tutorials