SSD Disappeared After KB5063878: Recover Your Files
Quick Navigation:
- What KB5063878 Changed on Affected Systems
- Confirm What Kind of Disappearance You Have
- Write Nothing to It and Image It First
- Recover From the Disk or Its Image
- Frequently Asked Questions
An update should never make a drive vanish, yet that is what some owners reported after KB5063878. The pattern was similar each time: a large file copy or a long write session, a short freeze, then an SSD that no longer appeared in File Explorer or in Disk Management. Some drives returned after a full power cycle. Others came back labelled RAW, reporting the wrong capacity, or showing no partition at all. The update does not erase a disk, and the files usually survive inside a volume Windows can no longer read. What decides the outcome is what happens in the next few minutes, so this guide shows how to confirm the drive, protect it from further writes, and recover the content to a different disk before any firmware change or reinstall.
What KB5063878 Changed on Affected Systems
KB5063878 is a cumulative Windows update, and the storage component it replaced is what caused the trouble. On the systems that reported the problem, the drive answered normally until a sustained write put the controller under load. At that point the device dropped off the bus, the copy stopped, and Windows removed the disk from its list as if the hardware had been unplugged.
The damage this leaves behind is logical, not physical. The partition table, the boot sector, and the file system records sit in the first sectors of the drive, and a dropout in the middle of a write can leave them half updated. Windows then sees a disk with an unknown layout and shows it as RAW, unallocated, or offline. The user files written earlier are still in their clusters; only the map that points to them is broken.
Not every SSD is affected. Drives with different firmware, a DRAM cache, or a different host controller kept working through the same update, which is why a model that fails on one machine may be fine on another. That variation matters for recovery: a drive that disappeared is not automatically a dead drive, and the data on it should be treated as readable until a scan says otherwise.
Two behaviours are worth separating. A drive that disappears only under heavy load and returns after a power cycle has a firmware or link problem. A drive that never returns, or returns with a changed identity, has lost its partition information as well. The first case needs a stable copy, and the second needs a scan of the whole disk.
Confirm What Kind of Disappearance You Have
Shut the machine down completely instead of restarting. Hold the power button until the fans stop, unplug the cable, and wait a few seconds before starting again; a warm reboot often leaves the controller in the same stuck state. If the SSD sits in a USB enclosure or an external dock, move it to a direct SATA or M.2 port on the motherboard, because a bridge chip adds one more device that can fail under load.
Open the firmware setup at boot and look for the drive in the storage list. A model and capacity that appear there prove the drive still answers at the hardware level, and the problem is in the partition table or the file system. A drive that is missing from that list as well should be tried on another port, with another cable, and in another computer before any conclusion is drawn.
Next, read the disk from a working system. Open Disk Management and compare the row for the SSD with what you see: a disk marked Offline can usually be brought online; unallocated means no partition entry is present; RAW means an entry exists but the file system inside cannot be read. diskpart shows the same information as text and is easier to record when several drives are attached.
Write down what you observe, including whether the drive vanished during a copy, how long it stayed away, and whether its capacity changed. A drive that keeps dropping out during every attempt should not be stressed again, because each dropout is another chance to overwrite the sectors that hold the directory structure.
Write Nothing to It and Image It First
Do not initialize the disk, create a new volume, format it, or accept the prompt that offers to make it usable. Each of those actions writes a fresh partition table and removes the last trace of the old layout. Do not run chkdsk on a RAW volume either, and skip every utility that advertises a one-click repair, because those tools write to the exact area you need to read.
Do not install recovery software on the affected disk. Run the tool from another computer, or from a USB boot environment, so the only writes on the failing drive are the reads performed by the scan. The recovered files must always go to a different disk, never back to the disk they came from.
When the SSD only disappears under load, make a sector-level image of the whole disk before scanning. Connect the drive to a working machine, choose a healthy destination with more free space than the SSD's full capacity, and let the image run without other activity on the machine. If the copy stops halfway, power the drive down, let it cool, and start again; a second pass sometimes reads the blocks the first one missed.
Once the image is complete, disconnect the original and work from the image file. The original then stays untouched, the controller stops being stressed, and every later attempt costs nothing. Keep the image until the recovered folders open normally on the destination disk.
Recover From the Disk or Its Image
Qiling Disk Master includes a recovery wizard that reads a physical disk or an image file without writing to the source. The flow is always the same: choose the disk or the image, run a scan, preview the results, and restore the files to another drive. The three steps below follow that order and none of them changes the failing SSD.
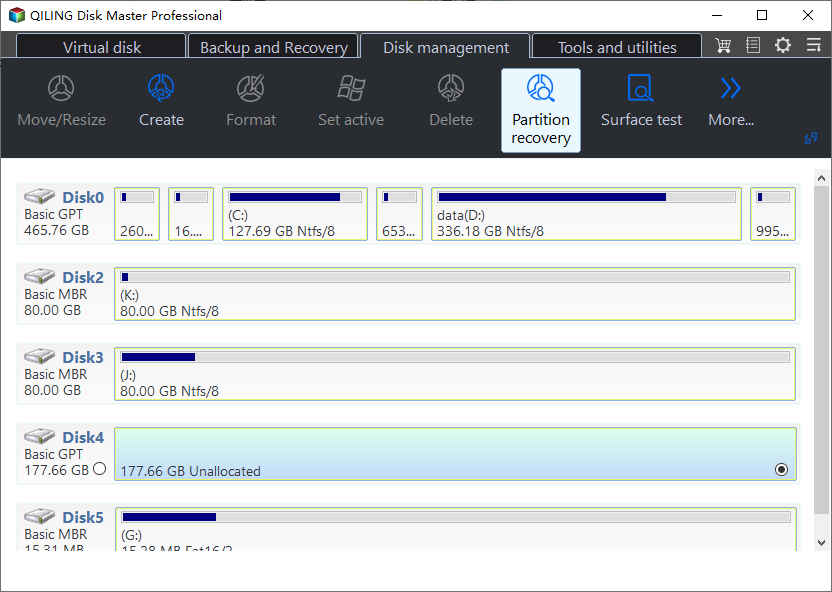
Step 1. Select the physical SSD or the image file. Start the recovery wizard and pick the disk by its model and capacity, not by a drive letter, because a drive that dropped off the bus may have been renumbered. If you already made an image, choose that file instead and leave the SSD disconnected; matching the disk number with the list in Disk Management avoids picking the wrong device.
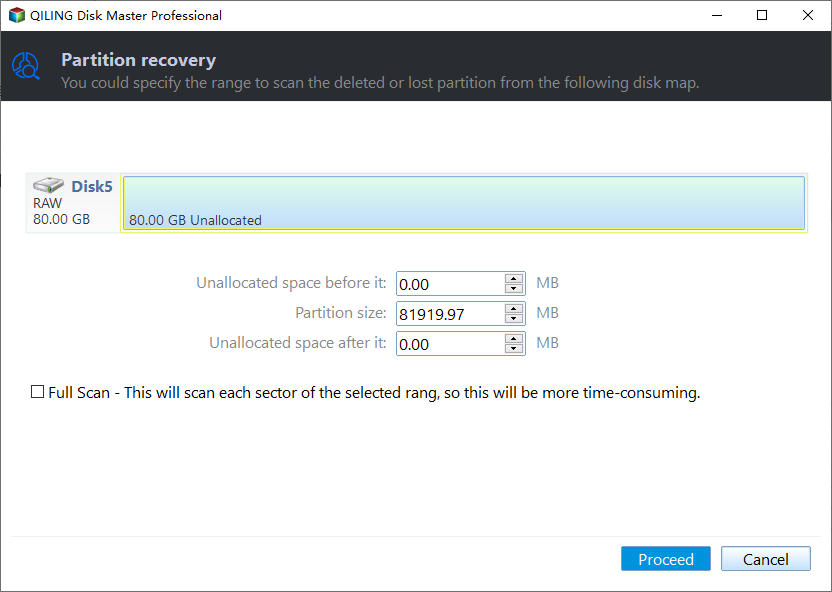
Step 2. Scan the whole disk, not just the volume. Set the scan range to cover the full capacity and enable the deep scan option, which reads every sector instead of only the file records of a mounted volume. This is the setting that finds a partition whose table was overwritten during the dropout. Let the pass finish, because files listed near the end of the disk are skipped when a scan is stopped early.
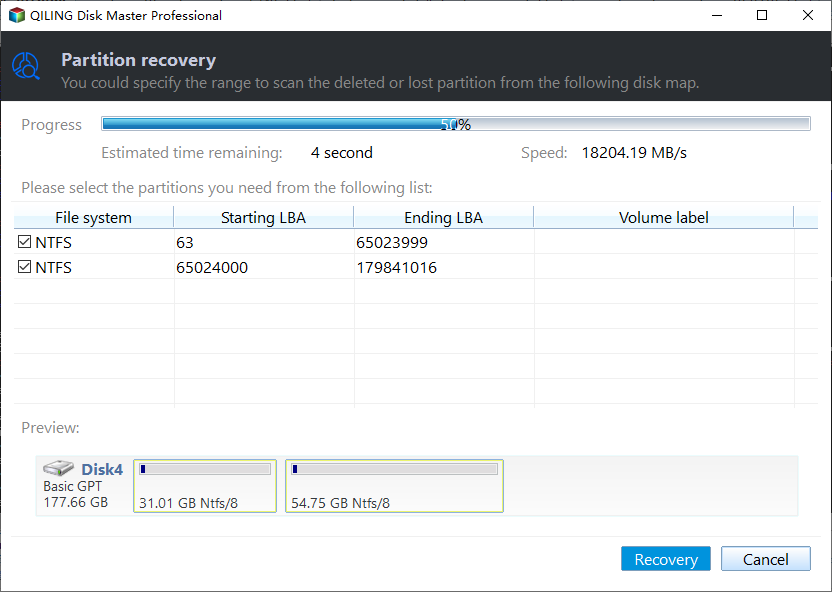
Step 3. Preview the results and restore to another disk. Filter by file type and by the date of the failed copy, then open documents, photos, and archives of several kinds to confirm that the content survived. Select the folders you need and send them to an external drive or a second internal disk. Never restore to the SSD being scanned, because the write would overwrite the clusters the scan just recovered.
After the files are safe, deal with the cause. Check the SSD vendor's site for a firmware release that addresses the dropout, and remove KB5063878 if the problem started with it. Reconnect the drive only after the update or rollback, copy a large file to test it under load, and keep a current backup on another disk so the next failure costs time instead of data.
Frequently Asked Questions
Did KB5063878 physically damage the SSD?
In most reports it did not. The drive dropped off the bus and came back without a readable partition table, which is a logical fault rather than worn flash. A drive that is still detected in the firmware setup usually holds its data, and a scan of the disk or of an image taken from it is the way to confirm that.
Can I fix the RAW disk with chkdsk instead?
Do not start there. chkdsk writes to the volume while it repairs, and on a disk that only answers intermittently that write may be the one that overwrites your directory structure. Image the drive first, recover the files to another disk, and only then decide whether the volume is worth repairing.
What if the SSD is missing from BIOS as well?
Try another port, another cable, and another computer before you give up on it. A drive that stays invisible everywhere has a link or controller problem that software cannot solve, and repeated power cycles will not help. In that case a data recovery specialist is the safer route than further experiments.
Related Articles
- SSD Firmware Update Failed and the Drive Is Not Detected
- SSD Not Detected After Windows Update
- Recover Files From an SSD After TRIM
- Recover Files After KB5132061 Leaves Windows Unbootable
- NVMe SSD Missing After BIOS Update
Products
Articles & Tutorials
- Data Recovery
- Data Backup
- File Recovery
- File Backup
- System Backup and Restore
- Disk and Partition Clone
- Technical articles
- Mobile articles
- Disk Master Help
- Windows Data Recovery Tutorials
- Windows Secure Delete Tutorials
- Windows Partition Management Tutorials
- Windows File Backup and Restore Tutorials
- Windows System Backup and Restore Tutorials
- Windows Disk Backup and Restore Tutorials
- Windows Clone Tutorials