Files Deleted by CHKDSK: How to Get Them Back
Quick Navigation:
- What CHKDSK Actually Changed
- Stop Using the Volume Right Now
- Look Inside found.000 First
- Scan the Partition for Names and Structure
- Frequently Asked Questions
CHKDSK is a repair tool, and repair means change. When it finds a directory entry that points at clusters already marked as free, a file with two names, or a folder that no longer has a parent, it cannot leave the inconsistency in place. It either moves the orphaned data into a folder named found.000 and renames the files to FILE0000.CHK, or it removes the entry that no longer makes sense. The files then look deleted, even though their content is often still sitting in the same clusters. Recovery depends on two things: stopping any further write to the volume and knowing that CHKDSK may have renamed the files rather than erased them. This guide covers both, plus what to do when the names and folders are gone for good.
What CHKDSK Actually Changed
CHKDSK runs in stages. It checks the boot sector, then the file records, then the indexes that map names to those records, and finally the security descriptors and free space. Each stage can end with a repair, and the log line that says corrections were made is the part people miss. A corrected index is a deleted entry from the point of view of Explorer.
The classic case is an orphaned directory. The data is intact, the file record is intact, but the parent folder no longer lists it, usually because of an unsafe removal or a write that stopped halfway. CHKDSK cannot guess where the file belonged, so it creates found.000 at the root of the volume and stores the entries there as FILE0000.CHK, FILE0001.CHK, and so on. The content survives, the original name and path do not.
Not every case is that gentle. When two records claim the same clusters, when a record points outside the partition, or when the file system cannot decide which version is correct, CHKDSK truncates or deletes the entry to keep the volume mountable. That is why a repair can finish successfully and still leave a folder half empty, or why an application stops finding a database file it used yesterday.
CHKDSK also runs automatically at boot on a volume marked dirty, sometimes more than once. Each pass can move more entries into found.001, found.002, and similar folders, so the fragments of one file may end up split across several of them. Check every found folder, not just the first.
Stop Using the Volume Right Now
Every write after the repair reduces the chance of a clean recovery. Windows writes logs, thumbnails, updates, and temporary files in the background, and each of those writes can claim clusters that still hold your content. Stop copying new files to the volume, close the programs that open files from it, and do not run CHKDSK again in the hope that a second pass will restore what the first one removed.
Do not format the volume, do not delete the found folders, and do not accept a repair offer from a utility that promises to fix the partition table in one click. None of those actions brings the names back, and all of them write to the area a scan needs to read. If the volume is the system drive, shut the machine down instead of experimenting while it runs.
Attach the drive to another computer as a secondary disk, or boot the machine from external media and leave the repaired volume unmounted. Read it from there, confirm which folders are affected, and take a sector-level image before scanning when the data matters. The image gives you a copy that can be read many times while the original stays untouched.
Keep a note of what CHKDSK reported: the stage it reached, the number of corrections, and the names of any found folders it created. That record tells you whether the entries were renamed or deleted, and it explains why one folder may need a different approach than another.
Look Inside found.000 First
The found folders sit in the root of the volume and are marked hidden and protected, so Explorer does not show them by default. Turn on hidden items and protected operating system files, then open found.000. Files named FILE0000.CHK hold whatever CHKDSK could not attach to a folder, and their sizes often match the documents, photos, or archives that went missing.
Do not double-click those files to see what they are, because Windows has no program registered for the .CHK extension. Copy one to another disk, open it in a hex viewer or a text editor, and read the first bytes. A PDF starts with %PDF, a ZIP-based document starts with PK, and a JPEG starts with a short binary signature. Rename the copy with the matching extension and open it with the right application.
This route works well for a handful of files and poorly for a whole folder tree. The .CHK names carry no original path, the timestamps may describe the repair rather than the file, and a large fragmented file can be stored as several separate .CHK entries that no longer fit together. Files that CHKDSK deleted outright are not in the folder at all.
When the found folders contain only fragments, or when the entries you need are missing, stop renaming and move to a scan. A scan reads the file records that CHKDSK detached and can usually rebuild the original names and folder structure, which is something the .CHK folder cannot offer.
Scan the Partition for Names and Structure
Qiling Disk Master includes a recovery wizard that reads the partition below the file system and lists the folders it can rebuild, including entries that no longer appear in Explorer. Nothing is written to the source, and the recovered files are saved to a different disk. Work from the image when you have one, or from the physical drive when the volume is stable.
Step 1. Select the repaired partition, its disk, or its image. Open the wizard and choose the volume that CHKDSK worked on, using its label and capacity to be sure. If the volume no longer mounts or reports as RAW, select the whole disk instead so the scan can read the unallocated space as well. Using the image file keeps the original drive idle.
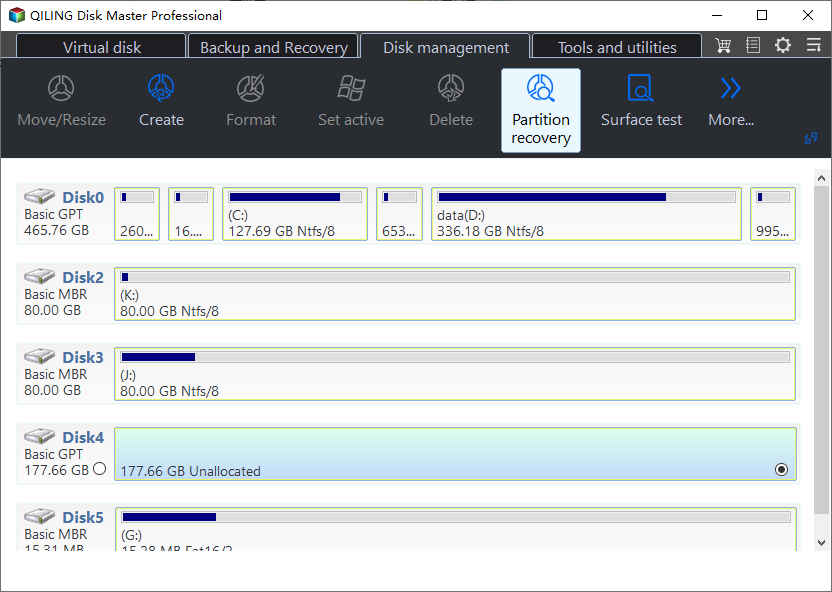
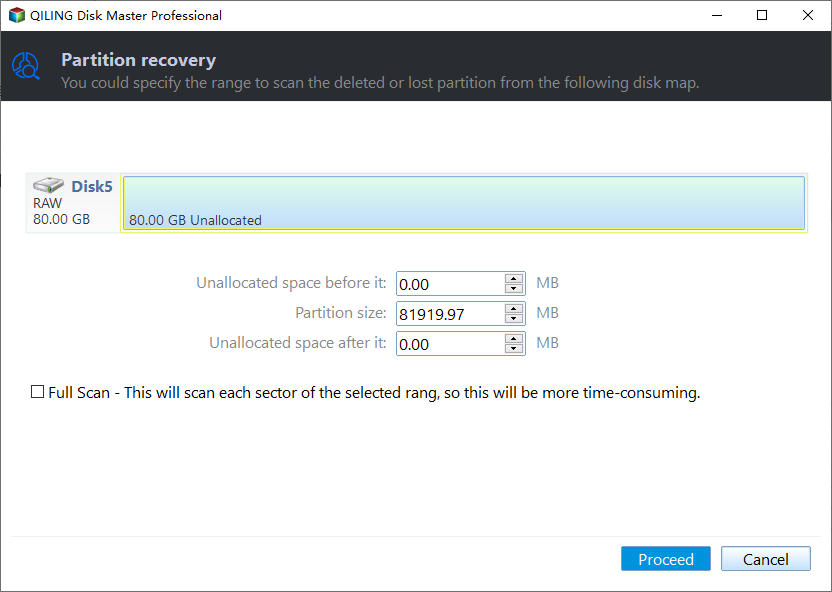
Step 2. Scan the full range with the deep option. A quick pass reads the records that are still linked to a folder, which is not where CHKDSK left your files. Enable the deep scan so every sector is read, and let the range cover the entire partition rather than a single folder. Expect the pass to take longer on a large or failing drive, and do not stop it early.
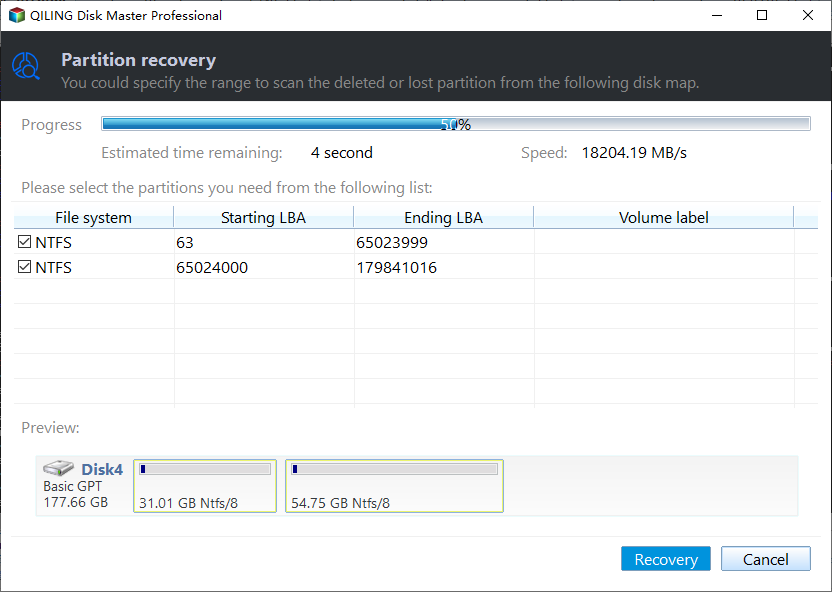
Step 3. Preview the results and save them to another disk. Sort by path to find the folders that went missing, then open previews of a few documents, photos, and archives before selecting a large batch. Restore the selection to an external drive or a second internal disk. Never save the files back to the repaired volume, because the new writes would land on the clusters still holding the originals.
Once the data is safe, deal with the volume itself. Run a full surface check with CHKDSK /r on a healthy system if errors keep returning, watch for pending or uncorrectable sectors in the drive's health report, and replace the disk when the same corruption appears twice. Keep the recovered files on another drive until the volume has survived a few days of normal use.
Frequently Asked Questions
Why did CHKDSK delete my files instead of repairing them?
Because the entries were inconsistent and could not be kept without leaving the volume unmountable. CHKDSK protects the file system, not the files, so it removes or renames whatever it cannot reconcile. The content usually remains in the clusters until something writes over it.
Can the .CHK files be turned back into the original files?
Sometimes, by reading their headers and renaming them with the correct extension. You get the content back but not the original name or folder, and fragmented files may be split across several .CHK entries. A scan of the partition is the better route when you need the names and structure.
Is it safe to run CHKDSK again?
Only after the files have been recovered and copied to another disk. A second pass writes to the volume and may move more entries into the found folders or remove them, so recovery comes first and repair comes second.
Related Articles
- Recover Files From .CHK Files in the FOUND.000 Folder
- CHKDSK Stuck at 10%, 11%, 12%
- CHKDSK Cannot Continue in Read-Only Mode
- Chkdsk Insufficient Disk Space to Repair USN Journal
- Recover Files After Accidentally Deleting the EFI Partition
Products
Articles & Tutorials
- Data Recovery
- Data Backup
- File Recovery
- File Backup
- System Backup and Restore
- Disk and Partition Clone
- Technical articles
- Mobile articles
- Disk Master Help
- Windows Data Recovery Tutorials
- Windows Secure Delete Tutorials
- Windows Partition Management Tutorials
- Windows File Backup and Restore Tutorials
- Windows System Backup and Restore Tutorials
- Windows Disk Backup and Restore Tutorials
- Windows Clone Tutorials