Fix SanDisk Cruzer Not Recognized Issue
What to Do When SanDisk Cruzer Is Not Recognized by PC
Here are some basic tips to protect your data when your SanDisk Cruzer can't be recognized by your PC: First, stop using the device immediately to prevent any further data loss. Then, try to recover your data using data recovery software.
- Stop using SanDisk Cruzer, don't save or input new data.
- Clear virus and malware on computer and storage devices.
- Make sure SanDisk Cruzer is properly connected to PC.
If your SanDisk Cruzer flash drive, external hard drive, USB drive, SD card, or other storage devices are not being recognized or deleted by your computer, there are solutions to resolve this issue and recover your data.
Part 1. Fix SanDisk Cruzer Is Not Recognized Issue
If your SanDisk Cruzer USB is not recognized or detected, there are three methods to help you fix the issue. These methods vary in complexity, with the first being the simplest and most straightforward, the second being moderately challenging, and the third being the most effective but also the most difficult. Understanding the level of effort required for each method can help you choose the best approach for your situation.
Method 1. Change USB Port or Computer, Reconnect SanDisk Cruzer (1 Minute)
When a SanDisk Cruzer or other brand's USB, external hard drive, or USB drive becomes unrecognized, try these quick fixes: check the USB port for dust or debris, try a different USB port, update the device drivers, disable and re-enable the device in Device Manager, and if all else fails, try a system restore to a point before the issue occurred. If the problem persists, you may need to contact the manufacturer or seek further technical assistance.
Step 1.If the system still warns with an unrecognized error after changing the USB port and reconnecting the SanDisk Cruzer on the PC, proceed to Step 2.
Step 2. Connect USB to another computer.
Step 3. Check if SanDisk Cruzer is recognized.
If the USB drive doesn't show up in Windows Explorer or Disk Management, you can try to troubleshoot by checking if it's recognized by the system. If it's detected but not accessible, you can click on the link for a reliable solution. If not, you can move on to Method 2 or Method 3 for further assistance.
Method 2. Run Device Troubleshooter (2-3 minutes)
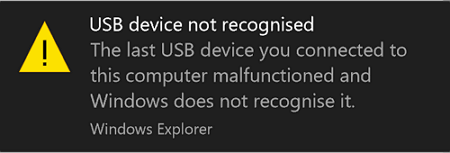
When a USB device is not recognized, you can run the Windows built-in troubleshooter to check and fix the error on your USB drive.
Step 1. Connect the not recognized Cruzer USB to your PC.
Step 2.To access the Settings app, right-click the Windows icon and select "Settings".
Step 3. Click "Troubleshoot", scroll down to choose "Hardware and Devices".
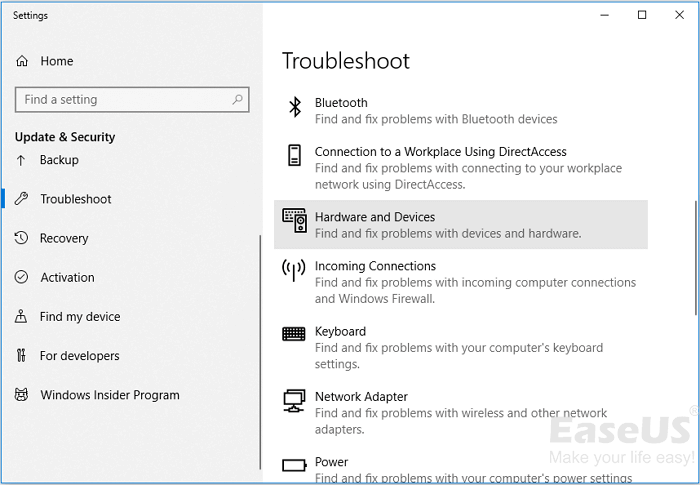
The troubleshooter will run to detect and fix your USB device, and then you can check if the "USB device not recognized" issue has been resolved.
Method 3. Update or Reinstall Cruzer USB drive (3-5 Minutes)
If the USB drive is outdated, your Windows computer may not be able to detect or recognize the device. To resolve this issue, you can follow these tips to get your computer to recognize the device again.
1. Update SanDisk Cruzer USB drive
Step 1. Connect the Cruzer USB to your PC, then right-click on "This PC" or "My Computer" and select "Manage" from the context menu.
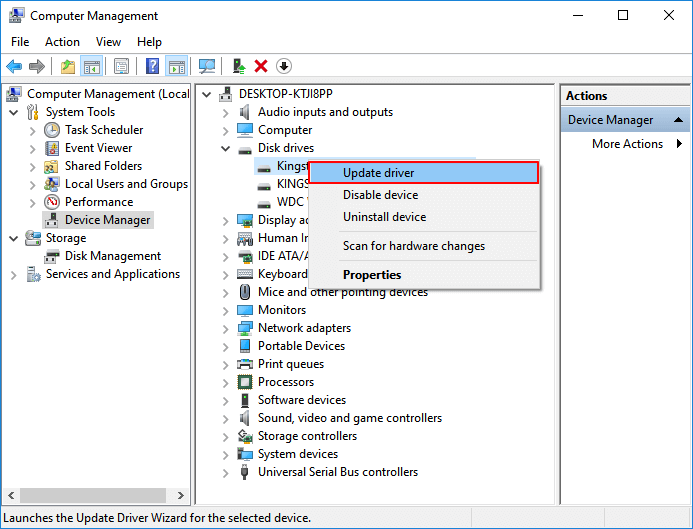
Step 2. Click "Device Manager" and expand "Disk drivers".
Step 3. To update the driver for your SanDisk Cruzer USB or portable device, right-click on it and select the option to "Update driver" from the context menu. This will initiate the process to search for and install any available driver updates.
Step 4. Click "Automatically search for driver software online" and wait for the process to complete.
If your USB drive doesn't show up after reconnecting, you can try to check the drive for errors or corruption. You can use built-in tools like the Command Prompt or a third-party software like Disk Drill to scan the drive and fix any issues that might be causing the problem.
2. Reinstall SanDisk Cruzer USB Drive
Step 1. Connect the Cruzer USB to your PC, then right-click on "This PC/My Computer" and select "Manage" from the drop-down menu.
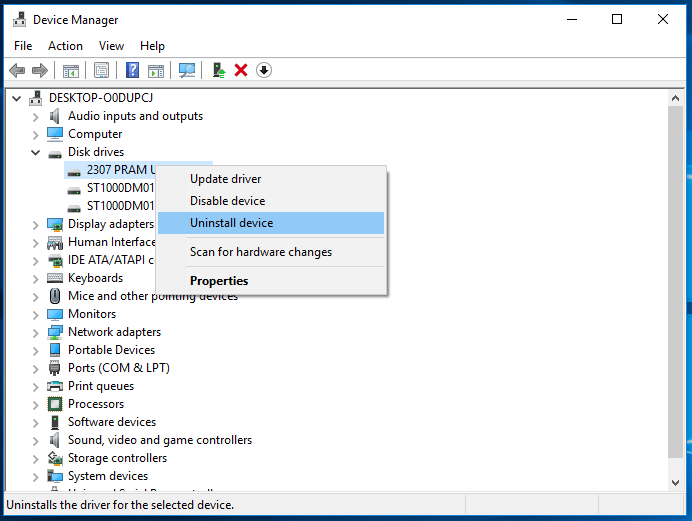
Step 2. Click "Device Manager" and expand "Disk drivers".
Step 3. Right-click on the SanDisk Cruzer USB or portable device, select "Uninstall device" and click "OK" to confirm its removal.
Step 4. Restart the computer, then reconnect the USB to the PC. Windows will automatically install the USB drive after the computer restarts.
If you can't access the saved data after the process, you can try to restore data from the SanDisk Cruzer first. Once you've completed the steps to recover your data, you can reconnect the USB to your PC and check if the saved data is accessible. If you still encounter issues, you may want to consider using a data recovery software to help retrieve your data.
You can also watch this video to check more effective methods of how to fix the SanDisk Cruzer not recognized issue.
Part 2. Restore Data from SanDisk Cruzer
Most professional data recovery software can scan and restore data from inaccessible storage devices. We recommend trying Deep Data Recovery, which allows you to scan and find important data from various storage devices, including SanDisk Cruzer, Toshiba USB drive, Seagate external hard drive, or Samsung SD card, etc.
Deep Data Recovery stunning features:
- You can recover data from emptied Recycle Bin, various storage devices, and more using data recovery software like Deep Data Recovery. This tool can retrieve files from emptied Recycle Bin, as well as from damaged or corrupted storage devices such as HDD, SSD, USB, pen drive, SD card, and external hard drive.
- The software can restore over 1000 types of files, including photos, videos, documents, emails, and more.
- Repair corrupted files during data recovery on Windows 11/10/8/7
- Retrieve lost files due to deletion, device formatting/corrupting, partition loss, OS crash, etc. by using data recovery software or services that scan and restore deleted or damaged files from various storage devices.
Follow these steps to restore your SanDisk Cruzer data now:
Step 1. Select file types and click "Next" to start.
Launch Deep Data Recovery on your PC, select the file types you want to recover, and then click "Next" to begin the recovery process.

Step 2. Choose the USB drive to scan
Launch Deep Data Recovery and select the USB drive where your lost files are located. Click "Scan" to begin the recovery process.

Step 3. Check and preview USB drive data
When the scanning is finished, you can quickly locate a specific type of file by using the Filter feature and the Search option to narrow down your search results.

Step 4. Restore flash drive data
After recovering lost USB drive files, click "Recover" to restore them, and save the found files to a safe location on your PC, not to the USB drive itself.
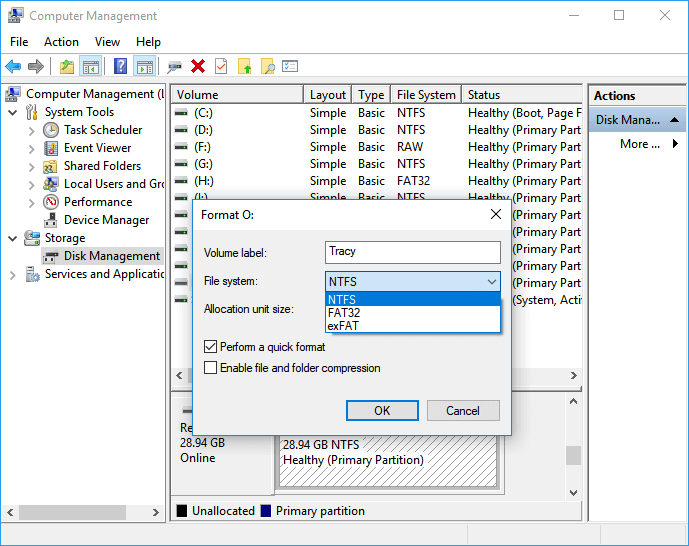
Part 3. Format SanDisk Cruzer to FAT32
To ensure no further issues arise with your SanDisk Cruzer, the final step is to format it and change its file system to FAT32, thereby resolving any existing problems and preventing new ones from occurring.
To format a drive to FAT32 using Disk Management, follow these steps:
Step 1.Connect the USB to your PC and right-click on This PC/My Computer, then select "Manage".
Step 2. Click "Disk Management", locate and right-click SanDisk Cruzer, then choose "Format".
Step 3. Select FAT32 as the file system that you want to set to the USB device.
Once the device is formatted, you can safely continue using it as you normally would. This includes saving files, browsing the internet, and running applications.
If your external hard drive, USB, or SD card can't be recognized by your PC, you can try the solutions outlined on this page to resolve the issue. If you're unable to access the saved data, Deep Data Recovery is available to help.
Related Articles
- FIX: HDD/SSD Unknown Device in Device Manager Windows 10/8/7
- External Hard Drive Can be Detected But Not Opening
- [2022 New] LaCie External Hard Drive Troubleshootings, No Data Loss
- SSD vs HDD Lifespan, Which Lasts Longer SSD or HDD? What's the Difference
- How to Show Hidden Files on Windows 7
If you want to view hidden files in Windows 7, you need to learn the right ways for how to show hidden files and folders in Windows 7. - [Solved] PS4 Not Recogizing/Reading External Hard Drive 2021
PS4 not recognizing USB hard drive is a problem that bothers a lot of people. Here are the steps for how to solve the problem.