How to Recover 0 Byte Word Document in Windows 10/8/7
Quick Navigation: 4 Solutions to Fix Word Document Shows 0 Bytes
If you're experiencing a 0 bytes error in Word, don't worry - we've can help. To fix this issue, you can try one of the six useful solutions we've gathered, which include troubleshooting the document, checking for corrupted files, and more. By following these steps, you should be able to resolve the 0 bytes error and get back to editing your Word document with ease.
| Workable Solutions | Step-by-step Troubleshooting |
|---|---|
| Fix 1. Use Anti-virus Software | Right-click on the Avast orange icon in the Windows system tray and open Avast UI...Full steps |
| Fix 2. Run CHKDSK | Press the Windows key and type cmd. Right-click "Command Prompt"...Full steps |
| Fix 3. Run CHKDSK Alternative | Download Qiling CleanGenius for Free and install it. Open the software and select...Full steps |
| Fix 4. Show Hidden Files | In Windows 10/8/7, press Windows + E to bring up the Windows Explorer...Full steps |
Why Is My Word Document Saving as Zero Bytes
Your Word document became empty after saving due to a known issue where Word saves a temporary file instead of the original file, and when you restart, it loads the temporary file, which is empty. To recover your document, try the following: check if you have a backup or a previous version of the document. If not, open Word and go to File > Open, then select the location where you saved the document. If you see a file with a ~ symbol at the end (e.g., "document.docx~"), open that file instead of the original one.
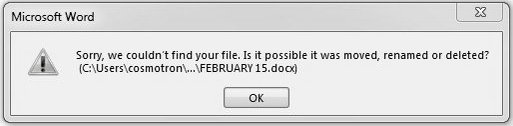
It's unusual to see a blank Word document showing 0 bytes even with data pages on it. However, many people still encounter a 0-byte Word doc or Docx file. This issue often indicates a corrupt or damaged file, or a bad sector on a hard drive or flash drive, resulting in the loss of contents.
Part 1. How to Recover 0 Byte Word Documents in Windows 10/8/7
Before attempting to fix the Word file saving as 0 bytes error, it's essential to recover the Word document as soon as possible to avoid accidental deletion. There are two methods to restore DOC files: using software or a manual solution. This way, you can retrieve your Word document in advance and ensure it's safe from any potential loss.
- 1. Recover 0 Byte Word Document with Data Recovery Software
- 2. Restore DOC Files in Windows 10/8/7 Manually
1 - Recover 0 Byte Word Document with Data Recovery Software
If you've lost a Word document, you can try downloading Deep Data Recovery on your PC to scan and recover the deleted file. It's effective at recovering various types of files.
- Data recovery software can recover deleted, formatted, and inaccessible data from various devices, including computers, laptops, mobile phones, and external storage devices. It can handle different data loss situations, such as accidental deletion, formatting, virus attacks, physical damage, and logical damage.
- Recover photos, audio, music, and emails from any storage effectively, safely, and completely, using a reliable data recovery software.
- You can recover data from various devices and storage media, including the recycle bin, hard drive, memory card, flash drive, digital camera, and camcorder, to retrieve lost or deleted files.
Simple steps to retrieve Word documents:
Step 1. Select file types and click "Next" to start
Launch Deep Data Recovery, select file types, and click "Next" to initiate the recovery process.

Step 2. Choose the Word file location
Select the drive or a specific folder and click the "Scan" button.

Step 3. Locate your Word files
The software will start scanning the selected drive, then you can select "Documents" from the left panel, choose "Word" from the category bar, and click "Preview" to view the lost Word files.

Step 4. Recover Word files
After previewing the lost Word files, select the desired Word files and click "Recover". Then, select a folder to store the Word files.
2 - How to Restore DOC Files in Windows 10/8/7 Manually
To retrieve a Word Document that was accidentally deleted, you can try using the temporary files method. This method involves searching for temporary files created by Word, which may contain a copy of the deleted document. To do this, follow these steps: Go to the location where you normally save your Word documents, usually the "Documents" or "My Documents" folder. Look for files with a ".
For Word 2010 - 2019
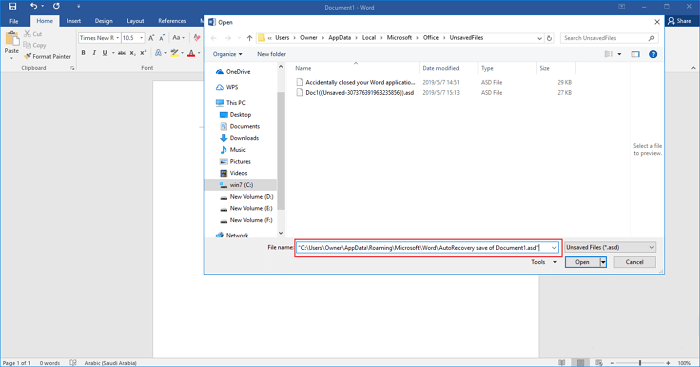
Step 1. To find the AutoRecover file location in Word, open the program and click "File" > "Options". In the left navigation pane, select "Save" and copy the path to the AutoRecover file location. You can then paste this path into File Explorer to access the files.
Step 2. Go to the File Explorer, find the unsaved document, and copy the .asd file.
Step 3. To recover unsaved Word documents, go to your Word app, click "File" > "Open" > "Recover Unsaved Documents" at the bottom, where you can find any recently unsaved Word files.
Step 4. Paste the copied .asd file into the File Name box popping up. Open the Word file recover it.
Office under 2010
For Office 365, the path to find temp files is C:\Users\YourUsername\AppData\Local\Temp. For other Office editions, the path is different: C:\Users\YourUsername\AppData\Local\Temp. However, the exact path may vary depending on your system configuration.
- 1. C:\ Documents and Settings\Application Data\Microsoft\Word
- 2. C:\ Documents and Settings\Local Settings\Temp
Locate files like ~wrdxxxx.tmp, ~wrfxxxx.tmp, ~wraxxxx.tmp, and open them in a notepad. Save the files after data recovery. The Word document saved as 0 bytes is usually caused by issues such as corrupted files, incorrect file associations, or incomplete saves, which can be resolved by following the solutions below.
- Virus infection
- Application failure
- System crash or bad sectors
- Files are hidden
Part 2. How to Fix Zero Bytes Word Document Error
According to these common causes, you can remove the 0KB error now.
- Solution 1. Remove 0KB Virus with Anti-virus Software
- Solution 2. Run CHKDSK to Resolve Disk Errors
- Solution 3. Run CHKDSK Alternative
- Solution 4. Show Hidden Files
Solution 1. Remove 0KB Virus with Anti-virus Software
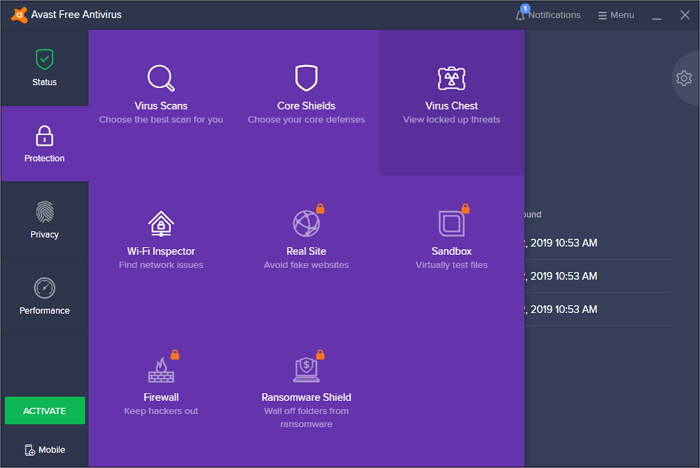
The easiest way to remove viruses is by using anti-software. There are lots of antivirus software that can help you get rid of the 0KB virus. Here is the way to remove the virus with Avast.
Step 1. Right-click on the Avast orange icon in the Windows system tray and open Avast UI
Step 2. Go to "Protection" > "Virus Scans".
Step 3. Click "RUN SMART SCAN " and the scanning process starts.
After the scan is complete, Avast displays all the issues it found. You can either resolve the problems right on the results screen or set up each virus scan to automatically resolve any detection issues that come up.
Solution 2. Run CHKDSK to Resolve Disk Errors
If you have a disk error or bad sector error, you can try this method to fix Word file 0 bytes error.
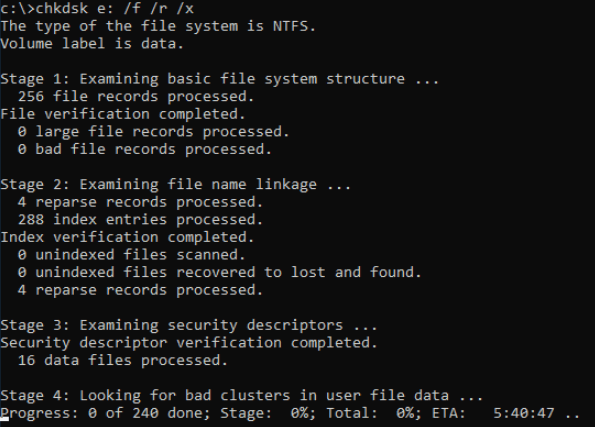
Step 1. Press the Windows key and type cmd.
Step 2. Right-click "Command Prompt" and choose "Run as administrator".
Step 3. Enter the following command: chkdsk E: /f /r /x
Solution 3. Check and Repair Errors Using CHKDSK Alternative
If you're not a fan of the command line, you can use a tool called Qiling CleanGenius, which is a one-click solution to fix file system errors on your hard drive.
Step 1. Download Qiling CleanGenius on your computer for free.
Step 2. To run the software, click on it. Then, on the left panel, select "Optimization" and choose "File Showing" from the options.
Step 3.To resolve a file system error on a drive, go to the "Choose drive" section, select the drive with the error, and check the box next to "Check and fix file system error". Then, click the "Execute" button.
Step 4. Once the Qiling CleanGenius completes the repairing process, click on the "here" link to view the result of the repair.
Solution 4. Show Hidden Files to Fix 0 Byte Word Document
If your Word files have been replaced by 0-byte files, you can try showing hidden files to locate them. To do this, you can follow some steps that may help reveal the missing files.
Step 1. Press the Windows key + E to open File Explorer.
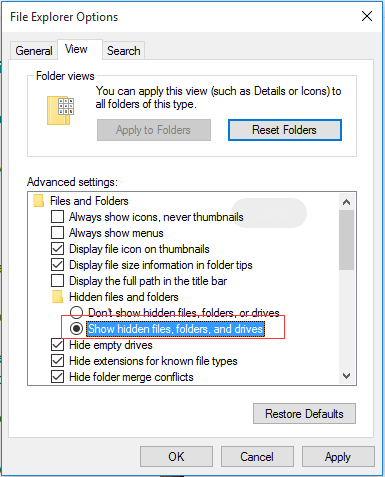
Step 2. In the Folder Options or File Explorer Options window, click the "View" tab and under Hidden files and folders, select the "Show hidden files, folders, and drives" option.
Step 3. To view the files of a hidden drive, right-click on the drive, select "Properties", then click on the "Apply > OK" button. This will make the drive visible, and you'll be able to see its files.
Conclusion
A zero-A 0-byte file is a bad sign, often indicating a corrupt or damaged file, or a bad sector on your hard drive or flash drive. This can cause the contents of the file to be lost. However, the solutions provided can help solve the problem. If needed, you can also use Qiling data recovery software for assistance.
Related Articles
- How to Recover Data from Specific Folder
- How to Open ISO File in Windows 10/11 Without Burning
- Files Automatically Encrypted, How to Remove Encryption from Files
- ISO Recovery: Recover Deleted ISO Files with ISO Recovery Software
- Resolved: Restore Lost/Disappeared Contacts after iOS 12 Update on iPhone X/8
If your iPhone contacts have gone missing after an iOS 12 update, don't worry, practical methods are available to help you restore them. You can follow these steps to recover your lost contacts on your iPhone X or iPhone 8. - VSCO Recovery | How to Retrieve VSCO Deleted Photos
VSCO recovery tutorial is available to help both iPhone and Android users recover deleted photos, pictures, and images from VSCO, VSCOcam, and the VSCO library.