Recover Pictures Deleted from Years Ago
"Can I recover 2-It's great that you found some old happy memories on the SD card. You can consider transferring the photos to your computer or a cloud storage service like Google Photos or iCloud, so you can easily access and enjoy them again. You might also want to consider organizing the photos into albums or folders, so they're easier to find and look through. If some of the photos are blurry or of poor quality, you could try to enhance them using photo editing software. What would you like to do with the old photos?
Unfortunately, it's unlikely to recover deleted photos from 2 years ago. Most digital storage devices, including memory cards, have a limited number of write cycles before they start to degrade. If you've deleted a majority of the photos, it's possible that the card's storage capacity has been reduced, making it harder to recover the remaining data. However, it's worth trying some data recovery software to see if any photos can be recovered.
If you're experiencing the same issue or have questions about it, don't worry. This page provides reliable and practical solutions to help you resolve the problem.
- If you're looking to recover deleted files that were deleted a long time ago, the chances of recovery depend on various factors such as the type of storage device, the operating system used, and the time elapsed since deletion. Generally, deleted files are stored in a recycle bin or trash folder, and if not overwritten, can be recovered using data recovery software. You can try using file recovery tools like Recuva, Disk Drill, or Deep Data Recovery to scan your storage device and retrieve deleted files.
- Unfortunately, it's unlikely to recover deleted photos from 2 or 3 years ago, as most devices and storage systems have a built-in overwrite mechanism that overwrites deleted data with new data. However, you can try using data recovery software or services that specialize in recovering deleted files, such as Photo Recovery or Disk Drill. These tools can scan your device or storage media for any remaining fragments of the deleted photos and attempt to recover them.
- Q 3. Can you restore sometime permanently deleted?
- Unfortunately, it's not possible to recover permanently deleted photos from your phone's internal storage, as the space is reused for new data. However, you can try using a data recovery app to scan your phone's external storage, such as an SD card, or a cloud backup service if you have one. Some apps, like Google Photos or Samsung Cloud, can also recover deleted photos from their servers.
This page provides a comprehensive guide to resolving the issue of restoring deleted data, specifically focusing on pictures, by understanding why deleted data can still be recovered. It offers solutions to restore years-old deleted photos on various devices, including Windows PCs, external storage devices, and cellphones.
Overview of Long Time Deleted Pictures Recovery
If you've created a backup of all the lost files, you're in luck - you can stop here and restore them from your backup in no time.
If you can meet either of the two important factors, you may be able to recover deleted files or pictures from years ago. These factors include having a backup system or having a computer or device that still has the original files or pictures on it. If either of these conditions are met, it may be possible to recover the deleted files or pictures.
# 1. Never Emptied Recycle Bin
The Recycle Bin keeps recently deleted items, including documents, pictures, audio and video files, for a while, until it is emptied, at which point they are permanently deleted.
In some instances, deleted files can't be recovered from the Recycle Bin or Trash due to various reasons such as: the files were permanently deleted, the Recycle Bin was emptied, or the files were deleted using a third-party app that bypasses the Recycle Bin. In such cases, specialized software or data recovery services might be necessary to recover the deleted files.
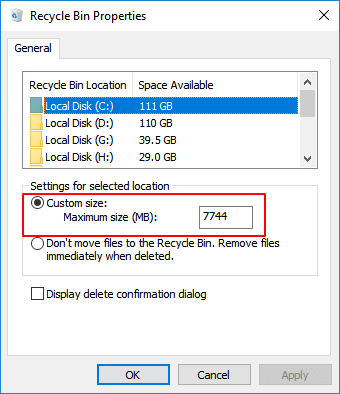
Case 1. Files too large for recycle bin, such as high definition photos and videos exceed the maximum size of Recycle Bin.
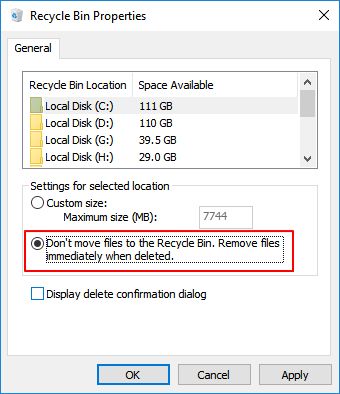
In this scenario, the Recycle Bin is set to automatically delete files immediately after they are deleted, rather than holding them in a temporary "recycle" state. This means that once a file is deleted, it is permanently removed from the system and cannot be recovered. This setting is often used by users who want to ensure that sensitive or confidential information is not recoverable after deletion.
# 2. No New Data Was Written to Storage Devices Where You Lost Files
If you didn't save any new files to a storage device where you deleted pictures or photos years ago, you can run a reliable data recovery software to scan and recover all lost data.
How to Recover Years Ago Deleted Pictures (3 Ways)
There are three practical ways to recover deleted photos or files from storage devices. Choose the most suitable method to retrieve your lost photos from years ago.
Method 1. Recycle Bin Photo Recovery
To recover deleted photos from the Recycle Bin on Windows 10/8/7, simply click on the Recycle Bin icon, navigate to the folder containing the deleted photos, and right-click on the photos you want to restore. Select "Restore" to move them back to their original location.
To recover deleted files from the Recycle Bin, the files must not have been emptied or cleaned. The process involves following detailed steps outlined below.
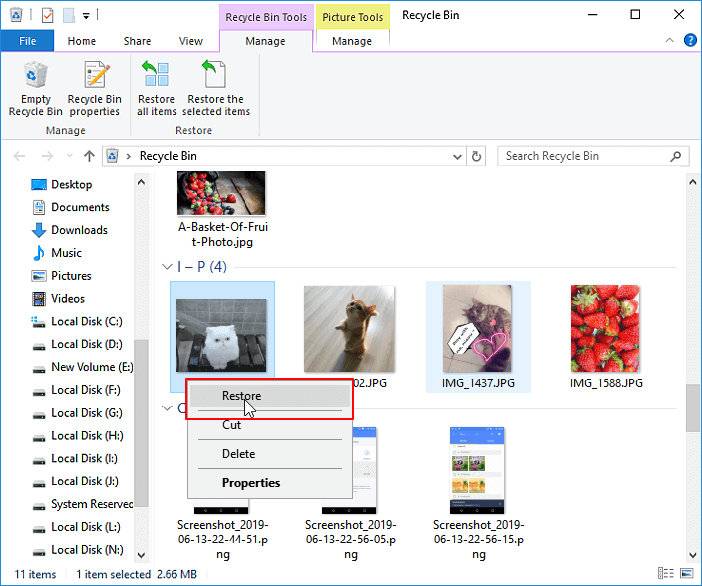
Step 1. Double-click on the Recycle Bin icon on Windows Desktop.
Step 2. Locate and right-click on the deleted photos, select "Restore".
Step 3. The deleted photos will be restored from Recycle Bin to its original locations.
If you have emptied the recycle bin, your last chance is to apply professional file recovery software as recommended in Method 2 for help.
For mobile phone users, you can refer to the provided links to recover lost photos on either an iPhone or an Android phone. The links offer guidance on how to retrieve deleted photos from your device.
- Recover Permanently Deleted Photos on iPhone
- Recover Permanently Deleted Files from Android Recycle Bin
Method 2. Use File Recovery Software to Restore Long Deleted Pictures
You can scan and restore deleted pictures on your Windows hard drive or external storage devices years ago, as long as no new data has been saved in the meantime. This allows you to retrieve photos that were previously lost, even if they were deleted a long time ago.
Professional file recovery software like Deep Data Recovery can help recover deleted pictures of various formats, including PNG, JPG, JPEG, TIFF, BMP, and many more, even after a long time, from Windows PCs, external hard drives, USB drives, or SD cards.
- To recover photos from emptied recycle bin, memory card, USB flash drive, SD card, digital camera, and camcorders, you can use data recovery software such as Deep Data Recovery or Disk Drill. These tools can scan the device for deleted files, including photos, and recover them in their original quality.
- Repair corrupted JPEG/PNG files automatically during data recovery
- Photo recovery software can help retrieve deleted, formatted, corrupted, or virus-attacked photos from various situations, including sudden deletion, formatting, hard drive corruption, and system crashes. This software can recover photos that were lost due to accidental deletion, formatting, or virus attacks, and even in cases where the system crashes or experiences hardware failure.
- Restore photos from mobile devices, Windows and macOS computers
You can use file recovery software to recover lost picture files, and then upgrade to its full version to recover the rest. Alternatively, Android users who store their photos on an external SD card can follow these steps for assistance.
Step 1. Launch Deep Data Recovery. Choose file types and click "Next" to start the recovery process.

Step 2. Find the partition where you deleted or lost pictures, then click "Scan" to begin the recovery process.

Step 3. After the scanning finishes, you can quickly filter photos by choosing "Pictures" in the left panel.

Step 4. You can preview the pictures you want to recover. Then, click "Recover" and choose another location to save the recovered data.
Mobile phone users can't recover deleted photos from their internal storage, as taking new photos or saving images requires camera or photos app usage, which wouldn't be possible without accessing the internal storage. Therefore, it's not possible to retrieve years-old deleted photos from iPhone or Android phone internal storage.
If you've made backups of the lost photos, you can refer to the tips in Method 3 for assistance.
Method 3. Restore Years Ago Deleted Photos from Backup
To recover deleted photos from personal backup, you can use a data recovery software or a cloud backup service. For Windows, you can use the built-in File History feature or a third-party recovery software like Deep Data Recovery.
# 1. Restore from Personal or Windows Backup
If you've backed up your deleted or lost photos and files on a storage device, you can simply plug the device into your computer, open File Explorer, and find your lost files stored there.
If you've created a Windows backup on your computer, you can follow these steps to recover lost files. First, insert the backup disc or connect the external hard drive that contains the backup.
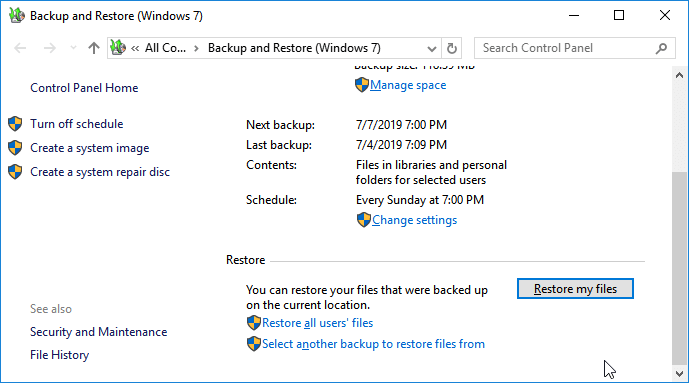
Step 1.To access the Backup and Restore feature in Windows 7, open the "Control Panel" and navigate to the "System and Maintenance" section, where you will find the "Backup and Restore (Windows 7)" option.
Click "Restore my files" to continue.
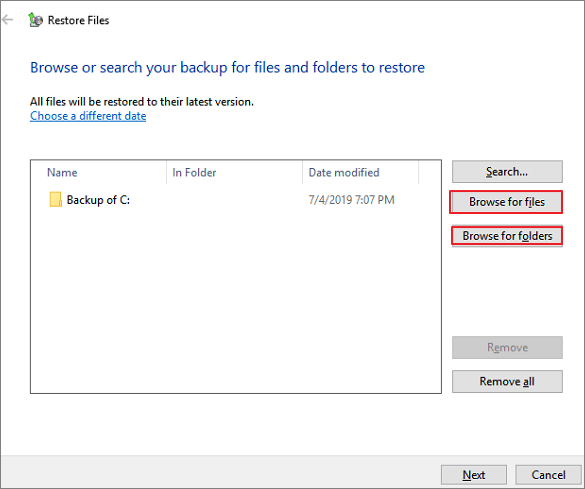
Step 2.Click "Browse for files" or "Browse for folders" to select the previously created backup, which can be used to restore the system to its previous state.
Step 3.To save the backup, navigate to the location where you want to store it and select either "In the original location" or "In the following location" as the destination. This will ensure that your backup is safely stored and easily accessible.
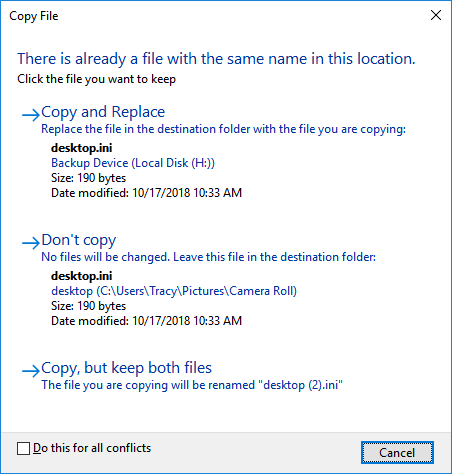
If there's a conflict, select "Copy and Replace", "Don't copy", or "Copy, but keep both files" based on your requirements.
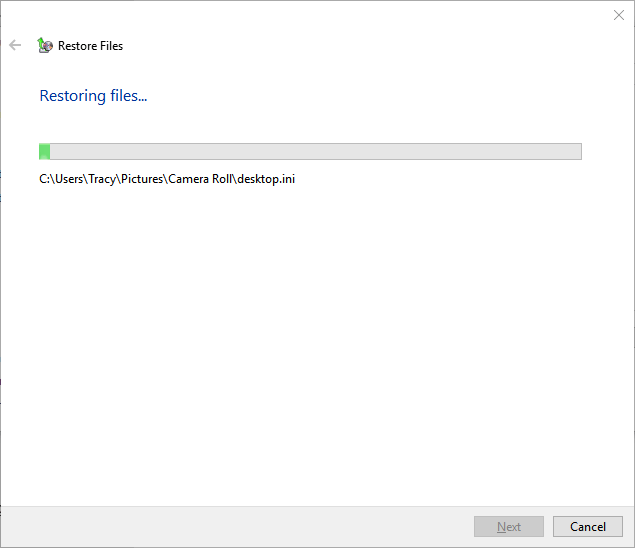
Step 4. Wait for the restoring process to complete.
# 2. Restore Pictures from iCloud backup
If you're an iPhone or iPad user who's accidentally deleted photos, you can easily recover them using a reliable iOS data recovery software that can access your iCloud backup.
# 3. Restore Android Lost Photos from Android Backup
To restore deleted photos on an Android phone, go to Settings, tap on "Back up & restore", and select the backup of your deleted photos from a long time ago. Then, click "Restore from Backup" to retrieve all the lost data.
Warm Tip
While Deep Data Recovery methods can recover deleted pictures from a year or two ago, there are still risks involved, such as new data overwriting the old or files becoming corrupted after recovery.
To prevent issues with recovered photos, it's recommended to create a full backup of all your valuable photos and pictures to another drive. This will help prevent problems such as half-greyed out or corrupted photos, which may still require efforts to repair after recovery. By having a backup, you can minimize the risk of losing your photos and ensure they remain intact.
For a Windows user, backing up photos can be done easily using Windows backup or a reliable file backup software like Qiling Backup. The process involves three simple steps: selecting the desired photos, choosing a local hard drive or external storage device as the backup location, and initiating the backup process.
Step 1. Click "File backup" to initiate a backup.

Step 2. Local and network files are displayed on the left side, allowing you to extend the directory and select which files to back up.

Step 3. To store the backup, select the location where you want to save it by following the on-screen instructions.

Step 4. To encrypt the backup with a password, click on the "Options" tab and select "Backup Options" from the menu. This will allow you to customize various aspects of the backup process, including the encryption of the backup with a password.

To schedule backups, go to "Backup Scheme" and choose to initiate a backup at a specific event, such as when the computer is idle or at a specific time of day. This allows you to automate the backup process and ensure that your data is regularly backed up.

Step 5. You can save the backup to a local disk, Qiling's online service, or a NAS.

Step 6. Qiling Backup allows customers to securely store their data in a third-party cloud drive and in Qiling's own cloud drive, providing a convenient and reliable backup solution.
To back up data to a third-party cloud drive, select Local Drive, scroll down to add Cloud Device, add your account, and log in.
Step 7. To start a backup, click "Proceed". Once the backup process is complete, it will be displayed as a card on the left side of the panel. To manage the backup job further, click on it.

For iPhone or iPad users, a convenient option is to save cherished memories directly to iCloud.
For an Android device user, you can use the Google Drive or Android internal backup feature to fully backup essential files.
Related Articles
- How to Find Pictures on an Old Hard Drive on Windows 10/8/7
- GIF Repair | How to Repair Corrupted GIF Files
- How to Recover Files Lost While Moving
- Restore or Repair Corrupted AutoCAD Files
- .Bak File Recovery Software Free Download
Download the best .bak file recovery software to recover accidentally deleted or corrupted .bak files as soon as possible. It's the best way to recover your backup files (.bak file extension) from any device. - Data Recovery Software for Windows 10/Mac/iPhone/Android
Data recovery software can help you recover deleted files and folders on your Windows or Mac computer, mobile device, or storage media, making it easy to restore lost data and alleviate frustration and stress.