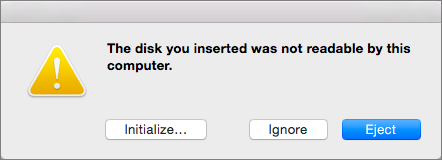
Fix 'The disk you inserted was not readable by this computer' on Mac
When Mac warns you "the disk you inserted was not readable by this computer", it means that your external hard drive or USB flash drive has a detect issue. You can fix this by checking the disk's connection, restarting your Mac, and ensuring the disk is properly formatted for Mac. If the issue persists, try using a different USB port or restarting your Mac in Safe Mode.
| Workable Solutions | Step-by-step Troubleshooting |
|---|---|
| 1. Check Mac System | Connect another external USB to Mac, check if it appears in Finder...Full steps |
| 2. Check File System | Check if the file system of your external device is NTFS. If yes, change it to FAT32...Full steps |
| 3. Repair with Disk Utility | Connect the external device to Mac > Go to "Utilities" > Select the device and click "First Aid"...Full steps |
| 4. Initialize Disk | Open Disk Utility > Choose problematic disk and click "First Aid" > "Repair disk" > "Erase"...Full steps |
USB says 'the disk you inserted was not readable by this computer'
Your Sandisk USB flash drive becomes unreadable and inaccessible due to unknown reasons, resulting in a 'the disk you inserted was not readable by this computer' error message on your MacBook. You have important family pictures and working documents saved on the USB. To fix the flash drive and access your data, you can try formatting the drive, checking for physical damage, running a disk utility, or using a data recovery software. If the issue persists, consider contacting Sandisk support or a professional data recovery service for assistance. This will help you recover your data and get your flash drive working again.
Fixes to 'The disk you inserted was not readable by this computer' error
- #1. Plug in Different Device to Mac
- #2. Check File System of Inserted Disk
- #3. Repair Unreadble Disk with Disk Utility
- #4. Initialize Disk and Recover Data
When trying to access removable storage devices like external hard drives, SD cards, USB flash drives, or Android phones/tablets, you may encounter issues if the system files or disk are corrupted. This can result in error messages that prevent you from accessing the device and its data. In Mac OS X, a common error message is 'the disk you inserted was not readable by this computer.'
Many Mac users have experienced the issue of their Mac not turning on, and they're looking for a solution. To fix this problem, our advice is to follow a series of steps, including checking the power cord and outlet, trying a different power source, and checking the Mac's power button and charging port. If the issue persists, it may be necessary to take the Mac to an Apple Store or authorized service provider for further assistance.
Step 1. Check the Mac system.
If a Mac won't recognize an external hard drive, try plugging in a different external drive. If it appears on the Finder, it suggests that the issue lies with the external USB devices, not the Mac itself.
Step 2. Check the file system format
The external hard drive or other device is unreadable on Mac because it's formatted with NTFS, which can be easily fixed by converting it to FAT32.
Formatting a disk will completely erase all data on it. To avoid losing important files, it's a good idea to back up the disk in question on a Mac using Qiling Backup for Mac beforehand.
Step 3. Verify or repair the unreadable disk, USB or SD card using Disk Utility
1. Choose "Go" > "Utilities".
2. double-click "Disk Utility".
3. Select the volume in the left pane for which you want to repair permissions, and then click the "Repair Permissions" button.
4. Click the "First Aid" tab.
5. Select the volume where you want to install the Adobe application, and then click "Repair Disk" Permissions.
Step 4. Initialize the disk and recover data
The pop-up message warns that if the problem continues, you have no choice but to agree to initialize the disk you inserted.
To avoid data loss on your Mac, download and install Qiling data recovery software, which can help prevent data loss on the storage device.
The overall troubleshooting steps are as follows:
1. Click on the "Initialize" button.
2. To access the Disk Utility, you can open it from the Applications/Utilities folder, or use Spotlight to search for it. Once open, select the problematic drive from the list on the left, and click on the "Erase" tab. From there, you can select the format you want to use for the drive, such as APFS or Mac OS Extended (Journaled). After selecting the format, click "Erase" to begin the process.
3. Choose the drive from the left pane and click on "First Aid".
4. If Disk Utility can't repair your disk, you can try using the built-in Repair Disk feature in Disk Utility. Click the "First Aid" tab, then click "Repair Disk". Wait for the repair process to complete. If this doesn't work, you can try reinstalling macOS, which will erase all data on the disk.
5. To erase and format a drive, navigate to the "Erase" button, name the drive, select "File Format", and click "Erase" to format it with a correct file system.
To resolve the issue, you can try reformatting the external hard drive on your Mac. This will erase all data on the drive, so make sure you have backups of any important files. To do this, go to Disk Utility, select the external drive, and click the "Erase" button.
To recover formatted data on the disk, open Deep Data Recovery for Mac and follow the steps outlined in the article "Recover Lost File from Formatted USB Flash Drive on Mac".
If you're still experiencing the 'the disk you inserted was not readable by this computer' error after trying various methods, it's likely that the drive is failing and may soon stop working altogether. In this case, it's a good idea to back up your data as soon as possible and consider replacing the drive with a new one. This will ensure that your important files and data are safe and can be easily transferred to the new device.
Conclusion
On this page, we listed 4-To fix the 'The disk you inserted was not readable by this computer' error on your Mac, start by safely ejecting the disk by clicking on the eject icon next to the disk's name in the sidebar of a Finder window. If that doesn't work, try restarting your Mac.
If you're experiencing the same issue on your drive, follow the tips on this page for assistance. Some users may lose valuable files during the process, but as this is a common occurrence.
Deep Data Recovery for Mac can scan and find all your files in just a few clicks, helping to restore your drive to normal operation.
Related Articles
- Time Machine Restore Button Greyed Out, How to Fix?
- Quick Answer: Why Do Deleted Files Still Appear Mac
- Mac Raw Recovery: How to Recover Data from Raw Hard Drive/Partition
- 3 Steps to Clean Install macOS from USB Bootable Installer
- Email Recovery for Gmail, Yahoo, Outlook, Hotmail
If you're struggling to find out how to recover permanently deleted emails, this article can help. It provides step-by-step guides on how to recover deleted emails in various email services, including Gmail, Outlook, Hotmail, and AOL. - [5 Solutions for macOS] Recover Deleted Files After Updating to Catalina
How to recover deleted files after updating to Catalina? This article teaches you five ways to recover lost files on macOS Catalina. You can recover deleted files with Time Machine, recovery software, iCloud, Apple Support, and by checking the Mac folder.