Backup Guide: System Image Backup on Windows 7
Backup Utilities in Windows 7
Windows 7 has a built-The Backup and Restore utility in Windows allows you to create backups of your system and personal files to internal or external disks on your local computer. On Windows 7, this utility offers a premium feature called "create a system image backup" that creates a copy of your entire system, including device drivers, Windows installation files, settings, applications, and personal files.
It's always crucial to have a complete backup of your PC, which can help you recover from system failures, malware, errors, or after installing a bad update on Windows 7. To create a system image backup, you'll see the detailed steps in this article, which can also be applied to other operating systems.
System Image Backup vs File Backup
System images are not ideal for standard backups of a Windows 7 PC and its files. A system image backup can capture files that can be easily redownloaded and reinstalled, along with others, but if you can't control what's backed up, you may end up with a complete image of everything on your hard drive.
A file backup is a simple and common type of backup that involves selecting specific files and folders to be backed up. This type of backup allows for granular options, enabling the backup and retrieval of specific items such as SQL, Exchange, and System State.
System image backup is more beneficial than file backup as it eliminates the need for Windows re-installment, allowing you to restore to a working state before a hard-drive crash.
System State Backup & System Image Backup Windows [2022]
System state backup is a feature that allows you to back up the system state of a Server computer, including the registry, system files, and other critical components. This can be useful for disaster recovery and troubleshooting purposes. Additionally, there are other solutions available for system image backup on Windows 10, which can provide a complete backup of the operating system and all installed applications.
Create System Image Backup on Windows 7
To create a system image backup for Windows 7, you can follow two methods. The first method involves using the built-in Windows Backup and Restore feature, which allows you to create a system image backup by selecting the "Create a system image" option and choosing the drive where you want to save the backup. Alternatively, you can use a third-party backup software, such as Qiling Backup, which offer more advanced features and flexibility in creating a system image backup.
Method 1. Use Backup and Restore to Create System Image
Step 1. Open system image backup
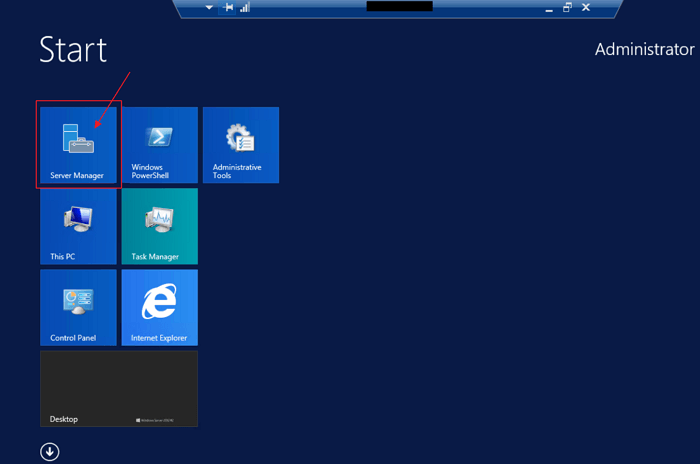
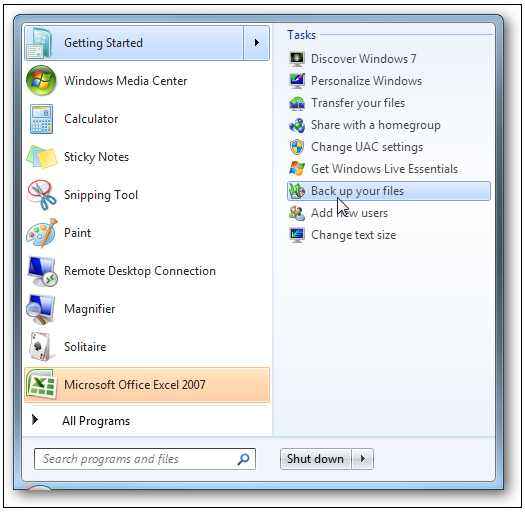
To create a system image backup on Windows 7, open Windows, click Start, select the arrow to the right side of "Getting started," and click "Backup your files."
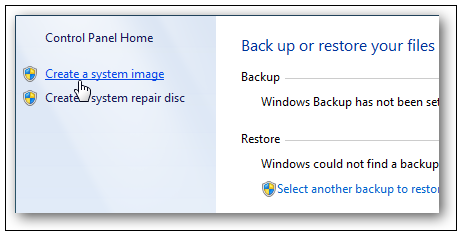
Step 2. To create a system image, click on the "Create a system image" link from the backup and restore option.
Step 3. To create a system image, you will need to open the Window for creating a system image.
To open the Backup and Restore Wizard, press the Windows key + R to open the Run dialogue box, then type sdclt.exe / BLBBACKUPWIZARD and press Enter. This will directly take you to the Backup and Restore Wizard window.
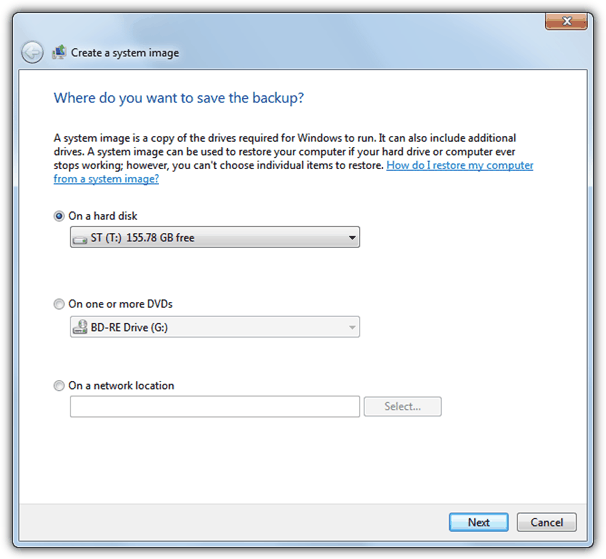
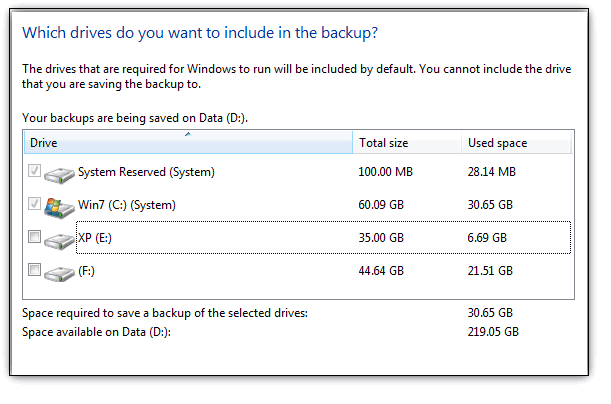
Step 4. To ensure the system image is safely backed up, it's recommended to store it on a physical device such as a hard drive or multiple DVDs. Although a warning may be displayed about the potential failure of the hard drive, this will not compromise the integrity of the backup. By using a dedicated physical device, you can safeguard your backups and the operating system in case of a system failure.

Step 5. In this step, the small 100MB boot partition and the primary system partition will automatically be chosen, preventing the selection of others due to their limited availability.
Note: In a multi-boot system, attempting to turn off one of the OS partitions will result in it being auto-selected. This typically occurs when Windows 7 is installed after the bootloader system files are not located on Windows 7.
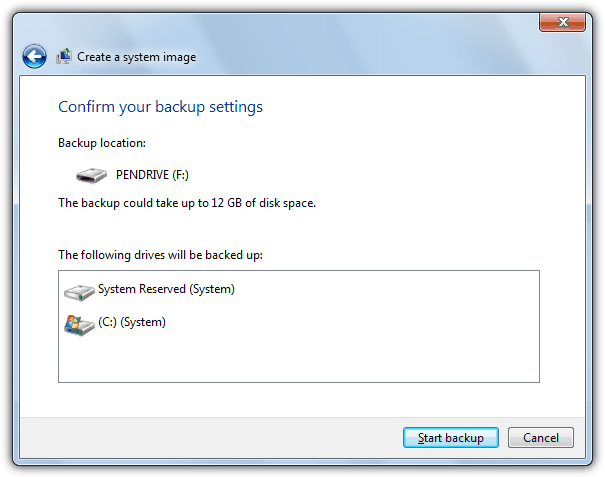
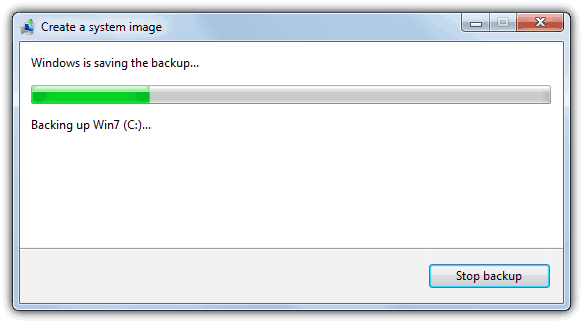
Step 6. The Backup and Restore tool will inform you of the estimated space needed to create a Windows 7 system image backup. To proceed, click the backup button, and the complete system image backup process will take a few minutes to complete.
Method 2. Use Qiling Backup to Create a System Image
You can now work diligently with free backup software, Qiling Backup, to create the most sophisticated and valuable version of Windows 7's system image backup.
This premium tool offers comprehensive protection for your data and future, featuring a user-friendly interface and robust capabilities to create backups of your disk, OS, partition, and more, with options to save backups to NAS, local drives, and cloud storage.
Qiling Backup offers free system imaging, with paid versions available for system backup and restore, quick recovery speed, disk backup and restore, and differential/full/incremental backup. The home and enterprise versions cost $39.95 and $49.95, respectively.
Step 1. Launch Qiling Backup, select System Backup on the home page.

Step 2. The system partition will be automatically selected, so you only need to choose the location.

Step 3. You can save your backup file on your local drive, access it through the cloud, or use a Network-Attached Storage (NAS) device. Alternatively, you can connect an external hard drive to store your system backup files.

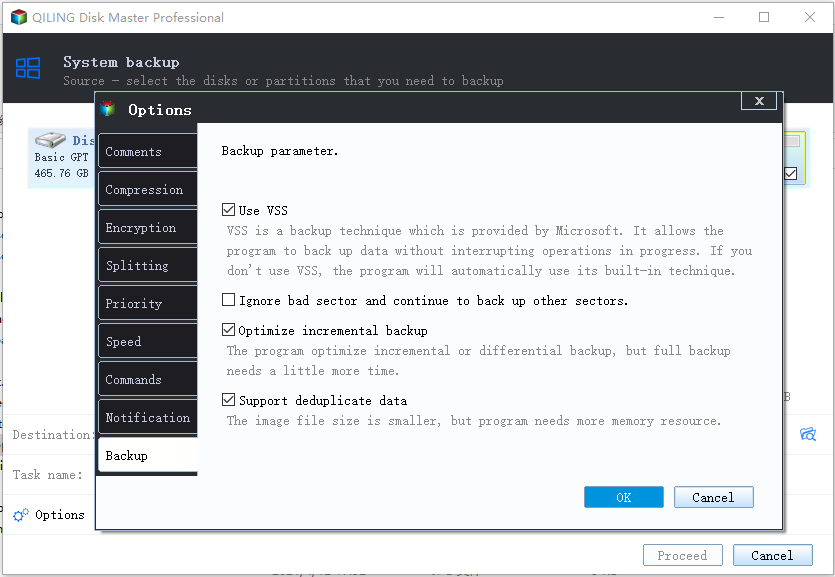
Step 4. You can customize the settings in "Options" at the bottom left, then click "Proceed" to start the process.
After finishing the backup process, you can check the backup status, recover, open, or delete the backup by right-clicking the backup task on the left.
How to Restore Windows 7 with A System Image
Step 1. To boot your Windows 7 PC, press the F8 key repeatedly until the Advanced Boot Options screen appears. Then, select "Repair your computer" and press Enter.
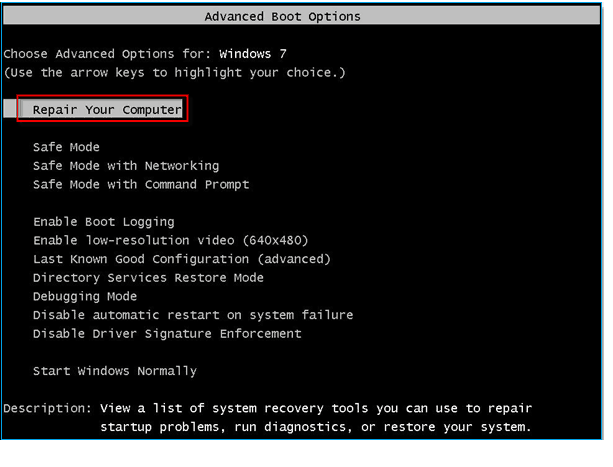
Windows will take a little time to load up the system image repair boot.
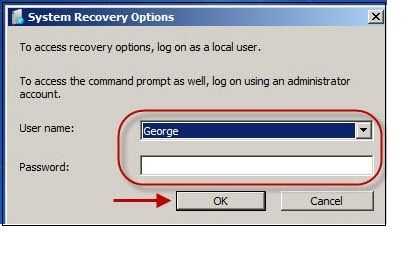
Step 2. After the repair boot loads, you will be prompted to enter your username and password. Simply hit the OK button to continue.
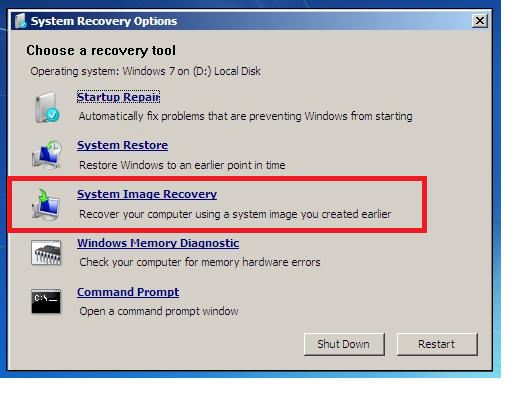
Step 3. Choose "System Image Recovery" from the available 5 options.
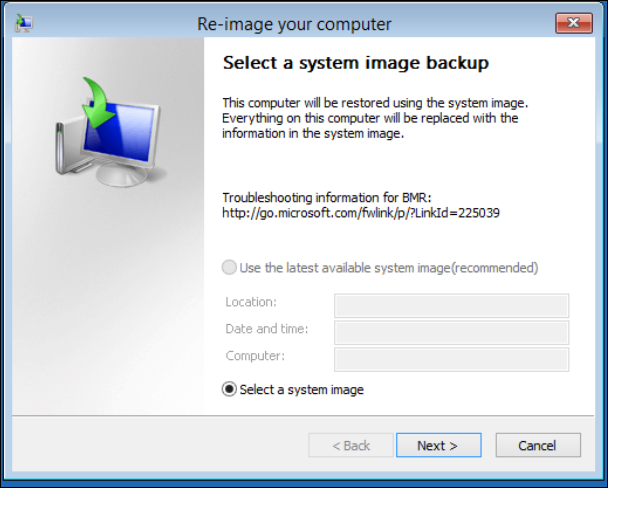
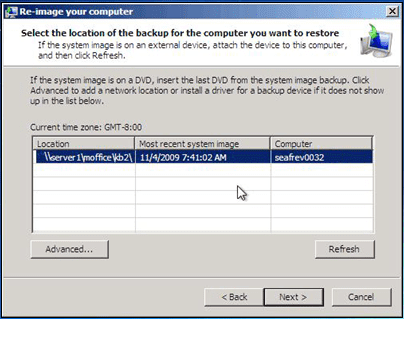
Step 4. If you're selecting a system image to retrieve from, there will be two options. It's recommended to choose the newest system image, but if it doesn't appear, select "Select a system image" instead.
Step 5. To access the backup on the network, go to the Advanced tab, save it, and then hit "Next" after detecting your backup image.
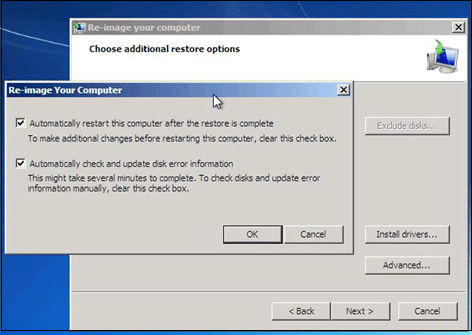
Step 6. An options screen will appear under the "Advanced" section, requiring you to check both available boxes and select "Next."
Step 7. Once the confirmation screen appears, confirm the restoration of the correct image and click the finish button to complete the process.

Step 8. Wait until the progress bar is filled, then bypass clicking the stop or reboot the Windows 7 PC.
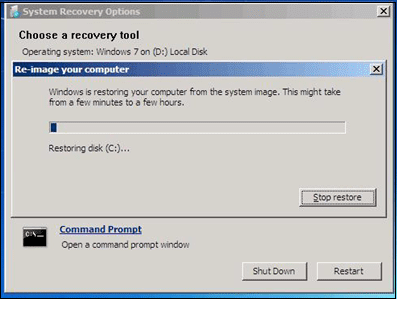
Step 9. Once done, the system will automatically reboot and restore.
FAQs
1. How Do I Restore Windows 7 from a system image?
To troubleshoot Windows 7, you can hit the F8 key while booting, choose "Repair your PC", and then select "System Image Recovery".
2. How do I do a full system backup in Windows 7?
To get started with backing up your Windows 7 computer, head to the system settings, which can be found on the taskbar. From there, select "File History" and follow the prompts to add an external hard drive. Once you've done this, Windows 7 will automatically backup your files every hour.
The Bottom Line
Here are the best steps to follow when you want to perform a system image backup on Windows 7: create a system image, choose a backup location, select the backup options, and check the backup status. If the image backup creates issues, Qiling Backup is the best solution. So, what are you worried about? Download it now!
Related Articles
- Automatically Backup a Folder to A Network Drive
- How to Backup Outlook Emails 2010(2 Simple Ways)
- Top 6 Best Incremental Backup Software for Windows 10 [2022 Guide]
- How to Clone Windows 10/8/7 to Another Computer
- How to Backup Any Folder to OneDrive on Windows 10 [Step-by-step Guide]
To back up any folder to OneDrive on Windows 10, you can explore three easy ways to achieve this. This guide walks you through the process, providing a helpful backup plan for your important files. - Easy Way: Backup C Drive to External Hard Drive
To backup the C drive to an external hard drive, use backup software and select “disk/partition backup”. Choose a location on the external hard drive to save the backup image and schedule a backup time to automate the process.