How to Delete Everything on MacBook [Two 2024 Solutions]
Why You Need to Delete Everything on MacBook
To delete everything on a MacBook Pro, users can restart their device and immediately hold down the 'Command + R' keys. This will boot the MacBook in recovery mode, allowing users to select the option to erase the content of the SSD. Users can also select the option to reinstall the operating system, which will also erase all data. Additionally, users can use the built-in Disk Utility to erase the hard drive and start with a clean slate. It's worth noting that these methods will permanently delete all data on the device, so users should ensure they have backed up any important files before proceeding.
If your MacBook Air has been compromised by a computer virus, or you simply want to give it a fresh start, deleting everything on the device can be a viable option. This can also help improve the system's performance by resetting it.
To erase everything on a MacBook, you can use either the Disk Utility or the Erase Assistant, which will delete all contents and settings, effectively factory resetting the system. However, this will completely wipe out all data present on the system, so it's essential to back up any important files before proceeding.
To make things easier, we have included a video explaining the same.
- To reset your Mac, press and hold the Command+R keys while turning on the system, then continue holding them until you see the loading bar.
- 01:08 Choose the language you want.
- 01:14 macOS Utilities window comes on the screen.
- 01:59 Click on Reinstall macOS from the macOS Utilities window
- 02:41 Select Agree when a pop-up comes asking for confirmation for the software license agreement
Solution 1. How to Delete Everything on MacBook Manually
To manually delete everything on your MacBook, follow these steps: first, shut down your MacBook completely, then press the power button to turn it back on while holding down the Command (⌘) + R keys to boot into Recovery Mode; once you're in Recovery Mode, select Disk Utility from the Utilities window, then choose your MacBook's startup disk from the left-hand menu and click the "Erase" button; confirm that you want to erase the disk by clicking "Erase" again; finally, quit Disk Utility and select "Reinstall macOS" from the Utilities window to start the installation process from scratch.
A. Turn Off FileVault on MacBook
FileVault is a vital in-built feature of MacBook that encrypts the hard drive and protects files stored inside, requiring authentication when accessing the storage option. However, when turned on, it can interfere with deleting everything, and users need to turn it off before starting the resetting process.
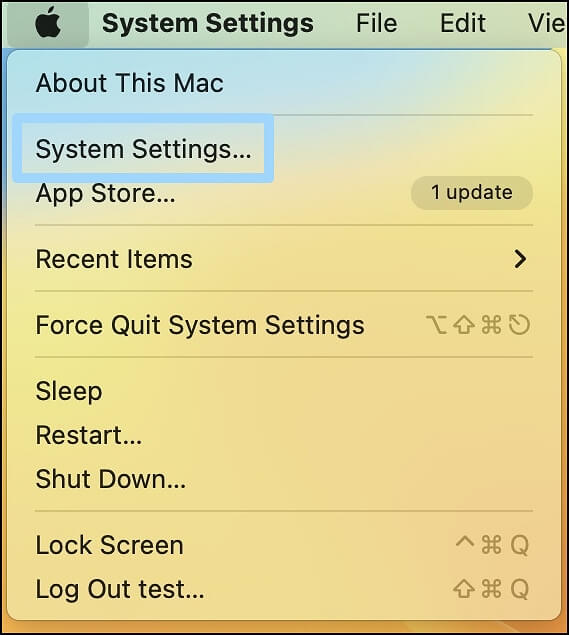
Step 1. To access System Settings, go to Finder and click on the Apple Menu, which will drop down a list of options, and then click on System Settings from this list.
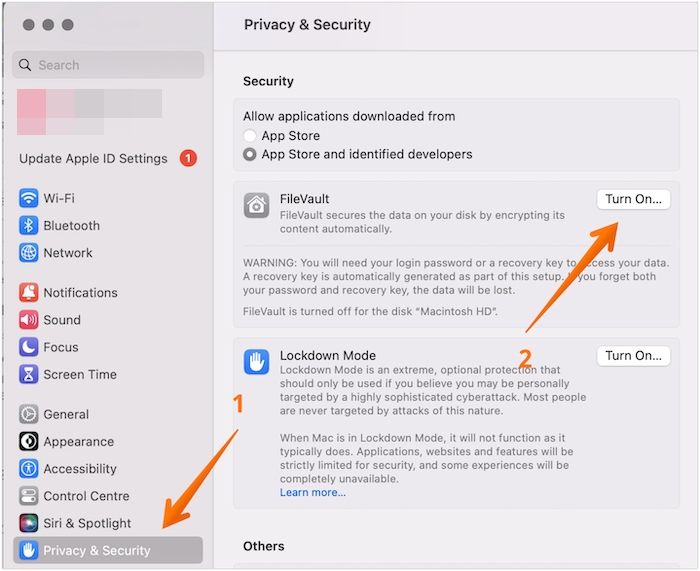
Step 2. Select Privacy & Security.
Step 3. Scroll down to the FileVault tab.
Step 4. If you want to disable FileVault, click on the "Turn Off FileVault" option. You may be prompted to enter your password.
B. Sign Out of iCloud, iTunes, and iMessage on MacBook
To disable iTunes, iCloud, and iMessage on your MacBook, you should sign out of these services on your device. This involves going to the iTunes, iCloud, and iMessage settings, clicking on "Sign Out" or "Quit" to exit the applications, and then confirming the action. This process will effectively disable these services on your MacBook.
Step 1. Go to Music App.
Step 2. Select "Account" from the menu.
Step 3. A drop-down will appear. Click on Authorizations.
Step 4. Select Deauthorize This Computer.

Step 5. Enter the password.
Step 6. Click Deauthorize.
To sign out of iMessage on Mac, follow these steps:
Step 1. Open Messages.
Step 2. Go to Settings.
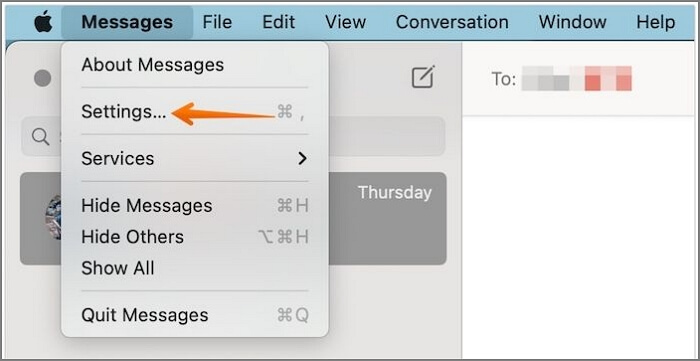
Step 3. Select the iMessage tab, followed by the Settings tab.
Step 4. Tap on Sign Out.

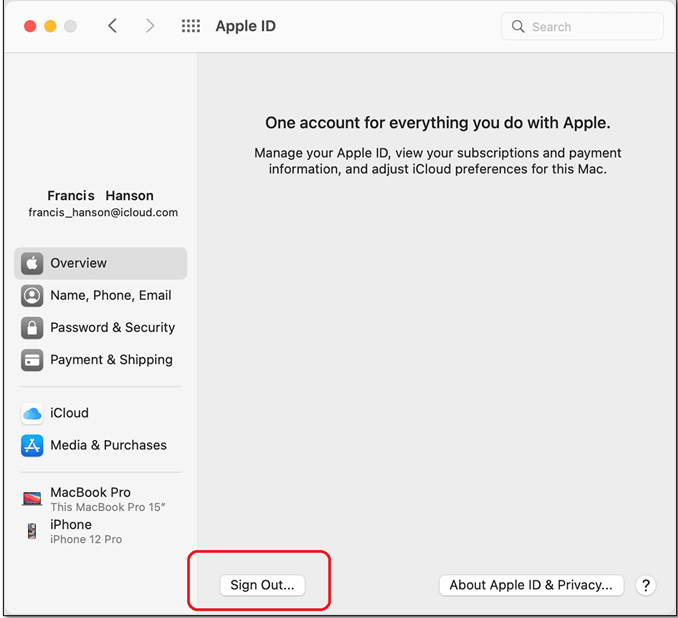
To log out of an iCloud account, follow these steps: tap Settings, navigate to your Apple ID, select the account you want to sign out of, and tap "Sign Out".
Step 1. To change your profile name on Windows, go to System Settings, then click on the Profile Name at the top.
Step 2. Scroll down and click on the Sign-out button.
Step 3. You will see a pop-up asking if you want a copy of your iCloud data.
Step 4. Deselect everything and press Continue.
C. Unpair Bluetooth Devices on MacBook
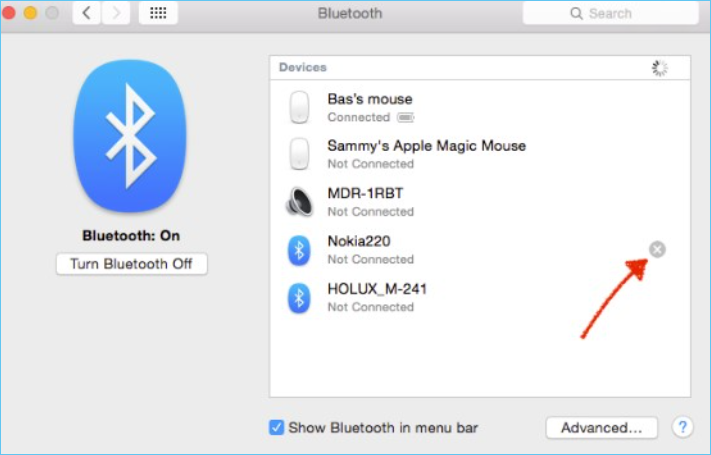
To unpair Bluetooth devices, you'll need to go to Settings, then Bluetooth, and find the device you want to unpair. Tap on the device, then tap on the "Forget device" or "Unpair" option. This will disconnect the device from your phone and remove it from the list of paired devices.
Step 1. Go to the Apple Menu. Click on System Settings.
Step 2. To remove devices from your Bluetooth list, select Bluetooth, go to the device list, and hover over the "i" icon next to the device you want to remove. This will disconnect and remove the device from the list.
D. Erase MacBook Disk with Disk Utility
To prepare a MacBook or Mac for erasing, shut down the system completely. Then, press the Command and R keys simultaneously and hold them while pressing the power button. Keep the keys held until the Apple logo appears. This will boot the system into Recovery Mode, allowing you to access Disk Utility and proceed with the erasing process.
Step 1. Click on Mac Disk Utility from the macOS Utilities window.
Step 2. To delete everything on your system, choose the Macintosh HD drive.

Step 3. Tap on the Erase button.
Step 4. Enter the name, format, and scheme of the drive.
Step 5. Press "Erase" to delete everything from the system.
E. Reinstall macOS After Erasing the Hard Disk on MacBook
Here are the steps to reinstall macOS on your Mac:
Step 1. Go to the macOS Utilities window.
Step 2. Now, choose the Reinstall macOS option.
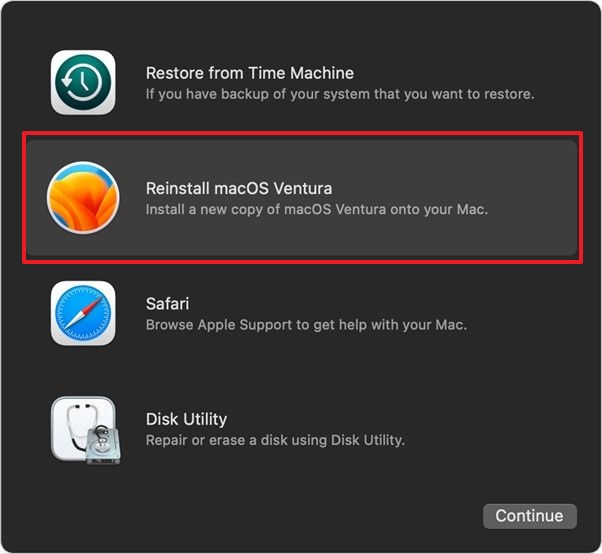
Step 3. Follow the instructions available on the screen.
Note: Reinstalling the operating system on your Mac will take time, so be patient.
Solution 2. Delete Everything on MacBook with Erase Assistant
To delete everything on a MacBook, you can use the Erase Assistant and select the "Erase All Content and Settings" option, which allows for a seamless factory reset of the system, effectively wiping out all content and settings.
Take a look at the steps:
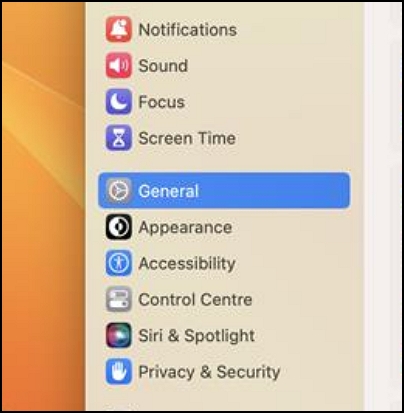
Step 1. Go to the Apple menu. Click on System Settings.
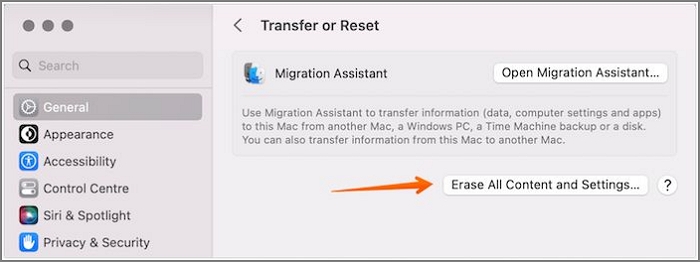
Step 2. Select General from the left-hand menu, then click on the Transfer or Reset option from the right-hand side.
Step 3. To erase all content and settings on a Mac, select the "Erase All Content and Settings" option and enter the admin password. Mac will then prompt you to back up your data using Mac Time Machine Backup.
Step 4. You will be deleting the things that Mac lists will be deleted.
Step 5. Select "Continue". Sign out of the Apple ID.
Step 6. To reset your device, click on the Erase All Content and Settings option, then select Restart.
How to Recover Mistakenly Deleted Files on MacBook with Software
If you've accidentally deleted important files on your MacBook, there are a few ways to recover them. You can try using the Time Machine backup feature, which regularly saves copies of your files. If you didn't use Time Machine, you can also try using a third-party data recovery software like Disk Drill or Deep Data Recovery Wizard. These tools can scan your MacBook's hard drive and attempt to recover deleted files.
Deep Data Recovery for Mac is a professional, reliable, and user-friendly recovery tool that is easy to use and suitable for various scenarios.
- The software is designed to recover data from various situations, including virus attacks, format issues during macOS Ventura upgrades, hardware failures, system crashes, accidental deletions without backup, manual mistakes, and sudden shutdowns, among others. With this excellent data recovery program, you can easily retrieve your data.
- This tool can recover deleted pictures, videos, audio files, emails, and more from various Mac-based devices, including HDD, SSD, fusion drive, memory card, camera, and USB drive, as well as restore data from Time Machine backups.
- Deep Data Recovery for Mac is a user-friendly tool that allows both experts and amateurs to recover lost files with ease. It scans the desired files and completes the process quickly, and also offers a file filter option to efficiently locate the specific data to be recovered.
Deep Data Recovery for Mac offers users the opportunity to recover deleted data, send recovered files to Cloud storage, and even receive remote IT support in case of any issues. To recover deleted data on Mac, users can follow the steps outlined in a tutorial, which guides them through the process.
Note: To create a backup and recover deleted files, click on "Disk Backup" on the left first. This will allow the software to recover deleted files from the backup image, preventing further damage to your disk and data, making it a safer and more reliable option.
Step 1. Scan for deleted files
Select the hard drive, external drive, or SSD where your important data & files were deleted and click "Search for lost files".

Step 2. Filter the lost files
The software will perform quick and deep scans on the selected volume, aiming to find as many deleted files as possible. It also allows users to filter their desired files through the "Type" and "Path" options.

Step 3. Recover deleted files
Double-After deleting files, click on them to preview. Click "Recover" to retrieve them.

Bottom Line
Knowing how to delete everything on a MacBook is a useful skill, especially in situations like selling the device or protecting it from a virus attack. Erasing all data on the system safeguards sensitive information from falling into the wrong hands.
When deleting everything on a Mac, you have two options: using Erase Assistant or Disk Utility. However, if you forget to back up your data or accidentally delete something, you'll need a reliable Mac data recovery software to rescue your lost files.
The Deep Data Recovery for Mac is an efficient and user-friendly data recovery program that allows you to retrieve any data you want. Use this remarkable data recovery program right away!
How to Delete Everything on MacBook FAQs
You can delete everything on your MacBook using various methods. For more information, you can refer to the questions and answers listed below.
How to factory reset MacBook Pro and Air?
To factory reset a MacBook Pro or Air, go to the Apple Menu, choose System Settings, and select the Transfer or Reset option, then click on Erase All Content and Settings. Alternatively, on macOS Monterey, you can find the Erase Assistant in System Preferences. This will reset the device to its original settings.
How to recover the files I accidentally deleted on my MacBook?
If you've accidentally deleted files on your MacBook, you can recover them by going to the Trash Can option. Here, you'll find the files you've deleted, and you can choose the one you want to restore and drag it to the desktop. If you've permanently deleted files without a backup, consider using professional data recovery software like Deep Data Recovery for Mac.
When and why do you want to delete everything on your MacBook?
If you want to sell your MacBook, improve its performance, or protect the system from a virus attack, you must delete everything on the device, primarily to protect sensitive data.
How to wipe a MacBook automatically?
If you're running macOS Big Sur or earlier, you'll need to erase your MacBook in Disk Utility. However, with macOS Monterey, you can use the Erase Assistant to automatically wipe your MacBook.
Related Articles
- How to Fix 'Switch User' Option Missing in Windows 10/11
- How to Change Your IP Address on Computer
- NTFS VS Share Permissions, What's the Difference and How to Set Them?
- Solved: Dell Boot Loop Error on Windows 10 - With Pictures
- How to Fix the Windows Key Not Working on Windows 10/11
Windows keys not working is an issue that can be frustrating. This article will explore common causes and methods to fix the problem on Windows 10/11. - Windows Mail Backup and Restore [Everything You Need Know]
Windows Mail is an email client developed by Microsoft. The Mail program keeps our email data within a hidden folder located on our computer. We may need to backup and restore our mail to protect our data. If you do not know how to make windows mail backup and restore, this guide provides a detailed answer.