How to Fix Windows 11 23H2 Update Failure in 5 Ways
Microsoft released Windows 11 version 23H2 on October 31, which includes new features, system improvements, and bug fixes. While many users have successfully downloaded the update, some are experiencing issues with the Windows 11 23H2 update failure.
Reports suggest that the Windows 11 update is often stuck on downloading for hours or fails to install properly with various errors. If you're experiencing this issue, this article from Qiling offers 5 effective solutions you can try to resolve the problem.
How to Fix Windows 11 23H2 Update Failure
To ensure a successful Windows 11 update, it's essential to verify that your computer meets the minimum system requirements beforehand. This includes having at least 64GB of storage space, 4GB of RAM, a Trusted Platform Module version 2.0, and other necessary specifications. By checking these requirements beforehand, you can avoid wasting time and effort on an update that may not be compatible with your system.
To learn more about the system requirements for Windows 11 and how to check if your computer is capable of upgrading, read this article to find out the details.
The Free Download Windows 11 Check Tool is a utility that helps users check if their current Windows 10 version is compatible with Windows 11. This tool can be downloaded and run on Windows 10 systems to determine if they meet the system requirements for Windows 11, allowing users to prepare and upgrade to the new operating system.
To check if your computer can upgrade to Windows 11, you can download a free Windows 11 checker tool to see if your computer meets the necessary requirements for the upgrade.
Solution 1. Extend the System Partition
The Windows 11 23H2 update may fail due to insufficient space on the system partition, usually the C drive, and a possible solution is to extend the system partition if it has less than 64GB of free space.
Lucky for you, a reliable partition manager, Qiling Disk Master Professional, can help you with it.
Follow the tutorial here to extend the C drive.
Option 1. Extend System C drive with unallocated space
- 1. Right-click on the System C: drive and select "Resize/Move".
- 2. To resize the system partition, drag the system partition end into the unallocated space, effectively adding it to the C: drive. This will increase the size of the C: drive.
- 3. To proceed, click the "Proceed" button to execute the operations and extend the C drive.
Option 2. Extend System C drive without unallocated space
- 1. To free up space on your system disk, right-click a big partition with enough free space and select "Allocate Space".
- 2. Select the system drive at the "Allocate Space From" (*) To section, and drag the end of the System C drive into the unallocated space.
- 3. Click "Proceed" to save the changes and extend the C drive.
Read Also:

Top 3 Windows 11 23H2 ISO Downloader With Newest Guide
Windows 11 23H2 Update (version 23H2) has been rolled out by Windows, and to help users upgrade, three of the best Windows 23H2 ISO Downloaders are recommended to facilitate the process more efficiently.
Solution 2. Perform Windows Update Troubleshooter
There's a built-The Windows Update Troubleshooter is a tool that detects and resolves common issues with Windows updates. It can identify and fix problems that are preventing Windows from installing updates normally, such as corrupted cache files or incorrect settings, and offer solutions to resolve the issue.
Step 1. Open the Settings by pressing "Windows key + I".
Step 2. Navigate to "System" > "Troubleshoot" > "Other troubleshooters."
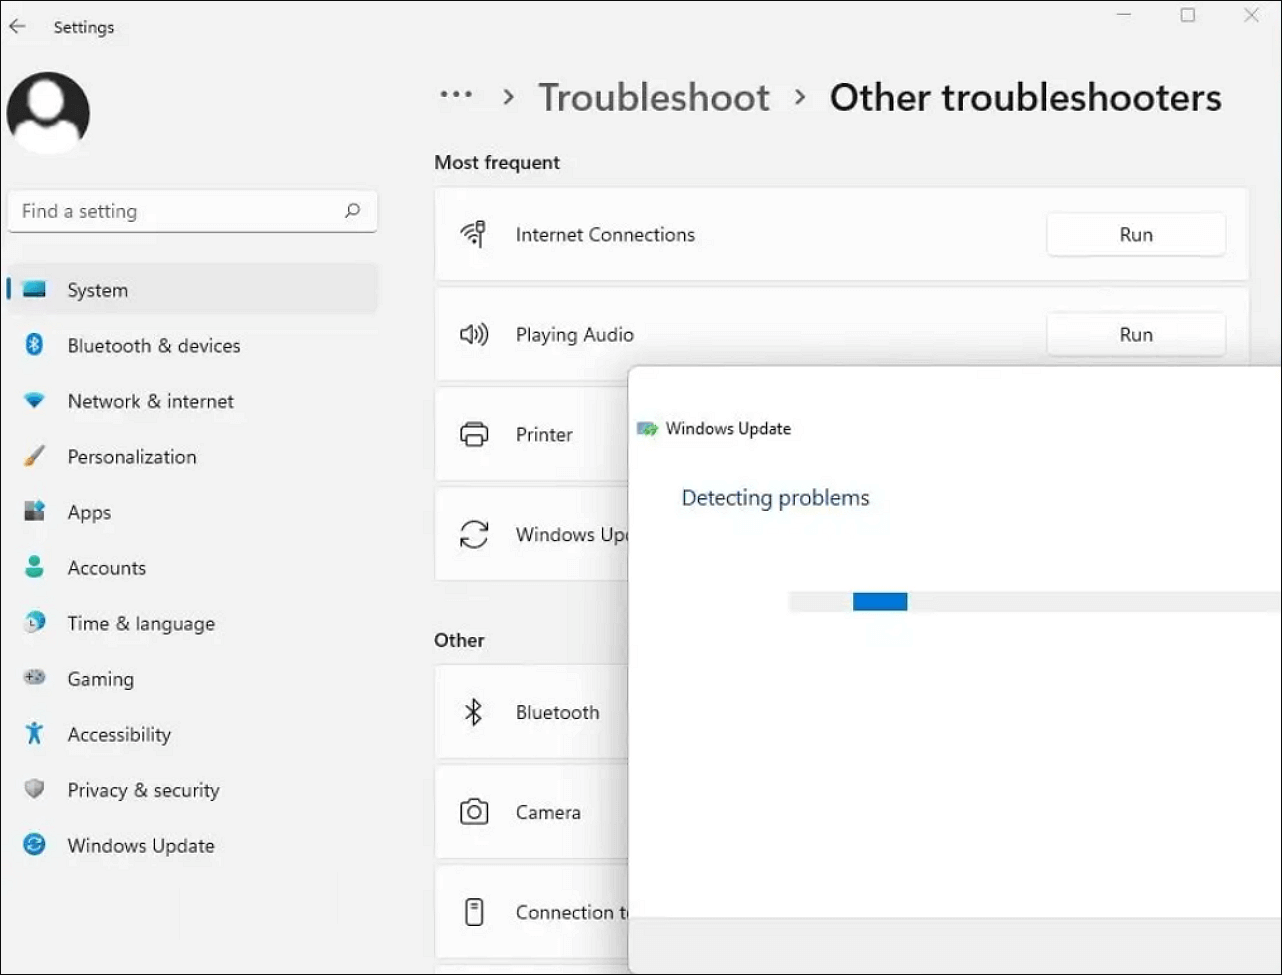
Step 3. To resolve Windows update issues, find the "Windows Update" option in the Settings app and click the "Run" button beside it to analyze and fix any problems related to Windows updates.
Step 4. Restart your PC after completing the process.
Solution 3. Update from USB Drive
To update Windows 11 23H2 from a USB drive, prepare a USB drive with at least 8GB of free space and download a professional tool like Qiling Disk Master for ISO burning. Then, manually download the Windows 11 23H2 ISO file from the Windows 11 download page. This method allows you to update Windows 11 23H2 from a USB drive.
Step 1. To create bootable media in Qiling Disk Master, go to the Tools section and click the "Create bootable media" button.

Step 2. Select the target USB as the destination and click "Proceed" to execute the operation.

After burning the ISO to your USB drive, you can now install the Windows 11 23H2 update.
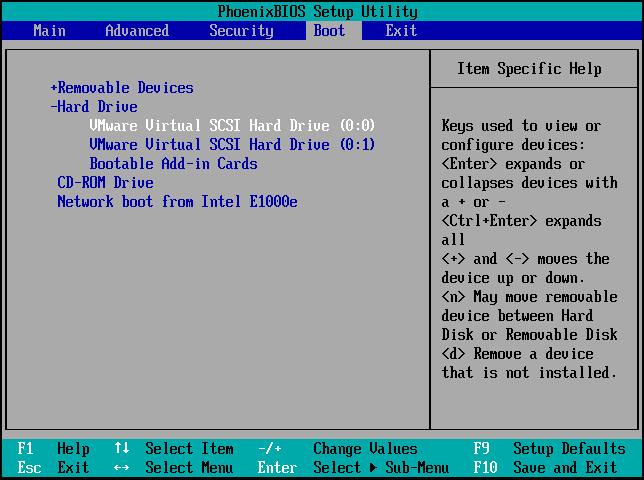
Step 1. Connect your USB to your PC and press the corresponding key (F2/F12/Delete/Esc) to enter the BIOS settings and set your computer to boot from the USB.
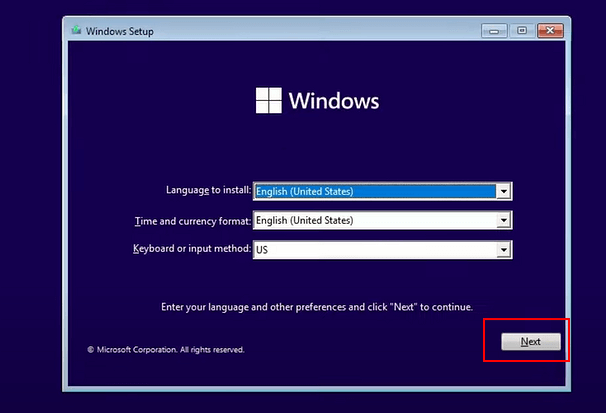
Step 2. Once your computer boots up, follow the on-screen wizard and select your preferred Language, Time and currency format, and Keyboard or input method. Then, click "Next".
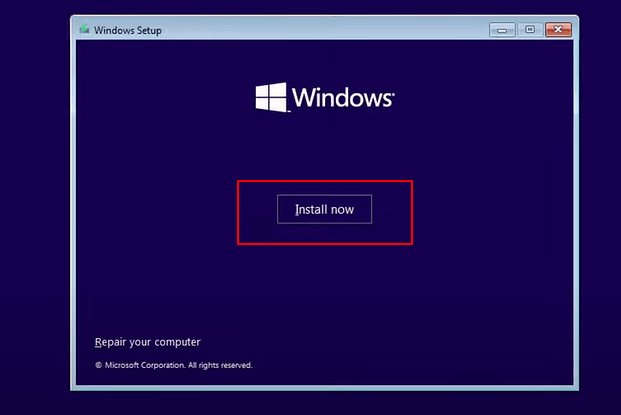
Step 3. Click "Install Now" to continue.
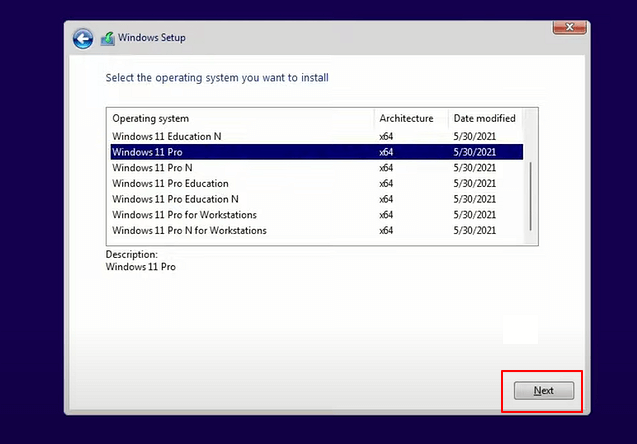
Step 4. To install Windows 11 without a product key, select the desired edition of Windows 11, and proceed with the installation by clicking "Next".
Step 5. To proceed, accept the Microsoft License Terms and click "Next". Next, select the type of installation that best suits your needs.
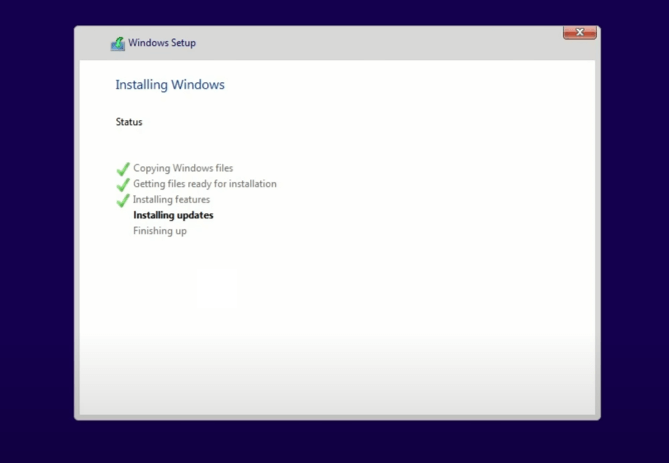
Step 6. Select your target disk, click "Next", wait for the installation to finish, and follow the on-screen tutorial to set up your PC.
If you're experiencing issues with the Windows 11 23H2 update, try restarting your PC, checking for updates again, or running the Windows Update Troubleshooter. If these methods don't work, you can try resetting Windows Update components, running the System File Checker (SFC), or using the Deployment Image Servicing and Management (DISM) tool to fix any corrupted system files.
Solution 4. Run SFC and DISM command
Corrupted system files can cause Windows update failures, so running the System File Checker (SFC) and Deployment Image Service and Management Tool (DISM) commands can help scan and resolve the issue.
Step 1. To run Command Prompt as administrator, press the Windows key, type "cmd" in the search bar, and then select "Run as administrator" from the context menu. This will open a Command Prompt window with elevated privileges, allowing you to execute commands that require administrative access.
Step 2. Type in the following commands and hit "Enter":
DISM/Online/Cleanup-Image/RestoreHealth
Step 3. After completing the DISM scan process, you can input the command and press "Enter" to continue with the troubleshooting process. This command is used to scan the system for any corrupted files or components and repair them if possible.
sfc /scannow
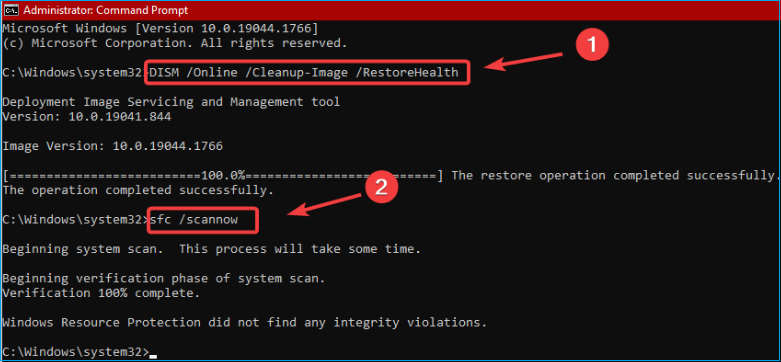
Step 4. Once the process is finished, close the Command Prompt and check if you can install the update now.
Solution 5. Reset Windows Update Components
If Windows 11 23H2 update fails, try resetting Windows Update components as a last resort to resolve the issue.
Step 1. To run Command Prompt as administrator, press the Windows key and input cmd in the search bar, then right-click on the Command Prompt result and select Run as administrator.
Step 2. To stop the Windows Update and its related services, run the command "net stop wuauserv" in the Command Prompt. This should be done multiple times to ensure the service is fully stopped.
- net stop bits
- net stop wuauserv
- net stop appidsvc
- net stop cryptsvc
Step 3. To access the Windows Update download folder, press the "Windows key + R" to open the Run dialog, type "services.msc" and press Enter. Then, scroll down and find the "Windows Update" service, right-click on it and select "Stop".
Step 4. Delete all files and folders(updated cache files) inside the folder by selecting all with "Ctrl + A" and hitting "Del".
Step 5. Run the following commands and hit "Enter" on each line to restart Windows Update and its related services:
- net start bits
- net start wuauserv
- net start appidsvc
- net start cryptsvc
Step 6. Restart your computer and see if you can install the update. If that doesn't work, you can try checking the Windows Update settings, running the Windows Update troubleshooter, or seeking help from Microsoft support.
Read also:
Possible Reason Behind Windows 11 23H2 Update Failure
If you want to know the reason why your PC cannot run Windows 11, below are some common causes listed.
- Invalid system requirements. If your computer doesn't meet the essential system requirements, such as having insufficient storage space, you won't be able to install the update successfully.
- Incomplete update download. If you've downloaded an incomplete update for some reason, it can cause update failures.
- Corrupted system files. If Windows update installation is hindered due to missing or damaged critical system files, it will result in issues.
- Invalid internet connection. A slow or unstable internet connection can disrupt the process of Windows updates being downloaded.
- Conflicts with third-party apps. Some third-party applications may have compatibility issues with the update process, potentially blocking the update from being installed.
Don't forget to share this informative and practical article with your friends!
Conclusion
If your Windows update is not working, it might be due to invalid system requirements, corrupted update files, damaged system files, etc. You can try using Qiling Disk Master to resolve system requirements issues and manually updating Windows 11 from a USB drive, which is the easiest and most efficient method.
FAQs on Windows 11 23H2 Update Failure
If you're experiencing issues with the Windows 11 23H2 update, you can check the FAQs below for related questions and answers.
1. Why does my Windows 11 update keep failing?
The "Windows 11 cumulative update failed to download and install" issue can be caused by unstable internet connection, insufficient disk storage space, damaged system files, or conflicts with third-party software.
2. How big is the Windows 11 23H2 update?
The Windows 11 23H2 update download size is approximately 5GB, and it does not require a new product key to activate Windows 11 23H2 if your computer has already been activated in the version of Windows 10.
3. What to do if Windows Update is stuck?
You can try restarting your PC via the reset button or powering it off and then get it back on with the power button to see if Windows will start normally and finish the update process. If the installation is truly frozen, the only choice is to hard reboot.
Related Articles
- Fixed: CHKDSK Failed to Transfer Logged Messages to the Event Log with Status 50
- How to Reinstall Windows 10 Without CD (3 Ways)
- Monster Hunter Rise Save File Location [Detailed Information]
- Solve System Reserved Partition on Wrong Drive: Everything You Should Know
- Find Windows XP Product Key/License with 4 Practical Solutions
Calling out all the Windows XP users who are trying to find or recover their missing product key to follow our guide and find Windows XP product key successfully. - Fixes for Adobe Photoshop Has Stopped Working Without Losing Files
Received 'Adobe Photoshop has stopped working' error message? Cannot restore lost PSD files when Photoshop 2017 fails to work? Relax! Follow offered methods here to fix 'Adobe Photoshop 2017 has stopped working' error without losing PSD files.