How to Fix Your Computer Is Low on Memory on Mac
The "Your computer is low on memory" pop-up is a deceptive notification that can appear on your Mac, claiming that your computer is running low on memory. This pop-up is often used by scammers to trick users into installing malicious software or making unwanted purchases. It's essential to be cautious and not take any action until you've verified the authenticity of the notification. If you're unsure, you can restart your Mac in safe mode, check the Activity Monitor, or run a virus scan to ensure your system is secure. Don't fall for the trap, and stay safe online!
The pop-Malicious apps often issue fake warnings, known as "up is a fake warning", to trick users into granting unnecessary permissions, such as browser control and access to data. To fix a computer that is low on memory, you can quickly navigate through the following steps.
| Workable Solutions | Step-by-step Troubleshooting |
|---|---|
| Fix 1. Force quit malicious apps | One of the simplest solutions to get rid of the tricky popup is to force quit the application responsibly...Full steps |
| Fix 2. Remove harmful Profiles | In some cases, malicious code present within the Mac Profiles can lead to the occurrence of the pop-up...Full steps |
| Fix 3. Remove rogue extensions | Have you clicked on any buttons on the pop-ups? In that case, the web browser you use is most likely...Full steps |
| Fix 4. Uninstall programs | While eliminating malware you can spot is relatively easy, the same cannot be said for the ones with...Full steps |
Rogue apps can trick users into giving them excessive permissions, leading to privacy issues, identity theft, and financial losses. To protect yourself, remove the suspicious app immediately and avoid clicking the Close button when your computer is low on memory. This will prevent further damage and potential security breaches.
Reasons: Why You See Your Computer Is Low on Memory Mac
If your Mac is showing a low memory warning, it's likely due to the installation of freeware or other suspicious apps, which can also be triggered by potentially unwanted applications (PUAs) or unauthorized software.
Deleting apps on Mac can be a challenge, especially with helper components that aid in reinstallation even after removal. To fix the issue, you need to be diligent and cautious.
Solutions: How to Fix Your Computer Is Low on Memory Mac
The "Computer Is Low on Memory" Mac pop-up is a severe issue, but there are various solutions to fix it, including closing unnecessary apps, restarting your computer, running a memory diagnostic, deleting unnecessary files, and upgrading your RAM if necessary.
- Fix 1. Force quit the malicious applications in Activity Monitor
- Fix 2. Get rid of harmful Profiles on your Mac
- Fix 3. Remove rogue search engine extensions
- Fix 4. Uninstall any questionable apps from Launch Agent
Fix 1. Force quit the malicious applications in Activity Monitor
To get rid of a troublesome popup, try force quitting the application via Activity Monitor. This allows you to remove the error message display in a responsible manner.
Here are the steps you need to follow –
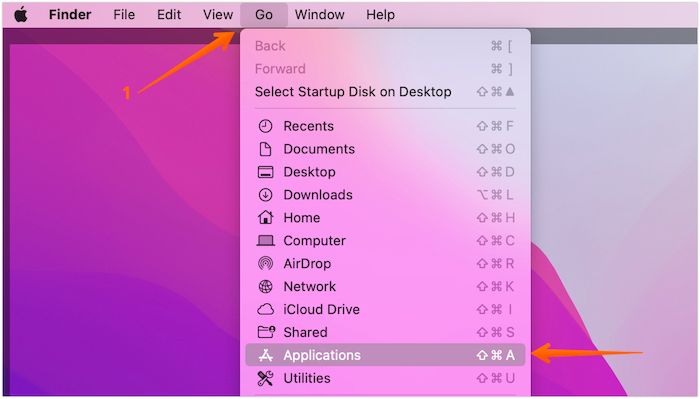
Step 1. To open the Applications folder, go to Finder, click on the "Go" option in the Apple menu, and select "Applications" from the drop-down list.
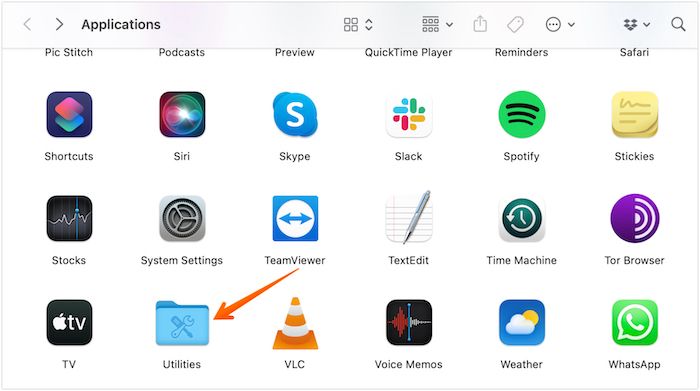
Step 2. Click on Utilities.
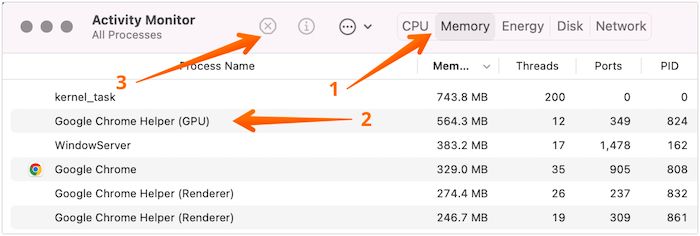
Step 3. Launch Activity Monitor, select the Memory tab, and identify unfamiliar or resource-intensive processes. Once located, select the malicious application.
Step 4. Now, select the cross-sign present at the upper-left part of the screen.
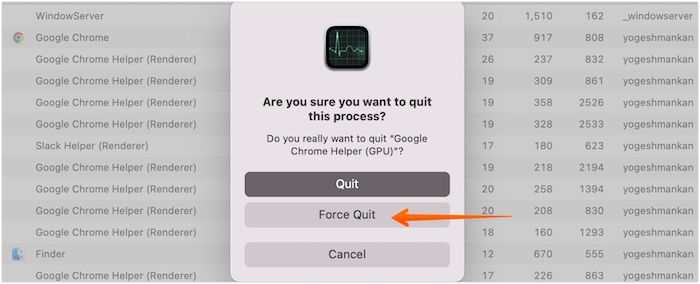
Step 5. To close the app, click on the Force Quit button in the dialog box that appears after clicking on the app's icon in the dock.
Fix 2. Get rid of harmful Profiles on your Mac
Malicious code in Mac Profiles can cause pop-ups, which can be resolved by removing the configuration file within Profiles, allowing for the easy deletion of these applications.
Check out the steps you need to follow –
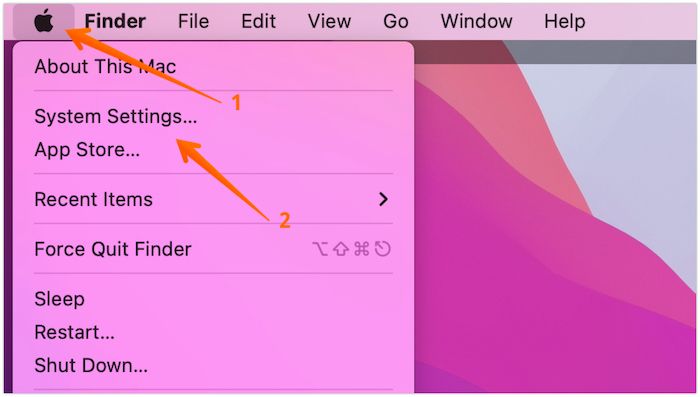
Step 1. Click the Apple logo. Go to System Settings.
Step 2. Scroll through the User & Groups icon on the left-hand sidebar.
Step 3. If you see a section called "People you may know" or "Suggested connections" on the right-hand sidebar, it may indicate the presence of dubious profiles. This section appears only if there are profiles connected to your account, so if you don't see it, it's likely that there are no suspicious profiles on your network. However, if you do see this section, it's a good idea to review the suggested connections and report any profiles that seem suspicious or don't belong to actual people.
Step 4. Select and then click on the – sign to get rid of it.
Step 5. Go to the Trash can present on the screen.
Step 6. Right-click on it and then select Empty Trash.
Fix 3. Remove rogue search engine extensions
Have you clicked on any buttons on the pop-ups? In that case, the web browser you use is most likely infected with malware.
Here, we discuss how to remove such rogue search engine extensions from different web browsers.
>Safari:
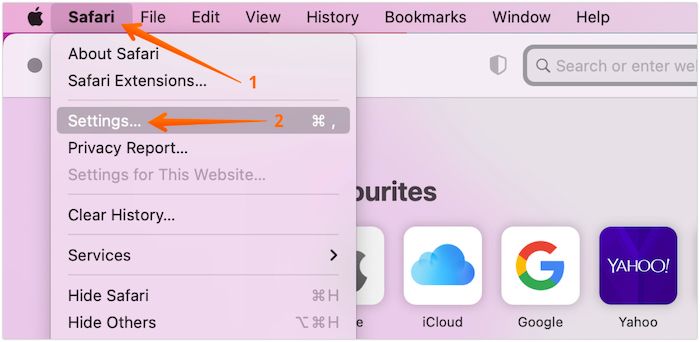
Step 1. Launch Safari.
Step 2. Click on Safari from the menu and select Settings options.
Step 3. A new window will open, click on the Extensions tab.

Step 4. You need to check out the various extensions installed here.
Step 5. Look for the ones that appear suspicious.
Step 6. To remove the "Easy Photo Editor" extension, go to the browser's extensions page by clicking on the three dots at the top right corner, hovering over "More tools", and selecting "Extensions". Find the extension in the list and click on it, then click the "Remove" or "Uninstall" button to confirm.
>Firefox:
Step 1. Open Firefox. Go to the main menu button. Select Help.
Step 2. To resolve the issue, go to the Firefox drop-down menu, click on Troubleshooting Information, and then select Refresh Firefox. This will restart Firefox with its default settings.

Step 3. You need to confirm again by clicking on Refresh Firefox.
Step 4. Now, select Finish.
>Google Chrome
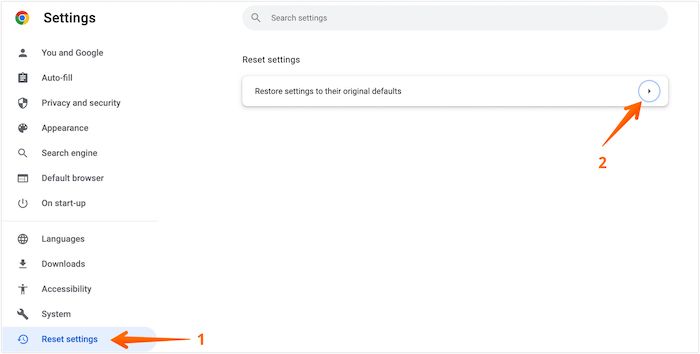
Step 1. Launch Chrome, go to the top-right corner and click on the three dots.
Step 2. To reset settings, go to Settings and click on Reset Settings from the left-hand sidebar.
Step 3. To reset the web browser, click on the "Restore settings to their original defaults" option. This will revert the browser's settings to their default state, effectively resetting the browser.
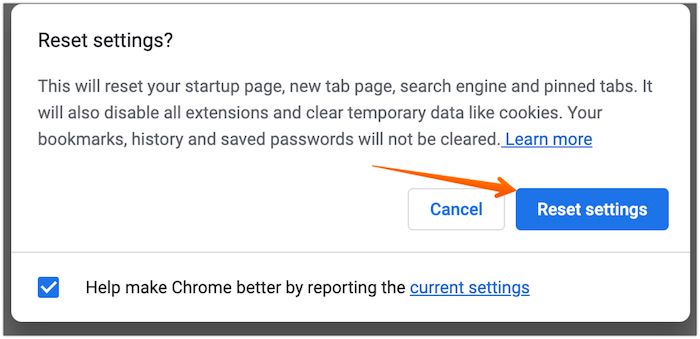
Step 4. A dialog box will open. Click on Reset Settings to confirm and proceed.
Note: Google and Firefox allow users to reset settings to default without affecting saved history, bookmarks, or passwords. This eliminates undesirable changes.
Fix 4. Uninstall any questionable apps from Launch Agent
To effectively eliminate hidden malware, it's essential to target the Launch Agent scripts that enable them to attack the system. This approach allows you to go directly to the root of the issue, making it a more efficient and effective way to eliminate the malware.
Take a look at the steps you must adopt –
Step 1. Go to Finder.
Step 2. Navigate to the top menu bar and click on Go.
Step 3. Go to the Utilities folder on your computer, and then select the Terminal app. Click on it to open it.
Step 4. Here, you need to type - /Library/LaunchAgents. Press Enter.
Step 5. To remove unwanted applications or files, start by identifying any that you're not familiar with or don't recognize. Once you've found these, select them for deletion or removal.
Step 6. Click on the Move to Trash option.
To check out the Library folder, you can follow the same procedure to check out - /Library/Application Support and /Library/LaunchDaemons. Additionally, you can also clear Recents on Mac with Finder.
Extra Tip: Recover Lost Data While Fixing the Mac Error
Low memory on a Mac can cause a black screen, requiring a reboot, which may result in data loss, especially after receiving a low memory warning, making a reliable data recovery tool a necessary solution.
Using a data recovery tool like Deep Data Recovery for Mac is a good idea to retrieve precious data. This highly efficient, powerful, and easy-to-use program was specifically created to aid users in recovering lost data.
- Data loss can occur due to various reasons such as macOS update issues, system crashes, virus attacks, user errors, unexpected shutdowns, or hardware failures.
- You can recover different data formats, such as documents, videos, photos, music, emails, archives, and more, from various sources.
- The software helps recover Mac files from various devices, including cameras, USB drives, memory cards, and hard drives.
- The tool is user-friendly and accessible to those who are not tech-savvy, making it simple to implement even for those without prior experience.
- You can even retrieve data when the system becomes unbootable.
- Bootable data recovery is one of the key features of the tool, allowing users to recover data from devices that are no longer bootable.
- If you're experiencing problems with restoring your data, you can reach out to the support team for assistance.
To recover data on Mac, here are the steps:
Step 1. Select the drive to be scanned
Select the drive you need to recover lost/deleted files from, and click the "Search for lost files" button in the main Deep Data Recovery window.
Note: Before attempting data recovery, it's recommended to create a backup of your Mac by clicking "Disk Backup" from the left sidebar to prevent further data loss. Once backed up, the software can then recover data from the Mac backup, allowing your computer to write new data again.

Step 2. Select your lost data/files
Deep Data Recovery for Mac will immediately scan your selected disk volume and display the scanning results on the left pane, allowing you to sort the results to find specific files if needed.

Step 3. Recover lost/deleted data
Once you have located the desired files, preview them and click "Recover" to initiate the recovery process for your deleted or lost Mac files.

Final Words
If you see a pop-up on your Mac saying "Your computer is low on memory," don't click anywhere on it. Instead, try to identify and remove the application that triggered this alert, as it's likely a malicious app trying to trick you into giving it unnecessary permissions.
You can resolve the problem by eliminating rogue search engine extensions and dubious apps on your Mac. However, if data loss still occurs, you may need to opt for a reliable data recovery tool.
To recover lost data on a Mac, consider using Deep Data Recovery, a user-friendly and efficient software that delivers good results. Have you tried it yet? Now is the perfect time to give it a shot!
Your Computer Is Low on Memory Mac FAQs
To resolve the "Your Computer Is Low on Memory Mac" issue, you can try closing unnecessary apps, quitting background apps, and freeing up disk space by deleting unnecessary files and emptying the Trash. Additionally, you can disable animations, turn off the spotlight, and disable the notification center to reduce memory usage. You can also consider upgrading your RAM or using an external hard drive to expand your storage capacity. Furthermore, you can try resetting the System Management Controller (SMC) and the Power Management Unit (PMU) to clear out any cache and memory issues.
1. Why is my available RAM so low?
Understanding how much RAM each file or program uses is crucial. The more apps you have running, the lower your RAM will get, ultimately slowing down your system.
2. How to prevent the pop-up virus from happening again?
To prevent the pop-To prevent a virus from happening again, you can block pop-ups. Go to Safari settings and block pop-ups. This will help prevent unwanted downloads and other malicious activities.
3. Why is my Mac saying memory is full?
Your Mac is running low on memory because there's no free space available, likely due to too many apps and files running on the hard drive. You need to free up some space ASAP to prevent it from affecting the system's performance.
4. How to increase memory on Mac?
To upgrade the RAM on your Mac, first check if it's possible to do so, as not all Mac devices support this. If it does, purchase the desired RAM modules, then remove the existing ones and replace them with the new ones to increase your Mac's memory.
Related Articles
- Short DST Failed! How to Fix Hard Disk DST Short Test Failed
- What Is SSD SMART Status, Everything You're Concerned About
- (Solved!) How to Effectively Download Windows 10 ISO Without Tool
- How to Resolve "Outlook Cannot Connect to Server" Error
- (Quick Solutions!) How to Backup SD Card Without Computer
You can back up your SD card without a computer by transferring its contents to an external hard drive or cloud storage. This process allows you to create a duplicate of your SD card's data, ensuring it's safe and easily recoverable in case of data loss. - How to Change DNS Settings [2023 New]
Changing DNS settings is crucial for accessing the internet, especially when the default DNS fails. This process varies across different operating systems and devices, including Windows 11 and 10, macOS, iPhone, and Android.