Fixed Solutions: Can't Erase USB Drive on Mac [10 Ways]
You may need to boot up your Mac with a USB drive to resolve the issue and find the solution to it without seeking external help. If you cannot format a USB drive on your Mac, it may sound frustrating, but we can help you resolve the issue of erasing the USB drive on your Mac.
Going through the details of the article will help you find a probable solution to the "can't erase USB drive on Mac" error, which is useful for formatting USB drives to FAT32 or exFAT on Mac, and also helps identify internal issues with your Mac without any hindrance from USB drives.
Why Can't Erase USB Drive on Mac?
The issue of not being able to erase a USB drive on a Mac can be attributed to several reasons, including the "Error Process Has Failed" status error. This frustrating error can be resolved by identifying its root cause, which involves reviewing the reasons behind it. By understanding the underlying causes, users can take the necessary steps to resolve the issue and successfully erase their USB drive on their Mac.
- The disk being erased is badly damaged.
- If you're trying to erase a disk that isn't mounted, you might need to mount it first before you can erase it. This could be a simple matter of clicking on the disk icon in your computer's file system and following the prompts to mount it. Once it's mounted, you should be able to erase it.
- If you're trying to erase your startup disk, you'll need to back up your data first. Then, use Disk Utility to erase the startup disk, and after that, reinstall your operating system and restore your backed-up data. This process will erase all data on the startup disk, so make sure to back up everything before proceeding.
- The Mac might undergo some virus or malware attacks.
- There might be unexpected termination of system files which will halt the formatting process.
How to Fix "Can't Erase USB Drive on Mac?" [10 Solutions]
As you've explored the possible reasons for being unable to erase a USB drive on a Mac, it's time to move on to the solutions that can be tried on the Mac. These solutions will allow you to format your USB drive and proceed with your task, effectively fixing the issue.
1. Run Disk Utility First Aid
Since you're using Disk Utility to format your USB drive on Mac, the first thing to resolve issues is to run the "First Aid" feature across the drive. To do this, follow the steps: open Disk Utility, select the USB drive from the left sidebar, click the "First Aid" button at the top, and then click "Run" to start the process. This may take a few minutes, and you'll be prompted to quit any open applications or make a backup.
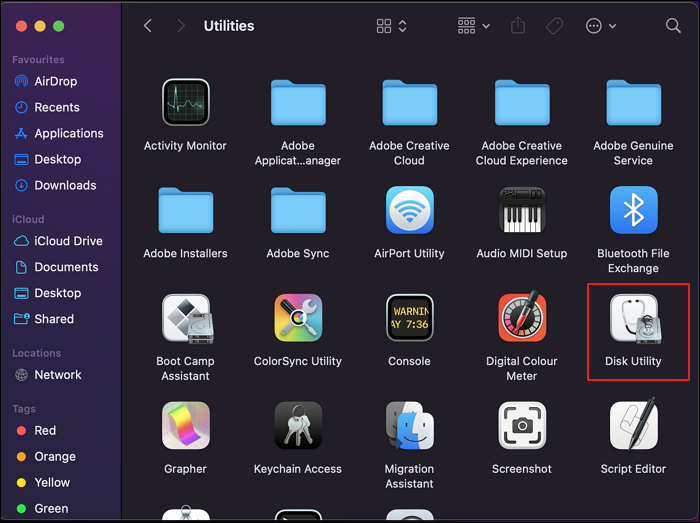
Step 1: To erase a USB drive on a Mac, hover over "Applications" in Finder, navigate to the "Utilities" folder, and launch Disk Utility. From there, select the USB drive you want to erase.
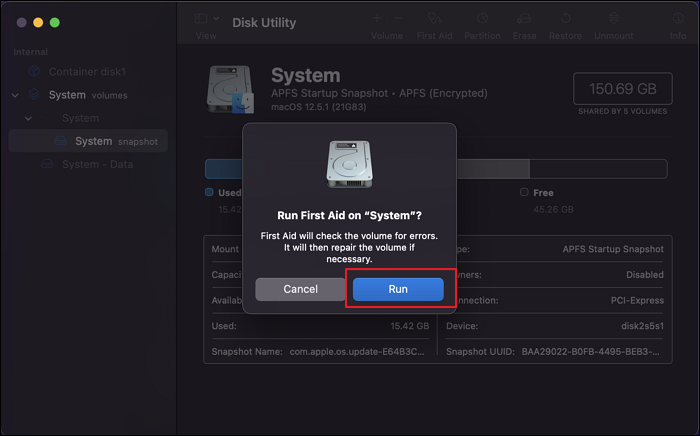
Step 2: To repair a drive using Disk Utility, select the drive and click the "First Aid" button on the top toolbar. A confirmation pop-up will appear, and clicking "Run" will initiate the First Aid process, which will scan the drive for errors and repair any issues it finds, with the repair time depending on the drive's size.
If you accidentally erased your hard drive in Disk Utility, don't worry, you can recover your lost files using data recovery software like Deep Data Recovery for Mac.
3. Get Permission to Erase USB on Mac
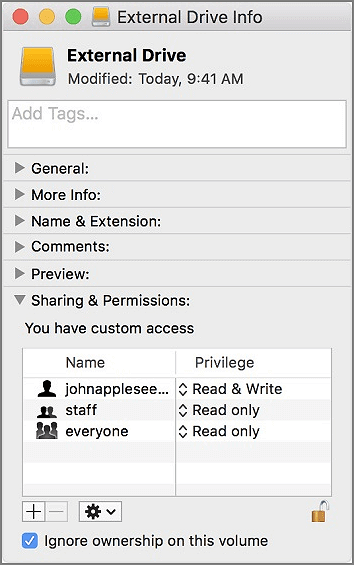
If you can't erase the USB drive on Mac, it is also possible that you don't have enough permissions. When you don't have enough permission, you need to get permission to erase USB on Mac. Below is a simple step-by-step procedure.
Step 1. Click the USB drive and select "Get Info".
Step 2. Expand the "Sharing and Permissions", and lock to authenticate.
Step 3. Choose "Ignore ownership on this volume".
3. Erase Selected Volumes
If you can't erase the USB drive on Mac, you need to have a proper flow of executing this task. Try erasing the selected volume across your Mac with the help of Disk Utility. To do this, look into the simple steps featured below:
Step 1: Launch Finder on your Mac, go to the "Applications" tab, and open Disk Utility from the "Utilities" folder.
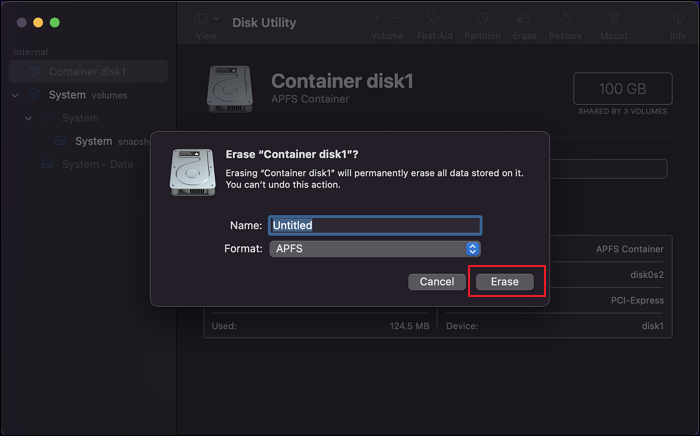
Step 2: To erase a USB drive, select it from the left panel of the window, then click on the "Erase" button in the top toolbar, which will open a new pop-up window.
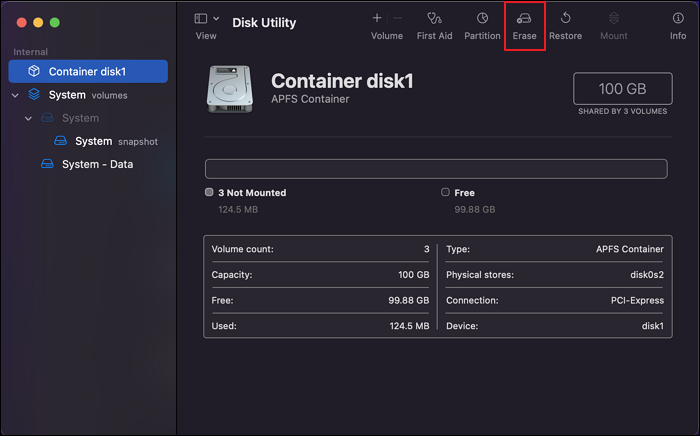
Step 3: After erasing the drive from Mac, set the "Name" and "Format" of the drive and click on "Erase" to complete the process.
4. Erase USB Drive with Terminal Commands
To resolve issues with an unmounted drive or a problematic USB drive, you can erase it using Terminal commands. To do this, first, you need to identify the drive's name using the `diskutil list` command. Once you have the drive's name, you can use the `diskutil eraseDisk` command with the desired file system type, such as `JHFS+` for a standard file system. For example, you can use the command `diskutil eraseDisk JHFS+ "USB Drive" /dev/disk2` to erase a drive with the name "USB Drive" located at `/dev/disk2`.
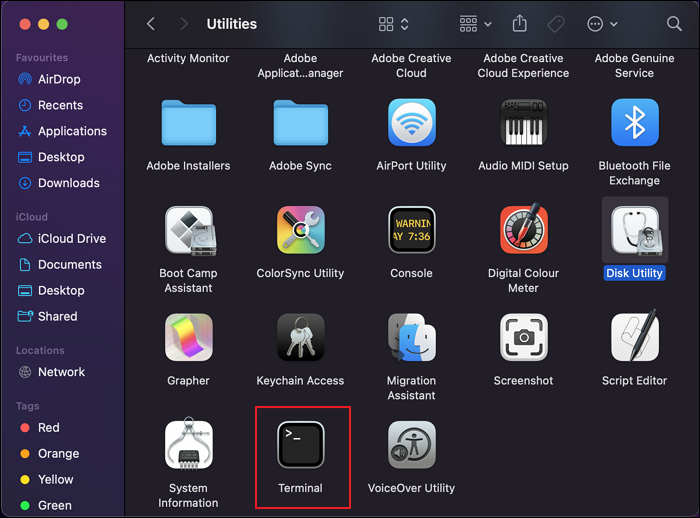
Step 1: To access the Terminal on a Mac, go to the Finder, navigate to the "Applications" folder, and then find the "Utilities" folder. Within Utilities, locate and launch "Terminal", which will open the command line interface on your device.
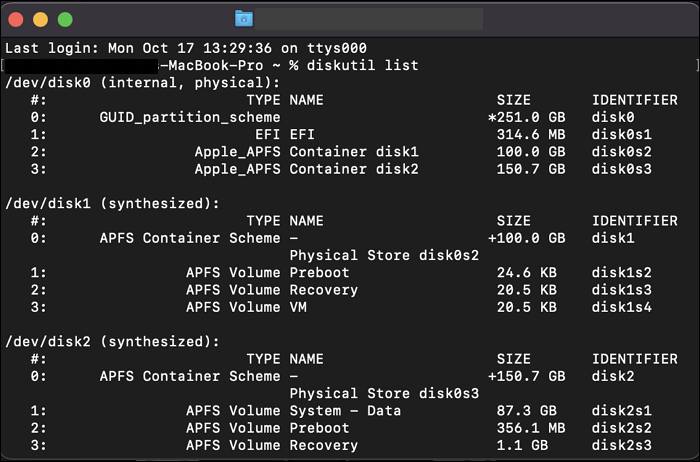
Step 2: You can list down all drives available across your Mac by entering the following command in the Terminal:
diskutil list
Step 3: To erase the disk and format it to APFS, first note the device node representing the USB drive, then use the command `diskutil eraseDisk APFS
diskutil eraseDisk APFS device node
5. Erase USB Drive in Recovery Mode
To erase a USB drive that is directly related to the startup process of a Mac, you may need to be cautious with the process. If the drive is essential for the startup process, you might need to access Recovery Mode to erase it. To get into Recovery Mode, you can restart your Mac and immediately hold down the Command (⌘) + R keys. This will boot your Mac into Recovery Mode.
For Intel Macs:
Step 1: To reset your Mac, shut it down completely, then press and hold the "Command + R" keys while turning it back on. This will boot your Mac in recovery mode.
Step 2: Once the Apple logo appears, click on the "Next" button and type in your username and password to access the "macOS Utilities" screen.
For Apple Silicon Macs:
Step 1: To reset your Mac, turn it off completely, then press and hold the Power button until you see the startup options screen. From there, select "Recovery Mode" and follow the on-screen instructions to reset your Mac.
Step 2: To access the "macOS Utilities" screen, click on the "Options" button on the front of the screen, then enter your username and password credentials to log in to the Mac. This will allow you to access the "macOS Utilities" screen.
To erase a USB drive on a Mac in Recovery Mode, follow these steps: First, select your language and click on Utilities in the top menu. Then, select Disk Utility from the Utilities window.
Step 1: Launch Disk Utility, select the USB drive volume, and then erase it.
Step 2: To erase the external drive, select the "Erase" button in Disk Utility and follow the on-screen instructions. Once done, quit Disk Utility and restart your Mac to exit Recovery Mode.
6. Reboot Mac in Safe Mode
The issue might be related to the macOS itself, which needs to be properly troubleshooted. In such cases, using Safe Mode for rebooting the Mac may resolve problems, including those caused by malware and viruses.
For Intel Macs:
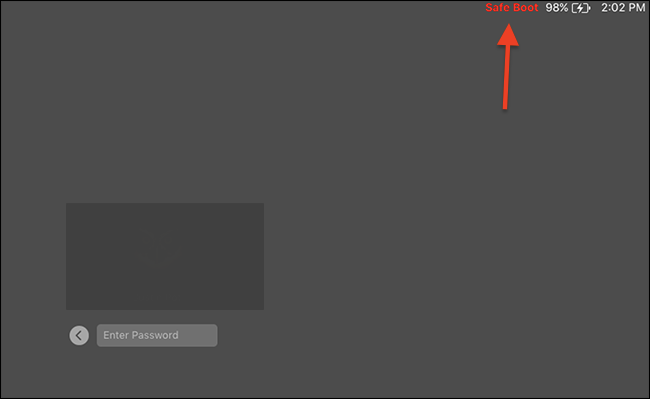
Step 1: You will have to restart your Mac if it is turned on. Press and hold the "Shift" key across your Mac as it starts, releasing it as you see the login screen.
Step 2: Log into your Mac and click on "System Preferences," then select "Users & Groups." Click on the lock icon and enter your password to unlock the options. From the list of users, select your username and click on the "Login Items" tab. Here, you can see the list of applications that automatically launch at startup.
For Apple Silicon Macs:
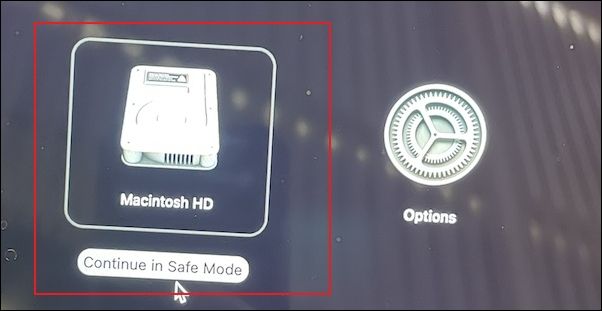
Step 1: Turn off the Mac, let it shut down completely, and then restart it. Hold the Power button until you see the "Loading startup options" screen.
Step 2: To get your Mac into Safe Mode, select a volume and hold the "Shift" key while booting up. This will allow you to continue in Safe Mode, where only essential system processes are running.
7. Update the macOS
If you're experiencing issues with erasing a USB drive on a Mac, you can try updating your macOS, which might resolve the problem. To do this, follow these simple steps: [insert steps here].
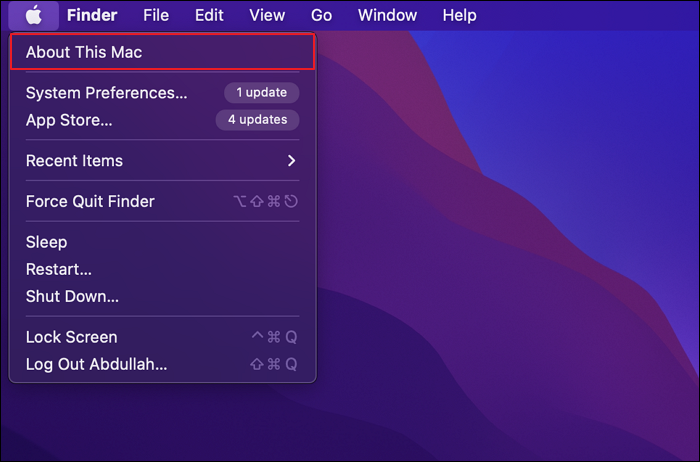
Step 1: To access the "About This Mac" information, click on the Apple icon located in the top-left corner of the window and select "About This Mac" from the dropdown menu. This will open a new window displaying the necessary information.
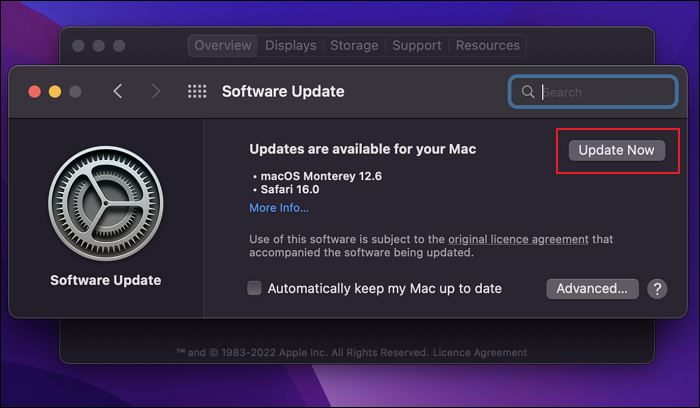
Step 2: Click on the "Software Update…" button to open the respective window.
Step 3: The script will scan for macOS updates and prompt the user to install any available updates by clicking on the "Update Now" button.
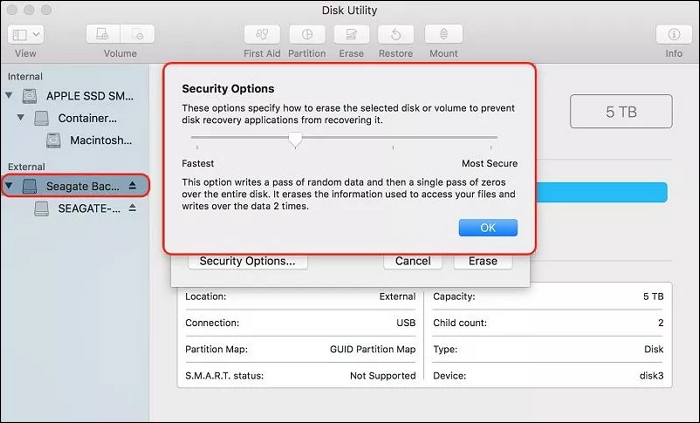
8. Lower the Security Level
To avoid the problem of not being able to erase a USB drive on a Mac, you can lower the security levels of the USB drive when formatting it with Disk Utility. This can be done by following specific steps, which include disabling the write protection, changing the security type to None, and then proceeding with the format process. However, be aware that lowering the security levels may compromise the data protection on the USB drive.
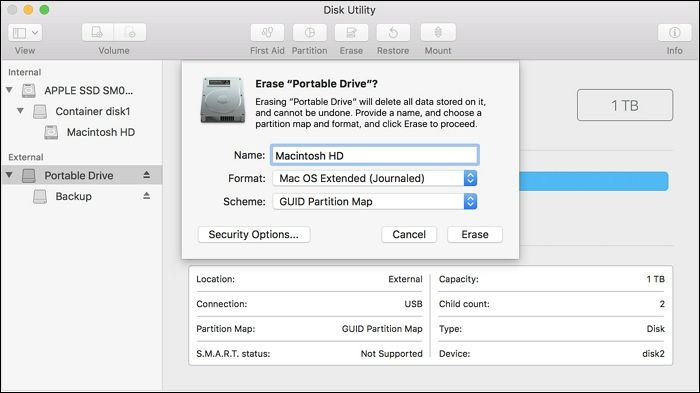
Step 1: To access the settings of a USB drive on a Mac, open the "Disk Utility" app by navigating to the "Utilities" folder within the "Applications" section of the Finder. Once open, locate the USB drive in the left panel and select it to access its settings.
Step 2: To format a drive, find the "Erase" button at the top and start the process. As you format, you can access the drive's "Security Options" for further customization.
Step 3: The security level can be adjusted using the slider in the next window, with lower levels reducing the likelihood of formatting errors.
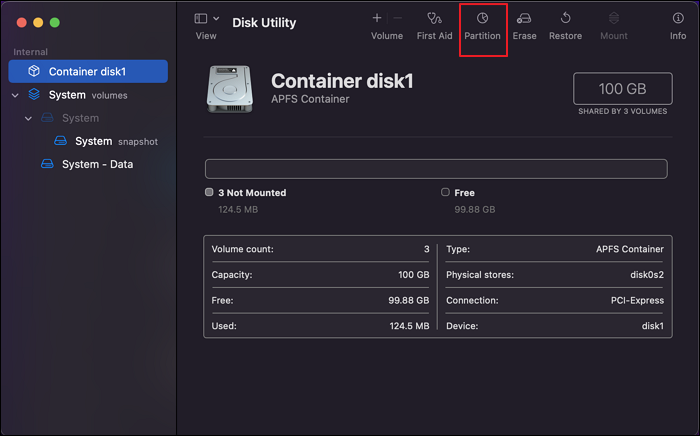
9. Delete the Partition
If you're experiencing issues erasing a USB drive on your Mac, you can try deleting the partition on your Mac to resolve the problem. To do this, follow these steps:
Step 1: To access Disk Utility, you need to launch it from the Utilities folder, which can be found in the Applications section across the Finder.
Step 2: To delete a partition and create a new one, click the "Partition" button, select the partition to delete, click the "-" button, assign a name and format to the new partition, and then click "Apply" to save the changes.
10. Format USB with Mac Unsupported File System on Windows
If you're having trouble formatting a USB drive on your Mac, it might be due to macOS not supporting the file system. To resolve this, try formatting the drive on a Windows computer first, then connect it to your Mac. You can use a partition manager like Qiling Partition Master Free, which is an all-in-one tool that allows you to format the USB drive to exFAT or FAT32, making it compatible with your Mac.
- Right-To format an external drive or USB, simply click on the device you intend to format and select the "Format" option.
- Set the Partition label, File system (NTFS/FAT32/EXT2/EXT3/EXT4/exFAT), and Cluster size.
- Click the "Proceed" button to format the hard drive partition.
- Click "Yes" to continue.
These are the ten ways to solve the "can't erase USB drive on Mac" problem. If you encounter other problems in formatting, you can also look for solutions from the buttons below.
Conclusion
If you're experiencing issues erasing a USB drive on your Mac, this article provides a comprehensive guide to resolving the problem. It outlines the reasons behind the issue and offers solutions to fix the error, allowing you to successfully erase your USB drive. If you have any suggestions or found the article helpful, please share your thoughts in the comments. We hope you found the information useful and will share it with others.
FAQ of Can't Erase USB Drive on Mac
If you're experiencing issues erasing a USB drive on a Mac, there are several potential causes. First, ensure that the USB drive is properly ejected from the system. If the drive is not ejected, you may receive an error message or be unable to erase it.
1. Why can't I delete things off my USB Mac?
If you're having trouble deleting files from a USB drive on your Mac, it's possible that the drive has write protection enabled, or the files on the drive are damaged, making them read-only.
2. How do I force my Mac to erase a hard drive?
To erase your Mac, you'll need to put it into Recovery Mode, which allows you to wipe it clean. The steps to do this are outlined in the article above.
3. What format is best for Mac external hard drive?
Apple File System (APFS) is the default system for macOS 10.13 and later, replacing HFS+. It's a more versatile and robust format, making it the best choice for formatting a Mac external hard drive.
Related Articles
- How to Delete File PowerShell [with Precise Command Lines]
- Copy Speed 0 Bytes: How to Fix File Transfer Speed Drops to Zero Windows 10
- 3 Ways | How to Enable and Disable Offline Files in Windows 10
- 5 Ways to Fix Hard Drive Read Speed Slow Error
- What If Error Message -- We Couldn't Find Any Drives Appears? [2023 Fixed]
When installing Windows on your computer, it may encounter an error that says “Windows cannot be installed to this disk. The selected disk is of the GPT partition style. - What Does Format Disk Mean? [Most Detailed Answer 2022]
Formatting a disk refers to the process of erasing all data on a storage device, such as a hard drive, solid-state drive, or USB drive, and restoring it to its original factory settings. This process is also known as low-level formatting, which reinitializes the disk's file system and prepares it for new data to be written. Formatting a disk is often necessary when a device is no longer recognized by a computer, or when a user wants to remove sensitive information from a device. There are various ways to format a disk, including using the built-in formatting tools in Windows or macOS, or using third-party software.