How to Clear Recents on Mac Without Losing Data [2023 Guideline]
Clearing the Recent folder on a Mac can be a challenging task, especially for users who are not tech-savvy. Manually detecting and deleting the traces of each session can be almost impossible, making it a difficult job to find and eliminate all the relevant files. However, this post will guide you through some practical methods to clear the Recent folder on a Mac.
| Workable Solutions | Step-by-step Troubleshooting |
|---|---|
| Fix 1: Clear with Spotlight Indexing | Spotlight catalogs your Mac's files and folders. The best solution to empty the Recents folder...Full steps |
| Fix 2: Clear Recent Using Apple Menu | Clearing your Mac's Recent results in Finder is a simple operation. Here is adhering to the guidelines...Full steps |
| Fix 3: Rename the Recent Folder on Terminal | You can open the Terminal on Mac and its commands to accomplish anything we can't do in the Finder...Full steps |
| Fix 4: Move Recent Files to Encrypted Drive | Moving the files to Encrypted Drive, where Spotlight search cannot index them and will remain secure...Full steps |
Some people try to clear the Recents folder on their Mac to free up space, but end up deleting the original files from their Trash instead.

What Is the Recents Folder on Your Mac
You can quickly access the files you've just made or opened on your Mac by clicking on the "Recents" folder in the Finder sidebar, as all files on iCloud Drive and your Mac are instantly added to it.
The Recents folder in Finder windows is a smart folder that automatically searches for recently used files using Spotlight, and its contents reside in other folders on your Mac, with no actual physical folder on the disk.
You can't delete the Recents folder since it doesn't exist, but you can disable its functionality or remove it from the Finder sidebar, and clear the search results.
So how can you clear the Recents folder?
How to Clear Recent Items on Your Mac
Here are the four best ways to clear Recent items on your Mac.
Method 1: Clear Recent Files with Spotlight Indexing on Startup Disk
The best solution to empty the Recents folder is to stop Spotlight from indexing your main hard drive. To do this, go to System Preferences, then click on Spotlight, and uncheck the box next to "Search Results" under the "Privacy" tab. This will prevent Spotlight from indexing your main hard drive, effectively emptying the Recents folder.
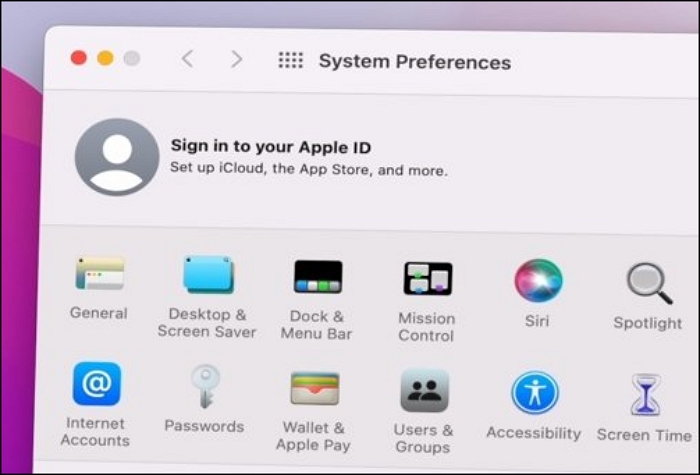
Step 1. Launch System Preferences and select "Spotlight".
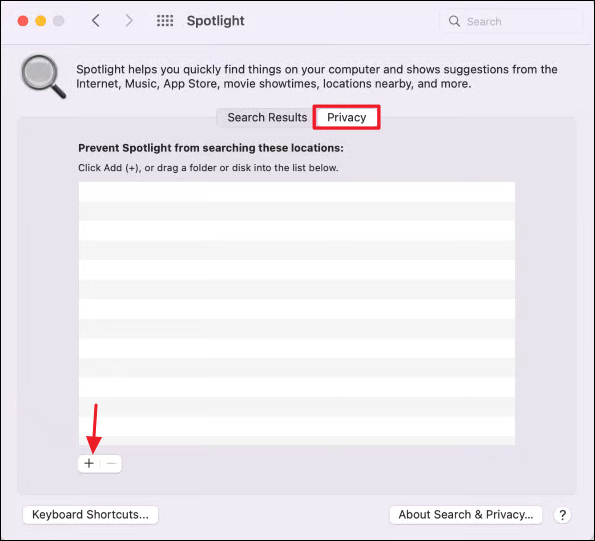
Step 2. In the lower-left corner of the window, click the "Privacy option" and select the "+" button.
Step 3. Choose "Macintosh HD" to add it to the list.
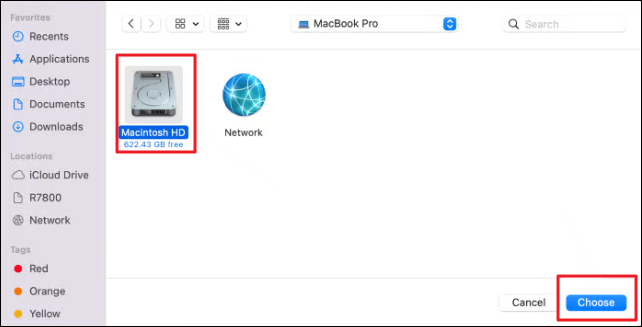
Step 4. On the warning message, click "OK". This should clear your recent items. Now, your recent items should be blank.
If you choose this option, Spotlight will be disabled, preventing you from searching files and folders on your hard drive, and after reindexing is finished, Finder will clear recent items.
Method 2: Clear Recent Using Apple Menu
To clear the Recents folder on a Mac, follow these steps: Go to Finder, click on "Go" in the top navigation bar, select "Recent Items" from the dropdown menu, and then click on "Clear Menu" in the context menu. This will delete all items from the Recent Items list. Note that this will not affect the Recents folder on macOS, which cannot be fully cleared. The Recent Items list is a separate feature that stores a list of recently opened files and folders.
- Launch Finder on your Mac
- From the menu bar, click Go.
- Select "Recent Folders" from the dropdown menu, then select "Clear Menu".

The Recent Items option on the Apple menu on Mac is often confused with the Recents folder, but it's actually a separate feature. Accessible from the Apple menu, it tracks the files and applications you've most recently opened, as well as the servers you've most recently connected to.
Method 3: Rename the Recent Folder on Terminal
You might be considering renaming the File after reading this to hide them. Unfortunately, the Mac won't let you start the file name with a dot, which can unhide them. But as usual, you can open the Terminal on Mac and its commands to accomplish anything we can't do in the Finder.
To prevent certain files from appearing in Mac's Recents folder, you can prefix their names with a dot (.).
- Start your Mac's Terminal program.
- To change to the directory containing the file you're interested in, you can use the `cd` command followed by the path to that file. For example, if the file is located in the `/Users/username/Documents` directory, you would type `cd /Users/username/Documents` and press Enter.
- To rename a file, navigate to the directory where the file is located, then type the command "mv" followed by the original filename and the new filename, separated by a period, and the file extension. For example, if you want to rename a file called "example.txt" to "newexample.txt", you would type: mv example.txt newexample.
- To carry out the command, press "return".
To view hidden files in the Finder, use the keyboard shortcut Command+Shift+dot (.), pressing the Dot key on the keyboard, not the letter dot keys.
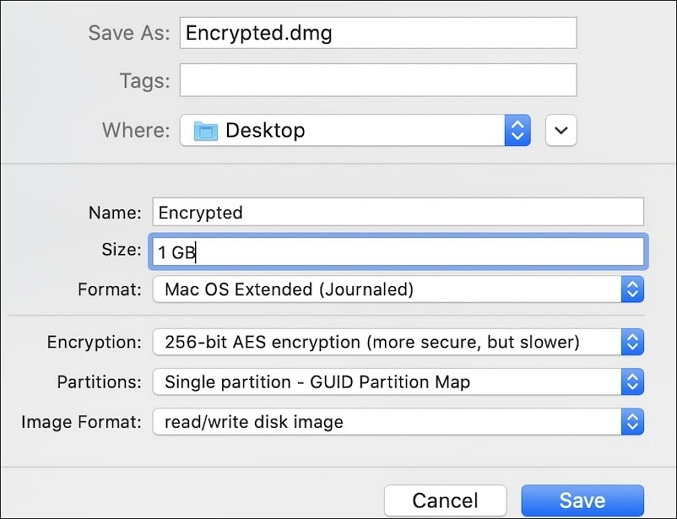
Method 4: Move Recent Files to Encrypted Drive
To prevent files from appearing in the Recents list, move them to an Encrypted Drive, where Spotlight search cannot index them, ensuring they remain secure and won't show up in Recents.
- Enter the Applications directory and locate and launch Utilities.
- Open Disk Utilities there.
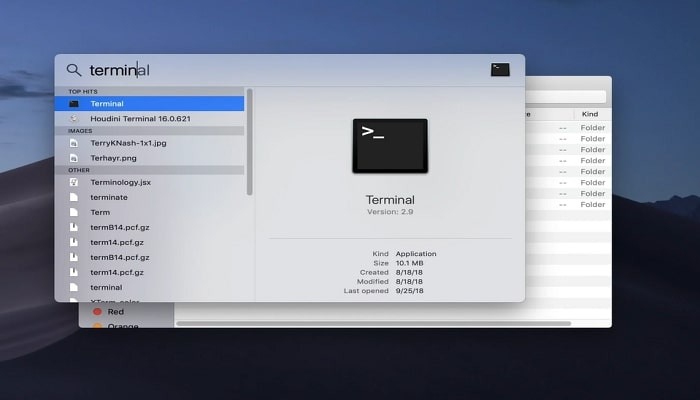
- To access Disk Utility, you can either go to the Applications/Utilities folder and open it from there, or use Spotlight to quickly search for it. To use Spotlight, press the command key and the space bar, then type "Disk Utility" and select it from the results.
- After entering Disk Utility, select "File" from the top menu.
- Choose "New Image" and "Blank Image".
- Now enter all the necessary information and save it.
- Ensure the Image Format option is set to read/write disk images.
How to Delete the Recents Folder in Finder
You may want to exclude certain items from the Recents list, such as photographs, while still allowing other non-essential items to appear.
To make a folder, simply create a new folder in the same way you previously described, and add it to the Privacy tab of System Preferences.
- To move files or folders on a Mac, select the item you want to move by clicking on it, then drag it to the desired location in the Finder. You can also use the "Move to" option in the context menu by right-clicking (or control-clicking) on the selected item.
- Select the original File in the Finder, copy it by pressing Command+C.
- The Finder should now display the new folder.
- To relocate the File, press the Option+Command+V key sequence.
- When you press Command+V, the original file remains in its old folder, and the original file still appears in the Recents folder.
However, this approach does not empty the Recents folder; only the files you transferred to the specific folder will be deleted.
How to Recover Deleted Files on Mac
To recover deleted files on Mac after clearing Recent, use Deep Data Recovery for Mac, a professional recovery program that can retrieve deleted data and files.
This approach to recovering permanently deleted files is the most efficient, as the data recovery software works with macOS 10.9 to 13, making the procedure the same regardless of the macOS version.
Deep Data Recovery for Mac
- Recover lost or deleted files due to various reasons such as corrupted data, accidental deletion, or misoperation.
- Recover deleted files from various situations, including the Trash, a formatted hard drive, a crashed operating system, or even an infected Mac.
- The software supports recovering more than 1000 types of files and allows users to preview recoverable files for free.
To recover irreversibly deleted files on a Mac, follow these steps: First, download and install the data recovery program, then launch it and select the drive or location where the deleted files were stored. Next, let the program scan the selected area for recoverable files, and once the scan is complete, preview the recovered files to ensure they are intact.
Step 1. Select file types
Launch Deep Data Recovery software, select the desired file types, and click "Next" to initiate the recovery process.

Step 2. Select the drive to be scanned
In the main Deep Data Recovery window, select the drive you need to recover lost/deleted files from and click the "Scan" button.

Step 3. Select your lost data/files
Deep Data Recovery for Mac scans the selected disk volume, displaying scanning results on the left pane, allowing users to sort and find specific files if needed.

Step 4. Recover lost/deleted data
To recover deleted or lost Mac files, preview the desired files and then click "Recover" to begin the process. This will initiate the recovery of your files.
To Sum Up
To delete recent items on a Mac, it's not as straightforward as it seems, especially when done manually. The reason is that these items are stored in various locations depending on the apps and browsers used. To minimize activity tracking, follow the steps to delete most traces, and consider using Deep Data Recovery for Mac to recover accidentally deleted files.
Clear Recents Folder Mac FAQs
Some related questions that you may be interested in include.
1. Do Mac Recents take up space?
The Recents is a saved SmartSearch that displays the most recently opened files, requiring no storage for its contents.
2. How to remove recent items from the Mac preview?
- In the menu bar, click the Apple logo.
- Select Recent Items.
- It displays a dropdown of recently used apps and documents.
- Press Clear Menu.
3. What occurs when I remove Recents on a Mac?
When you delete files from the Recents folder, they will be moved to the Trash instead of being permanently deleted. This means they will still be on your disk, but will be removed from the list. If you then empty the Trash, the files will be permanently deleted.
4. How do I clear Recents in Mac Finder without deleting them?
If you don't want to delete your data and files, you can try hiding the files with your Mac's Terminal and use the Command Lines mentioned in Method 3. Also, don't worry about data loss; you can download Qiling Recovery Wizard for Mac to restore your data.
Related Articles
- System Service Exception Stop Code 0x0000003B in Windows 10 [10 Fixes]
- {Solved}How to Fix No Audio in Windows 11?
- How Long Does It Take to Factory Reset A PC
- How to Fix PS4 Error Code CE-37857-0 [100% Working Solutions]
- Activity Monitor Mac: How to Open and Use It [3 Tips to Optimize Mac]
If you're confused about the activity monitor and how to use it, this article will help. It will explain what the Activity Monitor is, where to find it, and how to use it effectively. You'll learn how to open it using Spotlight, the Dock, Finder, and keyboard shortcuts, making it easy to navigate and get the most out of this useful tool. - What Is Apple Universal Control, All You Need to Know
Apple Universal Control is a feature that allows users to control multiple Apple devices with a single keyboard and mouse, making it easy to switch between Mac and iPad. To use Universal Control, simply enable it on your devices, place them near each other, and start typing or clicking on one device to control the others.