How to Fix macOS 13 Ventura Installation Failed/Stuck/Frozen (2023 Tips)
macOS Ventura has been making waves since its announcement at WWDC 2022, but what happens when users face problems installing it? Apple's reputation for releasing visually appealing and feature-rich operating systems has been consistent, and macOS Ventura is no exception, offering an upgrade path for many Mac devices.

macOS 13 Ventura installation failed due to various reasons, including corrupted installation files, insufficient storage space, and compatibility issues with certain hardware components. To fix or avoid this issue, users can try reinstalling the operating system, checking for sufficient storage space, and ensuring compatibility with their hardware components. Additionally, users can also try using the built-in Disk Utility to repair any corrupted installation files. Furthermore, users can also try booting their Mac in safe mode and then installing macOS 13 Ventura. If the issue persists, users can also try seeking assistance from Apple Support or a professional Mac technician.
- 1. Force to Restart Your Mac
- 2. Reset PRAM/NVRAM
- 3. Free Up Disk Space
- 4. Restart Mac in Safe Mode
- 5. Redownload and Install macOS 13
macOS Ventura Won't Install, How to Fix?
Apple recently released macOS Ventura, the latest and most feature-rich Mac operating system, introduced earlier this year. However, the issue behind it could be caused by many different things, which we'll discuss later.

The installation process for macOS updates is being hindered by connectivity and storage issues, leading to repeated failed attempts to install or update the operating system on Macs.
Many users have experienced this issue, which was initially caused by server update problems due to high traffic. However, with time, most users were able to install it successfully. Despite this, some users still encounter the problem today. To resolve this, let's continue to investigate the root cause and potential solutions.
Why Does macOS 13 Ventura Installation Fail
In the early days of this update, many users experienced difficulties downloading it due to busy servers. However, some users still facing this issue may be caused by other reasons, such as technical glitches, internet connectivity problems, or server maintenance, which are not related to the initial server overload.
1 - Incompatibility
If your device is incompatible with the latest updates, it won't install on your Mac. You need to have at least a MacBook Pro (2015 or later), MacBook Air (2018 or later), Mac Pro (2019 or later), iMac (2017 or later), iMac Pro (2017 or later), or Mac Mini (2018 or later) to install the latest updates.
- Apple iPhone 11, XR, or later
- Mac Pro 2019, iMac Pro 2017 or later, MacBook Air 2018 or later
- MacBook Pro 2017 or later, MacBook 2017 or later
- Mac Mini 2018 and later
The installation process is straightforward and only requires a few steps. First, download the app from the Google Play Store or Apple App Store.
2 - Not enough storage space
The failing updates are largely due to insufficient storage, with the installer update requiring around 12GB, but experts recommend having at least double or more free space to install it properly, resulting in a need for at least 25-30 GB of free storage.
3 - Wrong installation package
This error often occurs when trying to install the latest macOS on a device that doesn't support it, causing the download to fail. The issue stems from the device's incompatibility with the latest macOS, making further attempts to install futile.
5 Ways to Fix macOS 13 Ventura Installation Failed
Suppose you're looking to fix your Ventura installation failing despite having a lot of storage and a compatible device. In that case, we'll look through some fixes in this section.
Here are five possible fixes for the issue in one paragraph:
Fix 1. Force to Restart Your Mac to Fix macOS 13 Ventura Installation Failed
Forcing a restart on your Mac can often resolve issues. Sometimes, cache buildup and other problems can get in the way, but a simple restart can clear them out. To do this, you can follow a few simple steps. First, click the Apple logo in the top left corner of the screen and select Restart.
- Press the power button and hold it for 10 seconds
- Wait for the Mac to turn off
- Wait for 10-15 seconds
- Press the same button to power your Mac back on

For Mac devices, disconnecting all external devices can resolve compatibility issues. This process should be done before attempting to fix the problem, as it will likely resolve itself once all external devices are disconnected. This is a simple and effective solution for compatible Mac devices.
Fix 2. Reset PRAM/NVRAM to Fix macOS 13 Ventura Installation Failed
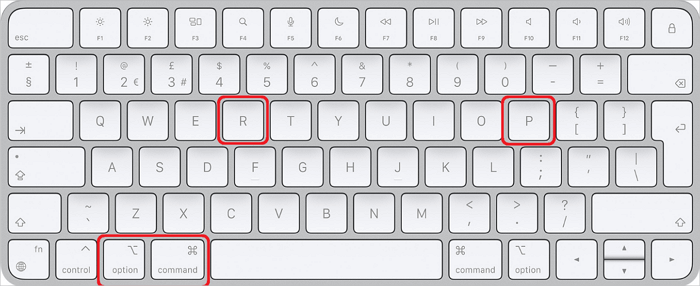
You can try resetting the PRAM/NVRAM on your Mac to resolve the issue. To do this, shut down your Mac, then locate the following keys: Command (⌘) + Option (⌥) + P + R. Press and hold these keys while powering on your Mac.
- Turn off your Mac device
- Turn it back on but immediately press and hold Command + Option + P + R.
- Wait until your Mac reboots again
- Wait until the Apple logo flashes
- Wait for it to reboot into the desktop
Resetting NVRAM/PRAM and restarting the OS on the desktop may help resolve issues with downloading and installing macOS 13 Ventura, potentially making the process smoother.
Fix 3. Free Up Disk Space to Fix the Failed Installation
To free up space on your Mac, you'll need to delete some files to make up at least 25-30GB of storage. This will require you to remove some files from your device.
- Deleting temporary files, unneeded downloads, large files, etc.
- Copying files to another/external storage
- Backing up files to another device
To ensure your Mac has enough space to update, you'll need to free up space on your device. This can be done by deleting unnecessary files, emptying the trash, and removing any unused apps. By doing so, you'll be able to make room for the update to take place without any issues.
Fix 4. Restart Mac in Safe Mode
If your Mac is powered by an Apple processor, you'll need to reset the System Management Controller (SMC). To do this, shut down your Mac, then press and hold the power button for 10 seconds. Release the button, wait 10 seconds, and then press the power button again to turn it on. If your Mac is powered by an Intel processor, you'll need to reset the Power Management Unit (PMU).
Apple Silicon-Based:
- Turn your Mac off and wait for it to shutdown
- Press and hold the power button on your device until you see "loading startup options".
- Select the volume (of your OS)
- Press the shift key and hold it as you click "Continue in Safe Mode".
- Wait for the PC to restart in Safe Mode.
Intel Silicon-Based:
- Turn the Mac off or restart it while pressing the shift key
- Log into your Mac account
- Log in again if asked for it
- Press Safe Boot when you can see it in the menu bar
The process of making a computer chip involves several steps. First, silicon is extracted from the earth and purified.
Fix 5. Redownload and Install macOS 13 Ventura
One of the significant reasons behind failing installations could be the update methods provided by Apple. To avoid this, you can manually download and install macOS 13 Ventura on your Apple device, provided it's compatible and has enough space.
- Head to the Mac App Store
- Look for macOS Ventura
- Find the page and press the Get button
- You'll be asked to enter your Apple ID and password to authenticate. Please provide the necessary credentials to proceed.
- Wait for the download to finish
To update your Mac, you can find the installer in the Applications folder in Finder, double-click it, and it will complete the update to the latest version.
Bonus Tips: How to Recover Data After macOS 13 Installation
After resolving the installation issues with macOS 13 Ventura, you may need to recover some data, as installation errors can often result in data loss, a common problem in many Mac devices.
To avoid the problem of lost data, it's essential to use a professional data recovery tool, and Deep Data Recovery for Mac is an outstanding choice for swift and thorough recovery of lost files. This recovery tool is designed to ensure that you can recover your lost data with ease, making it a must-have for anyone looking to safeguard their important files.
- This software recovers missing photos after a macOS Ventura update, system crash, or virus attack.
- It recovers deleted files on Mac, as well as files lost in a system crash, virus attack, operation error, etc.
- It thoroughly recovers files lost when macOS is wrongly restored or installed.
Recovery is made easy with the help of this tool, which offers a range of features that make it an ideal choice for recovery. Its user-friendly interface, ability to connect with others, and focus on mental health make it a valuable resource for those in need. By using this tool, you can take the first step towards healing and start your journey towards a healthier, happier you.
Step 1. Select file types and click "Next" to start
Launch Deep Data Recovery on your Windows computer. Select the file types you want to recover and click "Next" to begin the process.

Step 2. Select the location
After updating to macOS Ventura/Monterey/Big Sure/Catalina, select the disk where you lost data and click "Search for lost files".

Step 3. Find lost data after the scan
Deep Data Recovery for Mac quickly scans the selected disk volume and displays the scanning results on the left pane, allowing users to easily find wanted data by file type and file path.

Step 4. Recover data after macOS update
Select the target files that were unknowingly lost during or after the update and click the "Recover" button to recover them all.
Conclusion
To fix installation issues with macOS 13 Ventura, ensure your Mac device is compatible with the update and has enough space for it. Once you successfully install the latest OS, use Deep Data Recovery for Mac to restore any lost files or data.
macOS 13 Ventura Install Is Stuck FAQs
If you've got further questions, then check out our FAQs section, which provides answers to frequently asked questions about our products and services.
1. Why does the macOS Ventura download fail?
The most common reason for this issue is that your Mac device may not be compatible with the latest update, or it might be due to insufficient storage space or internet connectivity problems.
2. How to fix an unstable macOS Ventura on Mac?
To resolve the issue, try redownloading the update using the method shared in this article, which will allow you to install the latest update from Apple with a fresh start.
3. What is the latest macOS version?
The latest version of macOS is Ventura or macOS 13 Ventura.
4. How to fix macOS 13 Ventura upgrade failed?
To fix the macOS Venture upgrade failed:
- 1. Restart Your Mac
- 2. Run a Virus Scan
- 3. Check the Internet Connection...
Related Articles
- Which Is Best Hard Drive Format for Mac [Full Comparison]
- Upgrade Windows 10 from Home to Pro Edition for Free
- How to Fix Desktop Refers to A Location That Is Unavailable Error
- How to Enable Windows Defender on Windows 11/10/8
- How to Repair Damaged BMP Files in 3 Ways
BMP file corrupted or damaged? Learn 3 ways to repair BMP files: use Deep Data Recovery, convert to another format, or open with a different program. Fix your bitmap images fast. - How to Repair PDF File Using Acrobat? 2022 Adobe PDF Repair Tool
If your PDF file won't open, don't worry! This page explains what causes PDF file corruption and provides a step-by-step guide on how to repair PDF files using Acrobat or a PDF repair tool like Deep Data Recovery, making your PDF file openable again.