macOS Ventura Issues, Bugs, Promblems [Latest Updated]
Fix macOS Ventura Issues [Top 6 Problems]
Users may encounter various issues with macOS Ventura, depending on their upgradation and other factors. Common problems include, but are not limited to, the top 6 macOS Ventura issues that can be resolved through simple solutions.
| macOS Ventura Issues | Step-by-step Troubleshooting |
|---|---|
| macOS Ventura Update Not Found | Go to the Apple menu and select "System preferences". From this, click on "Date & Time"...Full steps |
| macOS Ventura Cannot Download |
The first thing to check is whether your internet works with excellent speed. You might encounter is...Full steps |
| macOS Ventura Installation Failed |
For this, go to the Apple menu and select Restart. Hold down the shift key while it boots and after...Full steps |
| macOS Ventura Cannot Boot | The most common but helpful method is to check the power. Unplug the device and connect it again to...Full steps |
| macOS Ventura Wi-Fi Problems | The simple solution is to turn off your Wi-Fi connection and connect again after a few minutes...Full steps |
| macOS Ventura Bluetooth Issues | Disconnect and reconnect all Bluetooth-enabled devices. You can also restart your Mac...Full steps |
macOS Ventura Issues Overview
Apple regularly introduces a new macOS base system each year, which has gained popularity among users. The latest version in the line is macOS Ventura, featuring a new multitasking feature called Stage Manager.
Despite its popularity and impressive features, macOS Ventura has been plagued by issues and bugs that have caused problems for users, including difficulties with downloading and installing the operating system, as well as various other bugs and glitches.
Apple has attempted to resolve issues with macOS Ventura updates, but for users already experiencing problems, here's a brief overview of common issues and potential solutions.
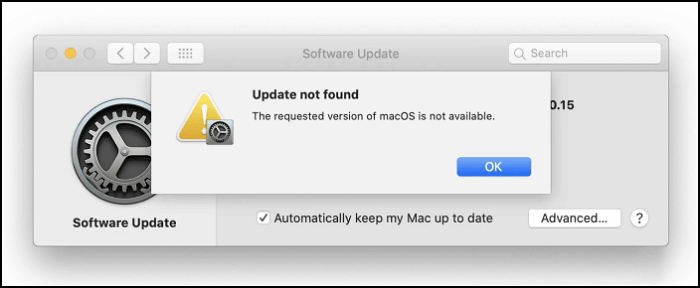
macOS Venture Issue 1. Update Not Found
As a Mac user, you may encounter issues with updating your device, but you can try the following. If the "Software Update" feature in System Preferences isn't working, you can try to update your Mac by going to System Preferences, then clicking on Software Update, and finally clicking on the "Update Now" button. If this still doesn't work, you may need to restart your Mac and try again. Alternatively, you can try restarting your Mac and then go to System Preferences, then click on Software Update, and finally click on the "Update Now" button.
To ensure you can run macOS Ventura, it's essential to check if your Mac model is compatible with the operating system. You can do this by visiting the Apple Menu, selecting "About This Mac," and checking the list of compatible models. This step is crucial, especially for older Mac devices that may not support the latest macOS version.
- iMac 2017 or later
- iMac Pro 2017 or later
- MacBook Air 2018 or later
- MacBook Pro 2017 or later
- Mac Pro 2019 or later
- Mac Studio 2022
- Mac mini 2018 or later
- MacBook 2017
To sync data and time with Apple's server, you can follow these steps: Go to Settings > General > Date & Time, and toggle off the "Set Automatically" option. Then, go to Settings > General > Date & Time, and tap on "Time Zone".
Step 1. Go to the Apple menu and select "System preferences".
Step 2. To make the necessary changes to the date and time on your device, go to the "Date & Time" section and unlock the yellow lock by clicking on it. Then, select the "Set date and time automatically" checkbox to enable automatic date and time setting.

If the above methods don't work, you can boot your Mac into macOS Recovery Mode and then use the "Reinstall macOS" feature.
Note: If your Mac won't boot into Recovery Mode, try resetting the System Management Controller (SMC) and the power management unit (PMU) by shutting down your Mac, unplugging the power cord, pressing the power button for 10 seconds, and then plugging the power cord back in. You can also try booting in safe mode by restarting your Mac and immediately holding the Shift key.
macOS Venture Issue 2. Cannot Download macOS Ventura
If you're experiencing issues with downloading macOS Ventura, follow these steps to troubleshoot and resolve the problem. First, ensure that your Mac is connected to a stable internet connection and that the download is initiated from a reliable source. If the download fails, try restarting your Mac and then attempt the download again.
Step 1. The first thing to check is whether your internet works with excellent speed.
Note: You can also check Apple's "System Status" page to ensure there is no server issue. If that's not the problem, you can try restarting your device.

Step 2. To resolve the issue, check your downloads folder and delete any unwanted files, which will free up space on your disk and allow you to download the file again.
macOS Ventura Problem 3. Installation Failed
After downloading macOS Ventura, the installation process may encounter issues, including a failed installation, due to the device not supporting the operating system or the presence of malware or third-party software interfering with the process.
You can boot your Mac to "Safe Mode" to prevent unwanted problems by only loading essential startup items, preventing unnecessary programs and drivers.

Step 1. For this, go to the Apple menu and select Restart.
Step 2. To resolve the issue, hold down the shift key while the computer boots and then install Ventura in Safe Mode. This should allow the operating system to install without any issues.
macOS Ventura Issue 4. Cannot Boot
macOS Ventura won't boot due to a possible display issue or device bricking, but you can troubleshoot by following some steps. If the issue persists, consult a professional for further assistance.

Step 1. The most effective method to resolve the issue is to check the power. Simply unplug the device and plug it back in to the main power source. This simple step can often resolve the problem.
Note: Check if the connection is secure and all cables are plugged in correctly.
Step 2. If your Mac is experiencing issues, you can try booting it in "Safe Mode" to prevent any third-party extensions from causing errors.
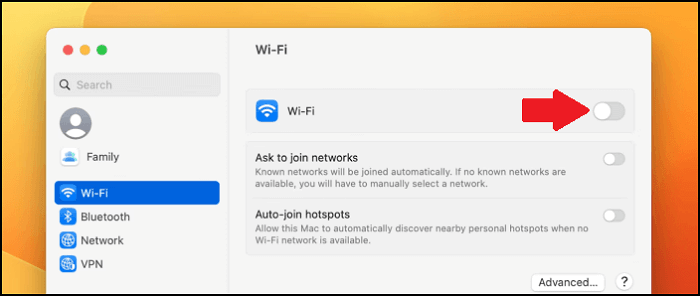
macOS Ventura Bug 5. Wi-Fi Problems
To ensure secure and fast Wi-Fi connectivity on macOS Ventura, it's recommended to revisit and reconfigure your Wi-Fi settings, especially after upgrading from a previous macOS version. This might resolve any issues with services not connecting automatically, such as Wi-Fi.
Step 1. Turn off your Wi-Fi connection, wait for a few minutes, and then connect again to resolve the issue.
Step 2. To resolve Wi-Fi connectivity issues, try uninstalling any apps or VPN that may be affecting the network. Additionally, try moving closer to the Wi-Fi router or restart it if necessary.
macOS Ventura Issue 6. Bluetooth Troubleshooting
This problem is similar to the Wi-Fi issue and can be resolved following a similar method.
Step 1. Disconnect and reconnect all Bluetooth-enabled devices.

Step 2. If your Mac won't connect to your Bluetooth device, try restarting your Mac and turning Bluetooth back on after a few minutes. This simple step can often resolve the issue.
If you're still experiencing issues, watch this video for further guidance. In the meantime, here are the key points to consider:
- 00:15 How to fix macOS Ventura issues
- 03:25 Fix the last issues of macOS Ventura
- 03:49 The closing words
How to Retrieve Lost Data After Installing macOS Ventura
To avoid losing your important files and data during the macOS Ventura update, it's crucial to back them up beforehand. This will ensure that your files and data are safe and can be recovered if anything goes wrong during the update process.
The good news is that it's possible to retrieve deleted files on macOS Ventura through various methods. You can restore from a Time Machine backup or an Apple Support resource, or retrieve them from iCloud. However, the most helpful and easy method is to use a data recovery tool, such as Deep Data Recovery for Mac, which can recover any deleted files in a simple and effective way.
Here are a few situations that can require you to use a data recovery app:
- Accidentally deleting some data on your Mac.
- Data loss because of physical storage disk failure.
- Errors with updates or installing the macOS Ventura.
- Data corruption due to macOS Ventura issues.
This powerful data recovery tool allows for the recovery of any deleted files from macOS Ventura, with a beginner-friendly interface that simplifies the recovery process.
To recover missing data, start by checking the system's event logs for any errors or clues about what might have caused the data loss. Next, try to identify the point at which the data was last successfully written to the system.
Step 1. Select file types and click "Next" to start
Launch Deep Data Recovery on your Windows computer, select the desired file types, and click "Next" to initiate the recovery process.

Step 2. Search for lost files
Select the disk location where you lost data and click the "Search for lost files" button.

Step 3. Go through the scanning results
This software will immediately scan your selected disk volume and display pictures, documents, audio, videos, and emails on the left pane.

Step 4. Select the file(s) and recover
Click the data to preview, and click the "Recover" button to have them back.
Summary
Mac users may face frustration when dealing with issues related to updating to macOS Ventura, which can potentially delete all their data. To avoid this, it's essential to back up your Mac before proceeding with any update.
If you've lost essential data on your macOS Ventura and don't have a backup, Deep Data Recovery for Mac can help you easily retrieve the lost data.
macOS Ventura Issues FAQs
macOS Ventura is the latest operating system from Apple, offering several new features and improvements. Some common questions about Ventura include its system requirements, compatibility with older Macs, and the availability of the public beta.
Is the new Mac update to macOS Ventura causing problems?
macOS Ventura, like any other version, comes with exciting features and improvements, but it's not uncommon for new systems to have some issues.
The problems encountered while using macOS Ventura differ from previous operating systems. Issues often arise during the update, download, and installation processes, but these are generally minor and can be resolved easily with simple steps.
How to fix macOS Ventura cannot install?
To fix the issue of not being able to install macOS Ventura, you can try resetting the NVRAM and SMC, checking the System Report for any compatibility issues, and ensuring the computer's firmware is up to date. Additionally, you can try running the installer in verbose mode to see if there are any specific error messages, and also check the Apple Support website for any known issues or solutions.
- 1. Check Mac Device is available for macOS Ventura or not.
- 2. Check if you have enough storage space.
- 3. Check the internet environment.
- 4. Restart your Mac device.
- 5. Check the Firewall settings on Mac.
- 6. Upgrade to macOS 13 Ventura Again.
- 7. Install macOS Ventura from the Apple App Store.
- 8. Install macOS Ventura in the Recovery Mode.
Should I update Mac to Ventura?
To clarify, updating to macOS Ventura can be a good idea for most users due to its many features, despite the potential challenges and indecisiveness that may come with it.
To ensure a smooth update, it's essential to back up all your existing data and files before proceeding. This is a major update that carries the risk of data loss, but with a backup, you can recover any lost data. It's always better to be safe than sorry, so take the time to create a backup before updating.
How to recover macOS Ventura lost data because of installation failure?
You can recover lost data using Time Machine or iCloud, or contact Apple Support for further assistance and solutions.
The simplest solution to recover lost files on a Mac is to use a data recovery tool like Deep Data Recovery. This powerful and reliable tool can retrieve all lost files within minutes and has a user-friendly interface, making it easy to use even for beginners.
- 1. Scan the target drive to find the lost files.
- 2. Preview the lost or deleted files.
- 3. Recover the lost or deleted files.
Related Articles
- [Solved!] Your Device Is Missing Important Security and Quality Fixes
- How to Solve SD Card Deleting Files by Itself in Every Possible Way
- 5 Ways to Fix Hard Drive Read Speed Slow Error
- How to Enable Windows Auto Login without Password
- How to Restore System Image from External Hard Drive Windows 10
You can easily recover a Windows 10 system image from an external hard drive when your computer is running normally. If your computer can't boot due to system crashes, corruption, or damage, you can still restore the image backup by following the provided guides. Alternatively, you can simplify the process with a professional Windows 10 system backup and recovery tool, eliminating the need for a complex system repair disc. - What Is RSAT? How to Install Remote Server Administration Tool on Windows? [All You Should Know]
To install the Remote Server Administration Tool (RSAT) on Windows 10, follow this guide. RSAT is a set of tools that allows you to remotely manage and administer Windows Server environments. To properly install RSAT, you can follow the steps outlined in this article, which provides a comprehensive guide to efficiently managing RSAT Windows 10 tools.