How to Clone an ADATA SSD to a New Drive
ADATA makes two SSD families: the XPG series for gamers and the Ultimate series for everyday use. Neither ships with an official cloning program, and ADATA SSD Toolbox only handles health checks and firmware updates. To move Windows from an old drive to an ADATA SSD you need a third-party clone tool.
This guide covers ADATA SSD models, the SATA and NVMe differences, 4K alignment, and the exact steps to clone Windows so the new ADATA drive boots correctly.
PAGE CONTENT
- ADATA SSD Models You Can Clone To
- Check Compatibility and Alignment
- Prepare the ADATA SSD Before Cloning
- Clone with Qiling Disk Master
- Boot from the Cloned ADATA SSD
- FAQs About Cloning ADATA SSDs
- Back Up Before You Clone
ADATA SSD Models You Can Clone To
- XPG Gammix series. The Gammix S70, S50 and S50 Lite are PCIe 4.0 NVMe drives aimed at gaming and heavy workloads.
- XPG Legend series. Legend 850 and Legend 960 sit in the mainstream NVMe segment with good sustained write speeds.
- XPG Swordfish. A value SATA SSD that fits the classic 2.5 inch form factor for older laptops.
- Ultimate SU650, SU750 and SU800. These are budget SATA SSDs commonly used for HDD to SSD upgrades.
- No official clone app. ADATA SSD Toolbox reports SMART data and updates firmware but cannot clone the system disk.
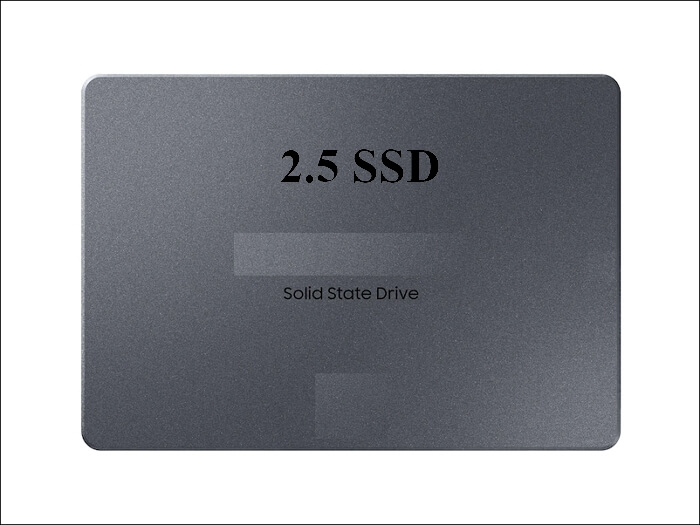
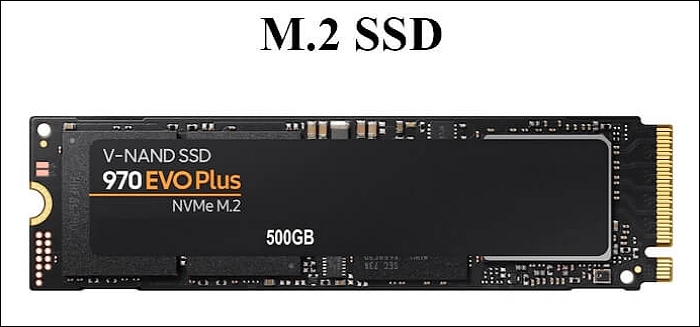
Before you buy, confirm the form factor your board accepts: 2.5 inch SATA, M.2 SATA, or M.2 NVMe. The slot type determines which ADATA model will fit.
Check Compatibility and Alignment
- SATA versus NVMe. SATA ADATA drives top out near 550 MB/s while NVMe models reach 3,500 MB/s or more depending on the PCIe lane.
- M.2 2280 is the default. Most ADATA NVMe SSDs use the 2280 size, meaning 22 mm wide and 80 mm long.
- 4K alignment matters. The SSD must be aligned to 4096 byte boundaries so the controller can write full pages and avoid write amplification.
- Target capacity rule. The destination ADATA SSD only needs to hold the used data, not the full source size, when intelligent cloning is used.
- PCIe 4.0 cooling. XPG Gammix S70 and S50 run hot under load, so fit a heatsink or use the motherboard M.2 shield.
A good clone tool aligns partitions automatically and resizes them to fill the ADATA SSD. Verify alignment afterwards with msinfo32 or a partition editor if you are unsure.
Prepare the ADATA SSD Before Cloning
- Install the drive. Mount the 2.5 inch model in a bay or seat the M.2 stick into the slot and tighten the end screw.
- Update ADATA SSD Toolbox. Check for a firmware update for the ADATA SSD before you clone onto it.
- Confirm the disk shows in Windows. Open Disk Management and make sure the ADATA drive appears as unallocated or healthy.
- Back up the destination if needed. Cloning overwrites every partition on the ADATA SSD, so move any important files off it first.
- Disable hibernation and fast startup. These can leave the source volume in an inconsistent state that breaks the clone.
Do not initialize the target in a way that conflicts with the source style. If the source uses GPT with UEFI, let the clone tool create GPT partitions on the ADATA SSD automatically.
Clone with Qiling Disk Master
Qiling Disk Master supports all ADATA SATA and NVMe models, aligns partitions at 4K, and rebuilds the boot records so the cloned drive starts on its own.
Watch the video tutorial below to clone the drive step by step with Qiling Disk Master.
Step 1. Open Qiling Disk Master, choose Clone, and then select Disk Clone.

Step 2. Pick the old system disk as the source and click Next.

Step 3. Choose the ADATA SSD as the destination and accept that its data will be erased.

Step 4. Enable SSD alignment and let the tool resize partitions to fill the ADATA drive.

Step 5. Click Proceed, wait for the copy to finish, then shut down before swapping the boot priority.

Boot from the Cloned ADATA SSD
- Set the ADATA SSD first in BIOS. Move it to the top of the boot order so UEFI looks there first.
- Disconnect the old drive for the first boot. This avoids Windows letter confusion and confirms the clone boots alone.
- Watch for the Windows logo. The first boot may run a disk check because of the new controller path.
- Open Disk Management. Confirm the ADATA SSD holds the C partition and the system reserved volume.
- Run a speed test. Compare the ADATA SSD read speed against its rated spec to confirm the PCIe link.
If the system falls back to the old drive, reboot into BIOS and disable the old disk or change the boot order. The ADATA SSD must contain an active EFI partition for UEFI boot.
FAQs About Cloning ADATA SSDs
Does ADATA provide free cloning software?
No. ADATA does not bundle a clone app. ADATA SSD Toolbox only monitors health and updates firmware, so use a third-party tool such as Qiling Disk Master.
Can I clone a SATA SSD to an ADATA NVMe SSD?
Yes. A modern clone tool copies Windows from SATA to NVMe and rebuilds the boot records for the new controller, as long as the board supports NVMe boot.
Do I need 4K alignment for an ADATA SSD?
Yes. Without 4K alignment the SSD performs more write cycles and runs slower. Qiling Disk Master aligns the ADATA SSD automatically during the clone.
My XPG Gammix S70 runs hot after cloning. What should I do?
Add a heatsink or use the motherboard M.2 thermal shield. PCIe 4.0 drives throttle when they exceed the rated temperature under sustained writes.
Can the ADATA SSD be smaller than the source disk?
Yes, as long as its capacity is at least equal to the used space on the source. Intelligent cloning skips empty sectors so the data fits.
Back Up Before You Clone
Cloning overwrites the target ADATA SSD and can fail if the source has bad sectors. Back up Windows first so you can restore if the clone does not boot.
Watch the video tutorial below to back up Windows and restore it if the clone fails.
Step 1. Open Qiling Disk Master and select System Backup to include the boot partitions.

Step 2. Save the image to a drive other than the ADATA target and start the backup.

Step 3. Click Proceed to start the system backup and wait patiently until it finishes. You can also tick Shut down the computer when the operation is completed to power off automatically.

Step 4. If the ADATA SSD does not boot after cloning, restore the image and retry with the SSD alignment option enabled.

Conclusion
ADATA SSDs such as the XPG Gammix and Ultimate series are easy to clone to, but ADATA does not provide cloning software. Use a tool that aligns 4K sectors, supports SATA and NVMe, and rebuilds the boot records. Keep a system backup before the clone, set the ADATA drive first in BIOS, and test it with the old disk disconnected.
For more SSD cloning guides, see Clone an SSD to a Larger SSD, Clone an M.2 SSD to a SATA SSD, Clone an SSD to the Same Size SSD, and 4K Alignment When Cloning an SSD.
Related Articles
- How to Clone a Crucial SSD to a New Drive
Crucial MX and P series SSD migration guide with boot repair. - How to Clone a Kingston SSD to a New Drive
Move Windows to a Kingston NV2, NV3, or A400 SSD. - How to Clone an SK hynix SSD to a New Drive
Clone to SK hynix Platinum P41 and Gold P31 SSDs. - How to Clone a Western Digital SSD to a New Drive
WD Blue, Black and SN series system migration steps. - Best Free Disk Cloning Software for 2026
Compare free tools that copy Windows to a new SSD.
Products
Articles & Tutorials
- Data Recovery
- Data Backup
- File Recovery
- File Backup
- System Backup and Restore
- Disk and Partition Clone
- Technical articles
- Mobile articles
- Disk Master Help
- Windows Data Recovery Tutorials
- Windows Secure Delete Tutorials
- Windows Partition Management Tutorials
- Windows File Backup and Restore Tutorials
- Windows System Backup and Restore Tutorials
- Windows Disk Backup and Restore Tutorials
- Windows Clone Tutorials