How to Clone or Upgrade a Microsoft Surface SSD
Surface devices are sealed with adhesive, priced like premium laptops, and rarely opened by their owners. Yet several current models hide a socketed M.2 2230 drive under the kickstand, and swapping that drive is far cheaper than buying a larger model.
This guide lists the Surface models with removable storage, explains how to release BitLocker before the swap, and shows how to clone Windows so the tablet boots again without a traditional BIOS.
PAGE CONTENT
- Surface Models With a Removable SSD
- Suspend BitLocker and Check the UEFI
- Remove the Drive the Way Microsoft Documents
- Clone Windows to the New 2230 Drive
- Boot the Surface Again
- FAQs About Surface SSD Upgrades
- Back Up Before You Swap the Drive
Surface Models With a Removable SSD
- Pro and Laptop lines. Surface Pro 7+, Pro 8, Pro 9, Laptop 3, Laptop 4, Laptop 5 and Laptop Studio store Windows on a socketed M.2 2230 NVMe drive.
- Older models are soldered. Surface Pro 5, Pro 6, Surface Go and the first Surface Laptop use onboard storage that cannot be replaced at all.
- Single-sided drives only. The 2230 slot has no clearance for chips on both sides, so a double-sided drive will not seat flat.
- Stock capacity is small. Many business units shipped with 128GB or 256GB, and a single-sided 1TB 2230 drive is the common upgrade.
- Mind the power draw. Choose a low-power 2230 model; tall heatsinks and metal covers will not fit under the Surface shield.
Check the exact model in System Information and look at the current drive in Settings before buying anything. Capacity support differs between generations, and the service guide for your model lists what Microsoft has validated.
Suspend BitLocker and Check the UEFI
- Encryption is usually active. Signing in with a Microsoft account normally turns on device encryption, and the drive will not unlock on new hardware without the key.
- Suspend instead of decrypting. Run manage-bde -protectors -disable C: -rebootcount 1 from an elevated prompt, which releases the key for one restart only.
- Save the recovery password. Print it or note it from account.microsoft.com/devices/recoverykey before the old drive leaves the tablet.
- Record the UEFI settings. Open Surface UEFI with Volume Up plus Power and note the boot order, TPM state and any custom security settings.
- Expect one prompt. The new disk changes the measurements the TPM checks, so the first boot may ask for the recovery password.
A suspended protector still leaves the data encrypted; it only stops BitLocker from demanding a key at the next start. Resume protection from Windows once the clone has booted cleanly.
Remove the Drive the Way Microsoft Documents
- Use the official service guide. Microsoft publishes a per-model guide; follow it instead of a generic teardown video made for another generation.
- Tools depend on the model. Most units need a small Torx driver, while display-first models also need a heat mat, suction cup and fresh adhesive strips.
- Disconnect the battery. Unplug the battery connector before removing or fitting the drive so a dropped screw cannot short the board.
- Reuse the shield and pad. Transfer the original metal shield and thermal pad to the new drive, or the controller will throttle under sustained writes.
- Keep the old drive safe. Place it in an anti-static bag until the replacement boots and encryption is switched back on.
Opening a Surface yourself can affect the warranty, and the adhesive display is easy to crack. Check the local terms first, and consider having an authorized center do the physical swap while you prepare the clone.
Clone Windows to the New 2230 Drive
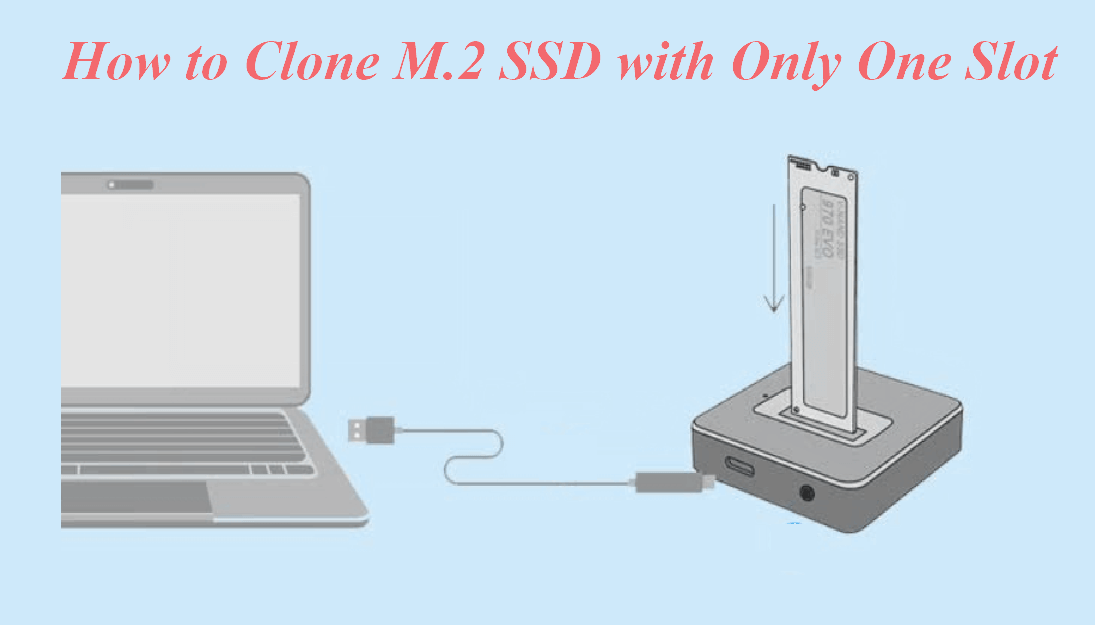
A Surface has a single M.2 slot, so the new drive has to sit in a USB enclosure while the original stays inside the tablet. The clone therefore runs from the internal drive to an external one.
Watch the video tutorial below to clone the drive step by step with Qiling Disk Master.
Step 1. Open Qiling Disk Master, choose Clone, and then select Disk Clone.

Step 2. Fit the new 2230 drive into a USB enclosure, refresh the disk list, and pick the internal Surface drive as the source.

Step 3. Choose the USB 2230 drive as the destination and accept that everything already stored on it will be erased.

Step 4. Keep the intelligent clone mode and leave the EFI, Windows and recovery partitions ticked so the new drive stays bootable.

Step 5. Click Proceed, let the copy finish, then shut the Surface down before you open it and change the physical drive.

Boot the Surface Again
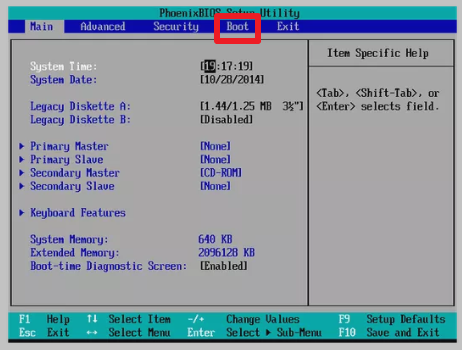
- There is no legacy BIOS. Press and hold Volume Up while pressing Power to enter Surface UEFI, or use Settings, Recovery and Advanced startup.
- Order the boot devices. In Boot Configuration, place the new internal drive or Windows Boot Manager at the top of the list.
- Enter the recovery key. If a blue BitLocker screen appears, type the recovery password you saved before the swap.
- Resume encryption. Check manage-bde -status, then run manage-bde -protectors -enable C: when Windows has settled.
- Fall back to a recovery image. Microsoft offers Surface recovery images by serial number if the cloned drive refuses to start.
Give the tablet ten minutes on AC power after the first login; Windows finishes device setup, re-registers the drive and may restart once on its own.
FAQs About Surface SSD Upgrades
Can I install any M.2 2230 SSD in a Surface?
Only a single-sided PCIe NVMe drive fits. Confirm the supported capacity and thickness in the service guide for your exact model before ordering.
Why does the Surface ask for a BitLocker key after cloning?
The TPM checks the boot measurements of the new disk and refuses to release the key automatically. Enter the recovery password, then enable protection again.
Do I need a special screwdriver for a Surface?
Yes. Most models use a small Torx screw, and models with a glued display also need heat, a suction cup and new adhesive strips.
Will the clone keep my Windows activation?
The digital licence follows the motherboard, which does not change, so Windows normally stays activated on the cloned drive.
Can I clone to a 2TB 2230 drive?
Only if the drive is single-sided and your model supports that capacity. Large drives run warmer, so monitor temperatures during the first long update.
Back Up Before You Swap the Drive
A drive swap is the moment when a working Surface can turn into an expensive brick. Make a separate system image first, so a clone that will not boot costs you an hour instead of your files.
Watch the video tutorial below to back up Windows and restore it if the clone fails.
Step 1. Open Qiling Disk Master and choose System Backup so the EFI, recovery and Windows partitions are all captured.

Step 2. Write the image to an external USB disk, never to the 2230 drive you are about to install in the tablet.

Step 3. Click Proceed and wait for the backup to finish; tick the shut-down option if you want the machine to power off when the job ends.

Step 4. If the new drive will not boot, restore the image to the original SSD and repeat the clone with a different USB enclosure.

Conclusion
A Surface upgrade is a hardware job wrapped around a software job. Confirm the model takes a single-sided 2230 drive, suspend BitLocker and keep the recovery key, clone to the new drive over USB, then set the boot order in Surface UEFI and re-enable encryption after the first successful start.
For more on partition handling during the swap, see How to Clone Windows 11 to a Smaller SSD, How to Clone Windows 11 with the System Reserved Partition, How to Clone the Windows Recovery Partition to a New SSD, and How to Migrate OS to SSD Without Reinstalling Windows.
Related Articles
- How to Clone a BitLocker-Encrypted Drive
Release the protector before the drive leaves the device. - How to Clone M.2 SSD with Only One Slot
Clone through a USB enclosure when the slot is occupied. - How to Clone Windows 11 to a New Laptop
Move a working install onto different hardware. - How to Clone an M.2 2230 NVMe SSD to a New Drive
Clone the short M.2 2230 SSD used in Surface, Steam Deck and ultrabooks. - How to Clone an SSD Encrypted with VeraCrypt
Copy a VeraCrypt-encrypted SSD at the sector level and keep it unlockable.
Products
Articles & Tutorials
- Data Recovery
- Data Backup
- File Recovery
- File Backup
- System Backup and Restore
- Disk and Partition Clone
- Technical articles
- Mobile articles
- Disk Master Help
- Windows Data Recovery Tutorials
- Windows Secure Delete Tutorials
- Windows Partition Management Tutorials
- Windows File Backup and Restore Tutorials
- Windows System Backup and Restore Tutorials
- Windows Disk Backup and Restore Tutorials
- Windows Clone Tutorials