Clone ROG Ally SSD: Upgrade 2230 or 2280 Drive Safely
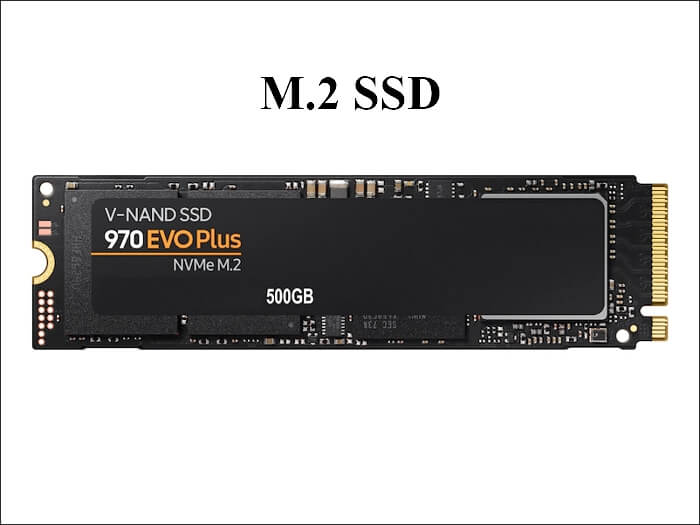
The ROG Ally, Ally X, and the newer Xbox Ally models all use a replaceable M.2 NVMe drive. The original Ally takes a short 2230 drive, while the newer models accept a full-length 2280 drive.
Cloning keeps Windows, your game launchers, and your settings instead of forcing a fresh install. This guide covers the enclosure method, the prep work, and the first boot after the swap.
PAGE CONTENT
- Which Drive Your Model Uses
- Prepare the Clone
- Risks Before You Open the Case
- Clone the SSD with Qiling Disk Master
- Swap the Drive and Boot
- FAQs About Ally SSD Upgrades
- Back Up Before You Clone
Which Drive Your Model Uses
- ROG Ally (2023). Uses a 2230 M.2 NVMe drive and has one internal slot.
- ROG Ally X. Uses a 2280 M.2 NVMe drive with more room for capacity.
- ROG Xbox Ally. Uses a 2280 drive and ships with a Windows-based ASUS image.
- ROG Xbox Ally X. Uses a 2280 drive and supports high-capacity models.
- One slot only. You cannot keep the old and new drive installed at the same time.
Because the handheld has a single slot, the clone must run with the new SSD in a USB enclosure. After the copy finishes, you open the case and swap the drives.
Prepare the Clone
- Buy the right enclosure. A 2230-capable enclosure is needed for the original Ally; 2280 enclosures fit the newer models.
- Check the target capacity. The new drive must be at least as large as the used data on the original.
- Charge the battery. ASUS asks you to discharge below 25 percent before opening the case.
- Suspend BitLocker. Device encryption must be paused or the clone cannot read the volume.
- Free up space. Delete old games and shader caches so the copy fits and finishes faster.
Connect the enclosure to the Ally while Windows is still running from the original drive. The clone runs inside Windows, with the enclosure as the destination.
Risks Before You Open the Case
- Ribbon cables are fragile. The Ally X and Xbox Ally models have a cable between the board and the back panel.
- Battery connector first. Disconnect the battery before you touch the SSD.
- Cloud Recovery overwrites. If the clone fails, ASUS Cloud Recovery reinstalls Windows and erases the drive.
- Activation can drop. A hardware change may require a Windows activation check.
- Warranty rules vary. Opening the case can affect coverage in some regions.
Do not skip the backup because the enclosure method sounds safe. A failed copy or an accidental format during Cloud Recovery leaves you with no games and no Windows image.
Clone the SSD with Qiling Disk Master
Qiling Disk Master can clone the internal drive to the enclosure while Windows is running, then resize the target to use the full capacity of the larger SSD.
Watch the video tutorial below to clone the drive step by step with Qiling Disk Master.
Step 1. Open Qiling Disk Master, choose Clone, and then select Disk Clone.

Step 2. Select the source disk and click Next.

Step 3. Select the destination SSD and confirm that its data will be replaced.

Step 4. Choose the clone mode and resize the partitions to use the full capacity of the new drive.

Step 5. Click Proceed, wait for the copy to finish, then shut the handheld down before you open the case.

Swap the Drive and Boot
- Power off and open the case. Remove the screws and gently lift the back panel.
- Disconnect the battery. Pull the connector before you remove the SSD screw.
- Install the cloned drive. Slide the new SSD into the M.2 slot and secure the screw.
- Boot and check storage. Confirm Windows starts and the full capacity appears in Settings.
- Reconnect the enclosure later. Use it as an external drive or wipe it for other data.
If the handheld boots into BIOS instead of Windows, check that the drive is seated and that the boot entry points to the new SSD. ASUS Cloud Recovery should be a last resort, not the first fix.
FAQs About Ally SSD Upgrades
Can I clone the ROG Ally SSD without opening the case?
Yes. Clone to an SSD in a USB enclosure first, then open the case once to swap the drives.
Does the ROG Ally use a 2230 or 2280 SSD?
The original Ally uses a 2230 drive. The Ally X, Xbox Ally, and Xbox Ally X accept a 2280 drive.
Will cloning keep my game saves?
Yes, a disk clone copies the Windows install and the game data. Cloud saves and launcher accounts still work as before.
Why does the new SSD show less capacity?
The clone copied the old partition size. Extend the volume in Disk Management to use the rest of the drive.
Can I use ASUS Cloud Recovery instead of cloning?
Yes, but it reinstalls Windows and erases the drive. Cloning is the only way to keep your current setup.
Back Up Before You Clone
Before you open the handheld, save a system image. If the clone fails or the drive is damaged during the swap, the image is the fastest way back to a working install.
Watch the video tutorial below to back up Windows and restore it if the clone fails.
Step 1. Open Qiling Disk Master and select System Backup to include the boot partitions.

Step 2. Save the image to an external drive and start the backup.

Step 3. Click Proceed to start the system backup and wait patiently until it finishes. You can also tick Shut down the computer when the operation is completed to power off automatically.

Step 4. If the new SSD will not boot, restore the image to the original drive and retry the clone.

Conclusion
A ROG Ally upgrade is a one-slot job, so clone to an enclosure first and swap the drives once. Match the drive length to your model, suspend BitLocker, and keep the old drive untouched until the new one boots twice.
For more handheld and small-drive guides, see Clone a Steam Deck SSD, Clone a 2230 NVMe SSD, Clone an M.2 SSD with One Slot, and Clone Windows 11 to an External SSD.
Related Articles
- Clone a Steam Deck SSD
Same one-slot handheld method. - Clone a 2230 NVMe SSD
Handle the short drive format. - Clone an M.2 SSD with One Slot
Use an enclosure for the target. - Legion Go SSD Upgrade: Clone Windows to a Bigger Drive
Stage the clone over USB, swap the single M.2 drive, and confirm the boot. - Cloned Drive Won't Boot? Fix It
Repair the boot after cloning.
Products
Articles & Tutorials
- Data Recovery
- Data Backup
- File Recovery
- File Backup
- System Backup and Restore
- Disk and Partition Clone
- Technical articles
- Mobile articles
- Disk Master Help
- Windows Data Recovery Tutorials
- Windows Secure Delete Tutorials
- Windows Partition Management Tutorials
- Windows File Backup and Restore Tutorials
- Windows System Backup and Restore Tutorials
- Windows Disk Backup and Restore Tutorials
- Windows Clone Tutorials