Time Machine Backup Schedule - A Beginner Guide
Time Machine, a built-in backup utility developed by Apple, allows Mac users to create backups of their data. Introduced in Mac OS X 10.5 Leopard in 2007, Time Machine has been continuously improved and has been a standard feature in subsequent macOS releases.

Time Machine automatically backs up files to an external hard drive or other disk on your Mac, preserving music, videos, apps, documents, and more. In the event of data loss or accidental deletion, it enables quick and easy restoration.
This backup software enables you to save backups to multiple storage devices, such as an internal hard drive, external hard drive (HDD/SSD), USB flash drive, or a Time Capsule.
Preview of Time Machine Backup Schedule
Time Machine Backup Schedule creates a computer data backup at a specific time, allowing for hourly, daily, or weekly backups based on user settings.

When you set up Time Machine, it will perform a full backup of your Mac, which may take some time depending on the amount of data on your computer. After the initial full backup, Time Machine will check for updates every hour and perform incremental backups of any changed or deleted data.
These hourly backups are stored on your computer for 24 hours, while daily or weekly backups are saved for a month and then accumulate until the storage location is full.
How to Set a Time Machine Backup Schedule on Mac
To start a Time Machine Scheduled backup, prepare a backup storage disk, ideally an external hard drive larger than your source disk. Then, follow the steps to set up a scheduled backup with Time Machine on your Mac.
Step 1. To connect an external hard drive to your Mac, first, ensure it is properly plugged in and securely seated in the USB port. Next, check your Mac's Disk Utility to see if the external hard drive is detected.
Step 2. Open the Time Machine with the following path:
For macOS Ventura or later: To access Time Machine settings, click on the Apple menu, then select "System Settings" from the dropdown list. In the System Settings window, click on "General" in the sidebar.
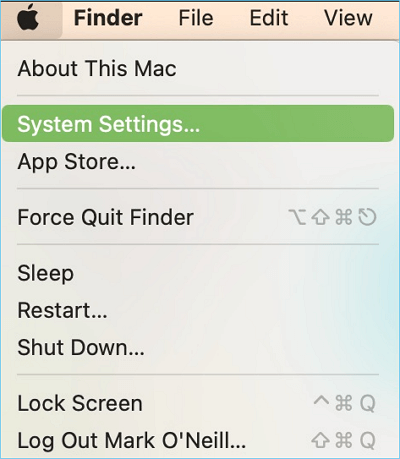
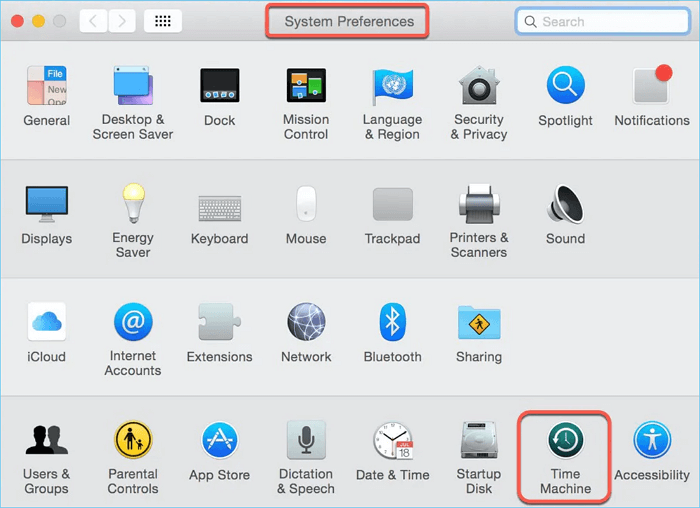
For earlier versions of macOS: Choose Apple menu - System Preferences - Time Machine.
Step 3. If you're using Time Machine for the first time, it will ask if you want to use the hard drive as the target disk. Click "Use as Backup Disk". If you're not using it for the first time, click "Select Backup Disk..." to add the target disk.
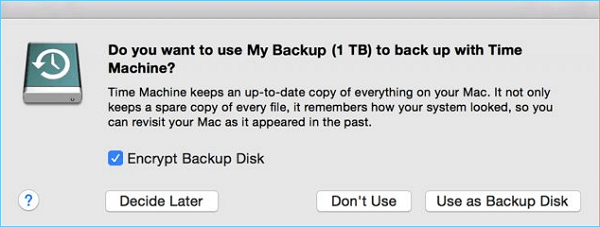
To protect your data from being leaked, you can also check the "Encrypt Backup Disk" option.
Step 4. When you finish selecting the backup disk, Time Machine will begin to create a backup automatically, following a scheduled backup plan that includes regular backups at set intervals.
- Hourly backups for the past 24 hours
- Daily backups for all previous month
- Weekly backups for all previous months
- The oldest backups are deleted when your disk becomes full.

How to Change Time Machine Backup Schedule on Mac
Here are the steps to change the Time Machine backup schedule on a Mac:
Step 1. Open Time Machine settings, and click Options.
Step 2. Click the "Back up frequency" option, and choose a backup frequency. It only provides four options:
- Manually
- Once every hour
- Once every day
- Once every week
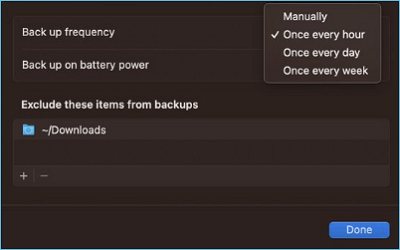
Step 3. When you select a frequency, click "Done" and the backup will run automatically at that interval.
If Time Machine still can't meet your needs about schedule backup, you can turn to some third-party backup software, such as Qiling Disk Master pro, which will provide more customized backup choices.
Conclusion
Time Machine Backup Schedule is a useful tool for Mac users to regularly back up their data, ensuring that important documents, photos, music, and applications are stored safely and protected from unexpected loss or damage.
By using this schedule, Mac users can rest assured that their valuable data is backed up in time.
Related Articles
- How Does an SSD Work | SSD VS HDD 2023 - Qiling
- Samsung Portable SSD T7 Processes Fast Transfer Speed with Robust Security
- What Is MacOS Extended Journaled? [Updated 2023]
- Windows 11 Taking Forever to Install? Get Complete Guide to Fix Windows 11 Slow to Install Issue
- How to Remove Bing from Chrome
If you keep having Bing hijack your browser and want to remove Bing from Chrome, read this article. Learn all the methods to remove bing from Chrome, such as removing Bing from a search engine, uninstalling suspicious extensions, etc. - How to Repair Install Windows 10 in 3 Different Ways
Repairing Windows 10 installation involves reinstalling the operating system while keeping your programs, settings, and files intact. There are three common methods to do a repair install of Windows 10, which can be used to resolve various issues with the operating system. This article will guide you through the process, allowing you to choose the most suitable method for your needs.