How to Format NVMe SSD in Windows 10/11 [Full Guide]
Key Takeaways
To format an NVMe SSD in Windows 10/11, you can use Qiling Disk Master, Disk Management, or Command Prompt. With Qiling Disk Master, you can quickly and easily format your NVMe SSD by selecting the drive, choosing the format type, and clicking "Format".
Go to Solutions
To-Do List Before Formatting NVMe SSD
How to Format NVMe SSD Windows 10/11
After Formatting - Enter TRIM on SSD to Optimize Performance
Can You Format NVMe SSD?
Formatting an NVMe SSD is a necessary step in preparing it for use, and there are several reasons why it's done. One common reason is to erase any existing data on the drive, which can be especially important if you're buying a used SSD or one that's been returned. Formatting also helps to reset the drive's partition table and file system, which can become corrupted over time.
People format NVMe SSDs for two main reasons. Firstly, it's for compatibility reasons - many devices, such as smartphones and tablets, use different file systems than traditional hard drives, making it necessary to format the drive to ensure the device can read the data. Secondly, formatting the drive allows you to ensure compatibility with your device.
People format NVMe SSDs to improve performance and efficiency by clearing out unwanted files and programs, effectively resetting the drive to its factory settings.
Further Reading: Format Hard Drive from BIOS Windows 10
To-Do List Before Formatting NVMe SSD
#1. Backup Important Data
Before formatting an NVMe SSD, back up any critical data to a separate storage location, such as an external hard drive or cloud storage service, using free backup software that supports NVMe drives. This ensures that important files and settings are preserved and can be safely cleared from the SSD.
#2. Select Quick Format & Full Format
Quick formatting a drive deletes files and folders, while full formatting writes over data with zeroes, making recovery more difficult. Quick formatting is usually sufficient, but full formatting is a better option if sensitive data needs protection. Quick formatting is a quick and easy way to refresh a drive, but doesn't protect data as well as full formatting does.
How to Format NVMe SSD Windows 10/11
Here are three methods you can choose to format your NVMe SSD. If you are unfamiliar with Disk Management or command lines, we recommend the first option, which finishes formatting in three steps, allowing you to quickly and easily format your NVMe SSD with minimal technical knowledge required.
#1. Format NVMe via Qiling Disk Master
#2. Use Disk Management to Format NVMe for Windows 10
#3. How to Format NVMe SSD in BIOS
#1. Format NVMe via Qiling Disk Master
Qiling Disk Master is a reliable and free SSD format tool that makes it easy to format your SSD drive in just a few steps. This user-friendly tool also offers additional features, such as resizing, moving, splitting, merging, creating, deleting, and converting partitions on your SSD drive.
Qiling Disk Master provides a range of features including disk/partition clone, dynamic disk manager, and more, making it an excellent tool to help manage your SSD drive.
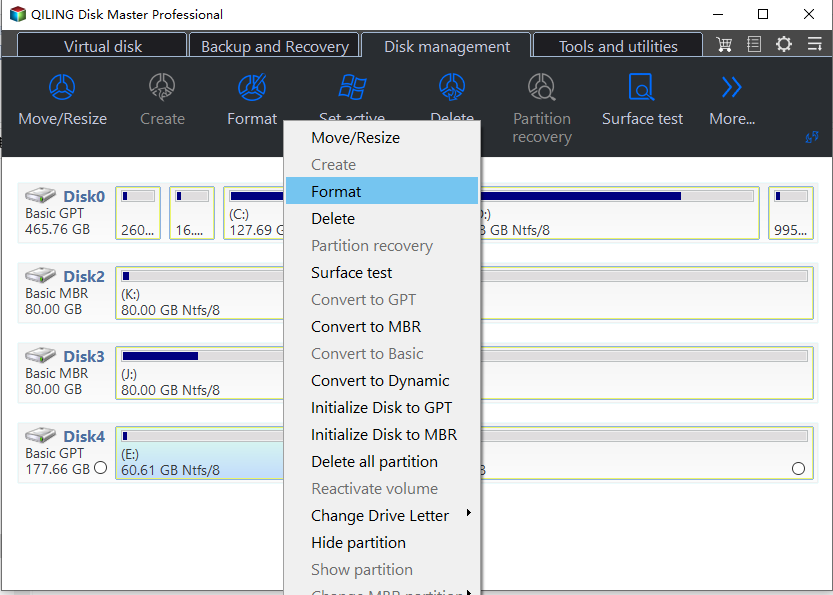
Step 1. Run Qiling Disk Master, right-click the hard drive partition you intend to format and choose "Format".
Step 2. In the new window, set the partition label, file system (NTFS/FAT32/EXT2/EXT3/EXT4/exFAT), and cluster size for the partition to be formatted.
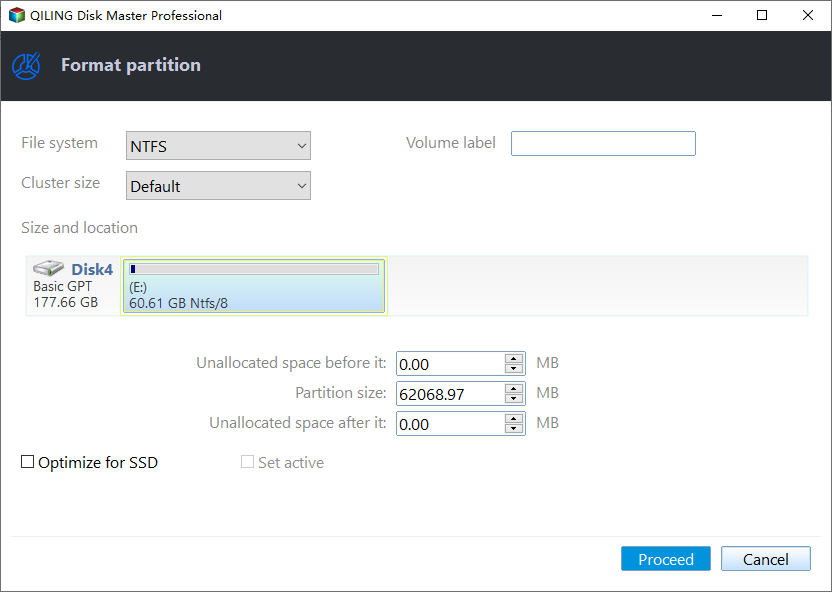
Step 3. To start the formatting process, click the "Proceed" button. This will initiate the formatting of the partition on your hard drive.
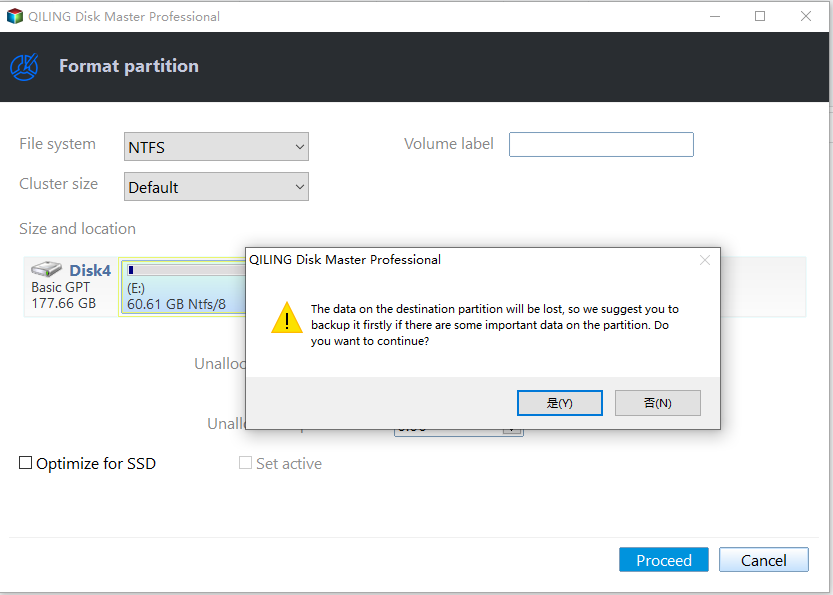
Step 4. Then you will see a warning window, click "Yes" in it to continue.
#2. Use Disk Management to Format NVMe for Windows 10
To Format NVMe Drive:
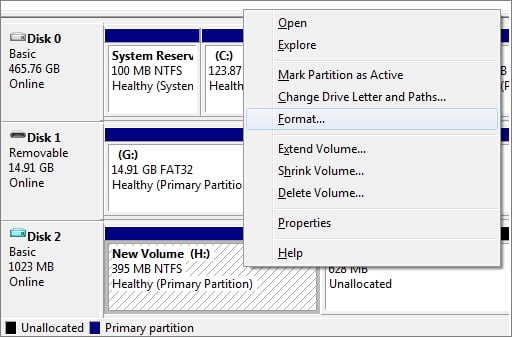
1. Right-click the Start icon and select Disk Management.
2. To format a disk, select it, right-click, and choose Format.
3. Select the compatible file system format.
4. Check Perform a quick format.

5. Click OK.
To Format NVMe for Windows 10 Install:
1. Open Disk Management and find your NVMe drive.
2. Right-click Drive and select Initialize Disk. (Initialize to MBR.)
3. Then right-click the partition and click Format.
4. In the pop-up window, select the file system and click OK.
#3. How to Format NVMe SSD in BIOS
1. Boot your PC with Windows installation media.
2. Click the "Repair your computer" on the Windows Setup window.
3. Go to "Troubleshoot" > "Command Prompt".
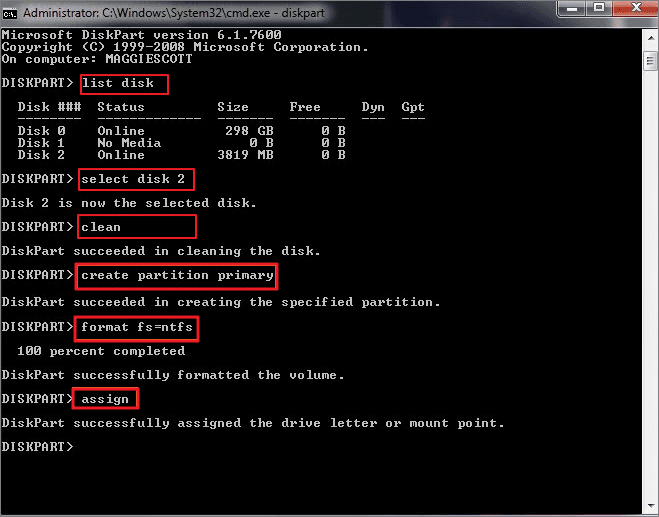
4. Type commands:
diskpart
list volume
select volume X (X = your partition number.)
format fs=ntfs quick or format fs=fat32 quick
assign
exit
If you're interested in formatting your NVMe SSD on Windows, there are three ways to do so. If you have friends who are also looking for this information, you can share this with them by clicking the social buttons.
After Formatting - Enter TRIM on SSD to Optimize Performance
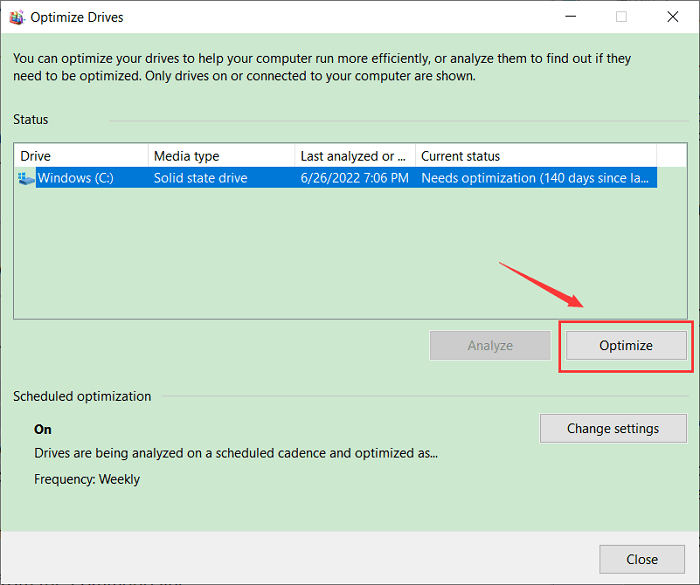
1. To defragment and optimize your Windows drives, open the search menu and type "Defragment and Optimize Drives" on the box, then select the drive you want to optimize from the list. This will open the Optimize Drives window, where you can choose the drive you want to optimize and select the schedule for optimization.
2. Once the "Optimize Drives" window shows, select the SSD and click Optimize button.
Format NVMe SSD Windows 10/11 FAQs
1. How do I format my NVMe SSD enclosure?
Step 1. To connect an NVMe SSD enclosure to your computer, first, use a USB cable to connect it. Then, open the Disk Management utility by pressing the Windows key + R, typing diskmgmt.msc, and selecting the utility from the Run dialog box. Next, locate the NVMe SSD enclosure in the list of devices, right-click on it, and select Format.
Step 3. In the format dialog box, choose the desired file system (NTFS or FAT32) and allocation unit size, then click Format.
2. How do I format my NVMe SSD to FAT32?
Step 1. Open This PC and select the drive you want to format.
Step 2. Right-click on the drive and select Format…
Step 3. In the File System dropdown, select FAT32.
Step 4. Click the Start button.
Step 5. Click OK to confirm.
Step 6. Click OK to format the drive.
3. How do I wipe data from NVMe?
To completely and irrevocably remove data from an NVMe drive, start by using a disk wipe utility to write zeros over all the information on the drive, rendering the data unrecoverable. Once the disk wipe is complete, the drive should be reformatted to prevent any future attempts at recovery.
Related Articles
- SSD Reports Wrong Size? Reasons and Fixes Here!
- How to Fix "No Audio Output Device is Installed" Windows 11
- Fix Error Code 0x8007025D When Installing Windows
- Top 5 Best USB FAT32 Formatter [Free Download]
If you're a USB user, this page is for you. It recommends the best USB FAT32 Formatter to help you format your USB drives to any file system format for different purposes, making it a useful guide for those who need to format their USB drives. - How to Upgrade EMMC to SSD [Tutorial with Pictures]
Upgrading eMMC to SSD can provide faster performance, improved storage capacity, and increased durability, making it a worthwhile investment for those seeking to enhance their device's functionality. - How to Upgrade PS3 Hard Drive without Losing Data
Upgrading the PS3's hard drive or solid state drive (SSD) can significantly enhance gaming performance, but it requires careful execution to avoid losing data.