Solved - Windows Not Booting After Installing New SSD
If your computer won't boot after upgrading to a new SSD, check if the SSD is properly connected to the motherboard and if the BIOS is set to boot from the SSD. You may need to reset the BIOS to its default settings or update the BIOS to the latest version. Also, ensure that the SSD is recognized by the BIOS and that the boot order is set to the SSD.
The user is experiencing issues with a Crucial P3 SSD M.2 NVMe drive, where the PC gets stuck on a black screen with a single white static line when trying to boot with the drive installed. They've tried entering the BIOS but were unable to do so, suggesting a potential compatibility or hardware issue.
You're not alone in experiencing this issue - Windows failing to boot after installing a new SSD is a more common problem than you might think. If you're facing the same issue, don't worry, as it's a relatively straightforward problem to resolve.
Continue reading this article, as we'll show you how to fix this issue!
One-click Fix Windows Not Booting After Installing a New SSD
If you've tried all the above solutions and still can't fix the problem, we highly recommend using Qiling Disk Master with its "boot repair" feature. This feature is capable of fixing all boot issues on an SSD or HDD, making it boot Windows successfully.
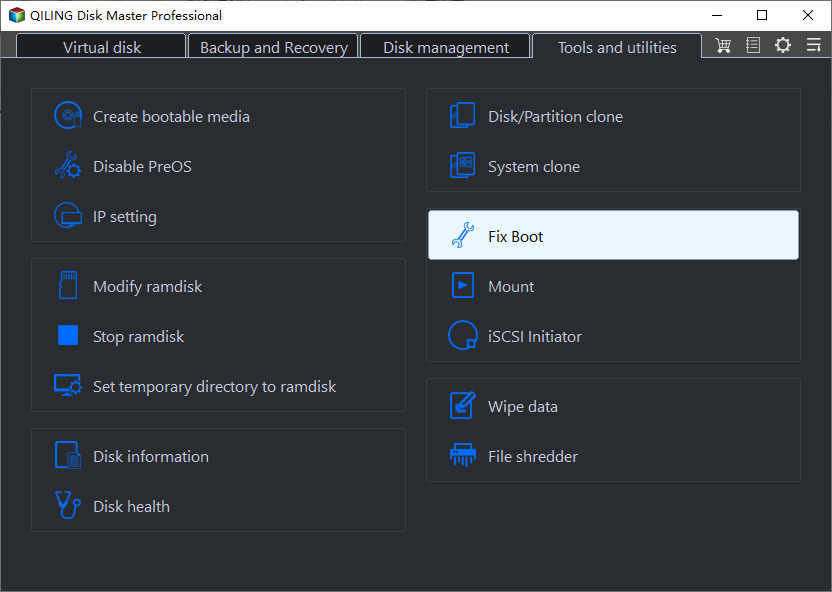
Step 1. Start Qiling Disk Master after connecting the external drive/USB to your computer, go to "Tools" and click "Create bootable media".

Step 2. Insert a USB drive or CD/DVD, then click "Proceed" to continue with the installation. You can also burn the Windows ISO file to the chosen storage media.

Step 3. Connect a bootable drive to the new computer, reboot it by pressing F2/Del to enter the BIOS, set the bootable drive as the boot disk, and exit the BIOS by pressing F10.
Step 4. Boot the computer again, enter the WinPE interface, and open Qiling Disk Master. From there, click "Fix Boot" under the "Tools" option.
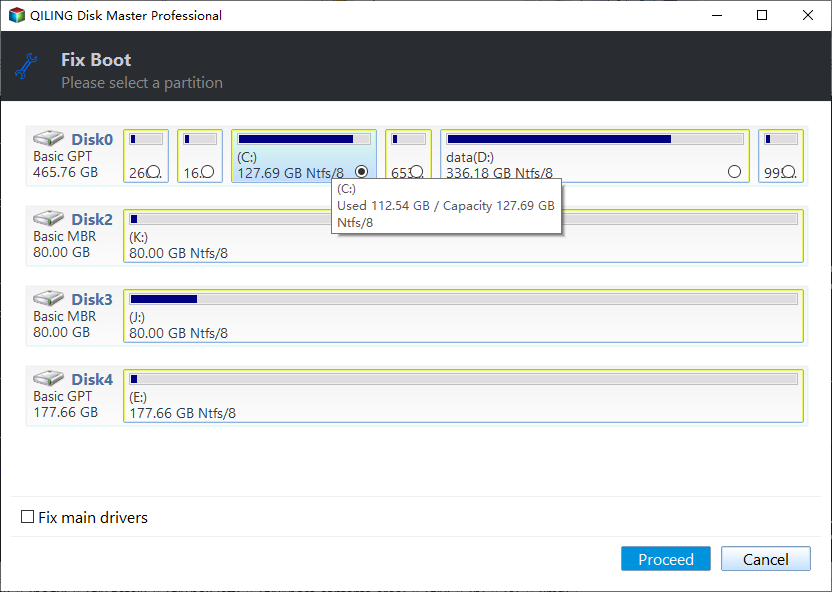
Step 5: Select the system you want to repair and click "Proceed".
Step 6. Wait a moment, and you will receive an alert that the system has been successfully repaired.
⭐Professional Help
If you require additional information, our support team is available to assist you:
Qiling experts are available 24/7 to provide manual services, helping with Windows boot errors, BSOD, and computer boot loops. They offer free evaluations and diagnose and resolve boot failure, Windows stop codes, and OS lag issues using their extensive experience.
- 1. To fix a BSOD error caused by a Windows update, restart your computer in Safe Mode, uninstall any recently installed updates, and then restart your computer normally. If the issue persists, run the System File Checker (SFC) tool to scan and replace corrupted system files.
- 2. To resolve Windows boot errors like "No bootable device found" or BCD file corruption, start by booting from a Windows installation media or a USB drive. Then, navigate to the Troubleshoot menu, select Advanced Options, and choose Command Prompt.
- 3. The Servo software is designed to resolve Windows system or OS boot loop issues caused by 0X000_error codes. It works by automatically detecting and fixing system errors, repairing corrupted system files, and restoring system settings to their default values.
Qiling Disk Master uses an enhanced algorithm to locate and fix multiple types of boot issues in minutes, enabling users to easily resolve the problem and successfully boot Windows.
Fixes - Windows Not Booting After Installing New SSD
If Windows fails to boot after installing an SSD, readers can try six solutions to fix the issue. These solutions offer a range of troubleshooting options to resolve the problem and get Windows up and running smoothly again.
Fix 1. Check the Compatibility Between the Motherboard and SSD
If your SSD isn't compatible with your motherboard, it may not be recognized or function properly, leading to issues such as failure to boot or errors during installation. This incompatibility can occur due to differences in interface types, such as SATA, PCIe, or M.2, or other factors like the SSD's physical size or the motherboard's chipset. To resolve this issue, you may need to replace the SSD with a compatible one or use an adapter to connect the incompatible SSD to the motherboard. It's essential to check the specifications of both the motherboard and the SSD before purchasing or installing them to avoid such compatibility problems.
To confirm if the product is compatible with your device, you can check the following:
Step 1. Remove the motherboard from your computer.
Step 2. The name of the motherboard can be found on a label or sticker, usually located at the top right corner of the motherboard. The model number is typically listed on the same label as the name.
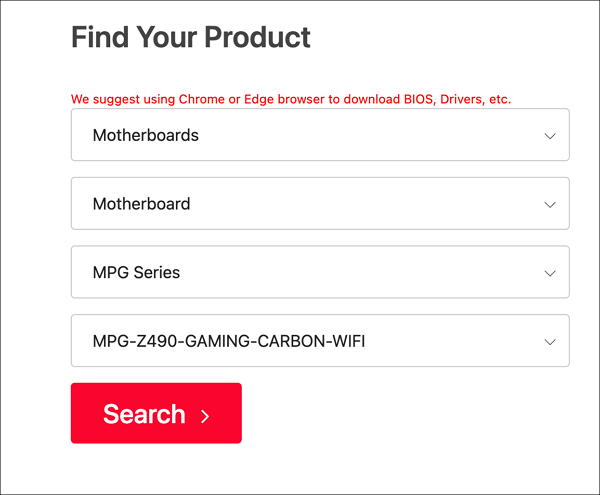
Step 3. Open the manufacturer's website and locate your motherboard.
Step 4. Before purchasing, please confirm that the product supports your type of SSD (Solid-State Drive) as specified in the tech specs.
Step 5. We have an M.2 SSD, and my motherboard supports it.
Share these methods to help more users facing the same boot errors.
Fix 2. Change Boot Order
Windows is not booting after installing a new SSD because the boot order was not changed and the SSD was not set as the primary boot device.
Here's how to do that:
Step 1. Restart your PC.
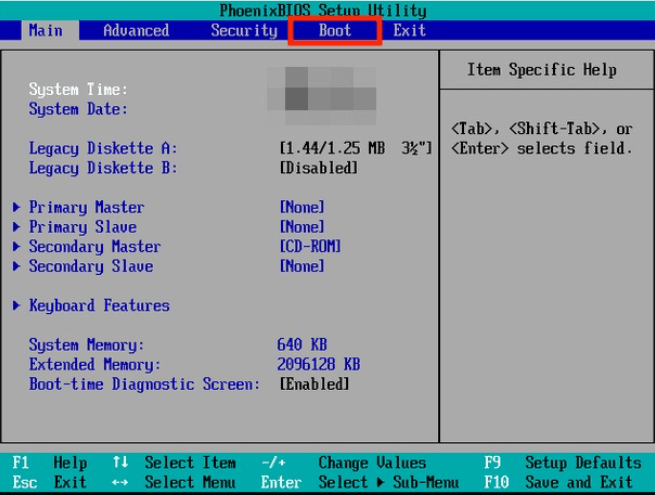
Step 2. Press the designated BIOS key (usually F2, F12, or Del) before clicking the Windows icon to access the BIOS settings when your PC starts up.
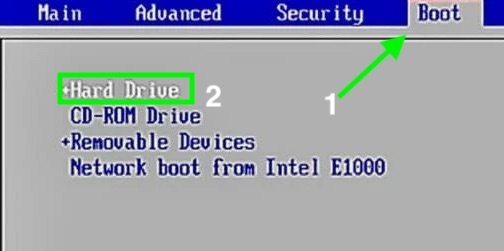
Step 3. Navigate to "Boot" and select "Hard Drive."
Step 4. Now select your SSD as the primary boot device.
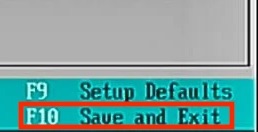
Step 5. Save the settings and close the BIOS window by pressing the F10 key or other boot menu keys.
Your Windows PC should now boot successfully from your new SSD.
You May Also Like:
Fix 3. Update BIOS
The BIOS is a crucial part of the computer's operating system, responsible for ensuring a proper startup and loading of Windows. An outdated or corrupted BIOS can prevent Windows from booting from the SSD, making it a likely culprit in this situation.
Here's how to update the BIOS:
Step 1. On a secondary computer, go to the motherboard manufacturer's website and download the latest BIOS update.

Step 2. Extract the ZIP file.
Step 3. Copy the extracted file to a USB drive.
Step 4. To access your SSD, plug the USB drive into a computer where Windows won't boot from your new SSD, allowing you to restore the system to its original state.
Step 5. Restart your PC and press the BIOS key to open the BIOS menu.
Step 6. The process involves selecting the USB drive as the primary boot device in the "Boot" menu. This allows the computer to recognize the USB drive as the primary device to boot from, effectively allowing the installation process to proceed.
Step 7. Save and exit the BIOS settings.
Step 8. Insert the USB drive containing the BIOS file into the computer.

To fix a PC that won't boot after installing an M2 SSD, start by ensuring the SSD is properly installed and recognized by the motherboard. Check the BIOS settings to ensure the M2 slot is enabled and set as the primary boot device.
This article provides a comprehensive guide on how to fix a PC that won't boot after installing an M2 SSD. The installation process of an M2 SSD can sometimes cause boot issues, and the article explains the reasons behind this problem. It provides step-by-step instructions on how to troubleshoot and resolve the issue, including checking the BIOS settings, updating the UEFI firmware, and ensuring the SSD is properly connected. Additionally, the article discusses common issues that may arise during the installation process, such as incorrect drive configuration or faulty hardware, and offers solutions to these problems.
Fix 4. Reinstall the New SSD Properly
For the installation of the SSD, you should have followed the instructions specific to your type of SSD. If you're unsure, consult the user manual or manufacturer's website for guidance. The installation process typically involves identifying the correct slot for the SSD, removing any protective covering, and securely fastening it in place. If you're still having issues, it may be helpful to consult with a professional or seek further assistance.
Check the connection - Ensure the new SSD is correctly connected to your laptop, whether it's an internal SSD that's been properly placed and its cables are securely connected, or an external SSD with its USB cable or other cables correctly plugged in.
To properly reinstall the SSD, refer to the manufacturer's installation guide for specific instructions. This ensures the correct installation of the SSD, allowing you to boot Windows from it successfully.
How to Install a Second SSD[Comprehensive Guide]
To install a second SSD on your computer, you'll need to determine the type of SSD you have and the type of slot available in your computer. Typically, you'll need to remove the existing drive, then locate the M.2 slot, which is usually found on the motherboard.

Fix 5. Test the New SSD on Another Laptop or PC
If you've tried all the previous steps and still can't boot Windows from your new SSD, try installing it on another PC to see if the issue is with the SSD itself.
If the SSD has a problem, you can return the damaged product for a replacement, or use the warranty to get it fixed if it's still under warranty.
Kindly share these fixes on your social media to help more people, and to do that, click the following buttons.
Conclusion
If you're getting a Solid State Drive (SSD) for your PC, first check if your motherboard is compatible with it, and then change the boot order to have Windows successfully boot from your new SSD after installation.
If the SSD doesn't work, try using it on a different computer to see if it works there. If it doesn't, it's likely the SSD is damaged and needs to be replaced or repaired under warranty.
If you successfully booted Windows after installing a new SSD, share this article with your friends who are having trouble booting Windows after installing a new SSD in their PC, and help them out!
Windows Booting Erro After Installing New SSDFAQs
Do you have any other questions about why Windows is not booting your new SSD after installing it? Here, we answer a few questions about it.
1. Why is Windows not booting after installing a new SSD?
There are several reasons why you could be facing the issue; however, here are a few of them:
- The SSD may not be properly connected to the motherboard.
- Incorrect boot order in the BIOS.
- The SSD may be damaged or faulty.
- Data corruption.
- Wrong SATA mode.
- The computer's BIOS may not be compatible with the new SSD, which could prevent the SSD from being recognized by the computer.
- And more!
2. How do I boot my computer after installing a new SSD?
To change the boot order in your PC's BIOS after installing a new SSD, follow these steps:
- Restart your PC and open the BIOS menu.
- Open the "Boot" section.
- To change the boot order, go to the BIOS settings, navigate to the "Primary Boot Order" section, and select your new SSD as the primary boot device. This will ensure that your system boots from the SSD instead of the old hard drive.
- Save and exit the settings.
3. Why won't Windows 10 install on a new SSD?
If Windows 10 installation on an SSD fails, it may be due to a faulty SSD, a corrupted installation media, or an issue with the UEFI firmware. In some cases, the installation may also fail if the SSD is not properly initialized or if there are compatibility issues with the SSD and the system's hardware. To resolve the issue, you may need to try reinstalling Windows 10 on a different SSD, checking the installation media for corruption, or updating the UEFI firmware to the latest version.
- The SSD is not formatted correctly.
- There is a problem with the SSD.
- There is a problem with the BIOS.
- The SSD is not compatible with your computer.
- The Windows 10 installation media is corrupt.
Related Articles
- SSD Slow Boot Windows 11 | Boot Windows 11 from SSD
- Fix 'The Selected Disk Has an MBR Partition Table' Error Efficiently
- Unable to Format SD Card? Fix SD Card Won't Format [2024 Tutorial]
- Top 5 Best Free Data Wipe Software for Windows [Pros & Cons] 2024
- How to Fix 3DS Could Not Detect SD Card in 6 Ways
If your 3DS can't detect an SD card, don't worry - this article provides can help. We've got easy and efficient solutions to help you fix the “Could not detect an SD card” error. Simply follow one of the methods outlined here to get your SD card detected and the software displayed on your 3DS. - Top 8 Ways to Fix Attempted Write to Readonly Memory BSOD Error in Windows 11/10
Windows 11/10 users may encounter a frustrating issue where the operating system repeatedly asks to restart the PC due to an Attempted Write to Readonly Memory BSOD error.