The Media Is Write-Protected? How to Fix It in Windows
| Workable Solutions | Step-by-step Troubleshooting |
|---|---|
| #1. Check the Physical Switch | Step 1: Locate the physical write protection switch on the device. The location of the switch will vary depending on the...Full steps |
| #2. Uncheck Read-only | Step 1: Open "File Explorer" and select the write-protected files. Step 2: Right-click the file and click "Properties"...Full steps |
| #3. Run CMD | Step 1: Press Windows + R key simultaneously and type "cmd". Step 2: Type "sfc /scannow" and press Enter...Full steps |
| #4. Scan Virus | Step 1: Click "Update & Security" in Windows Settings. Step 2: Click on "Windows Security". Step 3: Click...Full steps |
| #5. Use Qiling CleanGenius | Step 1: DOWNLOAD and install Qiling CleanGenius (free) on your computer. Step 2: Run Qiling CleanGenius...Full steps |
| Bonus Tip: Format Device after Removing Write Protection | Step 1: Right-click the external drive or USB you intend to format and choose "Format". Step 2: Set the Partition label...Full steps |
What Does It Mean "The Media is Write-protected"?
The media is write-The "write-protected" error occurs when a disk is unable to be written to, often due to physical switches or software protections. This can be a helpful security measure to prevent accidental writing or malware infections, but can be frustrating if you need to write to the media and don't know how to disable the protection. To resolve the issue, the write-protection must be disabled, allowing you to access and modify the disk as needed.
Fix "The Media is Write-protected" in Windows (5 Methods)
The "the media is write-protected" error occurs when the device's write protection is enabled, preventing any changes to the files on the device. This can happen due to various reasons, such as accidentally enabling the write protection feature or using a device that has a built-in write protection mechanism. To resolve this issue, you can try disabling the write protection feature on the device, using a different device to access the files, or formatting the device to start fresh.
The "media is write-protected" error can occur due to various reasons, including a corrupted file system, incorrect permissions, or physical damage to the storage device. Fortunately, this issue can be resolved with some quick and easy fixes, which will help remove write protection and get your storage device working again in no time.
Relate articles about removing write protection:
#1. Check the Physical Switch when the Media is Write-protected
To resolve the error, check if the physical write protection switch on the device is turned on, which prevents writing to the media. Follow the provided instructions to check the switch.
Step 1: The physical write protection switch on a device is typically located on the side or bottom, and its position may vary depending on the device's make and model.
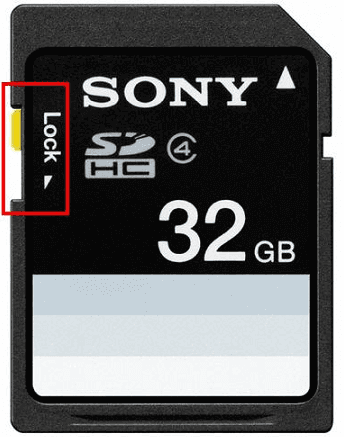
Step 2:If the switch is in the "on" position, you need to switch it to the "off" position to write to the media.
Step 3:The switch was moved to the "off" position, and writing to the media was tried again. If still unable to write, contact the device manufacturer for further assistance. Alternatively, try the fixes listed in our article.
#2. Uncheck Read-only in Properties when the Media is Write-protected
"The media is write-The "protected" error occurs when a file or drive is set to read-only, preventing modifications. To resolve this, disable the read-only setting in the file or drive properties menu, allowing users to copy, delete, or move files without issues.
Step 1: Open "File Explorer" and select the write-protected files.
Step 2: Right-click the file and click "Properties".
Step 3: You can uncheck the "Read-Only" option under the "General" tab.

#3. Run CMD to Remove Write Protection
If the issue persists, it's possible that corrupted system files are causing the "media is write-protected" error. To troubleshoot this, you can run the System File Checker (SFC) scan and Deployment Image & Servicing Management (DISM) scan. The SFC scan checks and fixes corrupted system files, while the DISM scan repairs the Windows image. To run these scans, follow the steps provided.
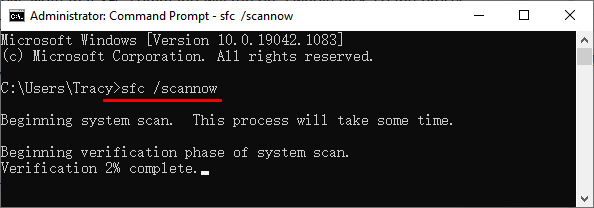
Step 1: Press Windows + R key simultaneously and type "cmd".
Step 2: Run the command "sfc /scannow" in the Command Prompt and press Enter. This may take around 20-30 minutes to complete, so do not close the Command Prompt during this time.
Step 3: To resolve the issue, restart your computer and open the command prompt again.
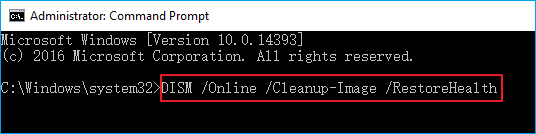
Step 4: Type the following command and press Enter after typing each command.
- Dism /Online /Cleanup-Image /CheckHealth
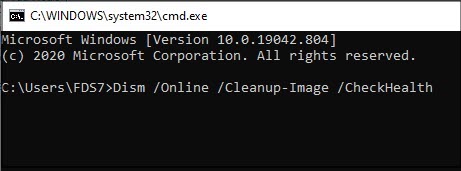
- Dism /Online /Cleanup-Image /ScanHealth
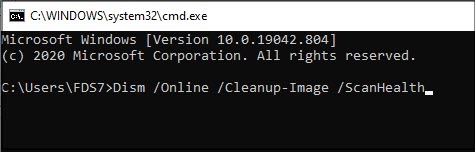
- Dism /Online /Cleanup-Image /RestoreHealth
#4. Scan Virus to Remove Write Protection
The "media is write-protected" error may be caused by malware that has infected your computer, as some malware can write-protect drives to prevent their own deletion. If you suspect malware is the issue, scan your system with an antivirus program, such as Windows Defender, to identify and remove the malware.
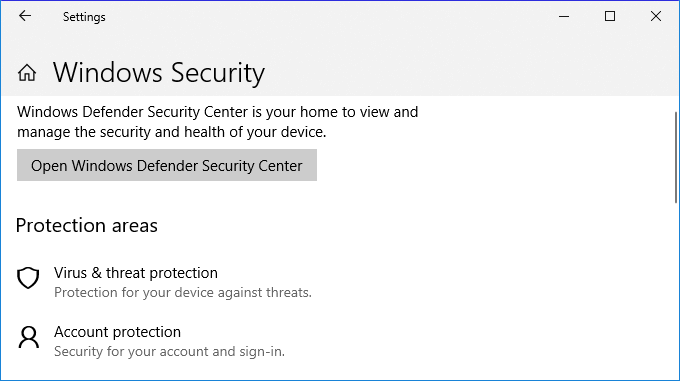
Step 1: Click "Update & Security" in Windows Settings.
Step 2: Click on "Windows Security".
Step 3: Click "Virus & threat protection" under the "Protection area".
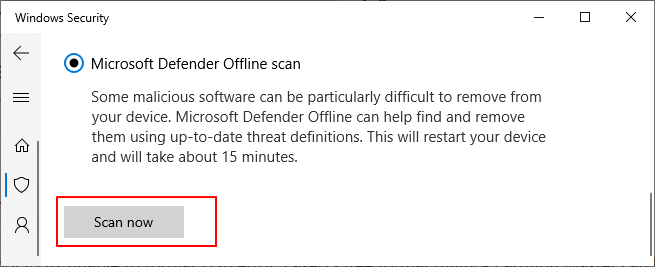
Step 4: Click "Scan options". We recommend you to choose "Microsoft Defender Offline" here.
Step 5: Click "Scan now".
#5. Use Software to Remove Write Protection
To remove write protection, you can use Qiling Clean Genius, a software designed to clean up drives and remove write protection. Simply download and install the software, then launch it, and the software will scan the drive and remove any present write protection.
If you're not tech-savvy and unfamiliar with command lines, - there are graphical-based solutions to help you remove write-protection from your hard drives, USB drives, and even SD cards.
Qiling CleanGenius is a tool that helps fix issues on drives without requiring command-line knowledge.
Here's an easy-Here's a brief guide on how to use this tool to get your issues sorted:
Step 1: DOWNLOAD and install Qiling CleanGenius (free) on your computer.
Step 2: Run Qiling CleanGenius on your PC, select Optimization and choose the Write Protection mode.
Step 3: Select the device that is write-protected and click Disable to remove the protection.
Bonus Tip: Format Device after Removing Write Protection
The media is write-If your device is write protected, you can fix the issue by using the methods provided. Once write protection is removed, you can format your device using a partition manager like Qiling Partition Master.
- To format an external drive or USB, click on the drive you intend to format and select the "Format" option.
- Set the Partition label, File system (NTFS/FAT32/EXT2/EXT3/EXT4/exFAT), and Cluster size, then click "Proceed".
- You clicked "OK" in the Warning window to format the hard drive partition.
Qiling Partition Master offers various partition management features, including resizing, moving, copying, merging, splitting, and converting partitions, all while preserving data, and supports Windows 10/8.1/8/7 and XP.
Conclusion
When the media is write-If a media device is write-protected, it means the data on it can't be modified, which can be frustrating for users, especially if they don't know how to resolve the issue. Fortunately, there are solutions to remove write protection, and following the instructions carefully can help prevent any damage to your computer. With a bit of effort, you should be able to get rid of the write protection and regain access to your files.
Related Articles
- Windows 11/10 Boot Repair: Fix UEFI Boot Issue on Windows 11/10/8/7
- [Fixed] Windows Resource Protection Found Corrupt Files but Was Unable to Fix Some of Them
- Full Guide to Fix Windows 11 Slow Startup Error
- How to Wipe or Erase Hard Drive in Windows Server - Qiling
- How to Fix Windows 10 Slow After Clone - Effective Ways⭐
If you've cloned your Windows and are now experiencing slow performance after cloning, - this guide is here to help. By following the steps outlined in this comprehensive resource, you'll be able to fix the Windows 10 slow issue and optimize your SSD after cloning, getting your system back to its usual speed and efficiency. - How Do I Completely Wipe C Drive [Full Guide]
If you're looking to erase all information on your C drive but haven't found a practical method yet, this article provides a full guide with easy steps to help you wipe your C drive.