Migrate Windows OS to SSD
Which Method is Right for Me
Both methods will result in a bootable SSD in Windows, but one method may be more suitable for your needs.
1. To keep your original OS, programs, and data on your system drive, migrate your current OS to the SSD for free with Qiling Backup.
2. If you want a fresh start and don't need your previous data, you can do a clean install of Windows on your SSD.
Migrate Windows OS to SSD
Clone an entire system drive to an SSD
Preparations:
- A SATA Cable
- An SSD
- A screwdriver
- Qiling System Clone Software - Qiling Disk Master
The total capacity of the system and boot drives exceeds the used space on them.
To resolve the issue, open Disk Management, delete all partitions, and then recreate the partition. This should allow the disk to be recognized and displayed as allocated.
The partition style of the target disk is the same as the source disk, achieved through initializing or converting it.
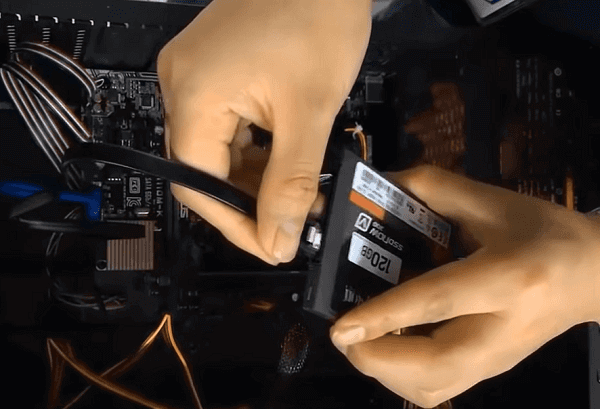
Step 1: Connect the SSD to Your Computer
To install an SSD, first, open your computer case using a screwdriver. Next, connect the SSD to your computer with a SATA cable.
Step 2: Launch Qiling Backup
Run Qiling Backup for Windows 10 Clone. Select "System Clone" on the tool panel by clicking the icon at the right top corner.

Step 3: Customize the Clone
The source will automatically be selected to be your system drive.
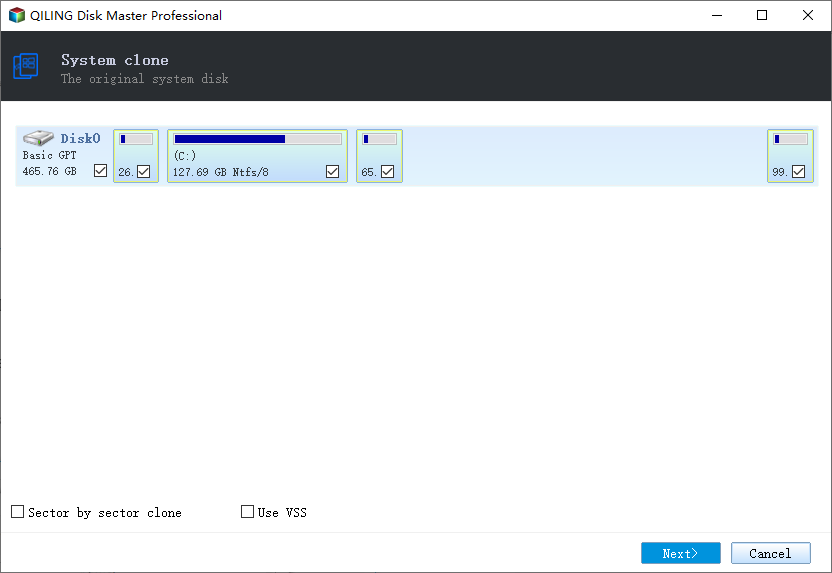
To begin the process, you need to select the target drive, which is the new drive where you want to clone the existing drive. This is the drive where you will be cloning the data from the source drive.

Step 4: Preview the Clone
Before you proceed, tick "Optimize for SSD", then click "Proceed".

The speed of cloning depends on the hardware and operating system, and users can choose to shut down their computer automatically when the clone is complete.
Step 5: Boot from the SSD
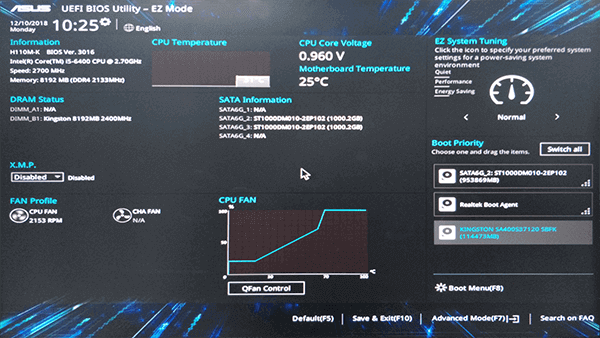
To complete the process, you'll need to change the boot order in your computer's BIOS settings so that it boots from the new SSD. If the cloned SSD doesn't boot, you can refer to the provided page for troubleshooting assistance.
- Restart your computer
- Press F2/F12/DEL to enter BIOS
- Set to boot from the SSD
Fresh Install Windows OS on SSD
Preparations:
- Empty USB (8GB min)
- An empty SSD
- Windows product key (activate after the installation)
- Access to Download Windows Media Creation Tool*
You can download Windows 10, Windows 8.1, and Windows 7 ISO files to access various versions of the operating system.
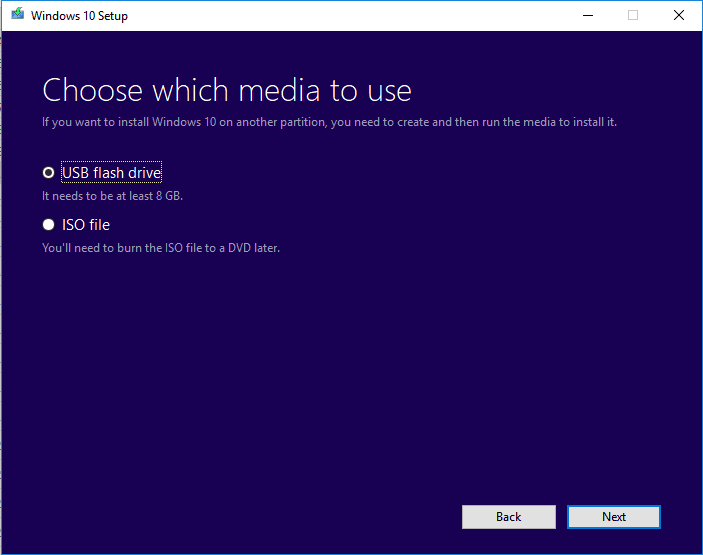
Step 1: Create Windows Installation Media
1. Download the Media Creation Tool on another PC that is connected to the internet.
2. Create Windows Installation Media on empty USB (min 8GB).
Step 2: Prepare New SSD
1. Remove the old disk and connect the new SSD (only the SSD should be attached to PC).
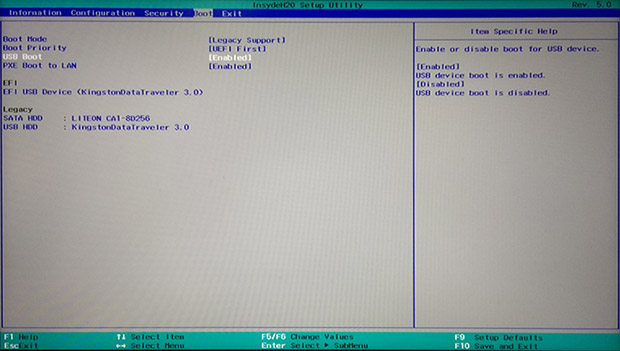
2. Boot PC from Installation Media.
Insert the bootable USB, change the BIOS boot order to prioritize it, and then reboot the PC from the installation media.
Step 3: Setup Before the Installation
1. Set language, and other preferences.
2. Boot PC from Installation Media.
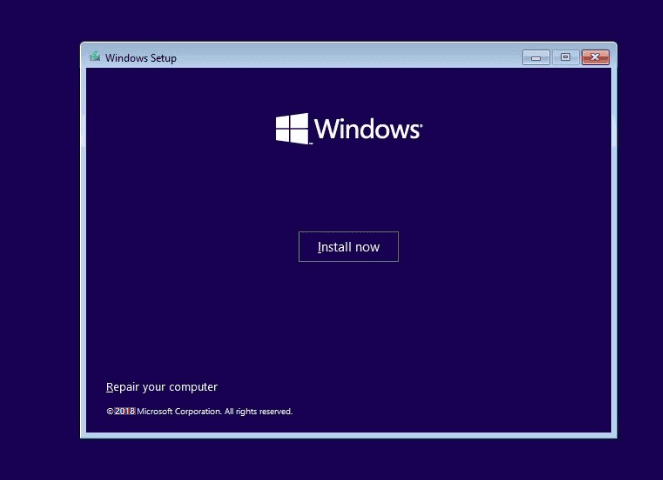
Step 4: Install Windows System on SSD
1. Skip entering a product key and select "Install Windows only".
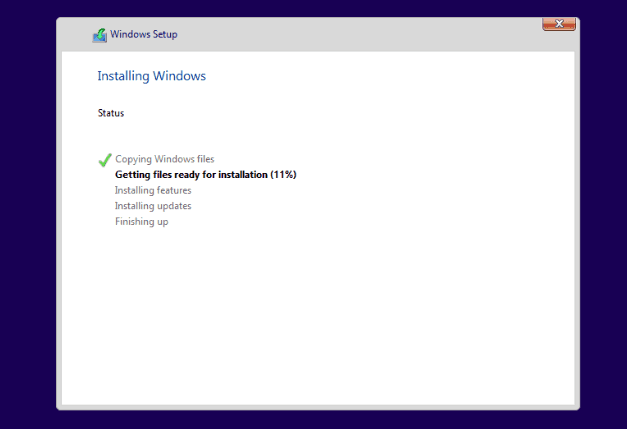
2. To install Windows OS to the new SSD, select the option to install it, and wait for the process to complete.
Step 5: Set up PC After Installing Windows
1. After the installation, restart your PC.
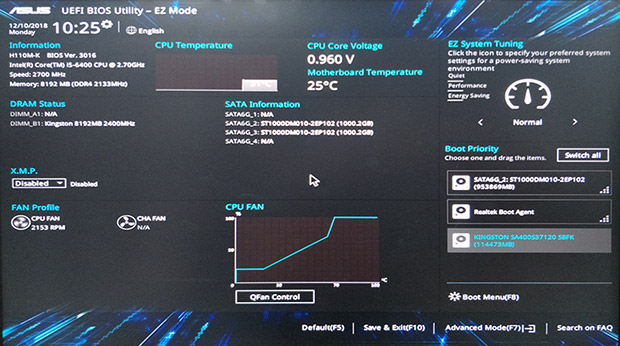
2. To change the BIOS order and set it to boot from the new SSD, follow these steps: Enter the BIOS settings by pressing the designated key (usually F2, F12, or Del) when the system is booting up. Navigate to the Boot Order section and look for the option to set the boot order.
Step 6: Reinsert the HDD
1. Shut down the PC, leave the installation USB plugged in.
2. Reinsert the old disk (HDD), then restart PC.
Step 7: Download Needed Drivers
1. Download and install all required drivers on the new Windows OS. This includes graphics, sound, and network drivers, which can be obtained from the manufacturer's website or the Windows Update feature.
2. You can delete the system partition on the old disk and use it as a data disk. This will free up space on the old disk and allow you to use it for storing files and other data.
Other Topics You May Like
- How to Backup Files on Computer? Here Is The Guide
- Find the Best Way to Back up Computer Data[The Complete Backup Guide]
- WD Backup Software | Backup Hard Drive with The Best Free Software - Qiling Backup
- What is Disk Imaging? Free Disk Image Software
- Best Free NAS Backup Software – Qiling
- How to Free Backup Windows 10 to OneDrive? – Qiling
- How Do You Backup Your Computer Data? Find the Best Way to Protect Data!
- Windows 10 Backup and Restore - Full Solutions to Protect System, Data and Applications
- How to Backup/Save Outlook Emails to Hard Drive Automatically in 3 Ways
- Windows Backup | Where Are the Backup Files Stored - Qiling Backup
- 3 Windows Backup Options | Make Full Backup on Windows 10 - Qiling Backup
- How to Backup Computer to Cloud? 7 Cloud Backup Solutions Available - Qiling Backup
- What is Disk Imaging? Free Disk Image Software.
- Best Free NAS Backup Software – Qiling
- How to Free Backup Windows 10 to OneDrive? – Qiling
- How to Copy Recovery Partition to USB/New Hard drive in Windows
- How to Backup to OneDrive with OneDrive Backup Software
- Backup Microsoft Office before Reformatting Hard Drive or PC
- Data backup: do it right, do it now!
- Is Norton Ghost 15 Crack with Serial Key 100% Working
- Seagate Backup Software Download | Back Up Seagate External Hard Drive
Related Articles
- How to Reimage a Lenovo Laptop Step by Step
Find your Lenovo laptop in bad condition and want to reimage it? This article provides you a clear guide. - Incremental Backup External Hard Drive in Windows 7/8/10
You will learn how to perform automatic incremental backup of an external hard drive with best free incremental backup software - Qiling Disk Master. - (Solved) No Disks Are Available for Use as a Backup Storage Destination
If you have a problem fixing the 'no disks are available for use as a backup storage destination' error, click on this article and learn 5 effective solutions. - Powerful Samsung SSD Image Software to Protect Data
Are you looking for Samsung SSD image software to backup Samsung SSD? Qiling Disk Master will be a great choice, which allows you to make disk image automatically and regularly. - Get System State Backup of Windows 2012 R2 Domain Controller
You will learn how to create a system state backup and system backup of Windows Server 2012 R2 domain controller. The detailed steps are in each method. - Top 10 Ways to Fix Windows 7 Task Manager Not Responding
How to fix Task Manager not responding or opening in Windows 7? This guide will tell you 10 methods to fix the problem.