Acronis Clone Disk Wizard Stuck During Cloning Process - How to Fix
- 🙍♂️User Case
- "I recently got my hands on a WD SN850 1TB drive with Acronis software. I want to clone my previous SSD with 500MB capacity to a recent one. However, it gets stuck after showing a message, 'locking drive C' and then 'Preparing.' Even after leaving it in that condition for a whole night, I could not fetch anything. Can you help me resolve the issue?"
If you're experiencing issues with Acronis True Image hanging when cloning, you're not alone. Fortunately, you've come to the right place for a quick solution. Try the following fixes to resolve the problem: [list the fixes].
Fixes to Solve Acronis True Image Hangs/Stuck When Cloning Disk
Cloning with Acronis can be a tiring process, and getting stuck with the Clone Disk Wizard can add technical complexity to the issue. To resolve this, consider the following instant fixes, which are explained in detail below.
Fix1. Clean Disk Before Cloning
If you're experiencing issues with the Acronis Clone Disk Wizard getting stuck, consider cleaning the disk before cloning. This step may not be necessary but can help resolve the problem and ensure a successful cloning process.
Step 1: To open Computer Management, tap the Start button, then tap on the Control panel, followed by 'System and security', and finally double tap on 'Computer Management'.
Step 2: From the left pane, select 'Disk management' given under 'Storage.'
Step 3: To format a volume, you need to select the volume you want to format and then choose the 'Format' option.
Step 4: If you're using the default settings for formatting, simply tap on 'OK' in the Format dialog box, followed by tapping on 'OK' again.
Fix 2. Installing the New Hard Drive to the Computer
If Acronis True Image hangs when cloning, try to resolve the issue by following a specific method, which can be applied to various laptop or desktop designs, as the process is generally similar, and works with most hard drives, regardless of the brand.
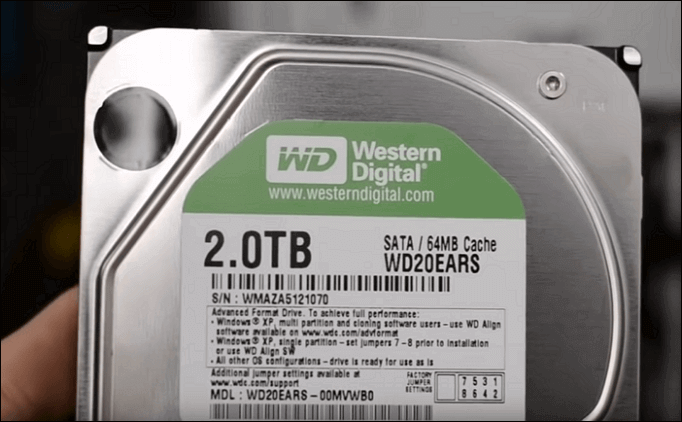
To install a 2TB hard drive on your computer, you'll need to ensure it's compatible with your system. Check your computer's manual or manufacturer's website for specific requirements.
Step 1: To replace the new drive with an old one, start by shutting down your PC and removing the new drive. This will prevent any accidental data loss or corruption.
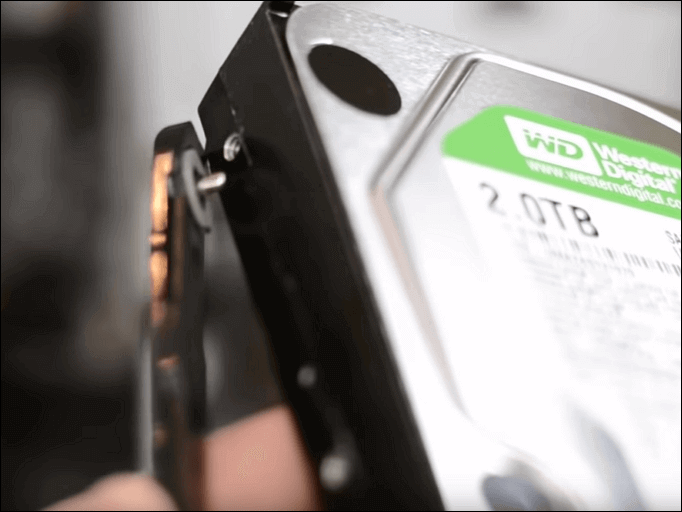
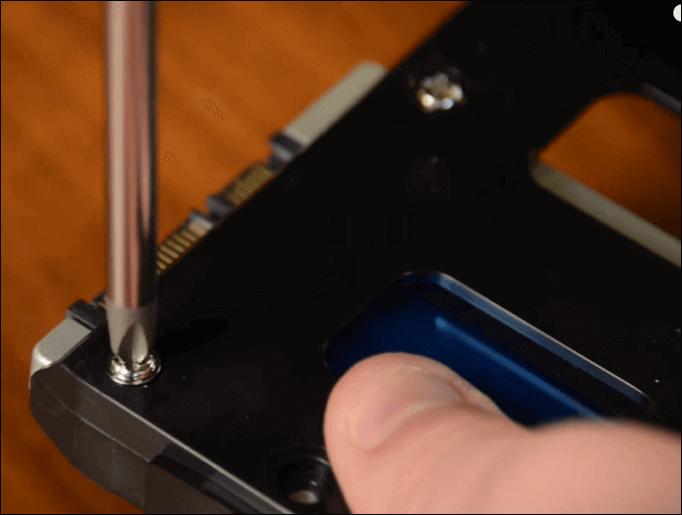
Step 2: To prepare the new drive, unscrew the screws on both sides of the disk, allowing you to access and install the drive.
To upgrade the drive, first, slide the drive bays out of the holes for screws on both sides of the recent drive. Then, move ahead by sliding the drive bays in the holes for screws on both sides of the recent drive.
If you're using an SSD, you may need to add a mounting slot to fit it with screws in 3.5-inch places, or use a drive adapter for compatibility.
Step 3: Now go ahead with removing the desktop computer case.
If you find it locked by screws, use a screwdriver to remove them.
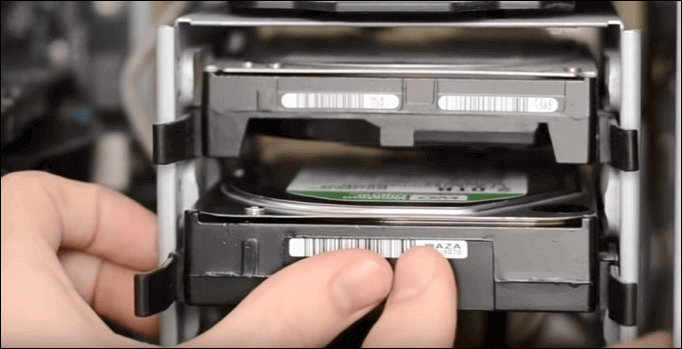
Step 4: Insert your new drive into the computer case, placing it next to your old drive.
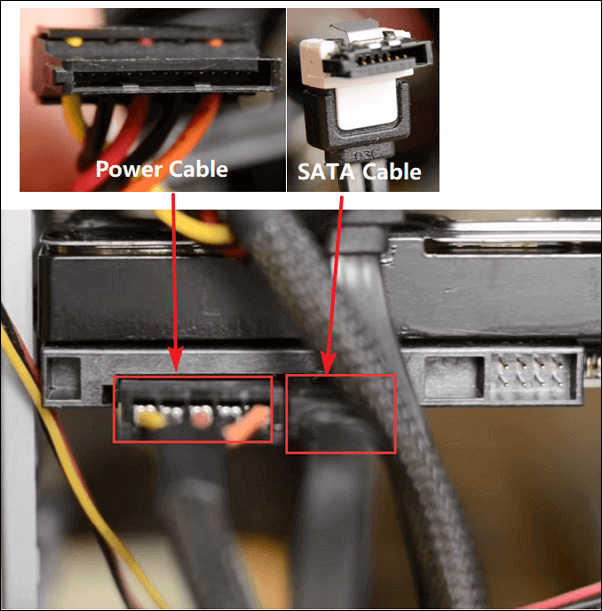
Step 5: To connect the new drive, simply attach it to the computer's motherboard using a SATA cable, and also ensure the power cable is securely plugged in.
Step 6: Reboot the computer after closing the computer case.
Fix 3. Create a Bootable Rescue Media to Boot
If you're having trouble with the Acronis Clone Disk Wizard, you can use rescue media to recover your data if you have a PC with crucial and valuable files that won't boot up. This fix can help you recover your important data.
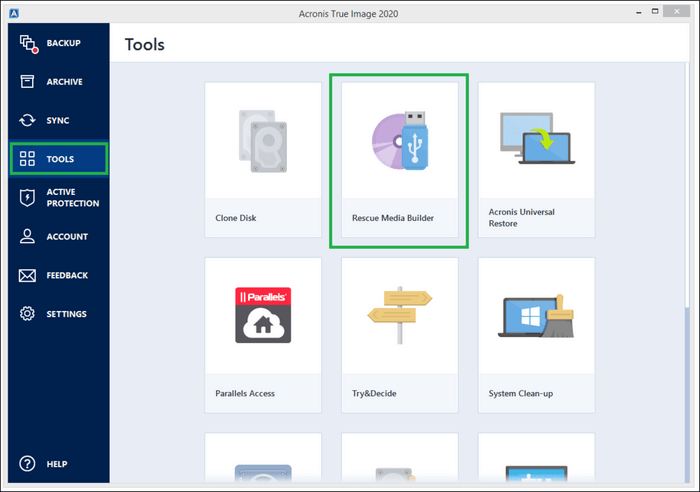
Step 1: Tap 'Rescue Media Builder' from the Tools option.
Step 2: Opt for methods including media creation, choosing from Simple and Advanced options, and see the results of selecting any of them.
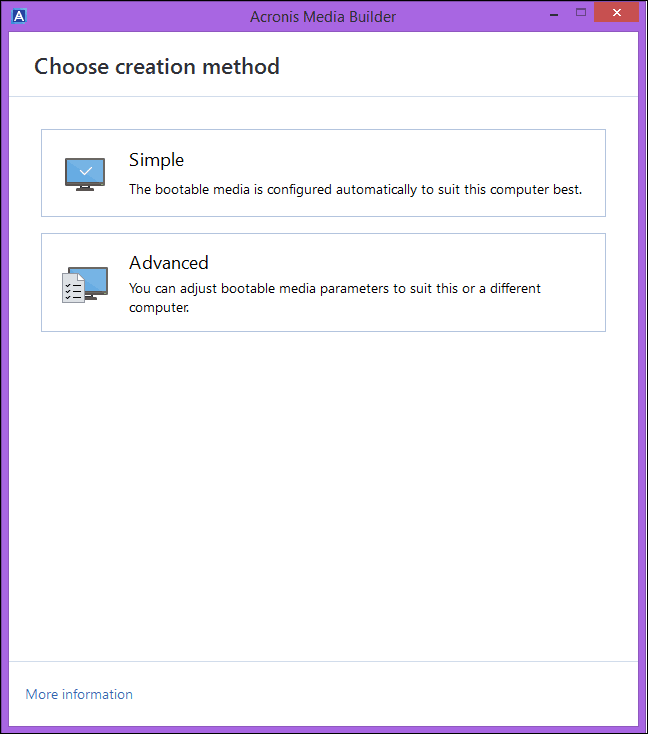
- Simple
Acronis True Image creates media for PC backup, selecting the optimal media type for the user's PC, with WinRE-based media created for Windows 7 and later versions, and Linux-based media for other versions.
- Advanced
Here, you can choose a media type to create rescue media for your PC and another PC running on a different Windows version.
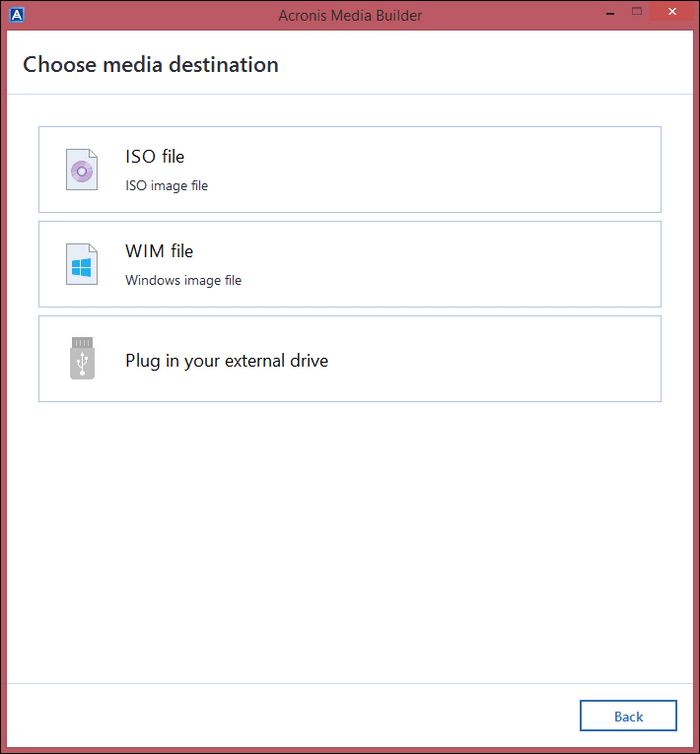
Step 3: To save your media, select the destination where you want to save it, such as a USB flash drive, CD, DVD, or ISO image file. Then, click the "Proceed" button.
Fix 4. Turn Off and Restart Acronis True Image
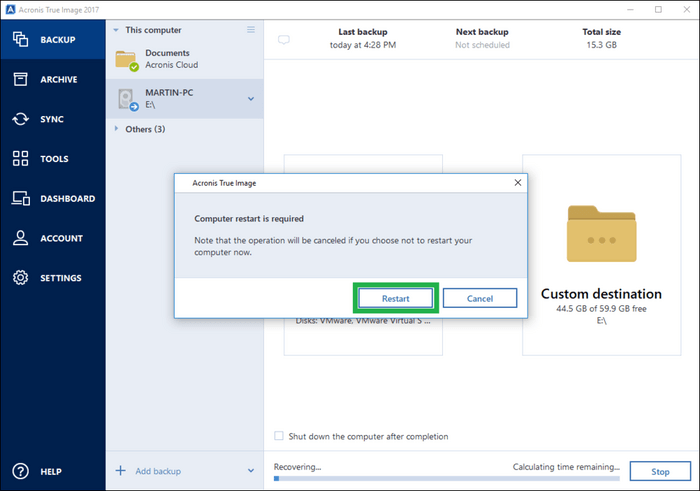
When cloning a WD SSD, you may encounter issues with Acronis True Image, especially if you're using the WD edition. This can cause the program to hang. To resolve this, you can disable the Secure Boot option, which requires using Acronis to start the computer. This can help you successfully clone your WD SSD.
Step 1: Once your PC starts, tap the Delete key to enter BIOS, or alternatively, tap on F2 or F12 keys if that's what your PC requires.
Step 2: Locate the 'Secure Boot' option in your BIOS settings, which can typically be found under the 'Boot' or 'Security' option.
Step 3: Once 'Security Boot' is turned off, tap on F10 to save the settings and exit BIOS.
Fix 5. Try Acronis True Image Alternative - Qiling Disk Copy
Qiling Disk Copy is a suitable alternative to Acronis True Image due to its user-friendly interface, making it easy to use for both basic and advanced users. Its simplicity in cloning functionality makes it a great option for those looking for a straightforward experience.
Check out its significant features below:
- Migrates Windows 10/11 to SSD without reinstallation.
- Upgrades hard drive without data loss.
- Fast and easy upgrade of hard drives along with SSDs.
- Rapid migration of data from one PC to another.
- Effectively backup hard drives.
Note: To initiate a smooth disk copying or cloning process, activate Qiling Disk Copy.
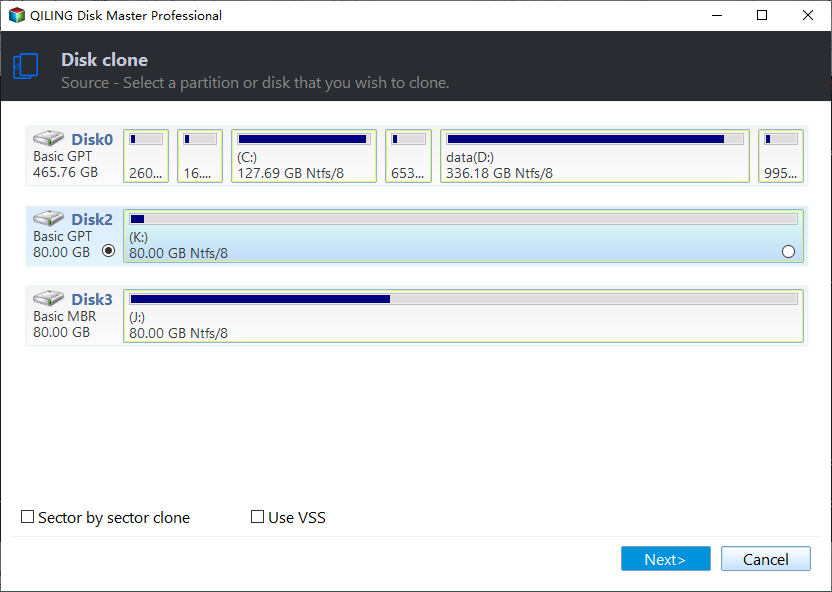
Step 1. Download, install and run Qiling Disk Copy on your PC.
To copy or clone a disk, click on Disk Mode and select the source disk that you want to copy or clone. Then, click Next to proceed.
Note: If you want to copy or clone a disk sector by sector, the destination disk should be at least the same size or larger than the source disk.
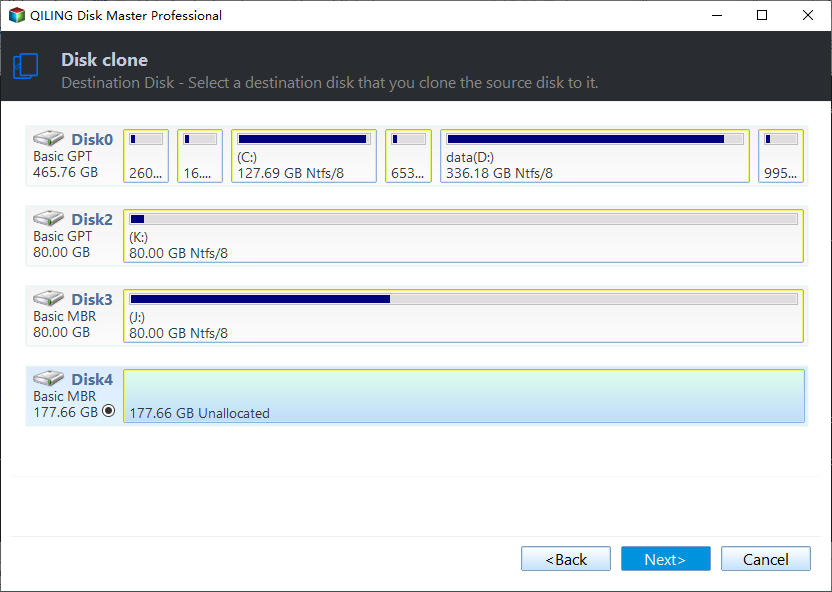
Step 2. Select the destination disk where you want to clone/copy the old disk and click Next to proceed with the cloning/copying process.
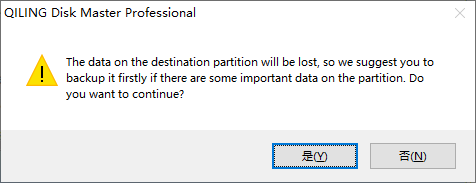
The user is asked to confirm if they want to erase data on the destination disk before the program proceeds with the installation. This is a security measure to prevent accidental overwriting of important data.
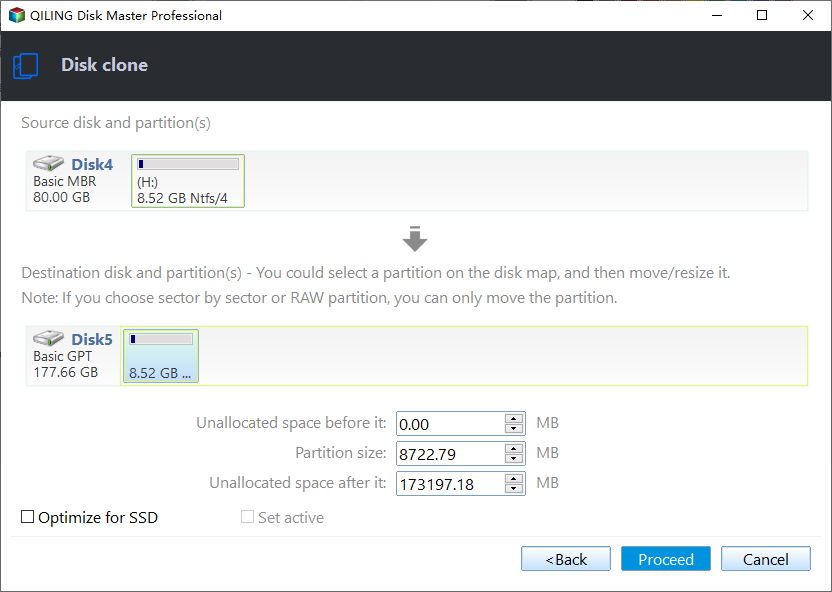
Step 3. To adjust the disk layout, select the option to "Check and edit the disk layout" and then choose one of the available options: "Autofit the disk", "Copy as the source", or "Edit disk layout".
Autofit the disk is recommended.
1. Select the source disk that contains the layout of partitions you want to copy.
Edit disk layout allows you to manually resize or move partition layout on the destination disk, enabling more control over the disk configuration.
If your destination disk is an SSD drive, be sure to select the "Check the option if the target is SSD" option.
Please proceed with the disk cloning or copying process to create an exact replica of the selected disk. This will allow you to have a backup of your data and ensure that you can restore your system in case of any issues.
Comparative Analysis of Qiling Disk Copy and Acronis
- Functionality: Qiling Disk Copy provides a more effective solution when the Acronis clone disk wizard gets stuck, even after reinstalling it.
- Performance: Qiling Disk Copy supports sector-by-sector cloning and allows for disk layout adjustments, differing from Acronis.
- Price: Qiling Disk Copy offers affordable options for various users, in contrast to Acronis Clone Disk Wizard which has premium plans that are less budget-friendly.
- Technical Support: Qiling Disk Copy offers more comprehensive technical support compared to the Acronis clone disk wizard.
We recommend Qiling Disk Copy for cloning your hard drive, as it is a better option than the other available choices.
[Tips] How to Ensure a Smooth Disk Cloning
Here are some quick tips to ensure a smooth disk cloning experience:
- Reliable disk cloning software: When cloning a disk, it's essential to choose software that is trustworthy and preserves the confidentiality of your data throughout the process. This ensures that your sensitive information remains secure and protected.
- Initialize the disk before cloning: Before cloning, ensure you remove all unnecessary programs or temporary files to keep your cloned system clean and organized. This will also help reduce the size of the cloned image, making it easier to store and transfer.
- Shrink source drive partition: To clone the original disk to a smaller source disk, you'll need to resize the source disk partition to ensure a smooth operation.
- Recheck the drive's capacity: To transfer data from a source drive to a targeted disk, ensure that the targeted disk has a larger capacity than the source drive, allowing for a successful transfer of data without any issues.
The Bottom Line
If you're an Acronis user, you may encounter issues with Acronis True Image hanging, which can be caused by several reasons. Finding the right solution for each situation can be time-consuming and challenging. To resolve the issue of Acronis True Image hanging when cloning, we've suggested some fixes that may help sort the problem.
We hold a strong opinion for Qiling Disk Copy as it serves to clone multiple disks without difficulty. As a robust and powerful software for disk cloning, it can also be used for synchronization, backup, or recovery.
Acronis Clone Disk Wizard Stuck FAQs
After going through the write-up, we are sure your query will get resolved. For anything else on your mind, check the following FAQs.
1. Why is Acronis taking so long?
Acronis may take a long time to run due to issues with an external drive, such as being old, corrupted, or improperly connected, which can slow down the reading operation and affect the UI performance.
2. How long does Acronis usually take to clone a disk?
With 500GB of disk capacity, it may take about 1.5 hours to clone the disk using Acronis, considering its 100MBPS speed.
3. How to clone HDD to SSD using Acronis?
To clone an HDD to an SSD using Acronis, follow these steps:
- To clone a hard drive to an SSD, start by connecting the SSD to your PC, then navigate to the cloning software, which is usually found under the 'Tools' or 'Clone Disk' menu.
- Opt for recommended 'Automatic' mode for transfer.
- Select a drive you want to clone and tap the 'Next' option.
- Choose the SSD as the destination drive and tap the 'Next' option. Once you see a prompt, tap 'Ok' to confirm.
- Tap on 'Proceed' and wait for the process to complete.
4. How to migrate Windows 10 to SSD with Acronis?
To migrate Windows 10 to an SSD using Acronis, you can follow these steps:
- Start by launching the Acronis True Image OEM app and tap 'Tools' and then 'Clone Disk.'
- Tap on 'Automatic method' and then tap' Next.'
- Once you've selected the source disk, tap on 'Next' to proceed with the installation process.
- Select the destination disk for the installation and click on 'Next' to proceed.
- Opt for a cloning method.
- Tap on 'Proceed.'
- Once the cloning process starts, you will see a notification.
- Once the process completes, remove the SSD safely.
Related Articles
- How to Fix Mac Not Responding on Mac Ventura/Monterey/Big Sur
- How to Fix Outlook Rules Not Working [8 Ways Included]
- Fix 'Windows Can't Find A System Image on This Computer' Error
- How to Fix Samsung SSD Slow Write Speed on Windows 10/8/7 [Step-by-Step Guides]
- How to Fix Installer Information on The Recovery Server Is Damaged?
Are you a Mac user experiencing a common challenge of The installer information on the recovery server being damaged? In this article, you learn why the installer information error occurred and the right approach to fix the problem in a detailed manner. - IS 75 Degrees Too Hot For a PC? Everything You Should Know
Is your PC getting slow? Is 75 Degrees too hot for a PC? If you have all these questions, then you're in luck. The guide below answers all your PC temperature concerns and help you get the best performance. So, what are you waiting for? Dive straight in and get your PC working smoothly.