Fix Finder Not Responding After Updating to Sonoma with 5 Proven Ways
macOS Sonoma introduces many new features and enhancements, but with every software update, it may sometimes result in unexpected problems. Some customers have reported that the Finder is not responding after updating to Sonoma.
The Finder is a crucial component of macOS, responsible for file management and navigation. If it stops working properly, it can significantly disrupt your productivity.
This tutorial will explore the reasons behind the "Finder not responding" issue after updating to Sonoma and provide five effective solutions to get your Finder back on track. Whether you're a tech-savvy user or a newbie, we have options to help you resolve this issue and get your Finder up and running again.
- Fix 1. Force Quit Finder
- Fix 2. Restart Your Mac
- Fix 3. Delete the Finder Preferences File
- Fix 4. Restart Mac in Safe Mode
- Fix 5. Downgrade from macOS Sonoma to Ventura
Why is Finder Not Responding After Updating to Sonoma
After upgrading to macOS Sonoma, some users have reported that the Finder becomes unresponsive, causing a significant disturbance in the user experience. This critical application, which manages files and navigates the Mac's file system, fails to function as it should, leading to frustration and inconvenience for users.
My MacBook Pro system was on 13 latest version. But today, I got a software update to 14. But, after performing the update, the Finder is not responding at all. All the other app seems to work ok... from the Apple Community
The Finder may stop responding after installing the Sonoma update due to corrupted system files, incompatibilities with third-party apps, or hardware issues, causing unresponsive windows, spinning beachballs, or apps not working on Sonoma, rendering your Mac unusable.
To get your Finder back up and running and your Mac functioning smoothly, consider these five tried-and-true approaches: first, try restarting your Mac to see if it resolves the issue; second, check for any software updates to ensure your operating system is current; third, reset the Finder by quitting it and then restarting it; fourth, reset the System Management Controller (SMC) and Power Management Unit (PMU); and fifth, if none of the above works, consider reinstalling macOS.
How to Fix Finder Not Responding After Updating to Sonoma
After determining why the Finder may stop functioning after a macOS Sonoma update, it's essential to explore alternative solutions. Two major remedies can help resolve this issue: however, keep in mind that you may need to give your system time to execute the instructions between these stages.
Fix 1. Force Quit Finder
You may force quit Finder if it becomes unusable following the Sonoma update. Follow the steps below to see how it's done:
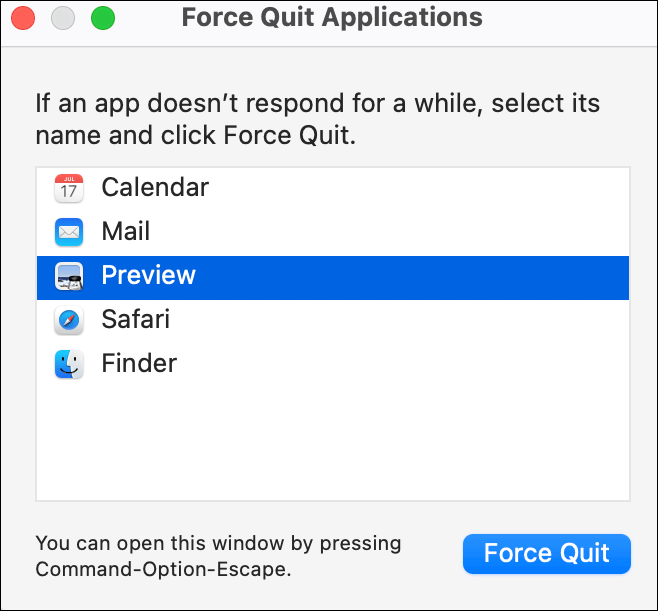
Step 1. To launch the "Force Quit Applications" window, press "Option + Command + Escape".
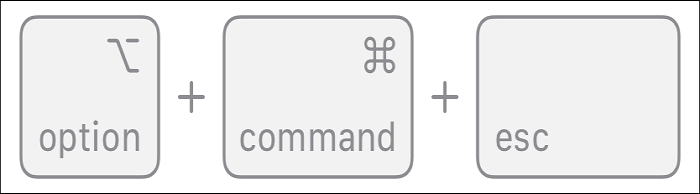
Step 2. Choose "Finder" from the list of available apps.
Step 3. The "Force Quit" button is at the bottom of the window. Click it.
To resolve the Finder issue on your Mac, you can try restarting your computer. This will automatically shut down and restart the Finder, which might resolve the issue. If the problem persists, you may want to consider reinstalling the Finder or seeking further assistance from a technical expert.
Force Quit Not Working on MacBook Pro/Air
To fix the Force Quit button not working on Mac, try restarting your Mac, resetting the System Management Controller (SMC), or using the Terminal command "killall
Fix 2. Restart Your Mac
A quick restart may remedy Finder issues. Follow the steps below to restart your device:
Step 1. Select Apple from the top-left menu.
Step 2. Select "Restart" from the drop-down.
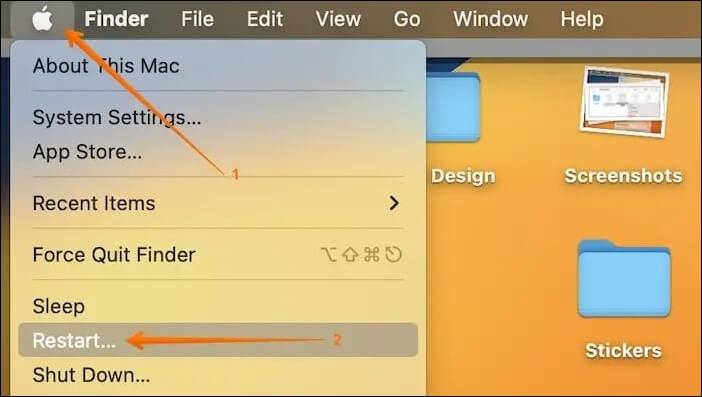
Step 3. To continue, click "Restart" in the confirmation dialog.
Your Mac will restart, and hopefully, the Finder will function as expected.
Fix 3. Delete the Finder Preferences File
To resolve the unresponsive problem, we shall use the Finder's preferences with caution, being mindful that wrong actions may result in data loss or unintended destruction of critical files.
If any crucial data is mistakenly erased or becomes inaccessible during the process, consider using professional data recovery software like Deep Data Recovery to recover your lost data.
Qiling data recovery software can recover deleted files on Mac and restore lost data due to system failure, file deletion, or corruption.
Deep Data Recovery for Mac Pro offers an easy-to-use interface that can be utilized by both beginners and experts. If you've lost data while trying to repair Finder, this tool can help. It can recover a variety of file types from your Mac's storage, including documents, images, movies, and more.
Step 1. Search for lost files
To search for lost files on macOS, click the "Select a disk" dropdown menu, choose the disk location to search, and then click the "Search for lost files" button. This will scan the selected disk for lost files and display them in a list.
Note: Before attempting data recovery, it's recommended to create a backup of your Mac using the "Disk Backup" feature, which can be found in the left sidebar. This precautionary step ensures that your data is safely backed up and can be recovered if needed, while also allowing your computer to write new data without any further complications.

Step 2. Go through the scanning results
Deep Data Recovery for Mac will immediately scan your selected disk volume and display the scanning results.

Step 3. Select the file(s) and recover
Select the desired file(s) from the scan results and click the "Recover" button to retrieve them.

Make backups of your critical data before trying any system updates or adjustments to ensure your data is secure and easily recoverable in case of unexpected data loss.
If you've updated to macOS Sonoma and are experiencing issues with the Finder not responding, don't worry - it's a common problem! To fix this, try restarting your Mac, as this often resolves the issue.
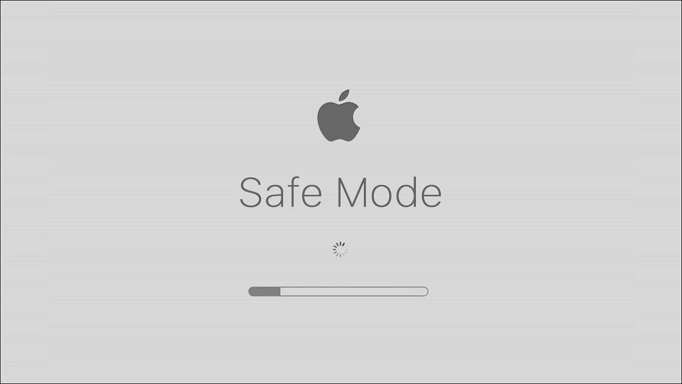
Fix 4. Restart Mac in Safe Mode
If the above workarounds haven't repaired the Finder's unresponsiveness after upgrading to Sonoma, restart your Mac in Safe Mode. Safe Mode starts your Mac with the bare minimum of system extensions and drivers, which might help you detect and isolate the problem. To restart your Mac in Safe Mode, simply restart your Mac and immediately hold down the Shift key. This will start your Mac in Safe Mode, where you can try to troubleshoot and resolve the issue.
Step 1. Go to the Apple menu and choose "Shut Down".
Step 2. Hold down the "Shift" key while pressing the power button.
Step 3. When you see the Apple logo or a spinning gear, release the "Shift" key.
Step 4. When you log in, your Mac enters Safe Mode, and the top-right corner of the screen displays "Safe Boot".
If your Mac is experiencing issues and you're trying to troubleshoot the problem, you can boot it in Safe Mode. This mode allows the computer to load only the necessary system applications, and if the Finder is responsive, it may indicate that a third-party program or plugin is causing the issue. If the Finder is unresponsive in Safe Mode, it could be a sign of a more serious problem. In this case, you may need to reinstall macOS or seek further assistance.
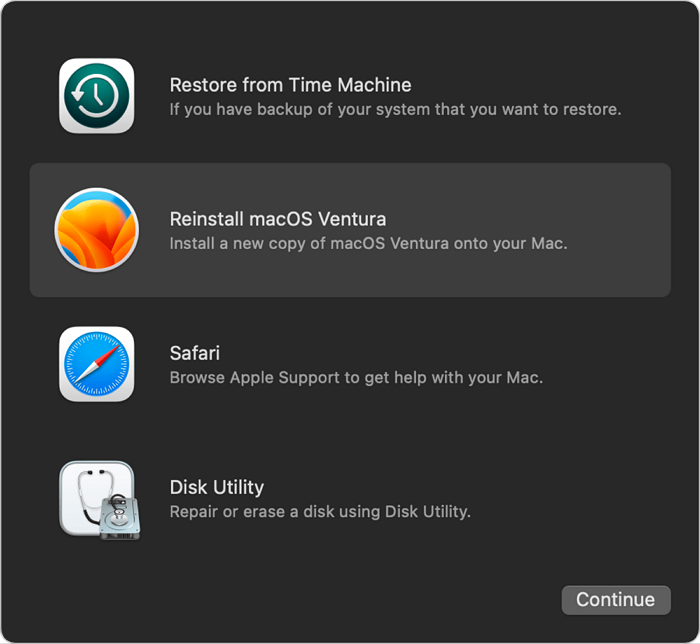
Fix 5. Downgrade from macOS Sonoma to Ventura
If you've tried all the previous remedies and the Finder still doesn't respond after upgrading to macOS Sonoma, you may want to try reverting to a more stable version, such as macOS Ventura. This is a sophisticated method, so back up your data. To downgrade macOS Sonoma to Ventura, you'll need to use the built-in Recovery Mode and follow the prompts to reinstall Ventura. This will erase all data on your Mac, so be sure to back up your files and documents before proceeding.
Step 1. Make a full backup of your data before downgrading the OS, using Time Machine or Qiling data recovery software to ensure all important files are safely stored. This precautionary step will prevent any potential data loss during the downgrade process.
Step 2. Browse the Apple store to download the macOS Ventura installer.
Step 3. Do not open the downloaded file, but if it opens automatically, go to "File" and "Quit". The Ventura installer will then appear in your Applications folder.
Step 4. Connect a USB stick and call it 'Ventura installer'.
Step 5. Open Terminal from Applications > Utilities. Replace [MyVolume] with your USB drive name in Terminal: `sudo /Applications/Install\ macOS\ Ventura.app/Contents/Resources/createinstallmedia --volume /Volumes/MyVolume`.

Step 6. To complete the installation, execute the command with the "Return" button and close the "Terminal" window after it verifies the installation creation.
Step 7. To select the Ventura Installer, go to the Apple menu, click on "System Settings," then click on "General," and finally click on "Startup Disk".
Step 8. Shut down and restart your Mac in recovery mode.
Step 9. To erase your Mac's startup disk, go to macOS Utilities, select "Disk Utility", and then choose "Erase" on your Mac's startup disk, following the on-screen instructions to wipe the disk.
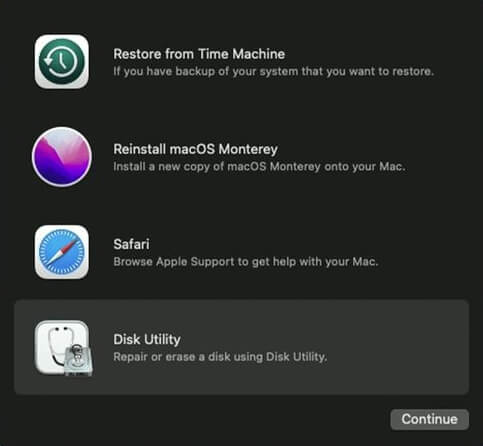
Step 10. Exit Disk Utility and choose "Reinstall macOS Ventura".
If none of the above solutions work, you might consider downgrading your macOS version as a last resort. However, it's essential to back up your data before doing so.
Conclusion
Upgrading to macOS Sonoma can be frustrating if Finder becomes unresponsive, but there are various practical solutions to this problem. Users can try simple remedies like forcibly closing Finder, or if the issue persists, they can consider upgrading to a more stable macOS version. The approach depends on the severity of the issue, with the easiest solutions tried first and more advanced ones considered only if necessary.
To troubleshoot Finder issues on a Mac, prioritize data backup to protect critical information. Follow the instructions to regain control of the Finder and enjoy a more fluid macOS experience. For data recovery needs, consider using a reliable application like Deep Data Recovery for Mac Pro.
Finder Not Responding After Updating to Sonoma FAQs
Users who have updated to macOS Sonoma are facing several challenges with Finder, including the challenges below.
1. Why is my Finder not responding?
Program incompatibilities, damaged settings, or system malfunctions may cause the Finder to become unresponsive, particularly after the macOS Sonoma update which can lead to compatibility issues. To resolve this, try force closing Finder, restarting your Mac, and removing Finder preferences.
2. How do I force reset my Finder?
Follow these instructions to reset the Finder on macOS forcibly:
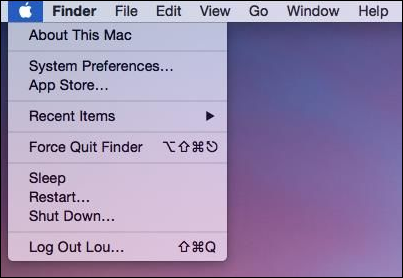
Step 1. To force quit an application, click the Apple logo in the upper-left corner of the screen and select "Force Quit" from the drop-down menu.
Step 2. In the Force Quit Applications box, choose "Finder".
Step 3. Select the "Re-launch" option.
If Finder becomes unresponsive, restarting it may resolve the issue. However, if the problem persists, you can try restarting your Mac in Safe Mode or downgrading to a previous macOS version for more stability.
Related Articles
- PC Turns On, but No Display or Power to Keyword [Fixed]
- [Solved] Fix Error Code 36 on Mac with 5 Available Solutions
- Why Won't My Mac Turn On and How to Solve It
- How to Factory Reset ASUS Laptop from BIOS🔥
- What Is Hard Reset & How to Hard Reset PC/iPhone/Android
A hard reset reinitializes a device's core hardware, forcing a complete system restart from firmware. Learn how to hard reset Windows PC, Mac, Chromebook, iPhone, and Android with step-by-step instructions, and understand the key differences between hard reset, soft reset, and factory reset. - What Is HFS+ | HFS+ vs. APFS, HFS+ vs. exFAT
HFS+ is a file system developed by Apple in 1998, also known as Mac OS Extended. It is natively supported on all Mac computers since macOS 8.1, but is not readable or writable on Windows, and only readable on Linux.