NVRAM Reset Not Working on Mac, 3 Steps to Fix!
The iMac's NVRAM stores important settings that the computer needs to function properly before it accesses the hard drive or loads the operating system.
If the settings on your iMac become corrupted, you can reset them to their default state during the startup process, which can help resolve any issues.
If the NVRAM reset isn't working, don't worry - there are alternative steps to try. A practical approach involves trying a combination of three steps to rectify the issue and get your Mac back in top condition. These steps can be a reliable solution if the NVRAM reset isn't effective.
- Step 1. Restart Your Mac
- Step 2. Check the Update on Your Mac
- Step 3. Try to Reset NVRAM Again on Your Mac
NVRAM Reset Not Happening, Why
Resetting NVRAM on a Mac is a crucial troubleshooting step to fix various system-related issues. NVRAM stores critical settings like volume, display resolution, and startup disk selection, and resetting it can often resolve these problems.
If the NVRAM reset is not working, it could be due to setting a firmware password, which prevents the reset process.
Software glitches or hardware malfunctions may obstruct the normal NVRAM reset, causing the Mac to boot up regularly without the reset happening as intended.
In Advance: Back Up Your Data Before Resetting NVRAM
Before making major system changes on your Mac, such as resetting NVRAM, it's essential to back up your important data to prevent potential loss due to unexpected circumstances.
Back Up Your Mac and Never Lose Data
You can back up and restore your MacBook/iMac without relying on Time Machine, iCloud, or external hard drives. Instead, you can use the built-in "System Image" feature in macOS to create a bootable backup of your system, which can be used to restore your Mac in case of a system failure or other issues.
Data loss can occur due to various reasons such as technical glitches, accidental deletions, or system modifications like NVRAM resets.
In situations where data is lost or deleted, having a reliable recovery solution is crucial. Deep Data Recovery for Mac Pro is a reliable tool that can recover permanently deleted files, including documents, photos, videos, audio, emails, and more. It can likely retrieve whatever has been lost.
To back up your data, follow these steps:
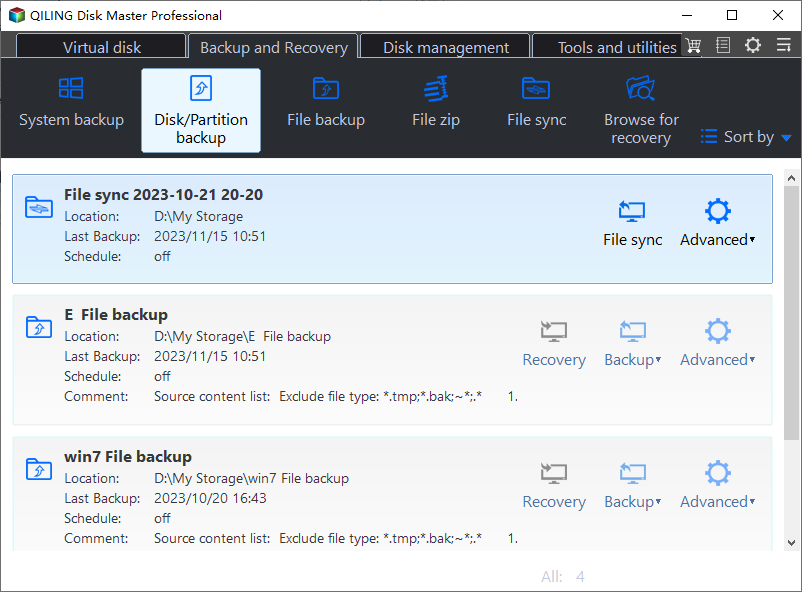
Step 1. To create a drive backup image file in Deep Data Recovery for Mac, navigate to the "Disk Backup" option, then select "Create Backup" and proceed to "Next" in the main interface. This allows you to create a backup image of the drive in case data is overwritten.
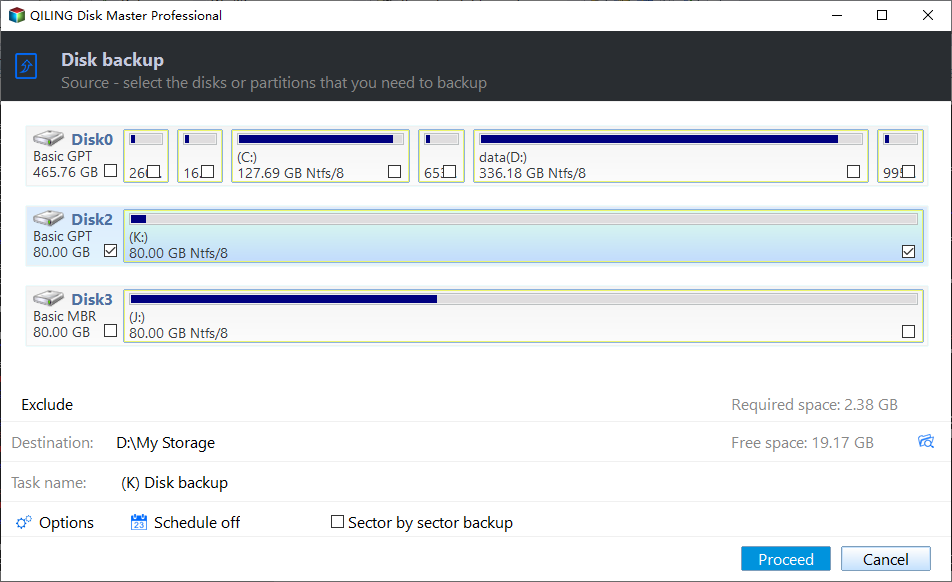
Step 2. To create a backup on your Mac, select the internal volume you want to back up and click "Create Backup". Ensure any external storage devices, such as an external hard drive, USB flash drive, or SD card, are connected to your Mac before attempting to back up and recover data from them.
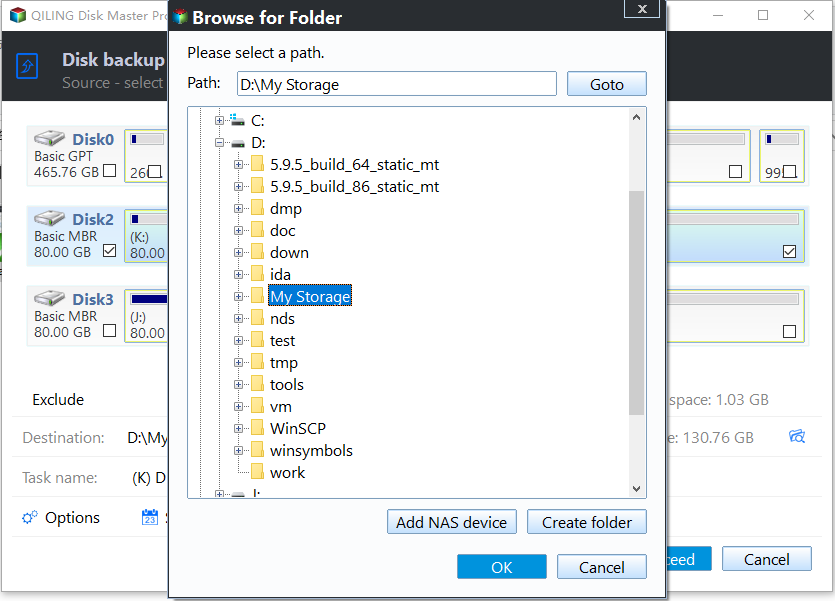
Step 3. Save your backup files in a designated location, such as an external hard drive, and rename the backup file to avoid overwriting previous backups. Click "Save" to complete the process. It's recommended to store backups on a separate device to ensure data recovery in case of device failure.
This tool is designed to be user-friendly, making it accessible to individuals with varying levels of technical knowledge, including those who may not be tech-savvy.
The software prioritizes data security and privacy by ensuring a secure recovery process, preventing further damage or loss to files.
How to Fix NVRAM Reset Not Working
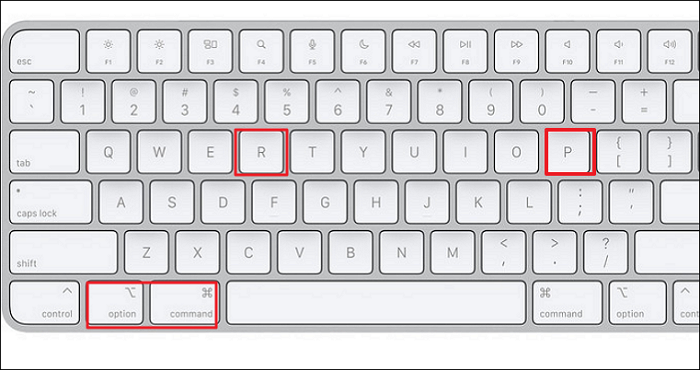
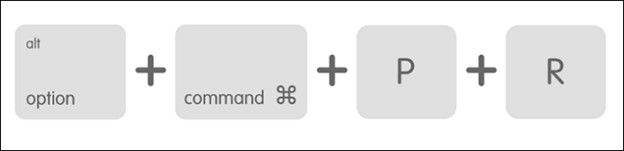
Now that you're prepared for a secure reset, let's dive into the essential steps to troubleshoot why NVRAM reset isn't working on your Mac. To fix the issue, start by restarting your Mac and immediately holding down the Command + Option + P + R keys to reset the NVRAM.
Step 1. Restart Your Mac
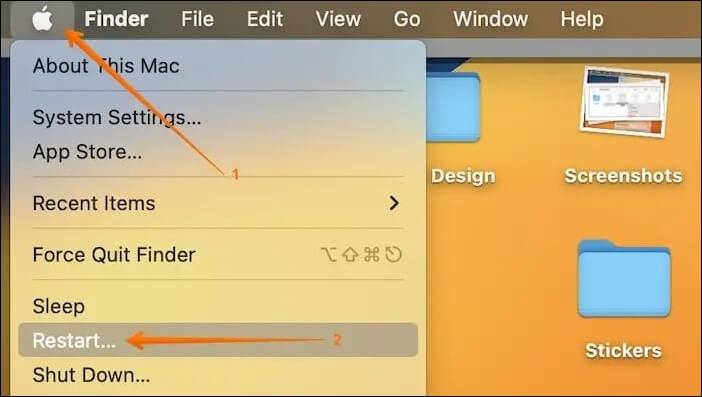
To initiate the Mac restart command, click on the Apple logo located in the top left corner of the screen, then select "Restart" from the drop-down menu. This will prompt the Mac to restart, and you can then log back in once the process is complete. This method is applicable to all MacBook Pro models, regardless of the macOS version.
To restart a MacBook from the Apple menu, select "Restart" from the dropdown menu. This will initiate the shutdown process and then automatically restart the computer.
Step 1. To navigate to the Apple menu, click on the Apple logo located at the upper left corner of the screen.
Step 2. Choose the "Restart" option from the menu.
Step 3. If you want windows to reopen when you log back in, tick the box next to "Reopen windows when logging back in".
Step 4. Proceed by clicking "Restart" again, or allow the timer to count down for an automatic restart.
6 Ways to Fix Mac Won't Restart After Update
This article provides 6 ways to resolve the issue of a Mac not restarting after an update, and also recommends using Qiling Mac data recovery software for assistance.
Step 2. Check the Update on Your Mac
Here are the steps to update your Mac:
Step 1. To navigate to the main menu, tap on the Apple logo at the top-left corner of your screen. This will open the App Library, where you can view and access your installed apps.
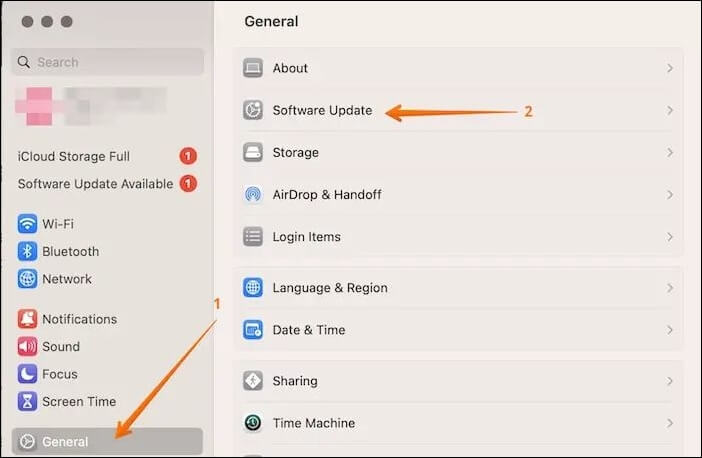
Step 2. To check for software updates on a Mac, go to the Apple menu, select "System Preferences", and click on the "Software Update" button. If there's an available update, you'll see a notification within the dropdown menu.

Step 3. To update your software, go to the gear icon, which is identifiable by the "Software Update" option. If there's an update available, a red badge icon may appear at the top-right corner of the gear icon.
Step 4. Be patient while your Mac checks for updates. The progress wheel may spin for a moment as it searches.
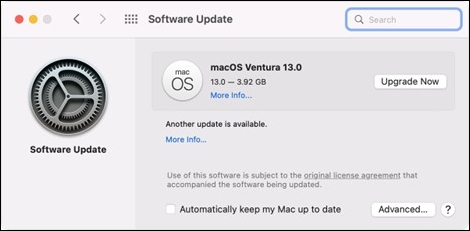
Step 5. Click on "Upgrade Now" and a countdown clock will appear indicating the estimated time for the update to download.
To update App Store Apps on your Mac, simply open the App Store, click on the "Updates" tab, and click the "Update" button next to each app that needs an update. You can also click the "Update All" button to update all apps at once.
Step 1. Launch the "App Store".
Step 2. Select "Updates" from the sidebar.
Step 3. Click "Update All" to install all updates available.
For Mac applications not downloaded from the App Store, you can upgrade them by visiting the developer's website to download the latest version, or by checking for updates within the app itself when you launch it.
If your Mac's NVRAM (Non-Volatile RAM) is reset not working, don't worry! There are a few simple steps you can take to troubleshoot the issue.
Step 3. Try to Reset NVRAM Again on Your Mac
Another way to get the NVRAM reset to work is by trying to repeat the resetting process. There are three ways to do so:
Method 1. Resetting NVRAM with Mac Terminal
This procedure can also be used for M1 or M2 devices if you suspect any issues but aren't sure if the device has reset itself.
Step 1. Open "Spotlight" and type terminal in the search box.
Step 2. Open Terminal when the app occurs.
Step 3. Enter sudo nvram -c and press "Enter".
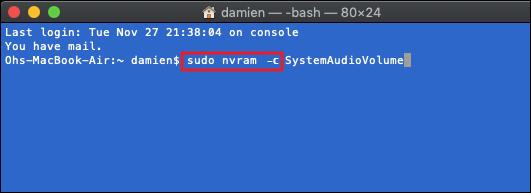
Step 4. Provide your password when prompted.
Step 5. To restart your Mac, type sudo shutdown -r now and press "Enter" again, then wait for the Mac to restart.
Method 2. Resetting NVRAM on Intel-based MacBook
This approach is most effective with a wired keyboard; wireless keyboards might not bring the desired results for resetting NVRAM on Intel-based Mac.
Step 1. Begin by switching off your MacBook.
Step 2. Turn on the device by pressing the power button, and then press and hold the keys "Command + Option + P + R" at the same time.
Step 3. Release these keys once the Apple logo reappears.
Step 4. Your Mac's NVRAM is successfully reset once it completes the startup process.
Method 3. Resetting NVRAM on Silicon-based MacBooks
If you have an Apple Silicon-based Mac, manual NVRAM reset isn't possible due to its advanced processor, which automatically tests and resets the NVRAM during startup if issues are detected.
Before attempting to reset your MacBook, it's essential to confirm whether it has an Intel chip or an M chip, as using the wrong reset method can lead to unexpected errors.
Conclusion
After looking at the possible fixes for the "NVRAM reset not working on Mac" error, it's evident that resolving such issues can be critical for smooth system functionality.
If a Mac Pro reset doesn't work, or data is lost during the process, using a reliable data recovery software like Deep Data Recovery for Mac Pro is necessary.
The software's efficiency in recovering lost data, combined with its user-friendly interface, makes it a valuable tool for restoring valuable files, providing a safety net during troubleshooting activities.
After downloading this software, you'll have peace of mind knowing your data is protected when dealing with complex technical procedures like NVRAM resets on Mac.
NVRAM Reset Not Working FAQs
Here are some frequent questions that people ask about the "NVRAM reset not working on Mac" issue.
1. How to do an NVRAM reset?
To perform an NVRAM reset, follow these steps:
Step 1. Switch off your Mac.
Step 2. Turn the Mac back on, and as soon as it starts, press and hold the Command + Option + P + R keys.
Step 3. To bypass the login screen on your Mac, press and hold the power button, then the Command (⌘) and V keys simultaneously. Maintain this key combination for roughly 20 seconds, then release them, allowing your Mac to proceed with its regular startup. For older Macs that produce a startup chime, hold the keys until you hear a second chime.
Step 4. To confirm and adjust your preferences, navigate to the Startup Disk, Display, and Date & Time sections within System Preferences. Ensure that the settings in these areas match your desired configurations.
2. How long does it take to reset NVRAM on Mac?
Resetting NVRAM on a Mac typically takes around 20 seconds, with the screen possibly going blank momentarily before the startup chime signals completion, although the exact duration may vary slightly based on the specific Mac model and its specifications.
3. How do I reset my NVRAM terminal?
To reset your NVRAM using the terminal, follow these quick steps:
Step 1. Head to "Spotlight".
Step 2. Type in terminal in the search button and choose the application when it pops up.
Step 3. Input sudo nvram -c and tap "Enter".
Step 4. Key in your password when requested.
Step 5. To restart your Mac, type sudo shutdown -r now and press Enter. This will initiate a restart. Wait for the process to complete.
4. Do I need to reset NVRAM before selling a Mac?
To prepare a Mac for sale, you should reset the NVRAM to erase sensitive information like Wi-Fi passwords and system settings, and then perform a complete system wipe and reinstall macOS to ensure all personal data is removed.
Related Articles
- How to Fix It Looks Like Windows Didn't Load Correctly
- [Fixed] How to Resolve Error Code 43 on Mac with 4 Workable Plans
- How to Fix Steam Unpacking Slow Error Efficiently - 7 Ways
- What Happens If You Delete the System32 Folder? Here Are the Answers
- Here Is Your Ultimate Guide of Windows Password Recovery
If you've forgotten or lost your Windows password, you can easily reset it using Qiling Key Finder. This tool guides you through the process of recovering or resetting your Windows password quickly and efficiently. - How to Repair Windows 10 Using Command Prompt [3 Ways]
Do you know how to repair Windows 10 using Command Prompt? You can use two useful Windows repair commands - SFC and DISM. Ask for manual repair services if you cannot repair Windows 10 using Command Prompt.