How to Save a Picture on Mac/MacBook Air [with 3 Practical Methods]
Saving a picture on a Mac or MacBook Air can be done in various scenarios. You might need to save a picture from a message, a website, or an email. Whether it's a photo you want to keep or an image you need for a project, saving it is a straightforward process that can be accomplished with a few clicks.
Saving a picture on your Mac can be done in various ways, with or without using the right-click feature. You can save images by clicking on the "Save As" option from the File menu, selecting the desired location and file format, and then clicking "Save". Alternatively, you can use the right-click feature to save images by selecting the "Save Image As" option, choosing the desired location and file format, and then clicking "Save".
- Save a Picture on Mac Without Right-Click
- Save a Picture on Mac via Right-Click
- Saved Picture Missing, How to Find It
To save a picture on your Mac, start by opening the image you want to save in the Preview app or any other image viewing software. Then, click on "File" in the top menu bar and select "Save As" from the drop-down menu.
How to Save a Picture on Mac Without Right-Click
On a Mac, you can save almost anything you open in the browser, just like any other OS. While the right-click method is well-known, there are two alternative ways to save a picture on a Mac without using a right-click:
🖼️Method 1. Take a Screenshot to Save a Picture
On a Mac, the easiest way to save a picture is to take a screenshot, which allows users to capture and save any image they want, choosing where the photo is stored on their Mac. This is a great option when the image is unavailable for direct downloading.
To take a screenshot on a Mac, press the "Command + Shift + 3" keys at the same time to capture the entire screen, or "Command + Shift + 4" to select a specific area.

To ensure your screenshots look as good as the original, it's best to remove any unwanted data that may be captured in the image. This helps to maintain the quality and integrity of the screenshot.
You can also use the Screenshot Toolbar to record your Mac's screen. To do this, the article will guide you through the process of recovering your screen.
How to Screen Record on Mac/MacBook Air/iMac with Audio
Screen recording on Mac with sound allows users to capture their entire screen, including audio, for various purposes such as tutorials, presentations, or simply sharing experiences. There are three primary ways to screen record on Mac: using the built-in QuickTime Player, ScreenFlow, and OBS Studio. QuickTime Player is a free and user-friendly option that can record the screen and audio simultaneously, while ScreenFlow offers more advanced features like editing and exporting the recorded video.
📋Method 2. Drag and Drop to Save a Picture
To save a picture on a Mac, you can use the drag-and-drop option, which is a quick and easy method that's useful when the screenshot isn't working.
Step 1. Go to the location of the image you want to save it.
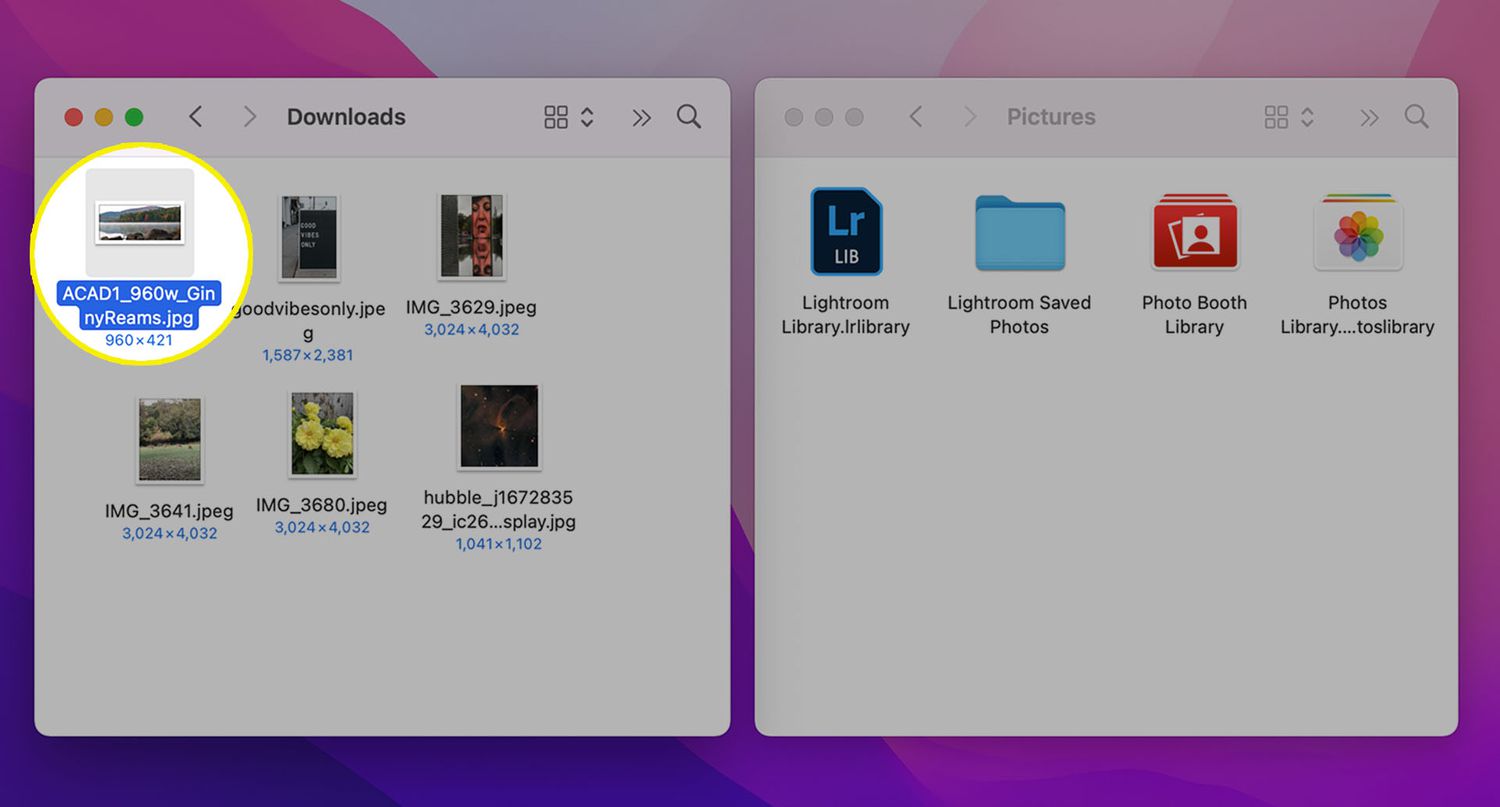
Step 2. To resize the picture, click and drag the green circle with the "+" symbol. This will allow you to adjust the size of the image to your liking.
Step 3. The company's new policy requires all employees to undergo a comprehensive background check before being hired. This includes a thorough review of their work history, education, and any previous criminal convictions.
It's not recommended to quickly move into folders while using a Mac, as it can be easy to accidentally click on something and end up in an unintended location. This can be frustrating and may lead to lost time as you try to navigate back to where you started.
How to Save a Picture on Mac via Right-Click
To save a picture on a Mac, you can use the right-click functionality on your trackpad or Magic Mouse. If you have a Magic Mouse, you can click on the picture and then swipe down with two fingers to access the context menu, where you can select "Save Image As" to save the picture. Alternatively, you can use the keyboard shortcut Command+S to save the picture. Note that the exact steps may vary depending on the version of macOS you are using.
To access right-click options, click on the right part of the mouse, or alternatively, assign corners on the trackpad for a right-click effect, or activate the two-finger tap on the trackpad for a similar functionality. This feature is also utilized for cutting and pasting files on a Mac.
Here are the steps to save a picture on your Mac using a mouse right-clicking:
Step 1. Right-click on the image.
Step 2. After taking a screenshot, you can choose to save it as an image or add it to your Photos app by selecting "Save Image As" or "Added to Photos" from the drop-down menu, which will change depending on the app being used.
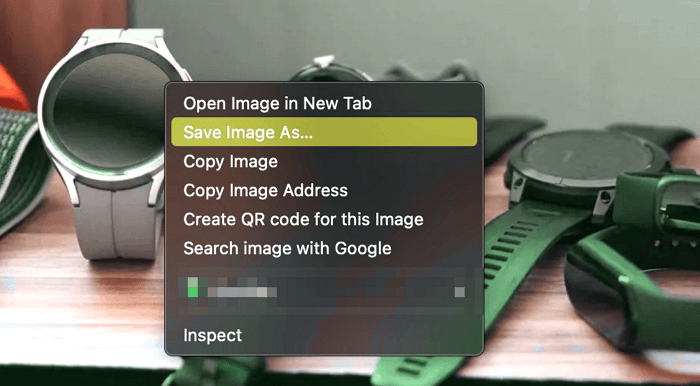
Step 3. Enter the name you want and choose the destination for saving the image.
Step 4. Click on the "Save" button.
To save a picture on a Mac, start by opening the image you want to save in the Preview app or any other image viewer. Then, click on "File" in the top menu bar, followed by "Save As" to choose the location and file format for your saved image.
Saved Picture Missing, How to Find It
You can't find screenshots on your Mac because they might have been deleted from the Trash or don't exist on your system anymore.
You can recover a deleted picture using a professional recovery tool like Deep Data Recovery for Mac, which can help retrieve the file even if it was saved in an unknown folder.
This tool allows you to recover deleted files on Mac, including photos, music, emails, documents, and more. It also supports data recovery from various Mac-based devices, such as SSD, HDD, Time Machine backup drives, fusion drives, and other storage devices.
With Deep Data Recovery for Mac, you can breathe a sigh of relief knowing that your lost data is recoverable. This powerful software can retrieve your data regardless of the cause of loss, and it's incredibly easy to use - just 3 simple steps to get back your lost or deleted pictures.
Step 1. Choose the partition on your Mac that stores the missing pictures before, and click "Scan".
Step 2. To find missing pictures, use the filter feature to narrow down your search. Preview the results to check if the images you're looking for are present.
Step 3. To recover the missing pictures on your Mac, click on the "Recover" button and save them in a safe location on your device.
Qiling data recovery software is a reliable tool that can help recover permanently deleted files on a Mac. It has a good chance of successfully recovering lost files, making it a valuable resource to have in case of data loss. If you've lost files, don't hesitate to download Qiling immediately to increase the chances of recovery.
Conclusion
On macOS, you can save images using three different methods. One way is to right-click on the image and save it, allowing you to rename it and choose its destination. Alternatively, you can take a screenshot of the picture, or use the drag-and-drop functionality to save it.
If you accidentally delete a picture, don't panic! While data loss can still occur, you can recover your data easily with Deep Data Recovery for Mac, a user-friendly and efficient data recovery tool.
How to Save a Picture on Mac FAQs
Here's a one-paragraph summary:
1. How do you right-click on a Mac?
To select an item on a Mac, press and hold the Control key while clicking on the item. This can be further customized by assigning corners or using the two-finger tap.
2. How do I save a picture from the internet on a Mac?
On a Mac, you can save an open browser picture by right-clicking and selecting "Save Image to Downloads". The image will be saved in the Downloads folder, where you can easily find it.
3. Where do I save Photos on my Mac?
On a Mac, photos are typically saved in the Pictures folder, but separate libraries can also be created for storing images.
4. How do I save a picture as a JPEG on a MacBook?
To save an image as JPEG using the preview app on macOS, go to the File menu, select Export, and choose JPEG from the Format pop-up menu.
Related Articles
- 4 Ways to Fix Windows System Backup Failed in Preparing the Backup Image
- How to Solve OneDrive Sync Pending Error in Every Possible Way
- How to Decide the Raid Redundancy over Performance [Everything You Should Know]
- What Is Volume Shadow Copy and How to Use It Correctly on Windows 11/10
- [FIXED] How to Fix Hogwarts Legacy AutoSave Not Working
If you're experiencing issues with the Hogwarts Legacy autosave not working, you can try resolving the problem and recovering any disappeared game data. To fix the issue, you can refer to the article for guidance. Alternatively, you can use Qiling game data recovery software to retrieve lost game saves. - Hogwarts Legacy Cloud Save on Steam/Xbox/PS5
Learn how Hogwarts Legacy cloud saves work on Steam, Xbox, and PS5, including how to access, sync, download, and protect saves.