How to Sync Desktop to OneDrive Automatically
This blog post provides a quick guide on how to keep your data safe, secure, and accessible from anywhere through any device, making it easily accessible and learnable.
You can automatically sync and back up your computer data, including files, documents, pictures, videos, and folders, to your OneDrive cloud account. To do this, you'll need to know what OneDrive is, how it works, and what purposes it serves. Once you understand its functionality, you can set up automatic syncing and backing up of your computer data to your OneDrive account, ensuring your important files and folders are safely stored and accessible from anywhere.
What Is OneDrive
OneDrive is a platform associated with Microsoft that allows you to store files, documents, and personal material in a single space, making it easily shareable with others and accessible on any device.
With OneDrive, businesses can create and edit documents on their desktop, and access them from anywhere, eliminating the need to save to USB or send via email.
This space allows collaboration with colleagues while editing Word, Excel, PowerPoint, and OneNote files, working similarly across different Windows versions such as 7, 10, and 11, with slightly more advanced features in Windows 10 and 11.
You may be interested in how to use OneDrive to back up and restore your PC.
Why Might You Want to Sync Your Desktop to OneDrive
Many computer users prefer to keep their frequently used folders on the Desktop for easy access. To achieve this while maintaining data safety, syncing the Desktop with cloud storage services like OneDrive, Google Drive, or Amazon Drive has become increasingly popular. This allows users to access their important files from anywhere and ensures they are backed up in case of any data loss.
You can sync your Desktop data with OneDrive to access it from other devices, making it easy to continue work on a file from home without having to save it to a USB drive first.
Desktop sync with OneDrive allows for easy access to files and can also serve as a convenient backup method, providing a safety net in case of accidental data deletion.
[Error 0x8007016a] Fix OneDrive Cloud Error Code
Many users have encountered issues with OneDrive Cloud, a popular storage service. If you're experiencing similar problems, you can find help with just a few clicks.
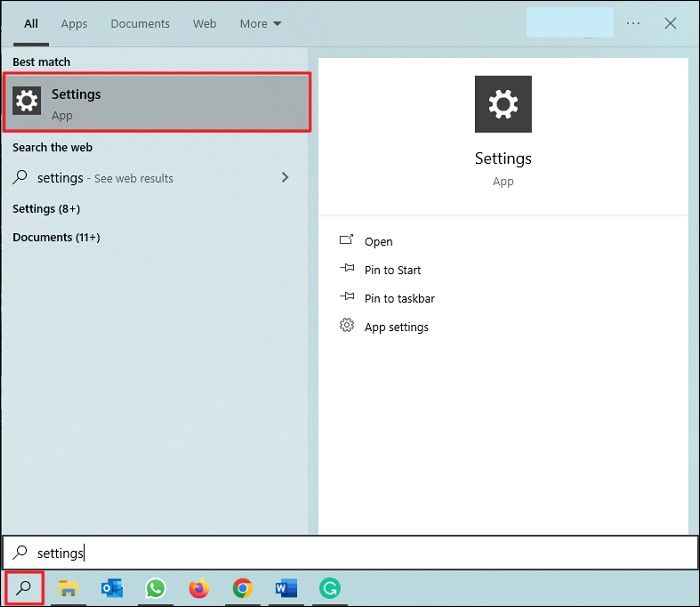
How to Set up OneDrive for Syncing with Your Desktop
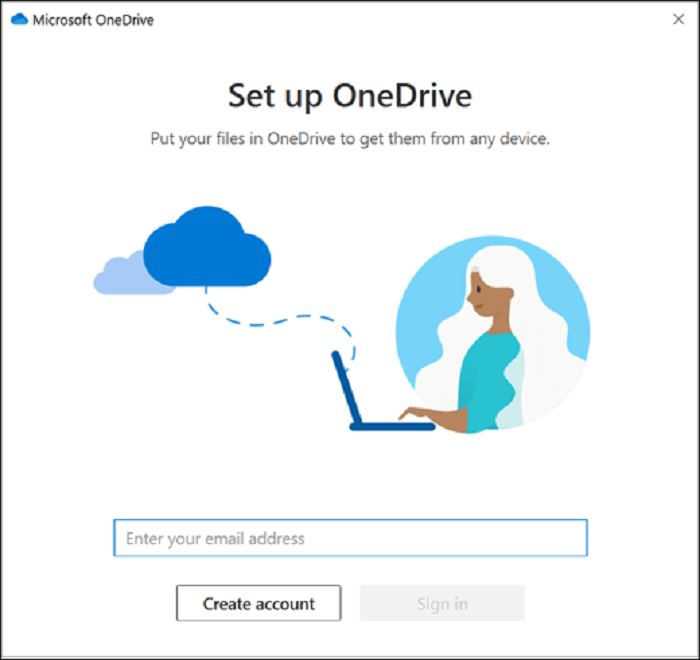
OneDrive comes pre-installed with Windows 11, 10, and 8, but Windows 7 users need to download and install it separately. To access OneDrive, simply sign in with a Microsoft account.
To sync your Desktop with OneDrive, simply drag and drop the Desktop folder into the OneDrive folder, which is typically located at C:\Users\your username\OneDrive. This will sync your Desktop files with OneDrive.
To avoid the hassle of manually dragging and dropping files to sync your Desktop with OneDrive, you can set your PC's Desktop folder location to be the OneDrive location, ensuring any files saved to this folder are automatically synced to the cloud.
Step 1. To create a new folder called "Desktop" in the OneDrive folder, go to the OneDrive folder on your device, right-click on the OneDrive folder, and select "New" > "Folder" from the context menu. Name the folder "Desktop" and click "Create" to create the new folder.
Step 2. To find the desktop folder in the C drive, right-click on it and select Properties.
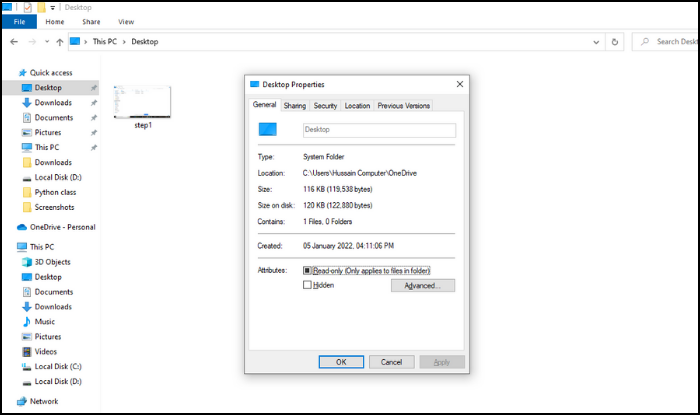
Step 3. To change the desktop location, open the "Desktop Properties" window, select the "Location" tab, and then choose "Move" from the options.
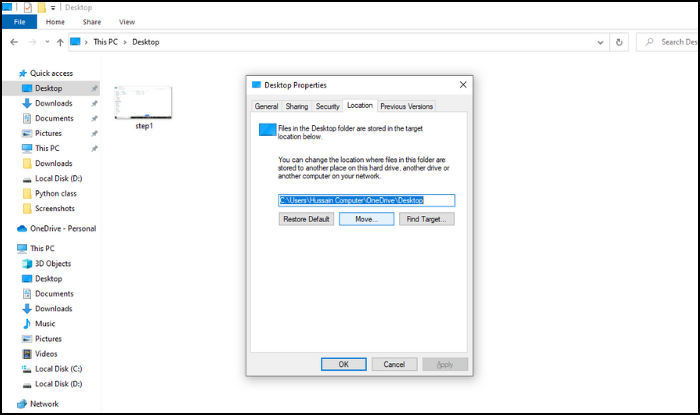
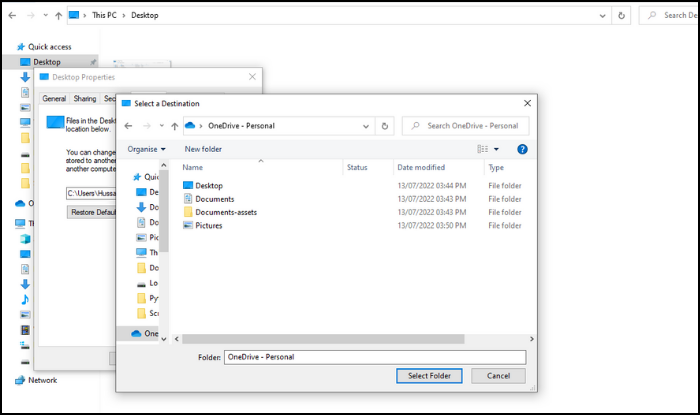
Step 4. In the box that appears, double-click OneDrive, select the Desktop folder inside, and then choose Select folder when it's highlighted.
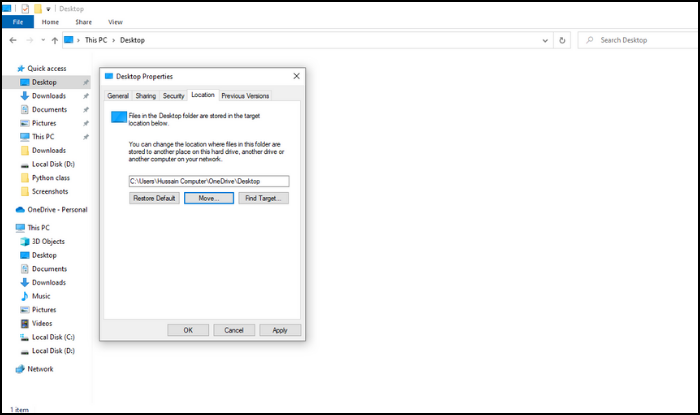
Step 5. To move the Desktop folder to OneDrive, click Apply on the Desktop Properties window, then confirm by clicking Yes to relocate the Desktop folder to OneDrive.
Syncing files and folders in Windows 10/8/7 with the OneDrive folder has some limitations. While it's easy to sync the default user folder automatically, not all folders can be set to sync this way. Folders like Program Files, for example, require manual syncing.
If you're looking for a more efficient way to sync your Desktop and other folders with OneDrive, consider using a professional sync tool like Qiling Backup for work, school, or personal use.
Related: How to stop OneDrive backup in Windows 11.
Sync vs. Backup: Have You Considered to Back up Files to OneDrive
File synchronization is the process of ensuring that two or more locations have identical and up-to-date files, by duplicating files in both directions, and updating them in real-time when changes are made.
Backups are essential for protecting against data loss, whether you need to fully restore a computer after a crash or restore a few files after they've been accidentally deleted or damaged. Qiling Backup allows you to back up your Windows data quickly and securely, either over the internet or on a server, providing peace of mind and a safeguard against data loss.
Qiling Backup is a free Windows data backup and recovery software that offers valuable features.
- Qiling Backup allows you to keep a backup of Windows files and folders in various locations, including external hard drives, OS and USB flash drives, networks, and cloud drives.
- Qiling Backup works in Windows 7/10/11.
- Qiling Backup offers expert guidance on cloning disks, partitions, and entire Windows operating systems from HDD to SSD.
If you'd like to learn more about Qiling Backup, take the time to download it and give it a try. Follow the steps to back up your data and enjoy its incredible features!
Step 1. When using Qiling Backup for the first time, select File backup on the home screen to choose which files to back up, such as pictures, videos, documents, and more.

Step 2. To backup files, folders, or directories, follow the paths to locate them, then select them all.

Step 3. You should choose a location that is safe and has enough free space to store the backup. This could be an external hard drive, a cloud storage service, or another internal drive on your computer.

Step 4. Qiling Backup allows users to save backup files to various devices, including local hard drives, external USB drives, SD cards, network drives, NAS drives, and Qiling cloud drives. It's recommended to store important backups in the cloud for greater accessibility, flexibility, and safety.

Step 5. If you want to set up an automatic and intelligent backup schedule for the next file backup task, go to the "Options" setting. There, you can choose to encrypt confidential files, compress the backup image size, or customize a backup scheme to specify when the next backup should start.

Customize an advanced and automatic backup task here:

Step 6. Click "Proceed" to initiate the file backup process, and the completed backup files will be displayed in a card style on the left-hand side.

Common FAQs to Fully Control OneDrive Backup and Sync
1. How do I force OneDrive to sync Desktop?
To force OneDrive to sync your Desktop, open OneDrive, click the "Pause button" at the top or select "Resume syncing" from the menu. This will prompt OneDrive to sync your Desktop.
2. Why does my OneDrive not sync automatically?
There are various reasons why your OneDrive doesn't sync automatically, such as exceeding the 5 GB free space limit or using an outdated version of the OneDrive app.
3. How to stop OneDrive from syncing Desktop?
To stop syncing a folder in OneDrive for a business client, open the OneDrive settings, click on the settings icon, navigate to the account tab, find the folder sync you want to disable, and click "Stop sync".
Locally available files will remain on your PC/Laptop, but online files will be removed from the folder.
Conclusion
Syncing a Desktop with OneDrive is a great way to keep your data safe, and with the help of Qiling Backup, the process becomes much more manageable.
Qiling Backup is a powerful yet user-friendly software that allows for seamless synchronization and backup of files, making it accessible to both novice and advanced users. With its scheduling feature, you can set automatic backups or syncs, ensuring your files are always safe and up-to-date, providing complete peace of mind.
Related Articles
- Halo Inifinite Keeps Crashing on PC: Solved by Specialists' 10 Ideas
- Windows 11 File History: Create File Backups and System Backup Image
- Windows 11 Free Download Full Version 2022 (4 Options Got You Covered)
- The Best Disk Imaging Software for Windows 11
- Can I Use a USB Flash Drive to Backup My Computer? [Answered with Details]
Can I use a USB flash drive to back up my computer? Have you ever been stuck on this question? This article will describe whether you can back up your computer to a USB drive and offer a backup tool named Qiling Disk Master to help you. - Copy Folders and Subfolders Using Xcopy Command | 3 Ways🔥
Learn how to copy folders and subfolders using the Xcopy command in Windows. This guide covers the Xcopy syntax, common switches, and step-by-step instructions for efficient file copying via the command line.