Clone to a Crucial P3 Plus SSD: What to Know
The Crucial P3 Plus is a PCIe 4.0 NVMe SSD that uses QLC memory to keep high capacities affordable. It suits a Windows upgrade, a game library, or bulk storage, provided you understand how its write cache works.
This guide explains the drive's design, how capacity tiers affect performance, which preparation steps matter, and how to clone Windows to it with Qiling Disk Master. It also covers the Acronis software that some retail kits bundle.
PAGE CONTENT
- What the Crucial P3 Plus Offers
- Capacity Tiers and the QLC Write Caveat
- Prepare the Drive and the Clone
- Clone with Qiling Disk Master
- Boot and Confirm the Result
- FAQs About the P3 Plus
- Back Up Before You Clone
What the Crucial P3 Plus Offers
- PCIe 4.0 x4 NVMe. The larger models are rated for sequential reads of up to about 5,000 MB/s, well above SATA and PCIe 3.0 drives.
- QLC NAND. Four-bit cells keep prices low at high capacity, at the cost of lower write endurance than a TLC drive.
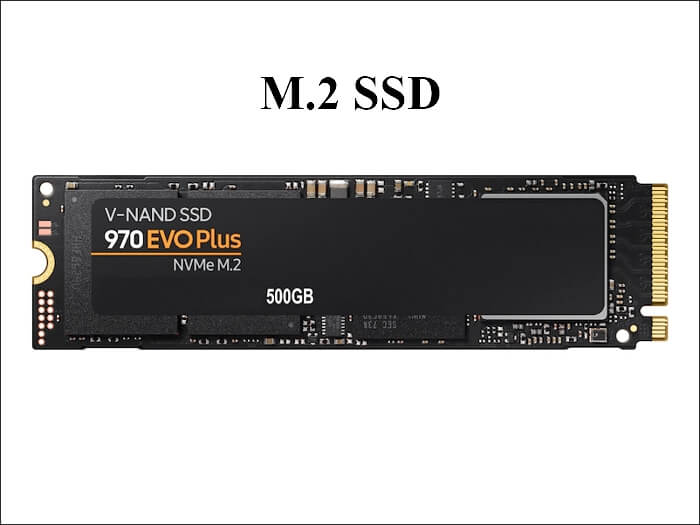
- M.2 2280. The drive fits standard NVMe slots in desktops and in many laptops that accept a full-length M.2 drive.
- DRAM-less design. It relies on host memory buffer, so it uses a little system RAM and depends on platform support for the best result.
- Several capacity tiers. The drive is sold in multiple sizes, and each tier has its own cache size and rated speed.
The P3 Plus is a value drive, not a flagship. For a Windows system, everyday apps, and game storage it is a sensible choice, as long as you understand how the QLC memory behaves under long writes.
Capacity Tiers and the QLC Write Caveat
- Write cache behavior. The drive absorbs bursts in a fast cache and then writes to QLC more slowly, so a very large single copy can slow near the end.
- Realistic clone load. A typical Windows installation is a mixed burst of files, so the clone usually finishes quickly. Do not judge the drive by one huge file.
- Leave free space. QLC drives behave better when they have free space, so keep headroom on the Windows partition instead of filling it.
- Plan the capacity. A 1 TB source needs at least a 1 TB target. A 2 TB or 4 TB drive gives room to grow and a larger write cache.
- Check the bundle. Some retail kits include Acronis cloning software tied to Crucial drives, and that software has limits on target and partitions.
The rated read speed is a best case for large sequential reads. A Windows volume holds thousands of small files, so a clone rarely reaches that figure. Expect a solid improvement over an older drive rather than a benchmark result.
Prepare the Drive and the Clone
- Check source health and back up. Read the SMART values of the old drive and copy personal files somewhere safe before you start.
- Suspend BitLocker. Pause BitLocker on the system drive and keep the recovery key, then resume protection on the new drive.
- Initialize the target. A new drive may show as uninitialized. Initialize it as GPT for a UEFI system or MBR for a legacy one.
- Update firmware. Use Crucial Storage Executive to check firmware, either through an enclosure before the clone or after the first boot.
- Disconnect spare drives. Remove extra storage so the source and destination disks are easy to tell apart.
The P3 Plus does not need special drivers. Windows loads the standard NVMe driver, so a cloned system boots like it would from any other NVMe drive. Crucial Storage Executive is only needed for firmware and health checks.
Clone with Qiling Disk Master
Qiling Disk Master copies a Windows disk to the P3 Plus without tying you to a bundled tool. It keeps the boot partitions, aligns them for the SSD, and expands the system partition when the target is larger than the source.
Watch the video tutorial below to clone the drive step by step with Qiling Disk Master.
Step 1. Open Qiling Disk Master, choose Clone, and then select Disk Clone.

Step 2. Select the source disk and click Next.

Step 3. Select the destination SSD and confirm that its data will be replaced.

Step 4. Choose the clone mode and adjust the partition size if the target is larger.

Step 5. Click Proceed, wait for the copy to finish, then shut the machine down before you remove any cable.

Boot and Confirm the Result
- Power off fully. Shut the machine down completely and unplug it before you remove or install a drive.
- Install the P3 Plus. Fit the drive in the M.2 slot, secure the screw, and attach the thermal pad or cover the board provides.
- Set the boot order. Enter BIOS or UEFI, select the new drive first, and keep the correct boot mode for the partition style.
- Check the capacity. If the clone kept the old partition size, extend the system partition in Disk Management to use the full drive.
- Check health. Open Crucial Storage Executive and confirm firmware, temperature, and drive health on the new unit.
If the drive is not listed, reseat it and check that the slot supports NVMe. A slot wired only for SATA will not detect a P3 Plus, no matter how the clone was made.
FAQs About the P3 Plus
Is the P3 Plus a good drive for a Windows boot volume?
Yes for everyday use, office work, and games. If you regularly write very large files, a TLC drive with a larger cache will hold its speed longer.
Why did the clone slow down near the end?
The write cache filled and the drive switched to writing QLC memory directly. That is normal behavior, and the job still completes, only at a slower pace.
Can I use Acronis True Image for Crucial with a non-Crucial source drive?
It can copy from another brand to a Crucial drive, but it runs only while a Crucial SSD is connected. For other targets or for partition resizing, use Qiling Disk Master.
Will a 4 TB P3 Plus boot on an older PC?
A boot volume larger than 2 TB needs GPT and UEFI. On a legacy BIOS system, use the drive as secondary storage or convert the disk layout first.
Does the P3 Plus need overprovisioning?
No. Leave a reasonable amount of free space on the drive and let Windows manage TRIM. Manual overprovisioning is optional and not required for normal use.
Back Up Before You Clone
A clone writes over the target disk and depends on a readable source. Back up the system first so a failed job, a power loss, or a bad sector never leaves you without a working Windows installation.
Watch the video tutorial below to back up Windows and restore it if the clone fails.
Step 1. Open Qiling Disk Master and select System Backup to include the boot partitions.

Step 2. Save the image to a drive other than the target disk and start the backup.

Step 3. Click Proceed to start the system backup and wait patiently until it finishes. You can also tick Shut down the computer when the operation is completed to power off automatically.

Step 4. If the clone fails, restore the image and check the source disk before you retry.

Conclusion
The P3 Plus is an affordable way to move Windows onto NVMe storage. Match the capacity to your used space, clone with a tool that can resize partitions, and check the link and the drive health after the first boot. The result is a responsive system with room to grow.
For related guides, see How to Clone a Crucial SSD to a New Drive, Sector-by-Sector Clone vs Intelligent Clone, How to Fix an SSD That Is Slow After Cloning, and Why a Cloned SSD Does Not Show Full Capacity.
Related Articles
- How to Clone a Crucial SSD to a New Drive
Clone a Crucial SSD with any source and target brand, and check firmware, alignment, and boot settings afterward. - FIX Error: Acronis True Image For Crucial Not Working
Work through the common reasons the Crucial edition of Acronis fails to start, detect the drive, or finish a clone. - How to Clone Windows to a PCIe 4.0 SSD
Move Windows to a PCIe 4.0 drive, confirm the correct slot and link speed, and verify the boot entry after the swap. - How to Clone a Disk Larger Than 2TB (MBR & GPT Limits)
Understand MBR and GPT limits when the target is larger than 2 TB, and choose a layout that can boot. - Cloned Drive Won't Boot? How to Fix It
Repair boot records, EFI entries, and BIOS settings when a cloned drive refuses to start Windows.
Products
Articles & Tutorials
- Data Recovery
- Data Backup
- File Recovery
- File Backup
- System Backup and Restore
- Disk and Partition Clone
- Technical articles
- Mobile articles
- Disk Master Help
- Windows Data Recovery Tutorials
- Windows Secure Delete Tutorials
- Windows Partition Management Tutorials
- Windows File Backup and Restore Tutorials
- Windows System Backup and Restore Tutorials
- Windows Disk Backup and Restore Tutorials
- Windows Clone Tutorials