Dell XPS SSD Upgrade: Clone Your Windows Drive
Dell XPS laptops are thin, quiet, and often sold with a modest SSD. Replacing that drive with a larger or faster NVMe unit is a common upgrade, but the XPS line has a few details that catch people out, including a single-slot design on many 13-inch models and a RAID storage mode on some units.
This guide explains the storage layout across XPS models, how Dell BIOS storage mode and BitLocker affect a clone, what to prepare, and how to copy Windows with Qiling Disk Master. It also covers the recovery tools Dell provides.
PAGE CONTENT
- Know Your XPS Storage Layout
- Dell BIOS Storage Mode and BitLocker
- Prepare the Drive and the Target
- Clone with Qiling Disk Master
- First Boot and Verification
- FAQs About XPS SSD Upgrades
- Back Up Before You Clone
Know Your XPS Storage Layout
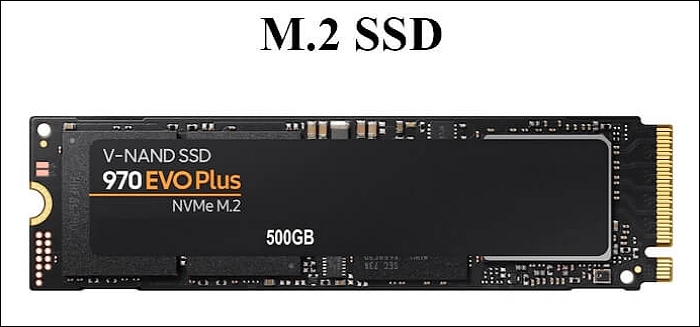
- XPS 13 layout. Most XPS 13 generations have a single M.2 slot. Some use a shorter 2230 drive, so confirm the form factor before you order.
- XPS 15 and 17 layout. Many generations have two M.2 slots, which allows an internal clone and leaves the old drive available as a spare.
- NVMe only. Modern XPS laptops use PCIe NVMe storage. There is no 2.5-inch bay, so a SATA SSD is not an option.
- Compact chassis. Space is tight inside the case. A double-sided drive or a thick heatsink may not fit under the bottom cover.
- SupportAssist OS Recovery. Dell ships recovery tools in the firmware, and they can rebuild boot files if a clone does not start.
Dell publishes a service manual for each XPS generation with the exact slot type, screw locations, and supported drive sizes. Read it before you buy the new SSD, because the answer differs between a 13, a 15, and a 17.
Dell BIOS Storage Mode and BitLocker
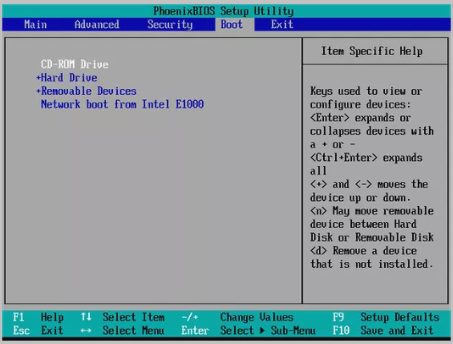
- RAID vs AHCI. Some XPS units ship with Intel Rapid Storage RAID mode. Changing that setting after Windows is installed can stop the boot.
- Record the current mode. Note the storage setting in BIOS before the swap and keep it identical afterward. A clone does not change the controller mode.
- BitLocker device encryption. Many XPS machines enable it automatically when you sign in with a Microsoft account. Suspend it and save the recovery key.
- BIOS and firmware updates. Update the BIOS and the SSD firmware before cloning a healthy system, not after something goes wrong.
- Secure Boot and boot entries. A GPT clone needs UEFI. Keep Secure Boot consistent and expect the firmware to create a new boot entry.
If you must change RAID to AHCI, do it before you clone or follow a dedicated procedure afterward. Switching the mode on an existing installation without preparation is one of the most common reasons an XPS stops booting.
Prepare the Drive and the Target
- Back up and check health. Copy personal files to another drive and read the SMART values of the current SSD before you start.
- Suspend BitLocker. Pause protection on the system drive and store the recovery key somewhere you can reach without Windows.
- Initialize the target as GPT. The XPS boots in UEFI mode, so a GPT target matches the firmware and the existing partition layout.
- Free up space. Remove temporary files and unused applications so the clone is shorter and fits comfortably on the target.
- Disconnect peripherals. Unplug docks, external drives, and card readers so the source and destination disks are easy to identify.
If the XPS has a second M.2 slot, clone internally and leave the old drive in place until the new one boots. On a single-slot XPS 13, use a USB NVMe enclosure and match it to the drive type.
Clone with Qiling Disk Master
Qiling Disk Master copies the XPS system disk with its EFI, Windows, and recovery partitions. It keeps the GPT layout, aligns the partitions for the NVMe drive, and can enlarge Windows when the new SSD has more capacity.
Watch the video tutorial below to clone the drive step by step with Qiling Disk Master.
Step 1. Open Qiling Disk Master, choose Clone, and then select Disk Clone.

Step 2. Select the source disk and click Next.

Step 3. Select the destination SSD and confirm that its data will be replaced.

Step 4. Choose the clone mode and adjust the partition size if the target is larger.

Step 5. Click Proceed, wait for the copy to finish, then shut the machine down before you remove any cable.

First Boot and Verification
- Power down and unplug. Shut Windows down completely, unplug the adapter, and disconnect the battery before you open the case.
- Install the new drive. Fit the SSD in the slot, secure the screw, and reconnect the battery and the bottom cover.
- Keep the storage mode unchanged. Enter BIOS, confirm RAID or AHCI matches the old setting, and make the new drive the first boot entry.
- Check partitions and drive letters. Open Disk Management, verify the EFI and recovery partitions, and assign any missing drive letters.
- Run a hardware scan. Start Dell SupportAssist and run a scan to confirm the new drive is recognized and healthy.
If the laptop boots straight into SupportAssist OS Recovery, the firmware did not find a valid boot entry. Check the storage mode, the boot list, and the EFI partition before you assume the clone failed.
FAQs About XPS SSD Upgrades
Does cloning affect my Dell warranty?
No. Cloning software does not change the warranty. Damage caused during installation, such as a broken connector, is a different matter and is not covered.
Can I clone from a 2230 drive to a 2280 SSD?
Yes, if the slot physically accepts a 2280 drive. Check the service manual, because some XPS 13 models are limited to the shorter 2230 size.
Why does the XPS not boot after the swap?
The usual causes are a RAID and AHCI mismatch, a missing boot entry, or BitLocker reacting to the hardware change. Check all three before you reclone.
Do I need a Dell recovery USB?
Only if the clone fails or the boot entry cannot be repaired. SupportAssist OS Recovery can create a USB recovery drive from the firmware tools.
Will Windows stay activated?
Yes. A digital license is tied to the motherboard, and a disk swap does not change it. If activation prompts appear, run the troubleshooter after the network is online.
Back Up Before You Clone
A clone writes over the target disk and depends on a readable source. Back up the system first so a failed job, a power loss, or a bad sector never leaves you without a working Windows installation.
Watch the video tutorial below to back up Windows and restore it if the clone fails.
Step 1. Open Qiling Disk Master and select System Backup to include the boot partitions.

Step 2. Save the image to a drive other than the target disk and start the backup.

Step 3. Click Proceed to start the system backup and wait patiently until it finishes. You can also tick Shut down the computer when the operation is completed to power off automatically.

Step 4. If the clone fails, restore the image and check the source disk before you retry.

Conclusion
The XPS upgrade succeeds when the small details are right: the correct drive size, the same BIOS storage mode, suspended BitLocker, and a GPT target that matches the UEFI firmware. Clone the full disk, boot from the new drive, and verify the partitions before you reuse or sell the old one.
For related guides, see How to Clone a Dell Laptop HDD to SSD, How to Switch From IDE to AHCI After Cloning, How to Clone the Windows 11 System Reserved Partition, and How to Fix Drive Letters After Cloning.
Related Articles
- How to Clone a Dell Laptop HDD to SSD
Clone a Dell laptop hard drive to an SSD, including model checks, boot settings, and verification after the swap. - (2022) Migrate Dell OS with Dell Migrate or An Alternative
Compare Dell Migrate with a disk clone for moving a Dell system to new storage, and see where each tool stops. - How to Clone a BitLocker-Encrypted Drive
Clone an encrypted Windows drive safely by suspending BitLocker and keeping the recovery key available. - SSD Not Detected After Cloning - Fix in BIOS
Fix a missing SSD with slot checks, BIOS storage mode, boot entries, and driver issues. - Cloned Drive Won't Boot? How to Fix It
Repair boot records, EFI entries, and BIOS settings when a cloned drive refuses to start Windows.
Products
Articles & Tutorials
- Data Recovery
- Data Backup
- File Recovery
- File Backup
- System Backup and Restore
- Disk and Partition Clone
- Technical articles
- Mobile articles
- Disk Master Help
- Windows Data Recovery Tutorials
- Windows Secure Delete Tutorials
- Windows Partition Management Tutorials
- Windows File Backup and Restore Tutorials
- Windows System Backup and Restore Tutorials
- Windows Disk Backup and Restore Tutorials
- Windows Clone Tutorials