Clone a Gaming Laptop HDD to SSD Without Reinstalling
A gaming laptop on a hard drive makes every loading screen feel longer. Swapping in an SSD fixes that, but a clean install costs hours of downloads, drivers, and game libraries. Cloning keeps the installed system, the launchers, and the saved settings exactly as they are.
This guide covers what a gaming laptop makes harder than a desktop: tight drive bays, a vendor recovery partition, and firmware that may not list the new disk on the first try.
PAGE CONTENT
- Why a Gaming Laptop Is Harder to Clone
- Prepare the SSD and the Connection
- Risks and Tricky Spots
- Clone the HDD to the SSD
- Boot the Laptop from the New SSD
- FAQs About Laptop Drive Cloning
- Back Up Before You Open the Laptop
Why a Gaming Laptop Is Harder to Clone
- Drive bays are limited. Many models expose only one M.2 slot.
- Recovery images live on the HDD. Vendor tools rebuild Windows from that partition.
- Fan and battery access is fiddly. Opening the chassis needs the right screwdriver.
- Games take space. The target must hold the used data of the source drive.
- Warranty terms matter. Some vendors void coverage after a user drive swap.
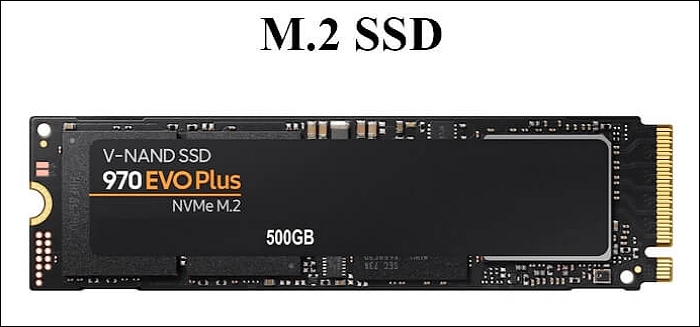
The main constraint is the target connection. If both M.2 slots are occupied, the new SSD has to be written through USB before it goes inside the laptop.
Prepare the SSD and the Connection
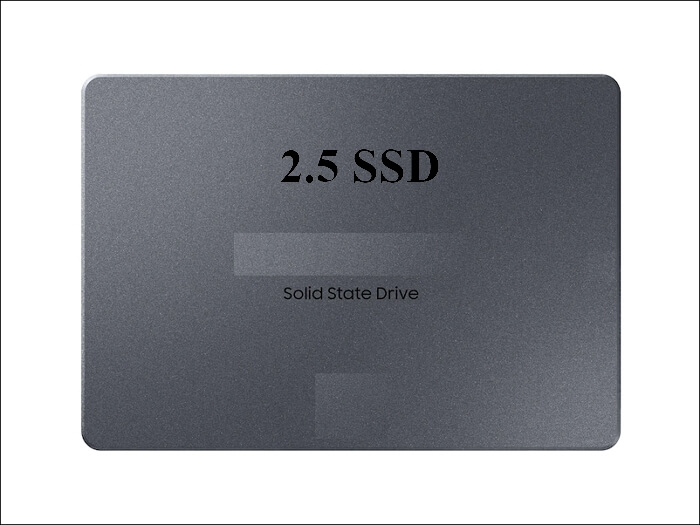
- Buy the right form factor. Check whether the laptop takes 2.5-inch SATA or M.2 NVMe.
- Use a USB enclosure. An M.2 enclosure or SATA-to-USB cable exposes the new SSD.
- Charge the battery. A power cut during the copy can corrupt the target.
- Free up space. Remove unused games so the clone fits a smaller SSD.
- Note the drive layout. Count the partitions, including recovery and EFI.
Connect the new SSD through USB, confirm Windows lists it in Disk Management, and keep the laptop plugged in for the whole transfer.
Risks and Tricky Spots
- Vendor recovery partitions. A clone must copy them or you lose the factory reset path.
- Thermal throttling. Long copies in a thin chassis slow down and can stall.
- BitLocker on some models. Suspend encryption before you clone the drive.
- Boot order after the swap. The firmware may not list the new SSD first.
- Dust and connectors. Reassembling a laptop risks damage if you rush.
Test the SSD through USB before you open the chassis. If it boots there, the clone is sound and the swap is only mechanical.
Clone the HDD to the SSD
Qiling Disk Master treats the USB-connected SSD like any internal disk. When the target is smaller, use the clone options to fit the partitions into its capacity.
Watch the video tutorial below to clone the drive step by step with Qiling Disk Master.
Step 1. Open Qiling Disk Master, choose Clone, and then select Disk Clone.

Step 2. Select the source disk and click Next.

Step 3. Select the destination SSD and confirm that its data will be replaced.

Step 4. Choose the clone mode and confirm the system partition gets the C letter on the target.

Step 5. Click Proceed, wait for the copy to finish, then shut the machine down before you remove any cable.

Boot the Laptop from the New SSD
- Swap the drives. Remove the HDD and fit the SSD in its place.
- Enter the boot menu. Use the vendor key to pick the new drive.
- Check the launchers. Steam, Epic, and other clients should find their libraries.
- Verify the license. Windows should stay activated after the clone.
- Watch temperatures. Confirm the fans spin and the laptop stays cool.
Keep the old HDD until the laptop completes a few clean boots and games launch without errors. If the target never appears in firmware, reseat the drive.
FAQs About Laptop Drive Cloning
Can I clone a gaming laptop HDD to an SSD without reinstalling games?
Yes. The clone copies the whole disk, so installed games and their launchers stay in place.
What if my laptop has only one M.2 slot?
Clone the new SSD through a USB enclosure first, then move it into the slot.
Does cloning keep the recovery partition?
Only if you clone the whole disk instead of a single partition. Check the partition list before you start.
Will the cloned SSD stay activated?
Windows usually stays activated because the hardware ID does not change.
How long does a laptop clone take?
A 1 TB HDD to SSD copy over USB typically takes one to three hours.
Back Up Before You Open the Laptop
A laptop clone depends on a USB bridge, a battery, and a chassis you have to open. One wrong move can cost the only copy of the system, so image the HDD first.
Watch the video tutorial below to back up Windows and restore it if the copy fails.
Step 1. Open Qiling Disk Master and select System Backup to include the boot partitions.

Step 2. Save the image to a drive other than the target disk and start the backup.

Step 3. Click Proceed to start the system backup and wait patiently until it finishes. You can also tick Shut down the computer when the operation is completed to power off automatically.

Step 4. If the clone or the boot repair fails, restore the image and then reassign drive letters or rebuild the boot records from Windows Recovery.

Conclusion
A gaming laptop upgrade comes down to one compatible SSD, one stable USB connection, and one tested clone. Keep the recovery partition, confirm the boot order, and do not remove the old HDD until the new drive has proven itself.
For more on laptop upgrades, see Clone an HP Laptop HDD to an SSD, Clone a Dell Laptop HDD to an SSD, Clone a Lenovo Laptop HDD to an SSD, and Clone an Asus Laptop HDD to an SSD.
Related Articles
- Clone a Laptop HDD to an SSD via USB
Copy the drive before you open the case. - Clone an MSI Laptop HDD to an SSD
Upgrade a gaming model without a reinstall. - Clone an Acer Laptop HDD to an SSD
Move the system to a faster drive. - Clone an SSD to a Larger SSD
Grow the capacity without losing Windows. - Replace a Hard Drive With an SSD
Keep Windows and start faster.
Products
Articles & Tutorials
- Data Recovery
- Data Backup
- File Recovery
- File Backup
- System Backup and Restore
- Disk and Partition Clone
- Technical articles
- Mobile articles
- Disk Master Help
- Windows Data Recovery Tutorials
- Windows Secure Delete Tutorials
- Windows Partition Management Tutorials
- Windows File Backup and Restore Tutorials
- Windows System Backup and Restore Tutorials
- Windows Disk Backup and Restore Tutorials
- Windows Clone Tutorials